Look At
Overview
The Look At feature enables the character to look at a certain point more naturally.
The Look At IK feature is integrated in the Animation Tree in the form of Animation Post-processing Nodes with each node controlling a bone. The desired pose can be realized by applying the animation node to one or more bones in the bone chain.
Look At Nodes
The Look At node in the Animation Tree can control the bone to always orient towards a certain target object.

Properties
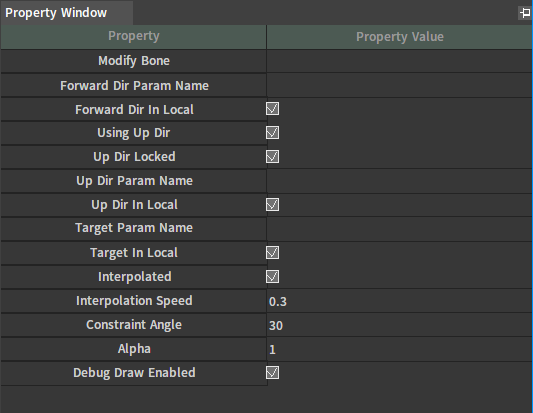
The properties of the Look At node are shown below.
| Property | Description |
|---|---|
| Modify Bone | Specify the name of the bone controlled by the current node. |
| Forward Dir Param Name | Specify the Anim Tree parameter names used to obtain the data of forward direction which refers to the direction toward the target. |
| Forward Dir In Local | Specify whether the forward direction is in local space. |
| Using Up Dir | Specify whether to use the upward direction which refers to the axis of rotation. |
| Up Dir Locked | Specify whether to lock the upward direction. Locking the upward direction will treat it strictly as the axis of rotation, while unlocking the direction will treat it as a rough axial direction. |
| Up Dir Param Name | Specify the Anim Tree parameter names used to obtain the upward direction data. |
| Up Dir In Local | Specify whether the upward direction is in local space. |
| Target Param Name | Specify the Anim Tree parameter names used to obtain the target position data. |
| Target In Local | Specify whether the target position is in local space. |
| Interpolated | Specify whether to interpolate. |
| Interpolation Speed | Specify the rate of approach to the target position. |
| Constraint Angle | Limit the rotation angle of the controlled bone. |
| Alpha | Control the extent to which the node exerts influence on the modified bone. |
| Debug Draw Enabled | Whether to enable debug drawing. |
Script Call
Related script call interfaces:
/// method: void GetAnimTreeValue(constIVarList&args, IVarList& result)
/// \brief Get action tree instance parameter value
/// \paramaction_index Action Index
/// \paramparameter_name Parameter Name
DECLARE_METHOD_N(Actor, GetAnimTreeValue);
/// method: void SetAnimTreeValue(constIVarList&args, IVarList& result)
/// \brief Set action tree instance parameter value
/// \paramaction_index Action Index
/// \paramparameter_name Parameter Name
/// \param value Parameter Value
DECLARE_METHOD_N(Actor, SetAnimTreeValue);
Example
Here is an example to demonstrate the Look At feature.
Creating Actors
Please refer to Assembling Actors to create an Actor containing the skin and skeleton assets.

Configuring Anim Trees
Double-click a skeleton asset in the Action List of the Actor Editor to open the Animation Editor.
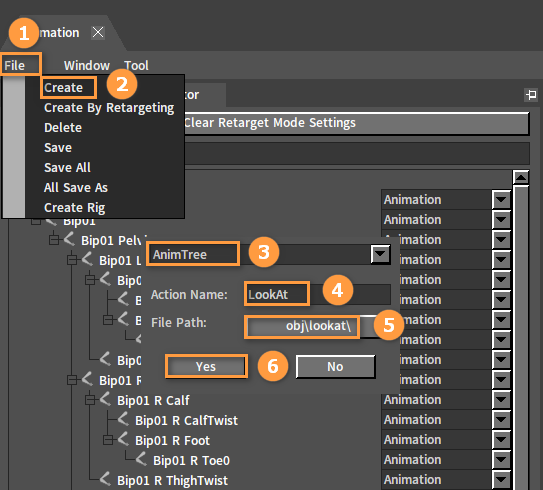
To create a Look At asset for the character, create an Animation Trees in the Animation Editor. Click File (Menu Bar) -> Create to pop up a window. Click the drop-down box and select AnimTree. Enter a name and select the save path for it.
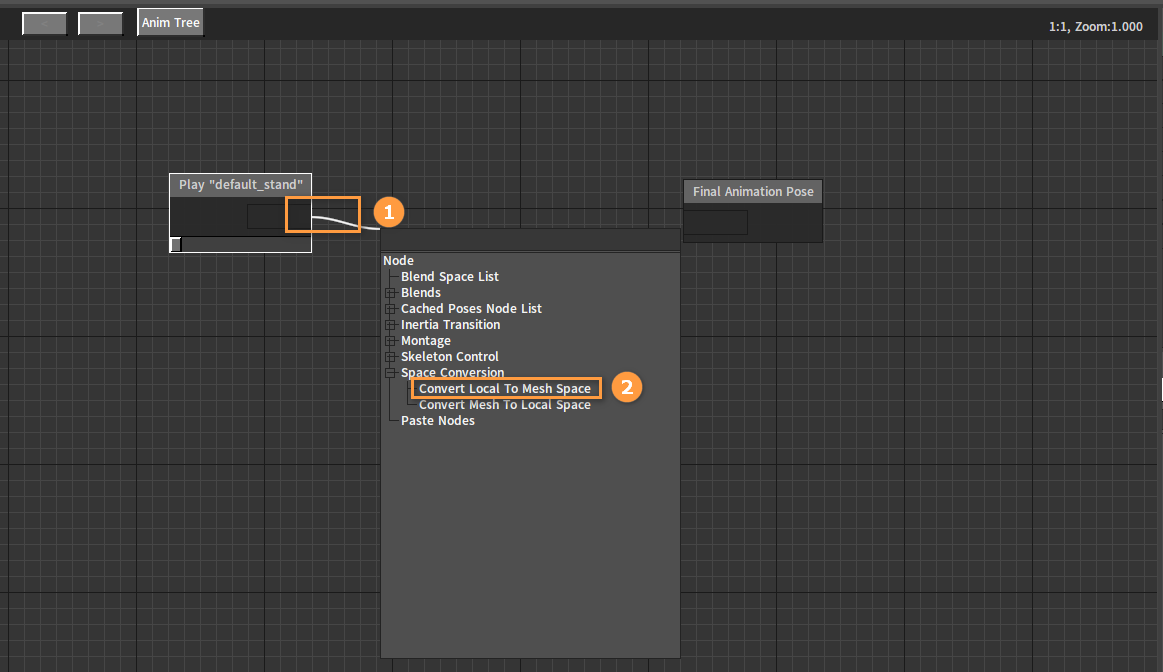
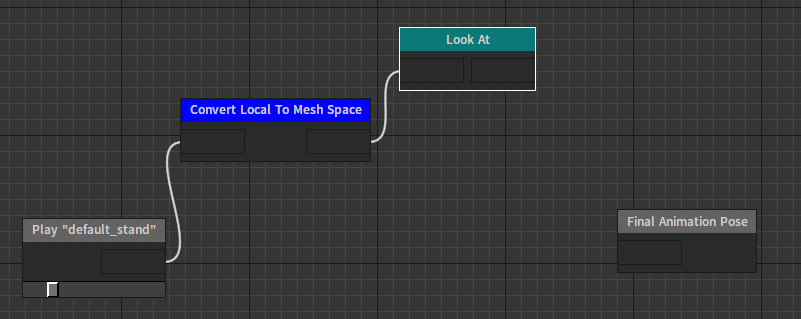
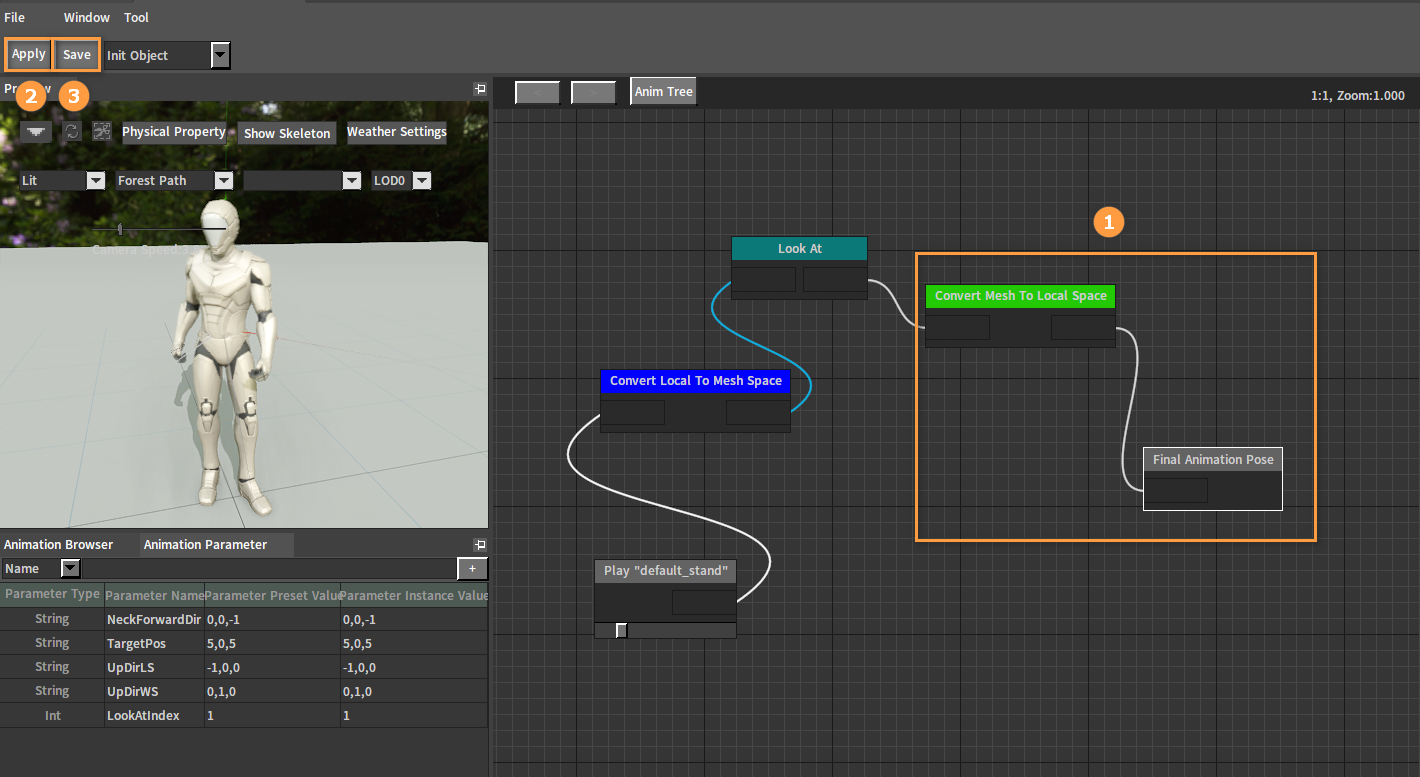
Create an Animation Sequence Playback node in the Animation Tree. Right-click in the blank area to open the Node Selection panel. Expand the Animation option and select the Play "default_stand" node.

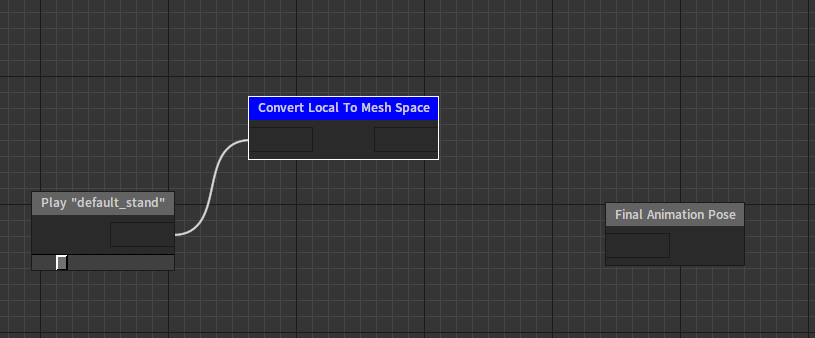
The original animations need to be converted to Mesh Space first to add Look At controls to character animations in the Anim Tree Editor for the Look At node works there. Drag off the Play “default_stand” node to add a Convert Local To Mesh Space node.
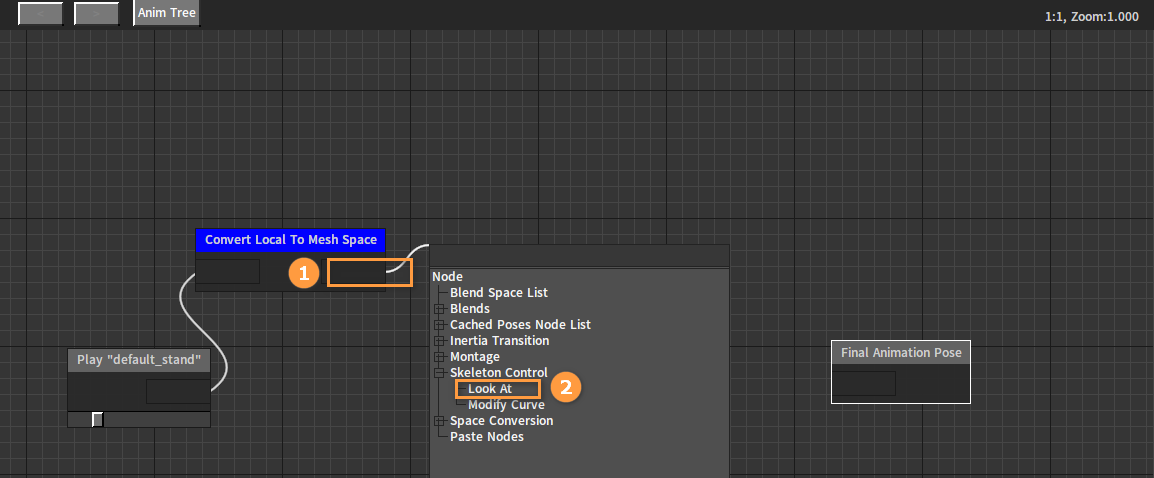
Add Look At nodes to control specified bones. Drag from the Convert Local To Mesh Space node to add a Look At node.
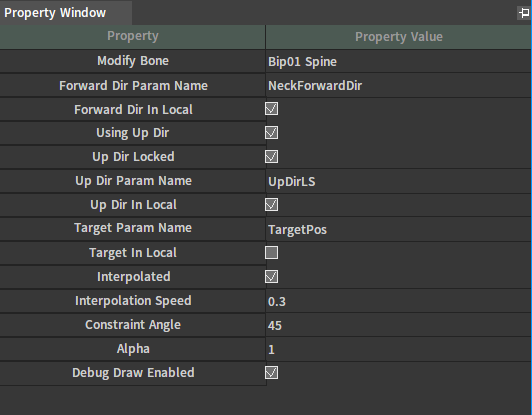
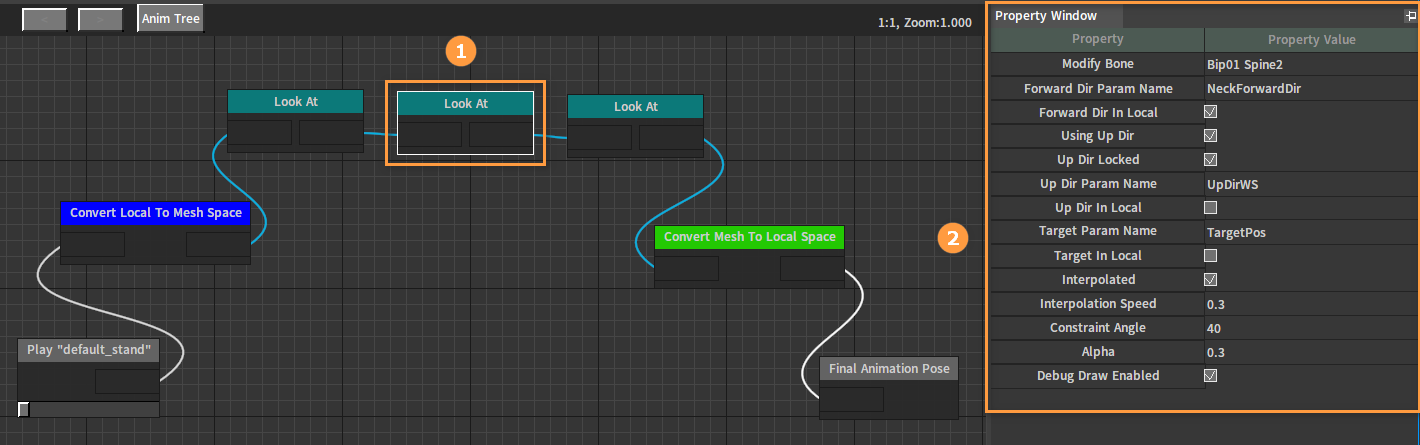
Set the Properties of the node after adding.
| Property | Value |
|---|---|
| Modify Bone | Bip01 Spine |
| Forward Dir Param Name | NeckForwardDir |
| Forward Dir In Local | Enabled |
| Using Up Dir | Enabled |
| Up Dir Locked | Enabled |
| Up Dir Param Name | UpDirLS |
| Up Dir In Local | Enabled |
| Target Param Name | TargetPos |
| Target In Local | Disabled |
| Interpolated | Enabled |
| Interpolation Speed | 0.3 |
| Constraint Angle | 45 |
| Alpha | 1 |
| Debug Draw Enabled | Enabled |
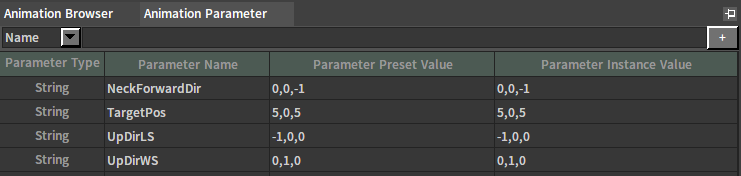
Add the parameters needed for the Look At node in the Animation Parameter window. For details on how to create parameters, please refer to Animation Parameters. Create four string type parameters NeckForwardDir, UpDirLS, UpDirWS and TargetPos, and set appropriate values for them. Where the TargetPos parameter is set to the target position to which the character orients.
Drag off the the Look At node to add a Convert Mesh To Local Space node.
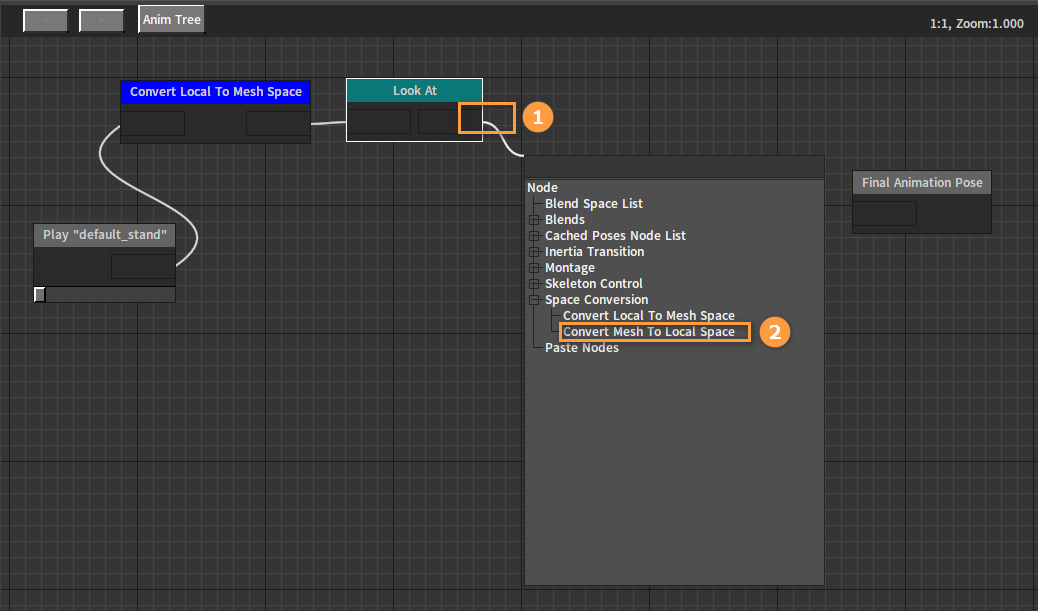
Connect the Convert Mesh To Local Space node to the Final Animation Pose node. Click the Apply and Save buttons in turn.
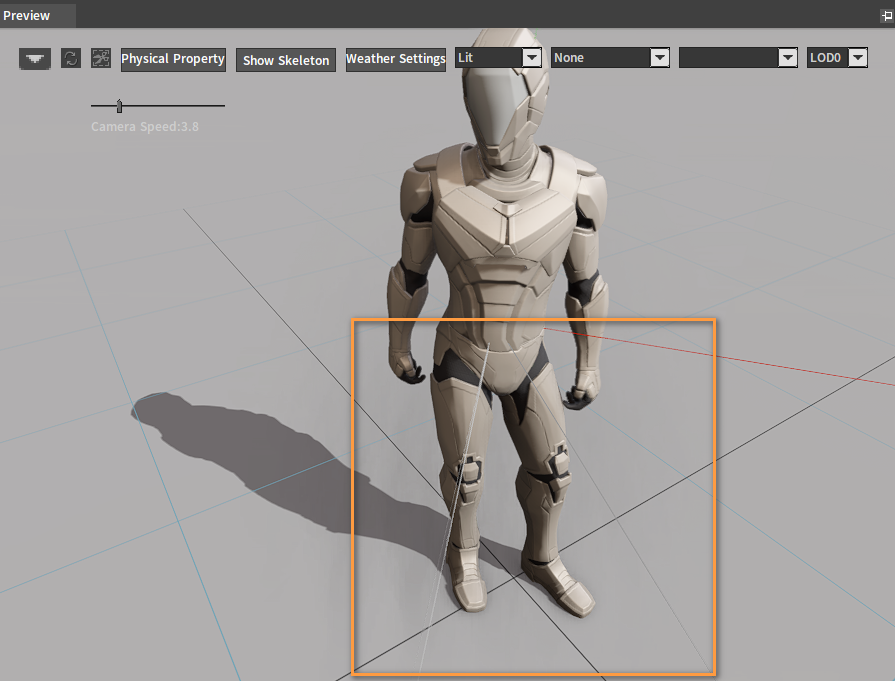
The effect can be viewed in the Preview window. At this point, the character's waist has twisted to the target direction with one of the white lines pointing to this direction, the other white line pointing to the real direction after Forward Dir adjustment, the gray line pointing to the direction before Forward Dir adjustment, and the black line pointing to the desired direction. The black one representing the desired direction and the white one representing the real direction have been highly overlapped after the bones were controlled by the Look At node.
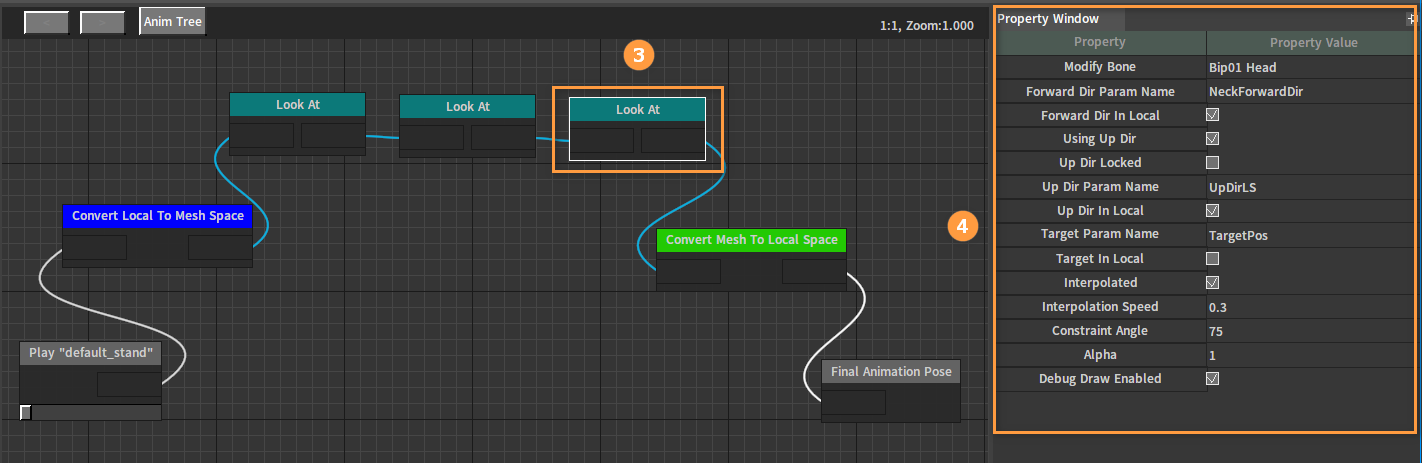
Continue to add new Look At nodes to control other bones, so that different parts of the character's body orient towards the target direction, creating a more natural following target animation. Connect the newly created Look At node in series in the previous Animation Tree, and add two Look At nodes after the first one.
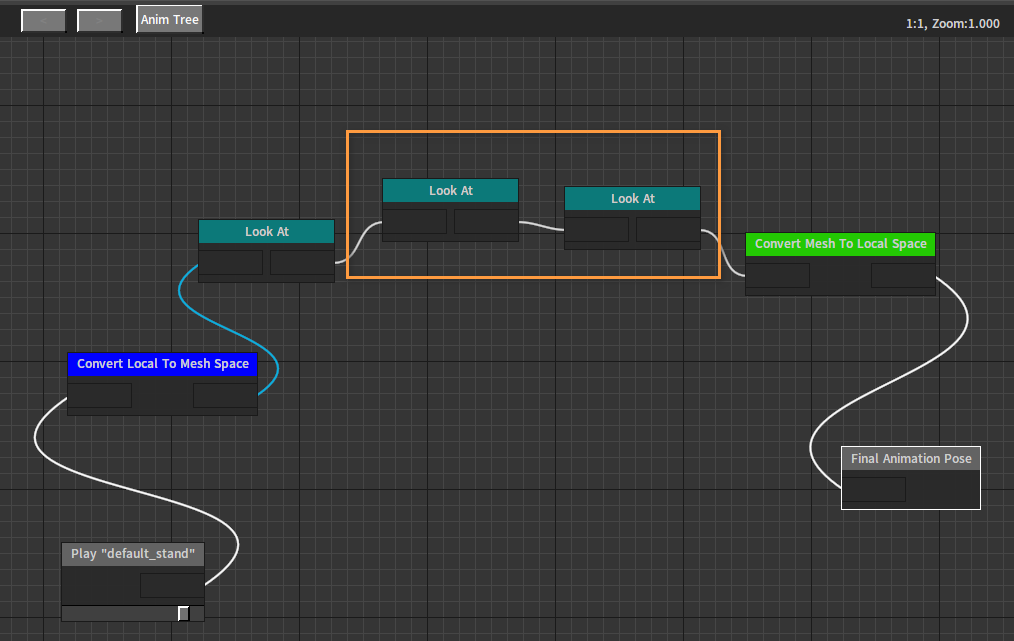
The two newly added Look At nodes are used to control the Spine2 and Head bones respectively. Set appropriate property values for them.
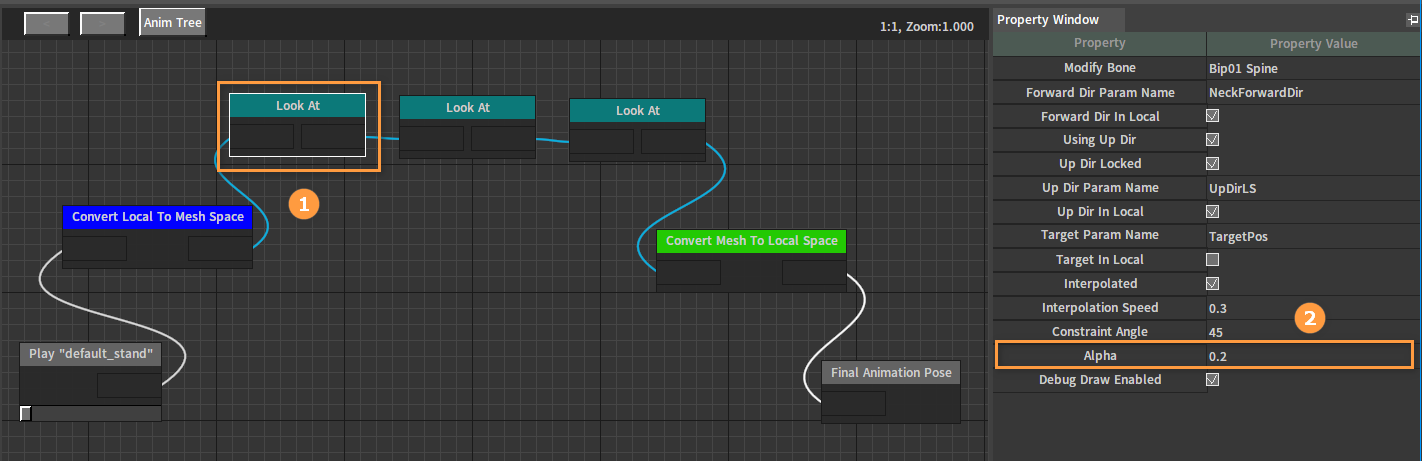
Change the Alpha value of the Look At node that controls the Spine bone to 0.2 to ensure that the final pose when the character orients towards the target direction is more natural.
Click Apply or Save in the Anim Tree Editor after editing. In the Preview window, different parts of the character's body are already orienting towards the target direction in varying degrees.

Select the node and uncheck Debug Draw Enabled in the Property Window to cancel the drawing of node debugging lines. Click Apply or Save button to see the effect in the Preview window.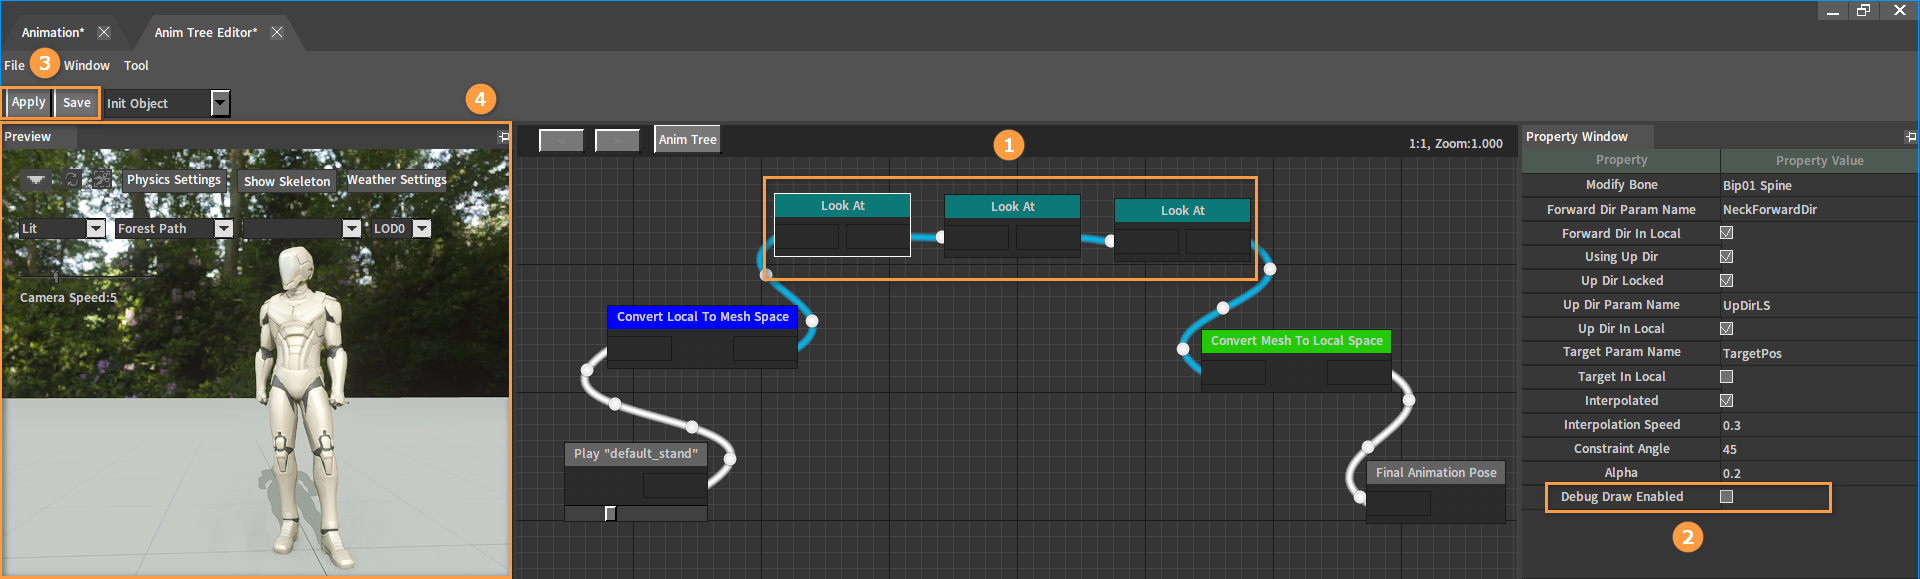
Configuring Actors
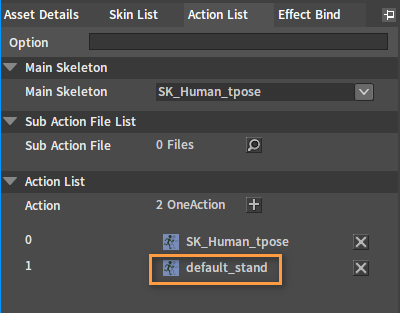
Double-click the .actor file in the Project panel of the Component Editor to open the Actor Editor. Set the Default Action to the Look At AnimTree asset in the Asset Details panel.

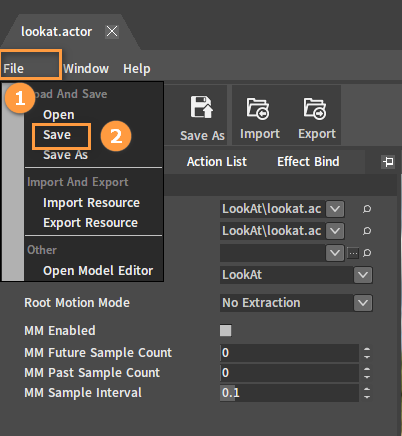
Then click File (Menu Bar) -> Save in the Actor Editor.
Creating Characters
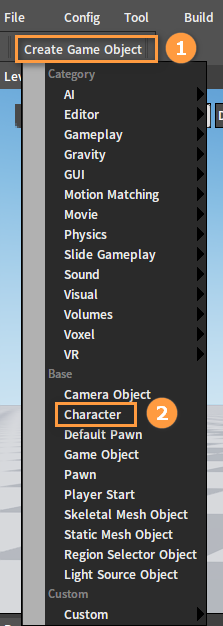
Create a Level in the Component Editor and click Create Game Object -> Character.
Select the character object in the Hierarchy panel, then select CharacterMesh0(Inherited) in the Inspector panel. Drag the created Actor file from the Resource Preview window to the slot of the Skeletal Mesh Config File.

Select CollisionCylinder(Inherited) and CharacterMesh0(Inherited) in the Inspector panel to adjust the positions of the character's capsule and mesh respectively, so that the feet of the skinned character touch the ground in the premise that the capsule wraps the character as much as possible with the capsule above the ground.

Binding Scripts for Characters
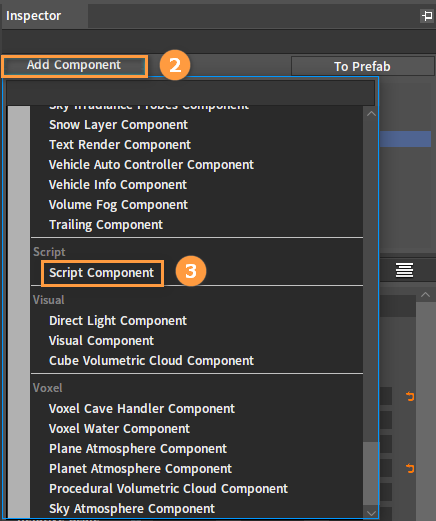
Select LCharacter(Instance) in the Inspector panel, then click the Add Component button to add a Script Component.

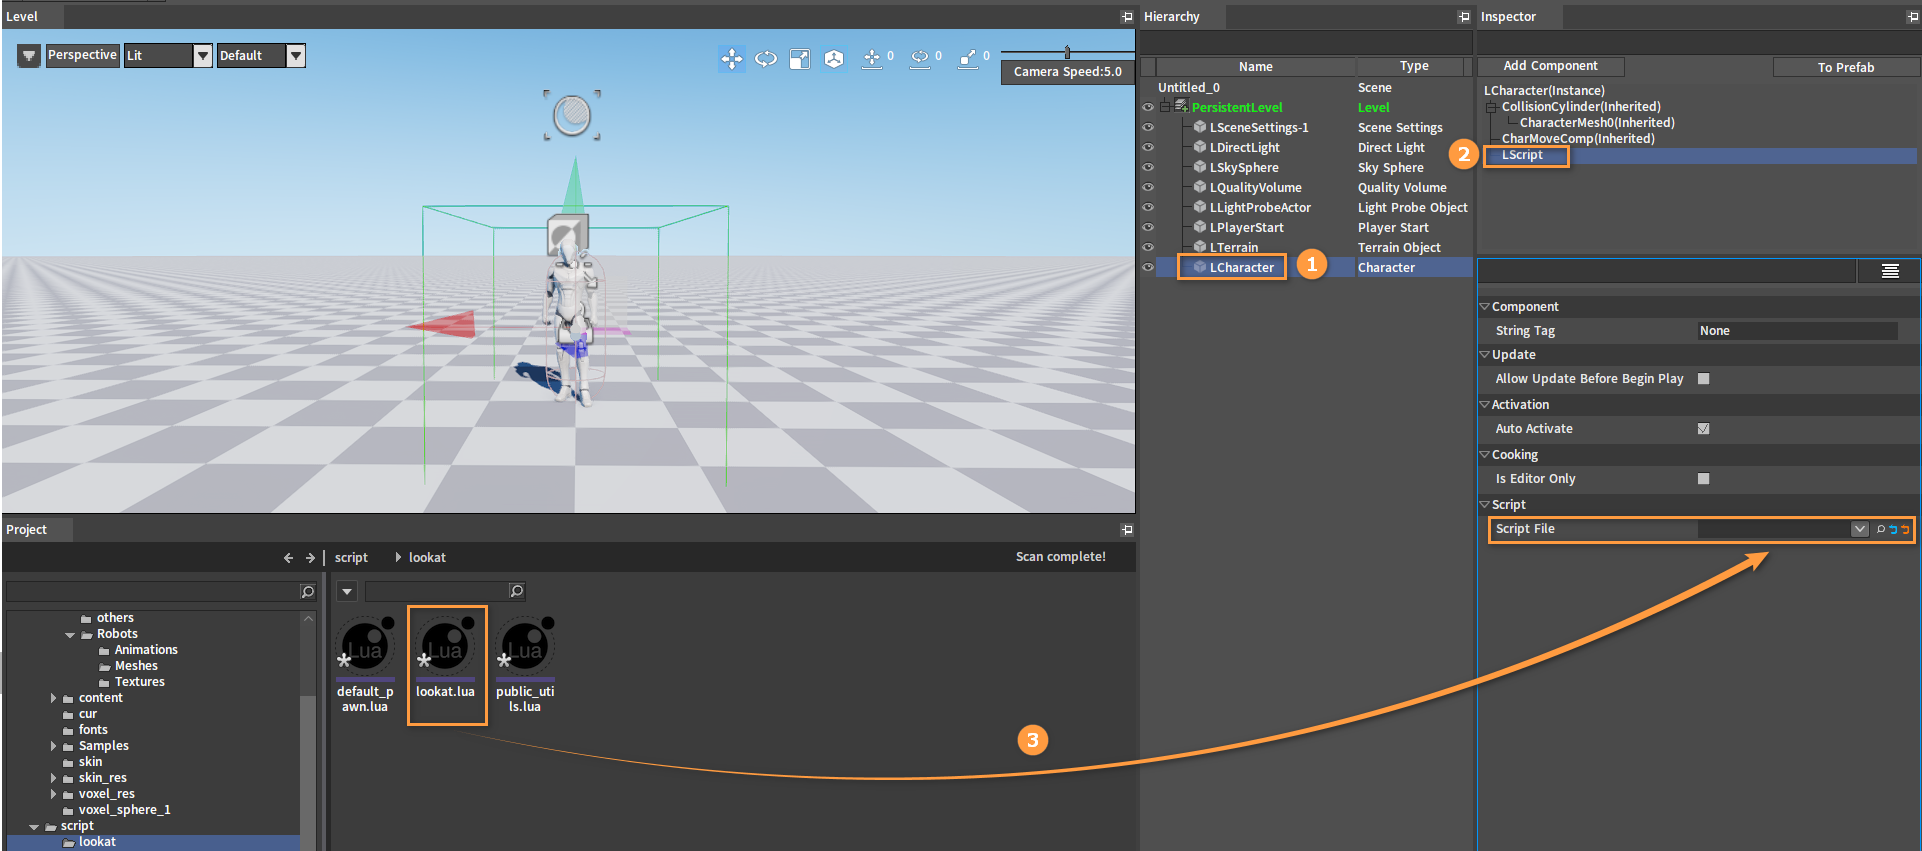
Bind scripts for this character. Write a script and save it in the script folder in the project resources. Select LCharacter in the Hierarchy panel and LScript in the Inspector panel respectively. Drag the script from the Resource Preview window to the slot of the Script File.
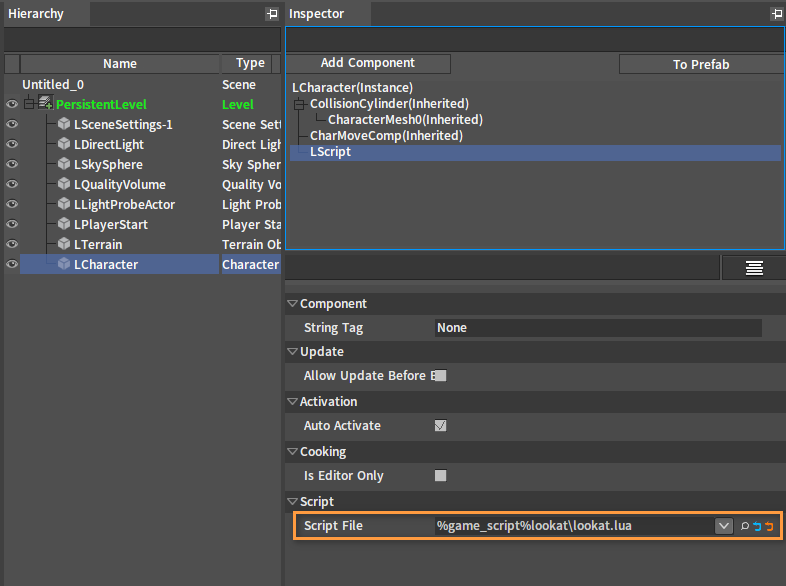
After dragging:
Scripts
lookat.lua
require("public_utils")

function on_begin_play(component)
    local self_object = get_mesh_object(component)

    if not nx_is_valid(self_object) then
        return
    end

    nx_callback(component, "on_tick", "tick")
end

function tick(component)
    local self_object = get_mesh_object(component)

    if not nx_is_valid(self_object) then
        return
    end

    local target_object = get_target_object()

    if not nx_is_valid(target_object) then
        return
    end

    local x = target_object.PositionX
    local y = target_object.PositionY
    local z = target_object.PositionZ

    local target_pos = nx_string(x) .. "," .. nx_string(y) .. "," .. nx_string(z)

    local action_idnex = self_object:GetActionIndex("lookat")
    local return_value = self_object:SetAnimTreeValue(action_idnex, "TargetPos", target_pos)
end

function get_mesh_object(component)
    local owner = component.GameObjectOwner

    if not nx_is_valid(owner) then
        return nx_null()
    end

    local mesh_com = owner.MeshComponent

    if not nx_is_valid(mesh_com) then
        return nx_null()
    end

    return mesh_com.VisBase
end

function get_target_object()
    local player_controller = get_player_control()

    if not nx_is_valid(player_controller) then
        return nx_null()
    end

    local pawn = player_controller.Pawn
    if not nx_is_valid(pawn) then
        return nx_null()
    end
    --[[
    local actors = pawn:GetComponentList()
    local mesh_com = nx_null()
    for i = 1, table.getn(actors) do
        if nx_is_kind(actors[i], "fx_component.LModelComponent") then
            mesh_com = actors[i]
            break
        end
    end

    if not nx_is_valid(mesh_com) then
        return nx_null()
    end

    return mesh_com.VisBase
    --]]
    return pawn
end
public_utils.lua
function get_player_control()
    local lworld = nx_value("lworld")

    if nx_is_valid(lworld) then
        local lscene = lworld.PlayScene

        if nx_is_valid(lscene) then
            local local_player = lworld:GetLocalPlayerFromControllerId(lscene, 0)

            if nx_is_valid(local_player) then
                return local_player.PlayerController
            end
        end
    end

    return nx_null()
end
Creating Default Pawns
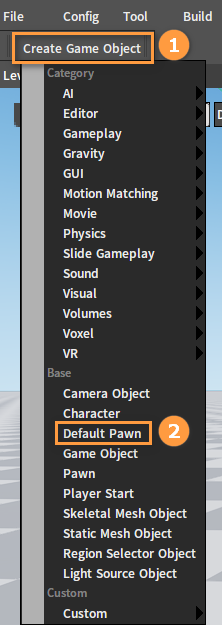
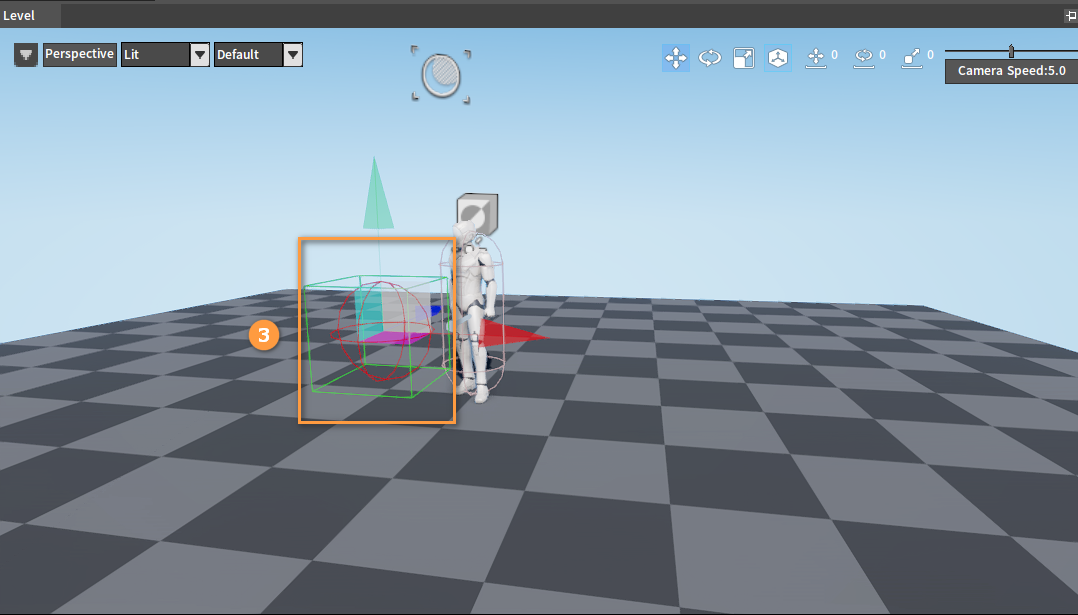
Click Create Game Object -> Default Pawn. Adjust its orientation and move it to a suitable position.
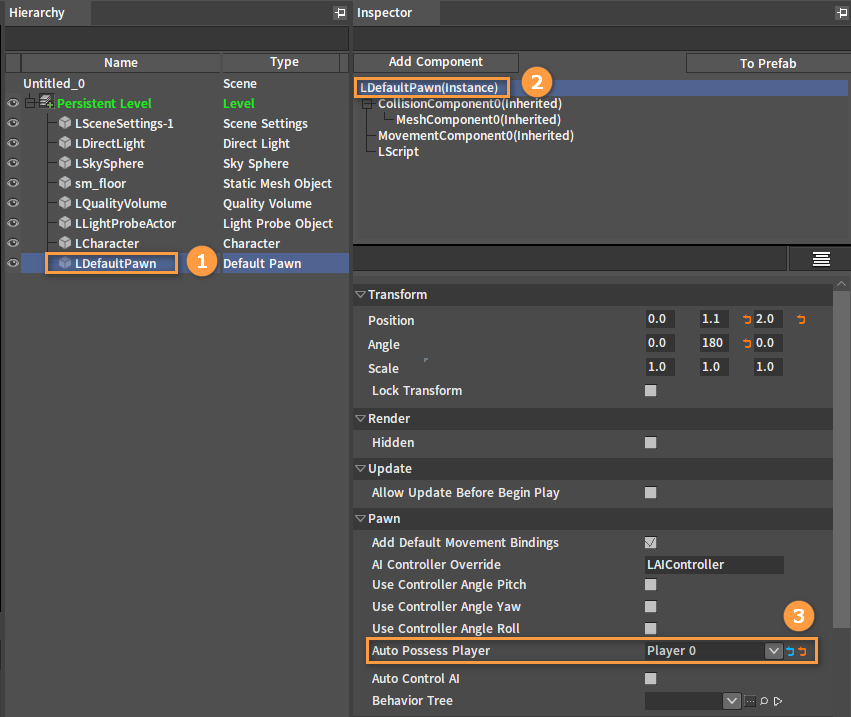
Select LDefaultPawn in the Hierarchy panel. Then select LDefaultPawn(Instance) in the Inspector panel and set Auto Possess Player to Player 0.
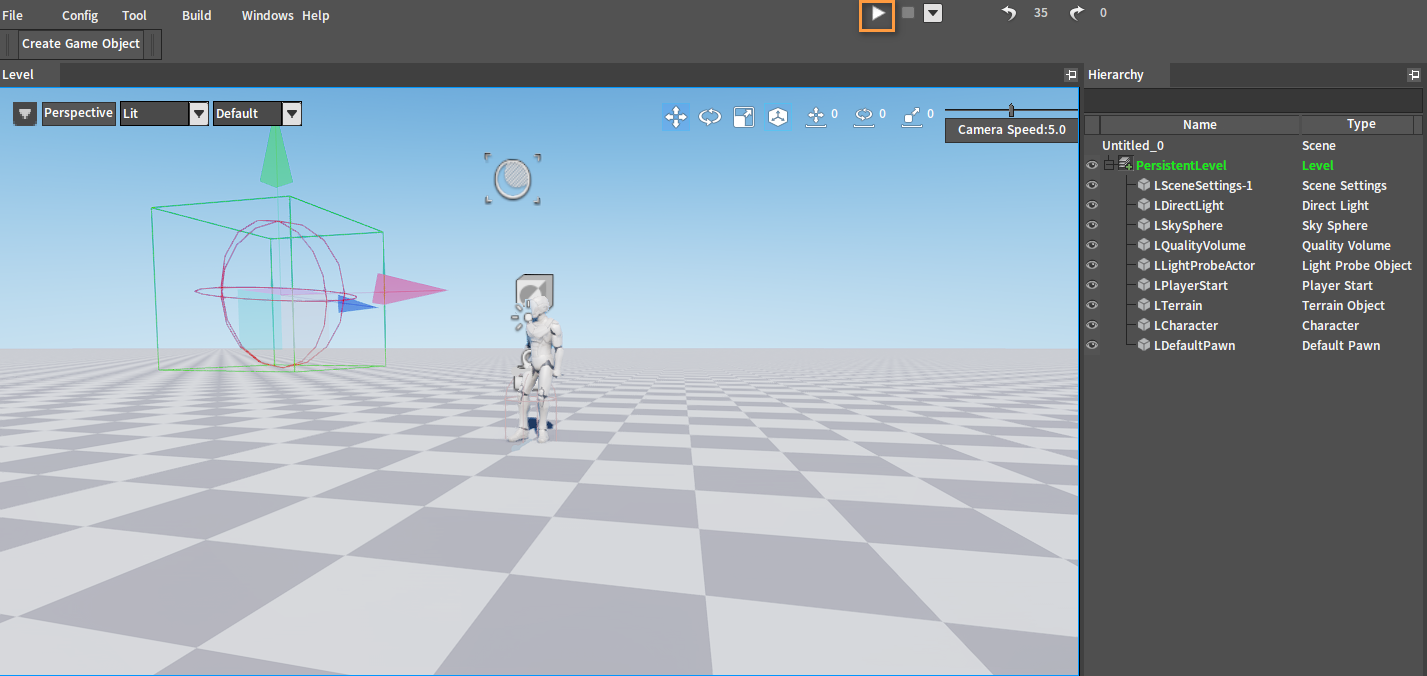
PIE
Click the Play button to see the effect that the character always follows the camera view.