Blend Pose Nodes
Overview
Blend Pose nodes include Blend Pose By Bool nodes and Blend Pose By Int nodes. This type of nodes can be used to switch between different poses, and when switching, the transition is natural and smooth instead of abrupt.
Blend Pose By Bool Nodes
The Blend Pose By Bool node controls the output pose to switch between the two input poses based on various parameters (except the vector parameter) combined with the use of operators. And output False Pose when the final result is false and True Pose when it is true.
Using Nodes
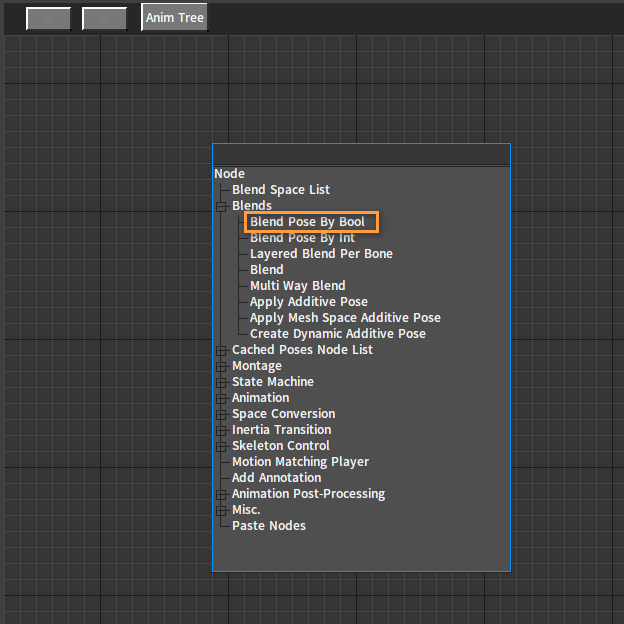
Right-click a blank space in the Anim Tree to open the Node Selection panel. Expand the Blends category and select Blend Pose By Bool.
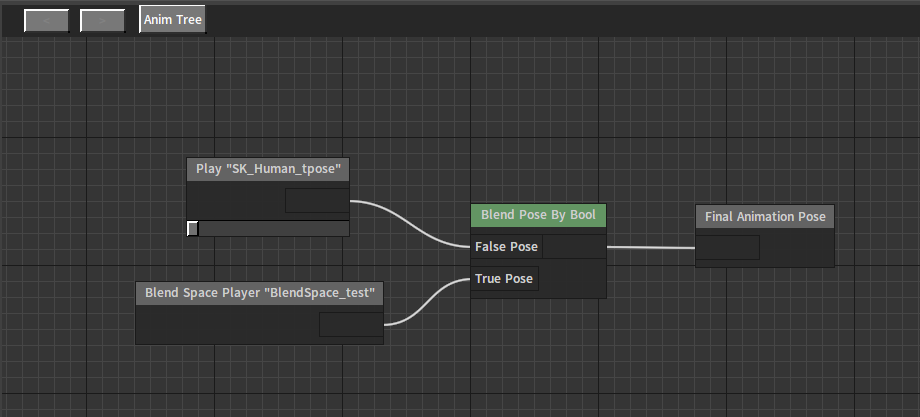
After adding the node successfully:

You can continue to configure the node with proper inputs/outputs.
Properties
When a node is selected, you can see its various properties in the Property Window.

| Property | Description |
|---|---|
| Transition Mode | Transition mode used when playing the node
|
| False Blend Time | Time required to blend with the false pose. |
| True Blend Time | Time required to blend with the true pose. |
| Callback String | Configure the callback function, and decide whether to transit based on the return value. |
| Use Conditions | When checked, parameters other than vectors can be selected for conditional expressions and the final result will be used to control the blending of nodes. Refer to the section Using Parameters in Animation Parameters. |
Blend Pose By Int Nodes
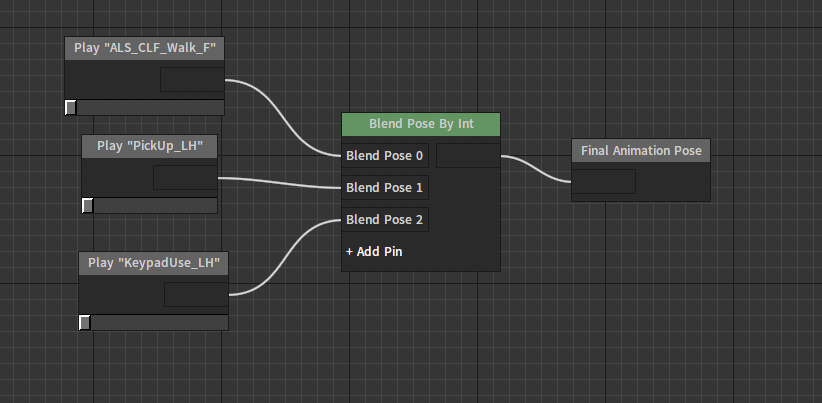
The Blend Pose By Int node controls the output pose to switch among multiple input poses based on the integer parameter. Blend Pose 0 will be output when the integer parameter is 0, Blend Pose 1 will be output when it is 1, and so on.
Using Nodes
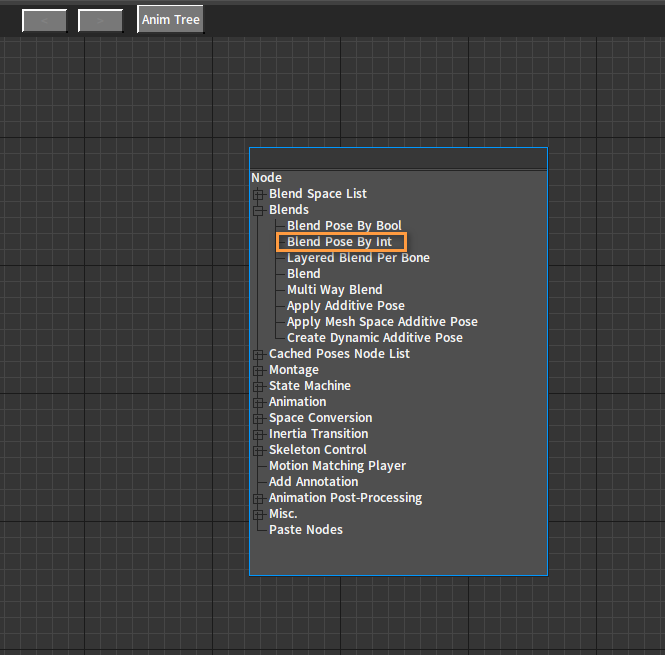
Right-click a blank space in the Anim Tree to open the Node selection panel. Expand the Blends category and select Blend Pose by Int.
After adding the node successfully:

Click Add Pin on the node to add a new pin for it.

A pin added successfully:

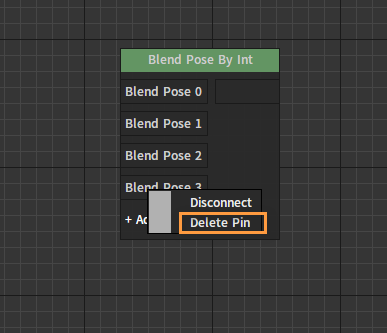
To delete a newly added pin, right-click the pin and select Delete Pin to delete it. The initial two Blend Pose pins cannot be deleted.
Then you can continue to configure the node with proper inputs/outputs.
Properties
When a node is selected, you can see its various properties in the Property Window.
| Property | Description |
|---|---|
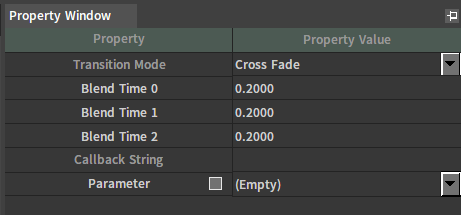
| Transition Mode | Transition mode used when playing the node.
|
| Blend Time | Time required to blend with each pose. |
| Callback String | Configure the callback function, and decide whether to transit based on the return value. |
| Parameter | When checked, the property uses the animation integer parameter. Specify from which parameter to get the parameter control amount in the drop-down list. |
Example
The following is a simple example of using the Blend Pose By Int node to switch between animation poses.
Creating Actors
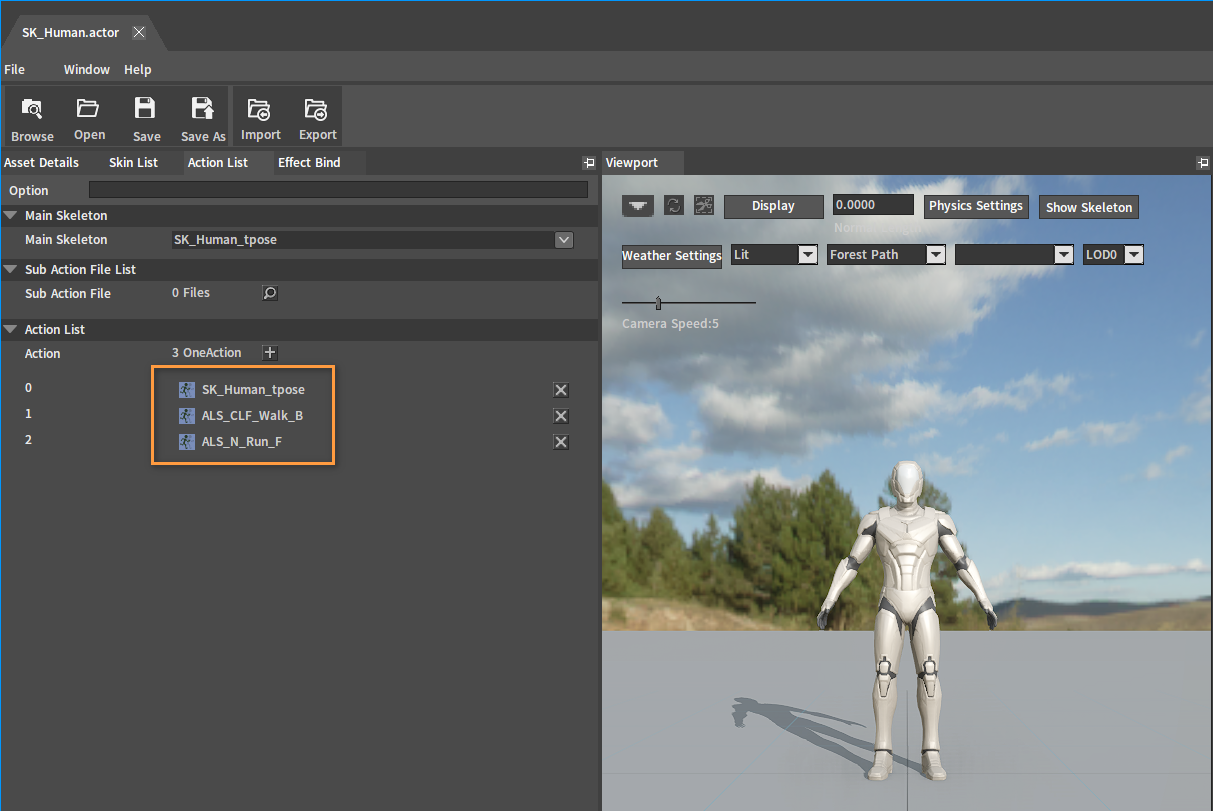
Refer to Assembling Actors to create an Actor containing animation assets SK_Human_tpose, ALS_CLF_Walk_B and ALS_N_Run_F.
Configuring Animation Trees
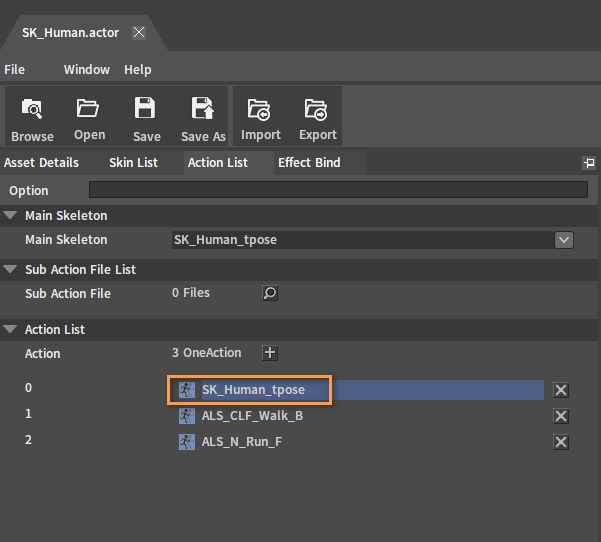
Double-click a skeleton asset in the Action List of the Actor Editor to open the Animation Editor.
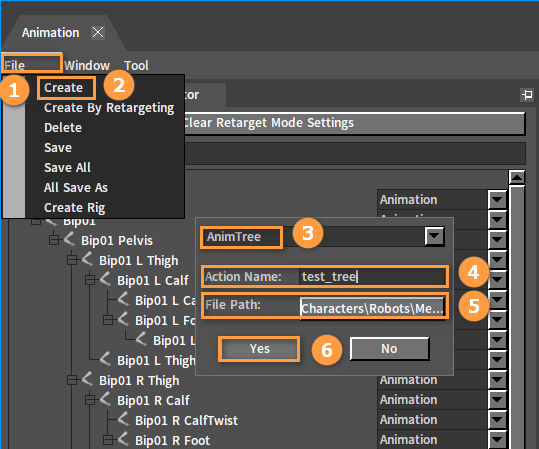
Create an Animation Tree. In the Animation Editor, click File (Menu Bar) -> Create, then click the drop-down box in the pop-up window, select Anim Tree, name it and select the File Path, then click Yes to complete the creation and enter the Anim Tree Editor.
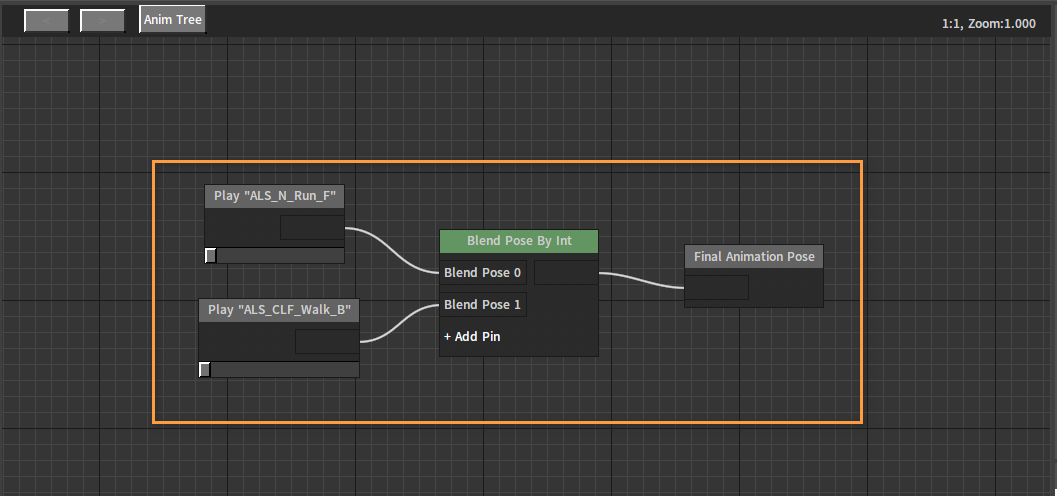
Add a Blend Pose By Int node to the Anim Tree, then connect a Sequence Playback node to the Blend Pose 0 pin and Blend Pose 1 pin respectively, and finally connect the Blend Pose By Int node to the Final Animation Pose node.
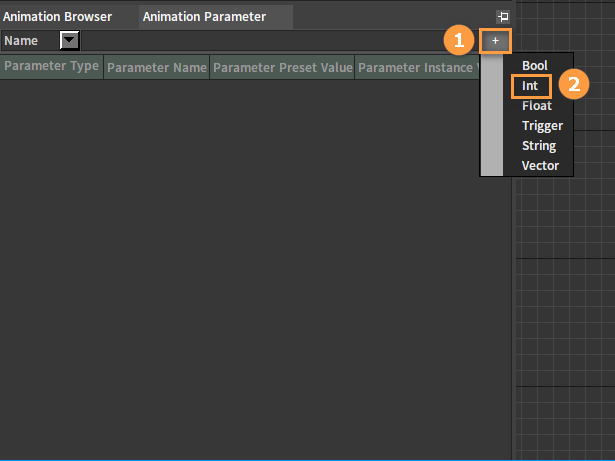
In the Animation Parameter window, click the ![]() button and select Int to create an integer parameter.
button and select Int to create an integer parameter.
After creation, modify its Parameter Name to WalkIndex.

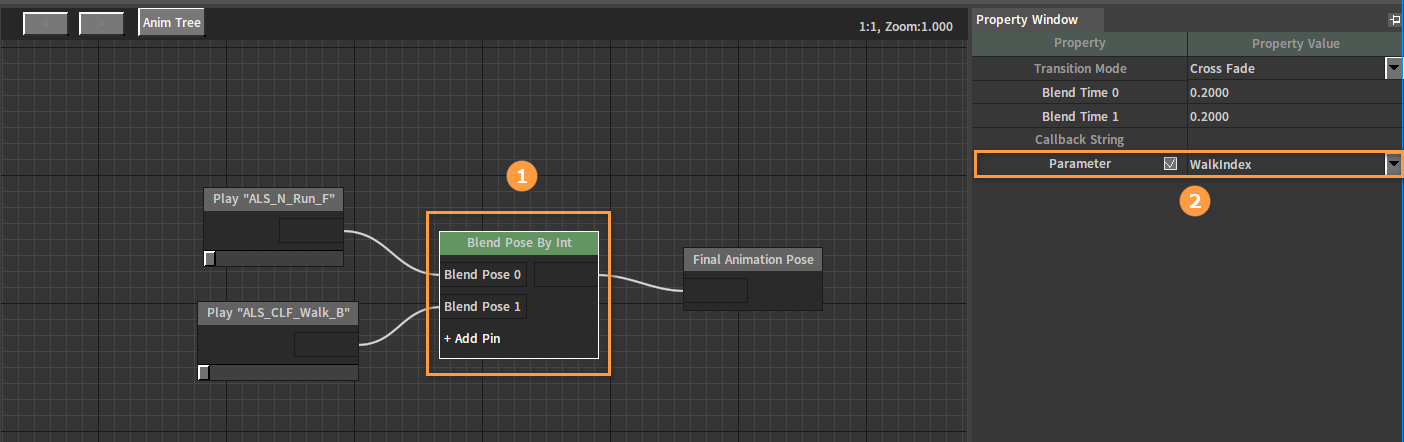
Select the Blend Pose By Int node, check Parameter in the Property Window, and then select the integer parameter WalkIndex you just created in its drop-down box. Other properties can be set as needed.
After editing, click the Apply button and select Preview Object in the drop-down box next to it, then you can view the effect in the Preview window later.
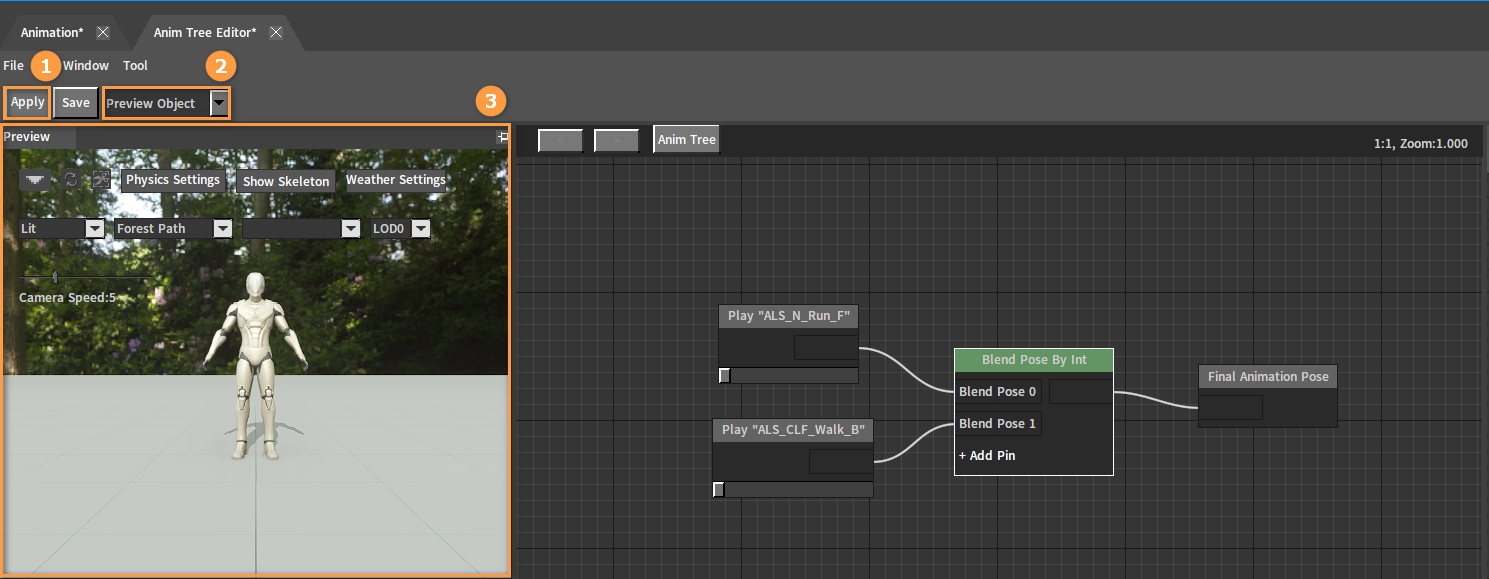
In the Parameter Instance Value of the Animation Parameter window, enter 0 to play the animation input to the Blend Pose 0 pin, and enter 1 to play the animation input to the Blend Pose 1 pin.
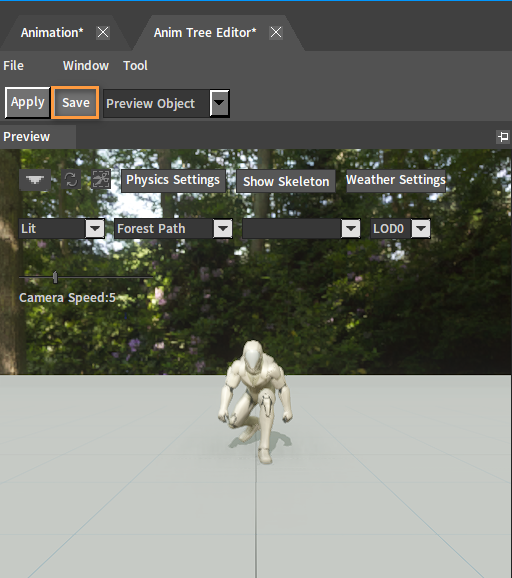
Click the Save button to save the Animation Tree.
Configuring Actors
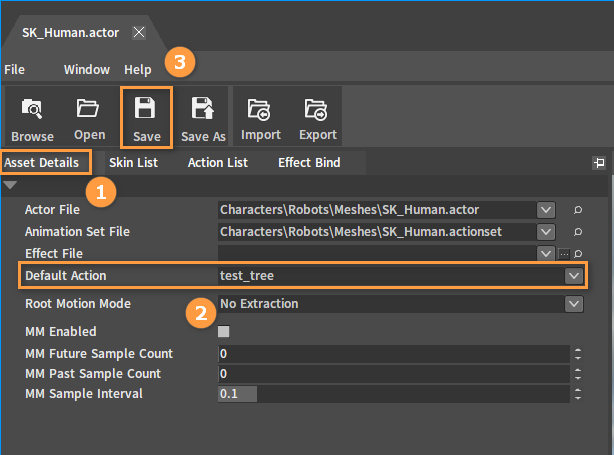
Click Asset Details in the Actor Editor, set Default Action to the created Animation Tree test_tree, and click Save.
Input Settings
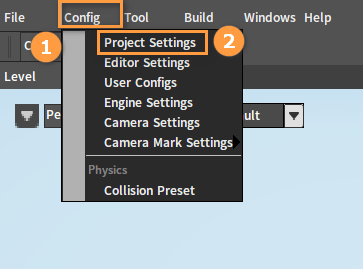
In the Component Editor, click Config (Menu Bar) -> Project Settings to open the Project Settings window.
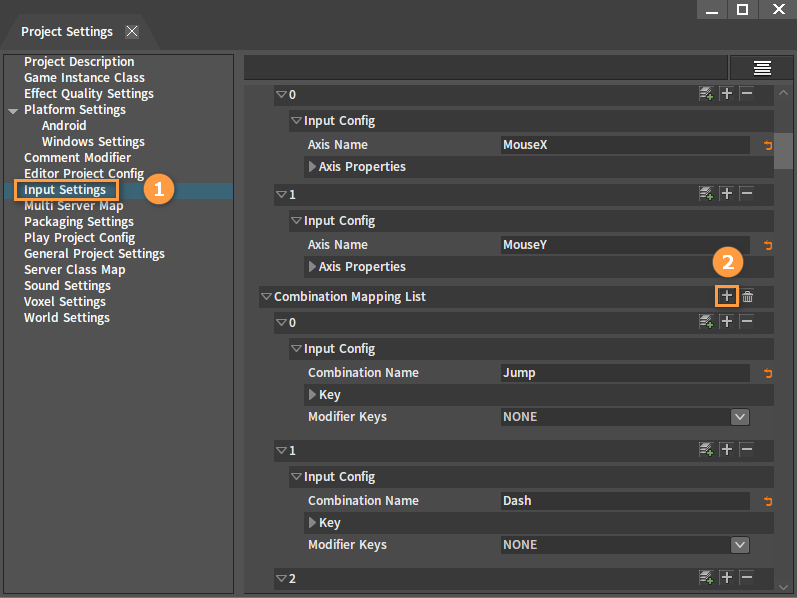
In the Project Settings window, click Input Settings, then click the ![]() button in the Combination Mapping List to add a new Combination Mapping.
button in the Combination Mapping List to add a new Combination Mapping.
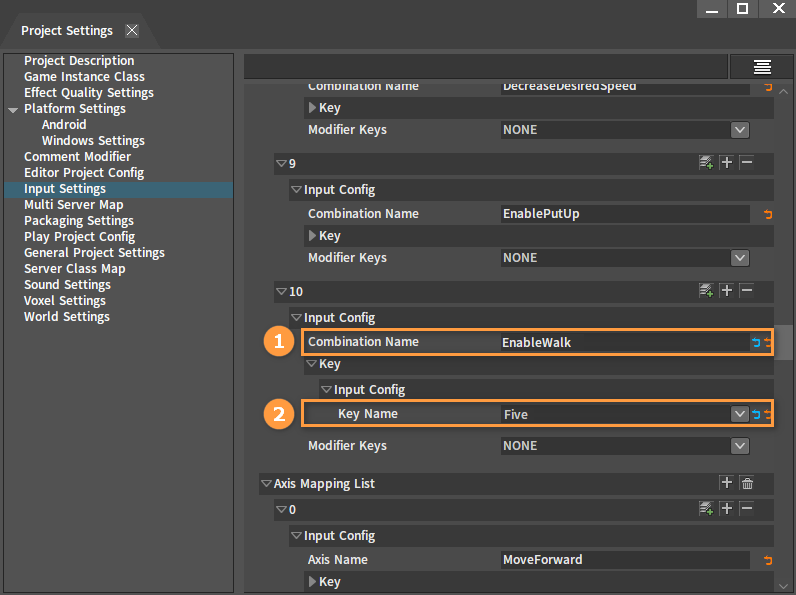
In the newly created Combination Mapping, enter Combination Name and specify a key in Key Name.
Creating Characters
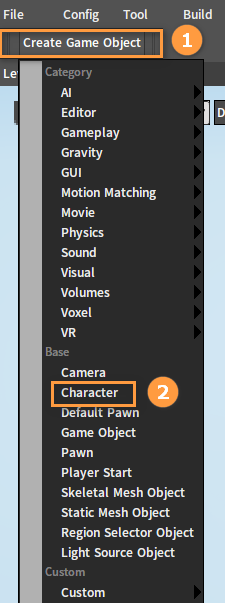
In the Component Editor, create a Level and click Create Game Object -> Character.
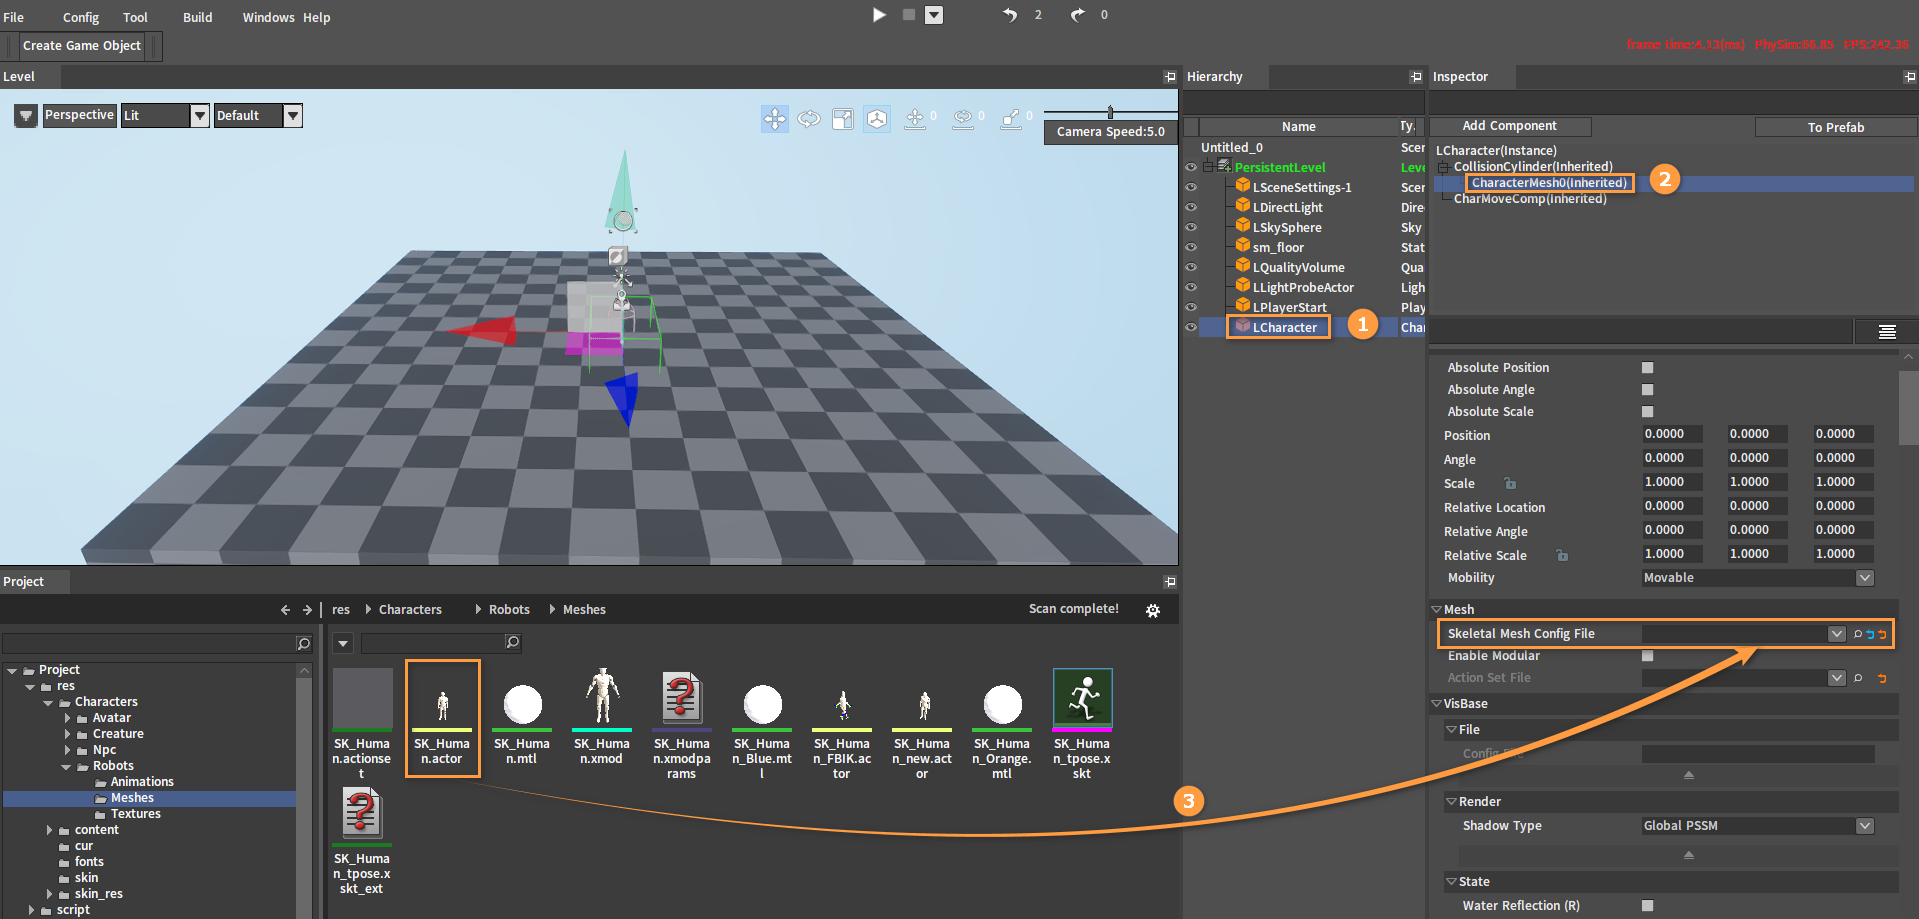
Select the character object in the Hierarchy panel, then select CharacterMesh0(Inherited) in the Inspector panel and drag the created Actor file from the Resource Preview window into the Skeletal Mesh Config File slot.
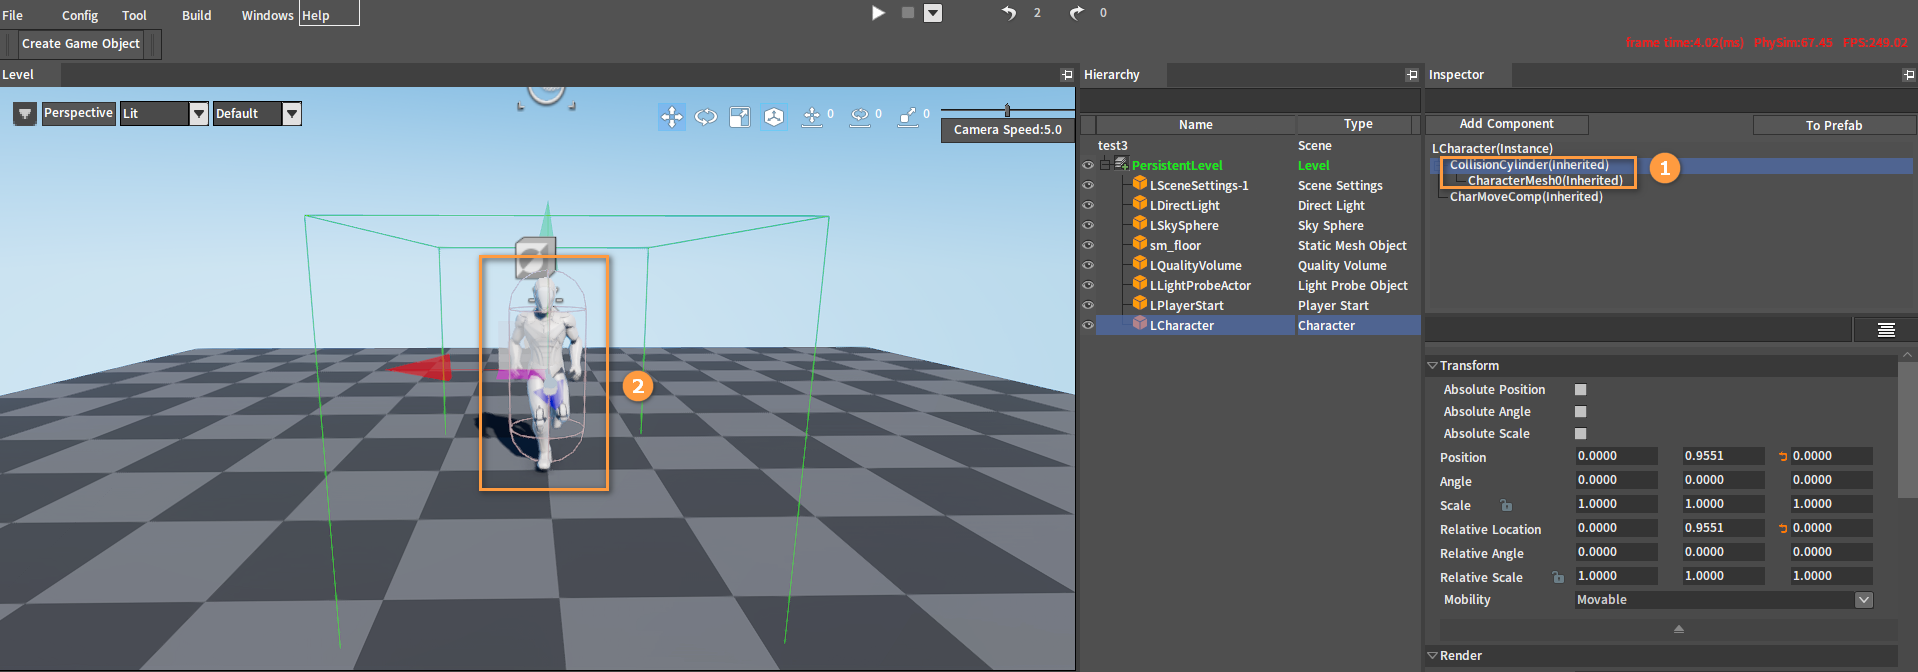
In the Inspector panel, select CollisionCylinder(Inherited) and CharacterMesh0(Inherited), and adjust the position of the character's capsule and mesh respectively, so that the skinned character's feet touch the ground and the capsule is close to the ground in the premise that the capsule wraps the character as much as possible.
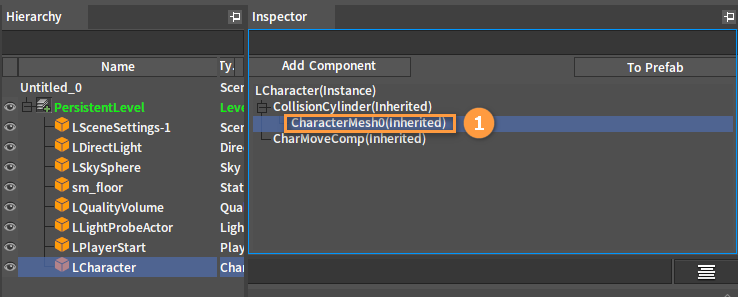
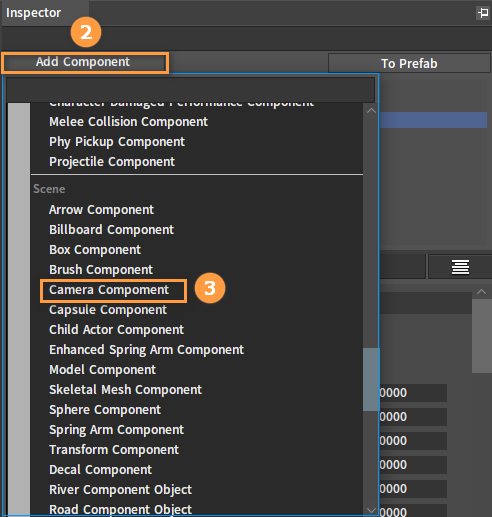
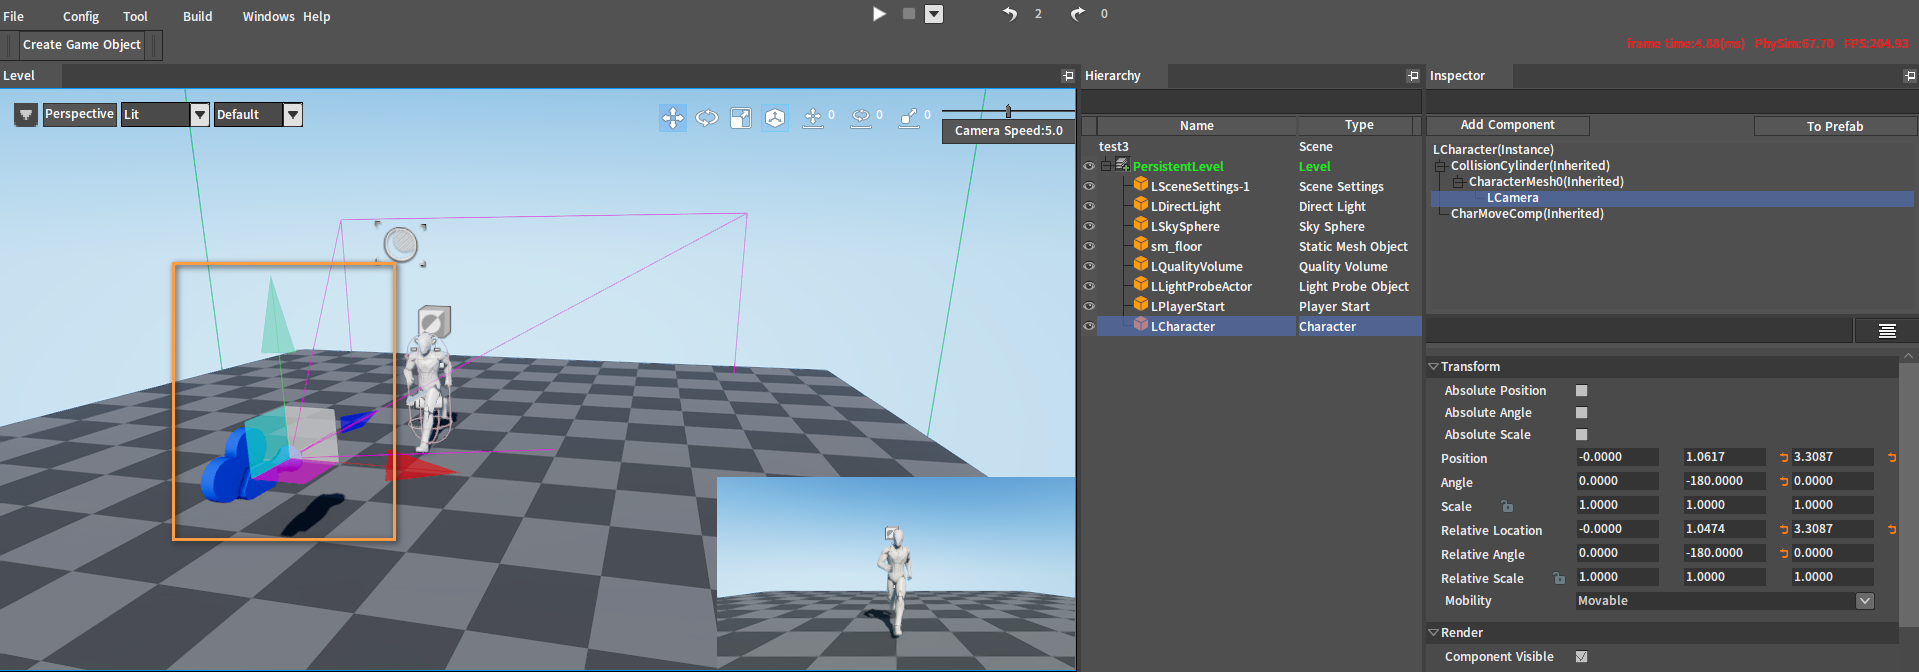
In the Inspector panel, select CharacterMesh0(Inherited), then click Add Component and select Camera Component.
After adding:
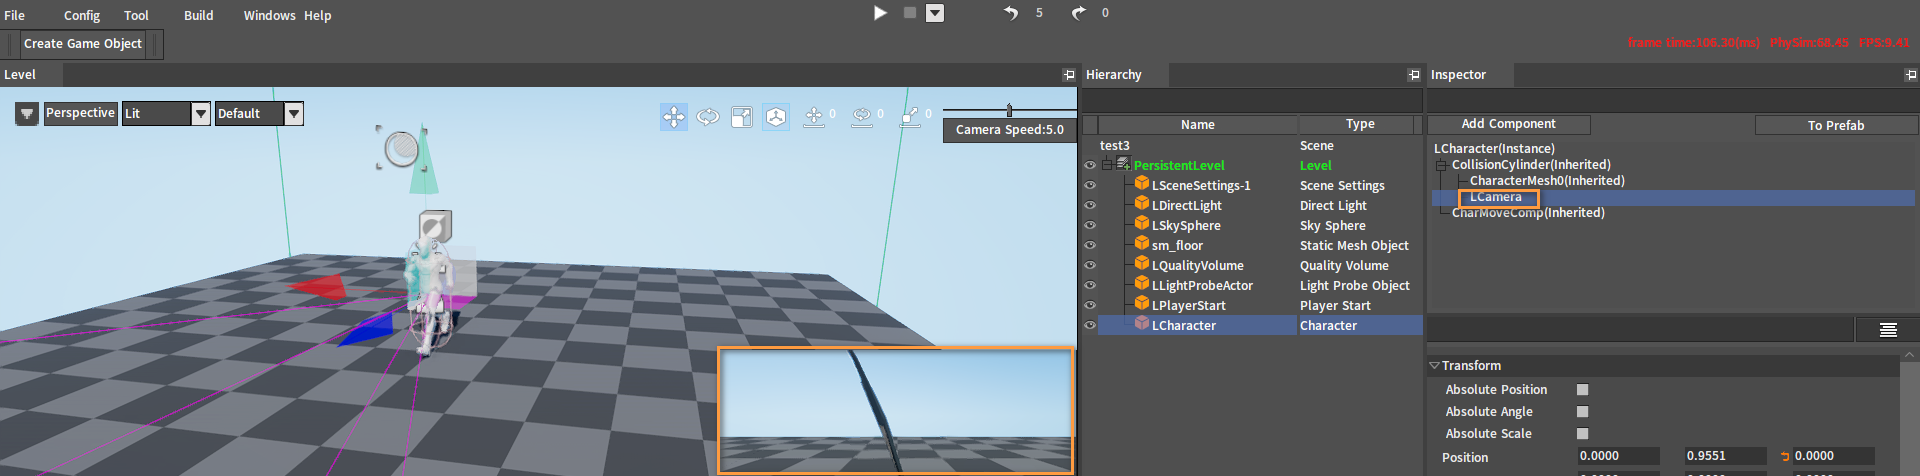
Adjust the created Camera Component to the proper position and angle.
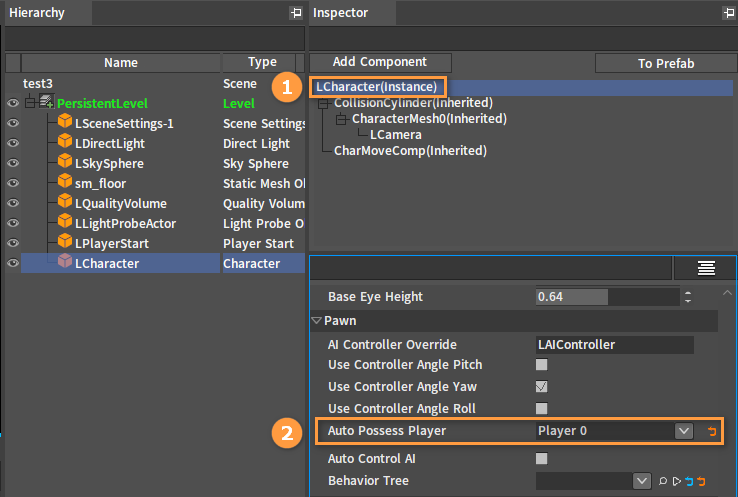
In the Inspector panel, select LCharacter(Instance) and set Auto Possess Player to Player 0.
Binding Scripts to Characters
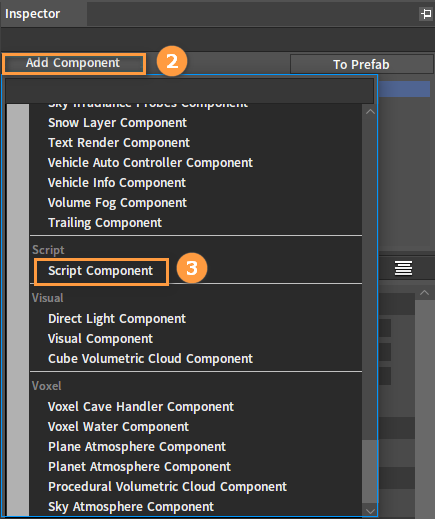
In the Inspector panel, select LCharacter(Instance), then click the Add Component button and select Script Component.
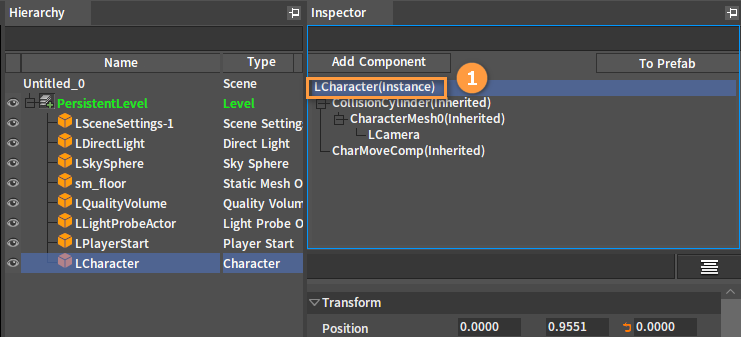
After adding:
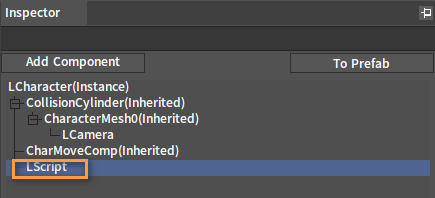
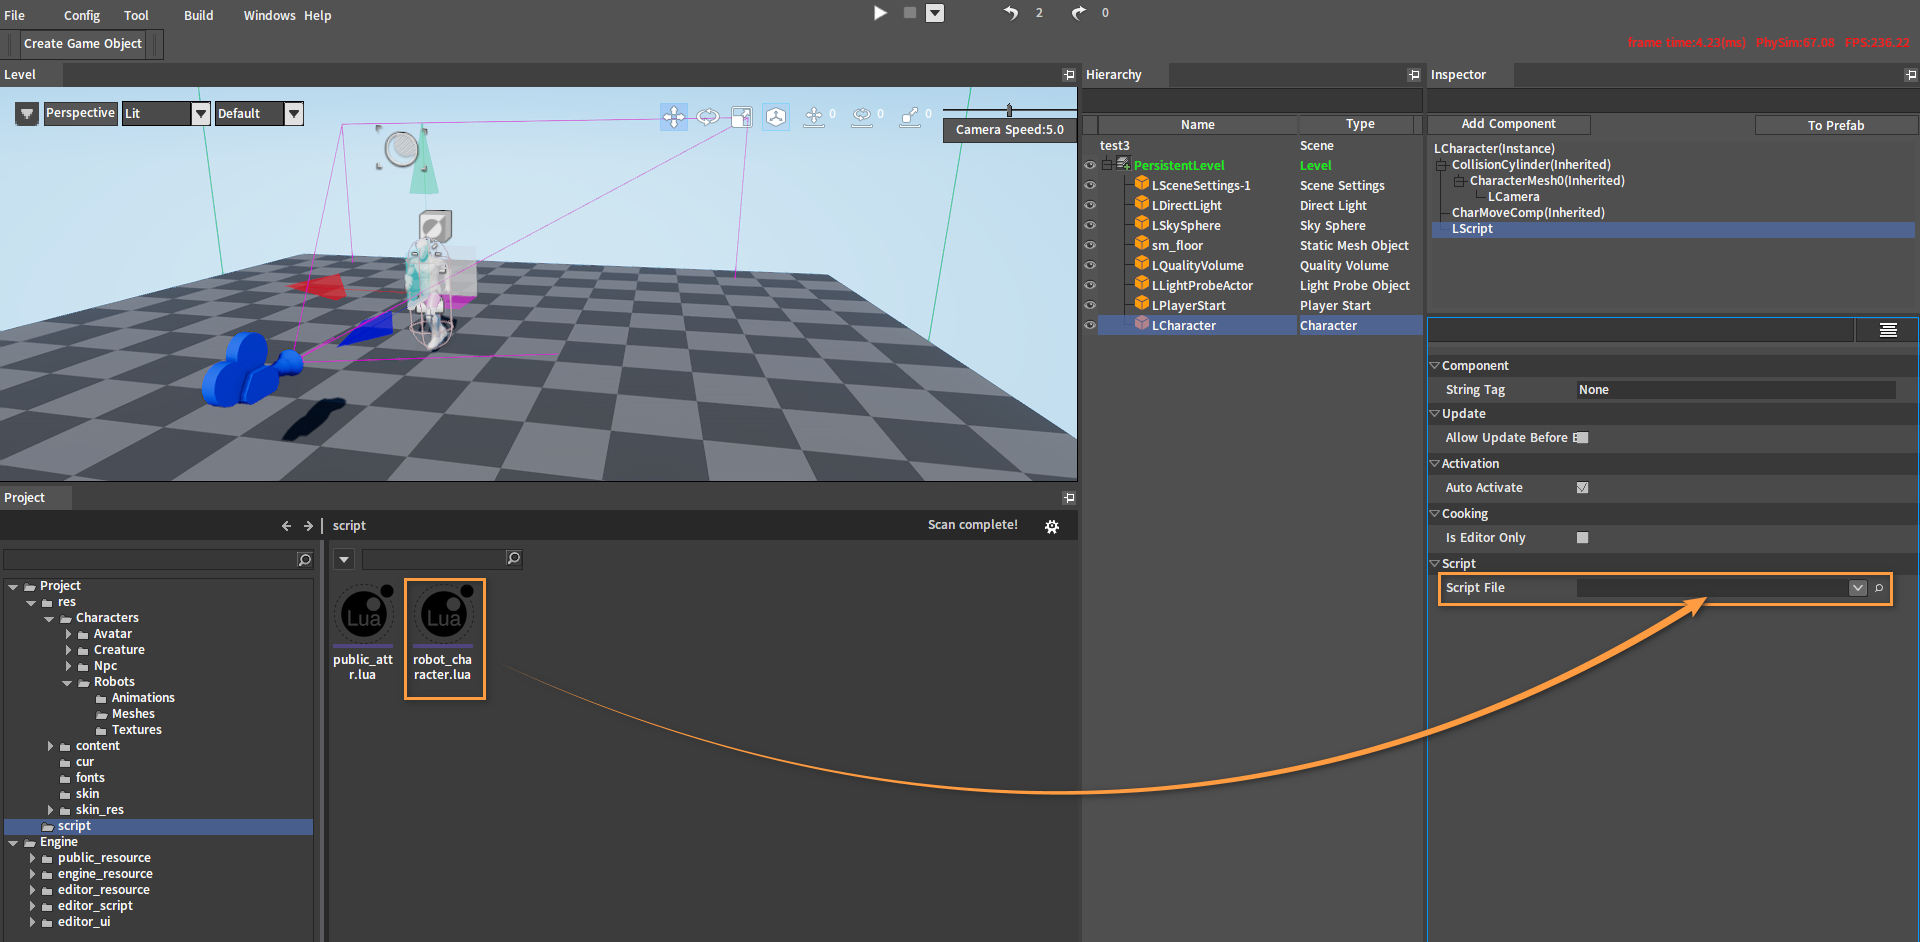
Bind a script to the character. Write a Script and save it in the script folder under Project resources. Select LCharacter in the Hierarchy panel, then select LScript in the Inspector panel and drag the script from the Resource Preview window into the Script File slot.
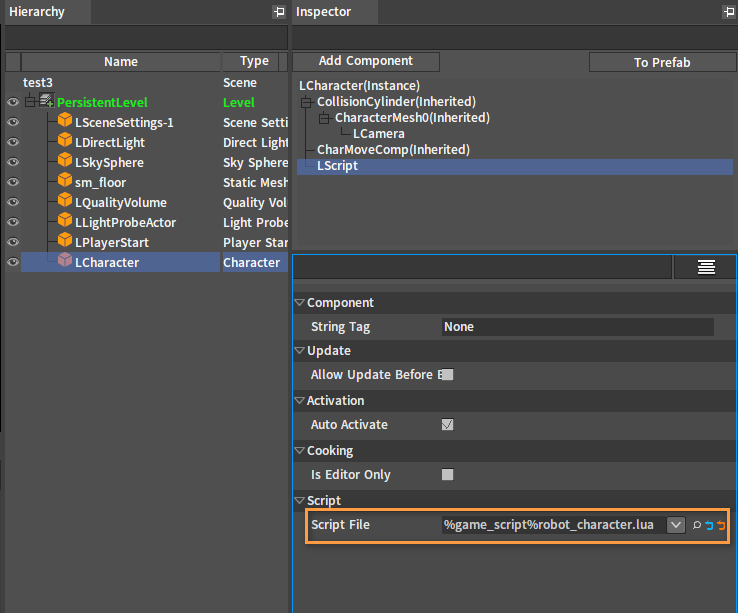
After binding:
Scripts
The following scripts are for reference only:
robot_character.lua
--script template

require("public_attr")

local IE_Pressed        = 0     --Button pressed
local IE_Released       = 1     --Button released
local IE_Repeat         = 2
local IE_DoubleClick    = 3
local IE_Axis           = 4
local IE_MAX            = 5

--Get the actor
function character_get_actor(character)
    if nx_is_valid(character) then
        local mesh_component = character.MeshComponent

        if nx_is_valid(mesh_component) then
            local vis_base = mesh_component.VisBase

            if nx_is_valid(vis_base) and nx_is_kind(vis_base, "Actor") then
                return vis_base
            end
        end
    end

    return nx_null()
end

--walk
function on_enable_walk_pressed(owner)
    local actor = character_get_actor(owner)
    if not nx_is_valid(actor) then
        return
    end

    local action_name = actor:GetBlendActionName(0)
    local action_type = actor:GetActionType(action_name)
    local action_index = actor:GetActionIndex(action_name)
    if action_type == AT_ANIMTREE then
        if actor:GetAnimTreeValue(action_index, "WalkIndex") == 0 then
            actor:SetAnimTreeValue(action_index, "WalkIndex", 1)
        else
            actor:SetAnimTreeValue(action_index, "WalkIndex", 0)
        end
    end
end


function get_object_by_tag(lscene, tag_name, class_type_name)
    --local lscene = nx_value("lscene")
    if not nx_is_valid(lscene) then
        return nx_null()
    end

    if tag_name == nil then
        return nx_null()
    end

    local tag_table = lscene:QueryObjectListByTag(tag_name, class_type_name)
    local tag_count = #tag_table
    if tag_count == 0 then
        return nx_null()
    elseif tag_count == 1 then
        return tag_table[1]
    elseif tag_count > 1 then
        for i = 1, tag_count do
            nx_log("info, get_object_by_tag,  "
                ..nx_string(i) .." : "..nx_string(tag_table[i].StringTag))
        end
        return nx_null()
    end
end

function input_comp_init_bind(component)
    local owner = component.GameObjectOwner

    if nx_is_valid(owner) then
        local input_comp = owner.InputComponent

        if nx_is_valid(input_comp) then
            nx_bind_script(owner, nx_current())

            input_comp:AddCombinationBinding("EnableWalk", IE_Pressed, true, false, true, "InputActionEvent_EnableWalk_Pressed")

            nx_callback(owner, "InputActionEvent_EnableWalk_Pressed", "on_enable_walk_pressed")
        end
    end
end

--use this for initialization
function on_begin_play(component)
    input_comp_init_bind(component)
    nx_callback(component, "on_tick", "tick")
end

function tick(component, delta_time)
    if not nx_is_valid(component) then
        return
    end

    local lscene = component.Scene

    local owner = component.GameObjectOwner
    local actor = character_get_actor(owner)
    local target_pawn = get_object_by_tag(lscene, "Pawn_0", "LCharacter")
    if not nx_is_valid(target_pawn) then
        return
    end
end
public_attr.lua
--Resource manager: global variables

MODEL_PATH = "mdl\\"
MODEL_PATH_DX9 = ""
ACTOR_PATH = "ini\\actor\\"
ACTOR_PATH_DX9 = "ini\\actor\\"
LIGHT_PATH = "ini\\light\\"
LIGHT_PATH_DX9 = "ini\\light\\"
EFFECT_PATH = "ini\\effect\\"
PARTICLE_PATH = "ini\\particle\\"
SOUND_PATH = "snd\\"
REVERB_PATH = "reverb\\"
TRIGGER_PATH = "ini\\trigger\\"
PROBE_PATH = "ini\\light_probe\\"
VOLUME_FOG_PATH = "ini\\volume_fog\\"
MATERIAL_PATH = ""

--Resource type definitions
TYPE_MODEL = "model"
TYPE_ACTOR = "actor"
TYPE_LIGHT = "light"
TYPE_EFFECT = "effect"
TYPE_PARTICLE = "particle"
TYPE_SOUND = "sound"
TYPE_REVERB = "reverb"
TYPE_TRIGGER = "trigger"
TYPE_PROBE = "light_probe"
TYPE_VOLUME_FOG = "volume_fog"
TYPE_DECAL = "decal"
TYPE_GROUP = "group"
TYPE_RIPPLE = "ripple"
TYPE_SNOW = "snow"
TYPE_RAIN = "rainlayer"
TYPE_UI3D = "ui3d"

--Animation resource types
AT_UNKNOWN = 0
AT_SKELETON = 1
AT_SKELETON_AS_ANIMSEQUENCE = 2
AT_ANIMSEQUENCE = 3
AT_MONTAGE = 4
AT_BLENDSPACE = 5
AT_BLENDSPACE1D = 6
AT_AIMOFFSETBLENDSPACE = 7
AT_ANIMTREE = 8

TYPE_LIST = {
    "model",
    "actor",
    "light",
    "effect",
    "particle",
    "decal",
    "sound",
    "reverb",
    "trigger",
    "light_probe",
    "volume_fog",
    "ripple",
    "snow",
    "rainlayer",
}

FORM_TREE_BROWSER = "common_form\\form_tree_browser"
SEARCH_PATH = "ini\\common_form\\form_tree_browser\\"
SEARCH_CONFIG = SEARCH_PATH .. "form_put_visual.ini"
SEARCH_CONFIG_TEMP = "cache\\common_form\\form_tree_browser\\form_put_visual_temp.ini"
GROUP_CONFIG = "ter\\visual_group.ini"

--Get the visual_put file
function get_search_file()
    local ini = nx_create("IniDocument")

    ini.FileName = nx_resource_path() .. SEARCH_CONFIG

    if not ini:LoadFromFile() then
        nx_destroy(ini)
        return 0
    end

    local file = ini:ReadString("SEARCH_CONFIG", "search_file", "form_put_visual.ini")

    nx_destroy(ini)

    return nx_resource_path() .. SEARCH_PATH .. file, file
end
PIE
After clicking the PIE button, press 5 to switch between the character's animations.
