Import Height Map
Overview
Import Height Map is a built-in voxel terrain editing tool in the Flexi Engine, which can edit voxel terrains, such as creating mountains and rifts, by using height maps.
Opening the Height Map Editing Interface
Zoom in to get close to the surface of the planet. Click Windows (Menu Bar) -> Edit Modes -> Voxel Terrain Mode to open the Voxel Editor.
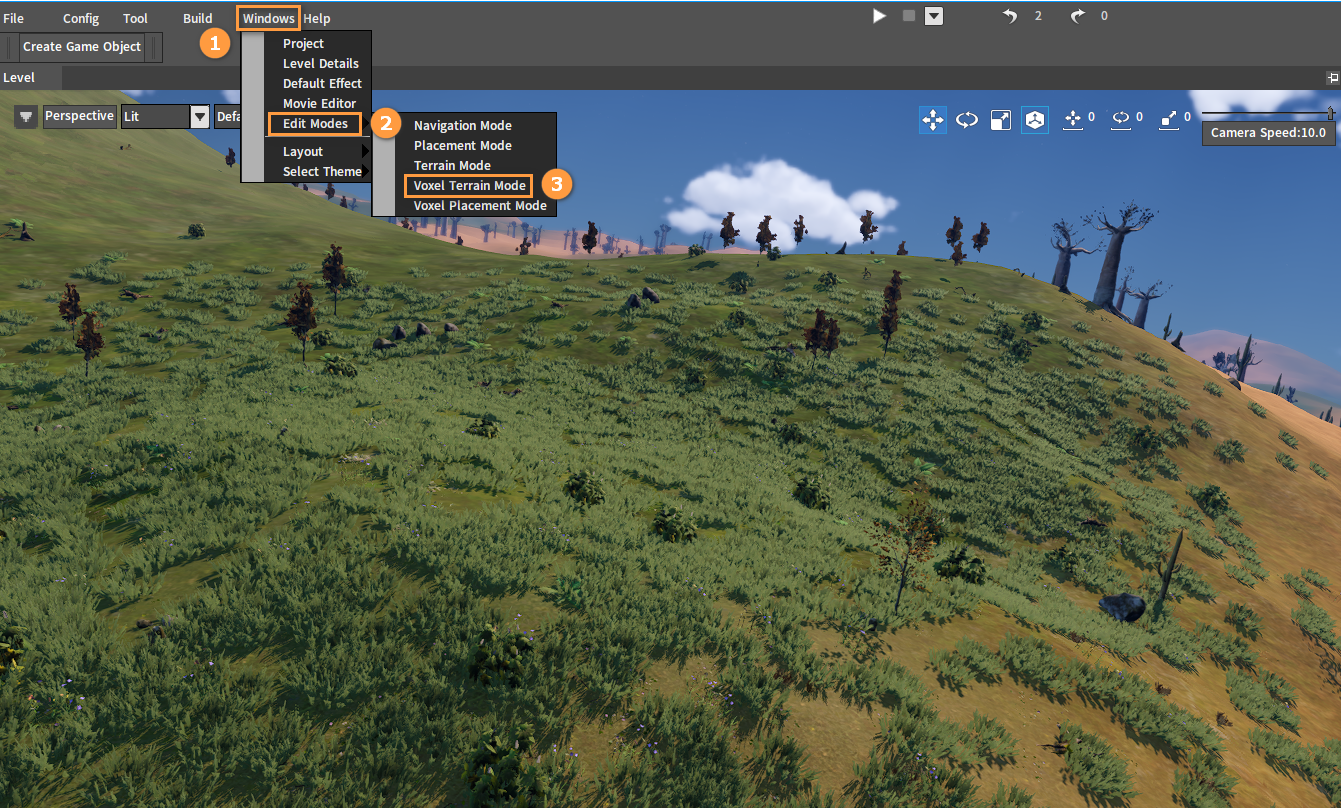
Click Import Height Map in the Voxel Editor to enter the height map editing interface.
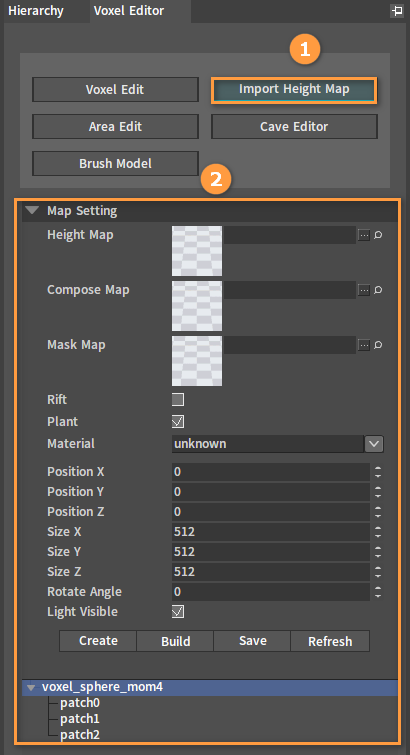
Properties
Here is the introduction to height map related properties.
| Property | Description |
|---|---|
| Height Map | Used to determine the height of the terrain. |
| Compose Map | Used to handle detail textures of the height map. |
| Mask Map | Used to smooth the junction of the surface and the height map. |
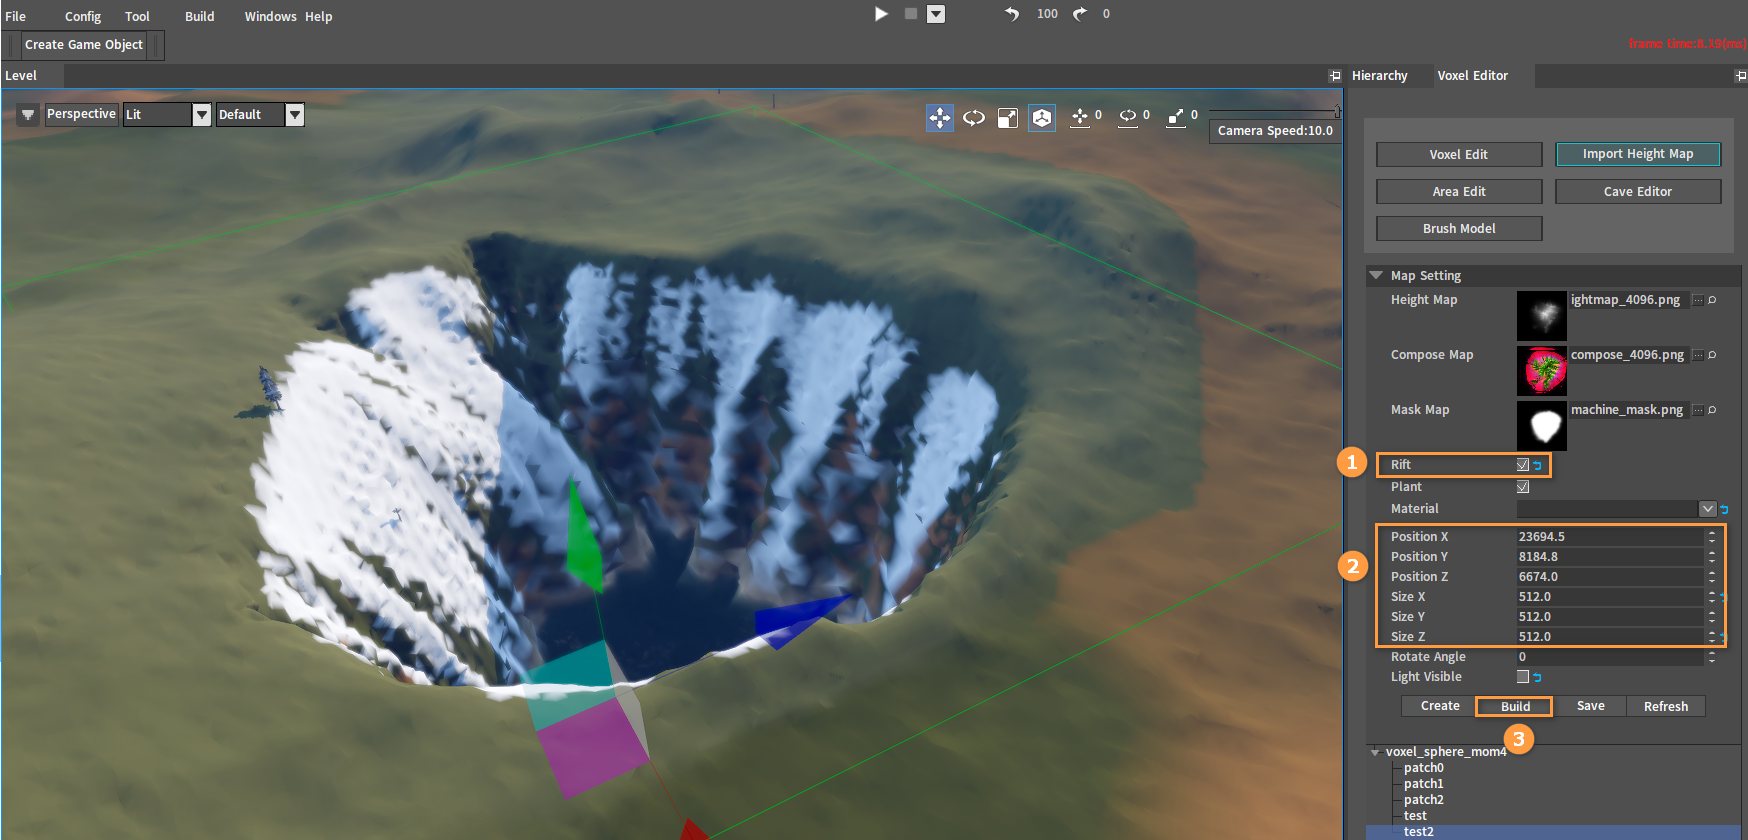
| Rift | If checked, it will dig down the surface voxel. |
| Plant | Used to control whether vegetation is generated on the height map. |
| Material | Used to select the material for creating the height map. |
| Position(X/Y/Z) | Used to determine the position of the height map. |
| Size(X/Y/Z) | Used to determine the size of the height map. |
| Rotate Angle | The angle by which the height map is rotated around the Earth's axis. |
| Light Visible | Used to control whether to display the green light box. |
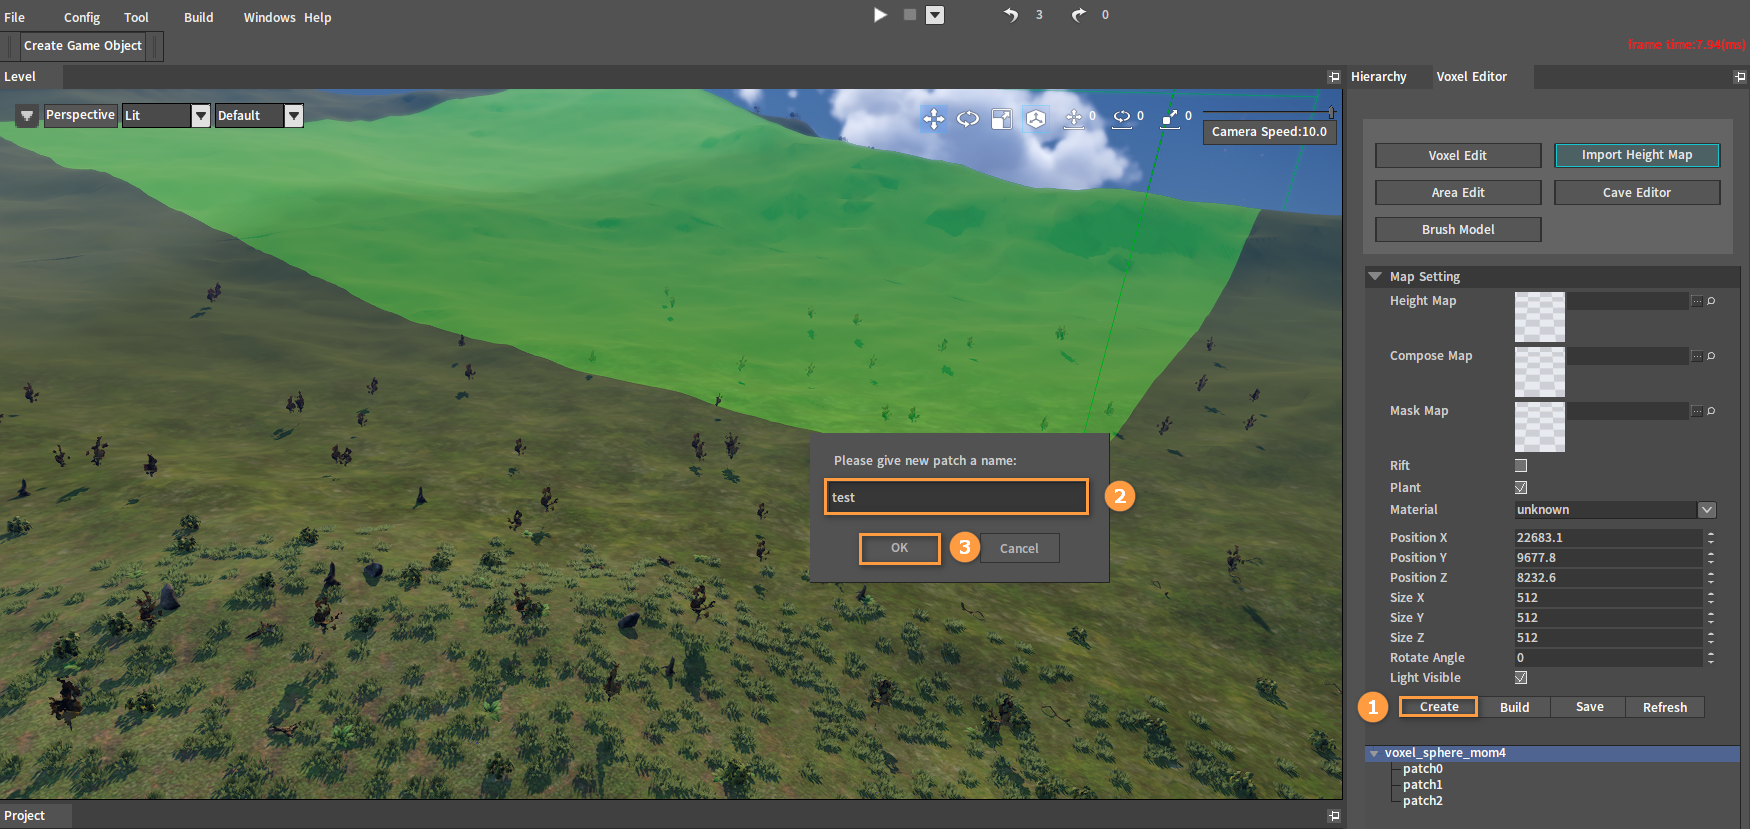
Creating Height Maps
Move the camera to the location where you want to create a height map. Click the Create button in the height map editing interface and enter a name in the pop-up window. Click OK to complete the creation at which the green light represents the location where the height map will be created.
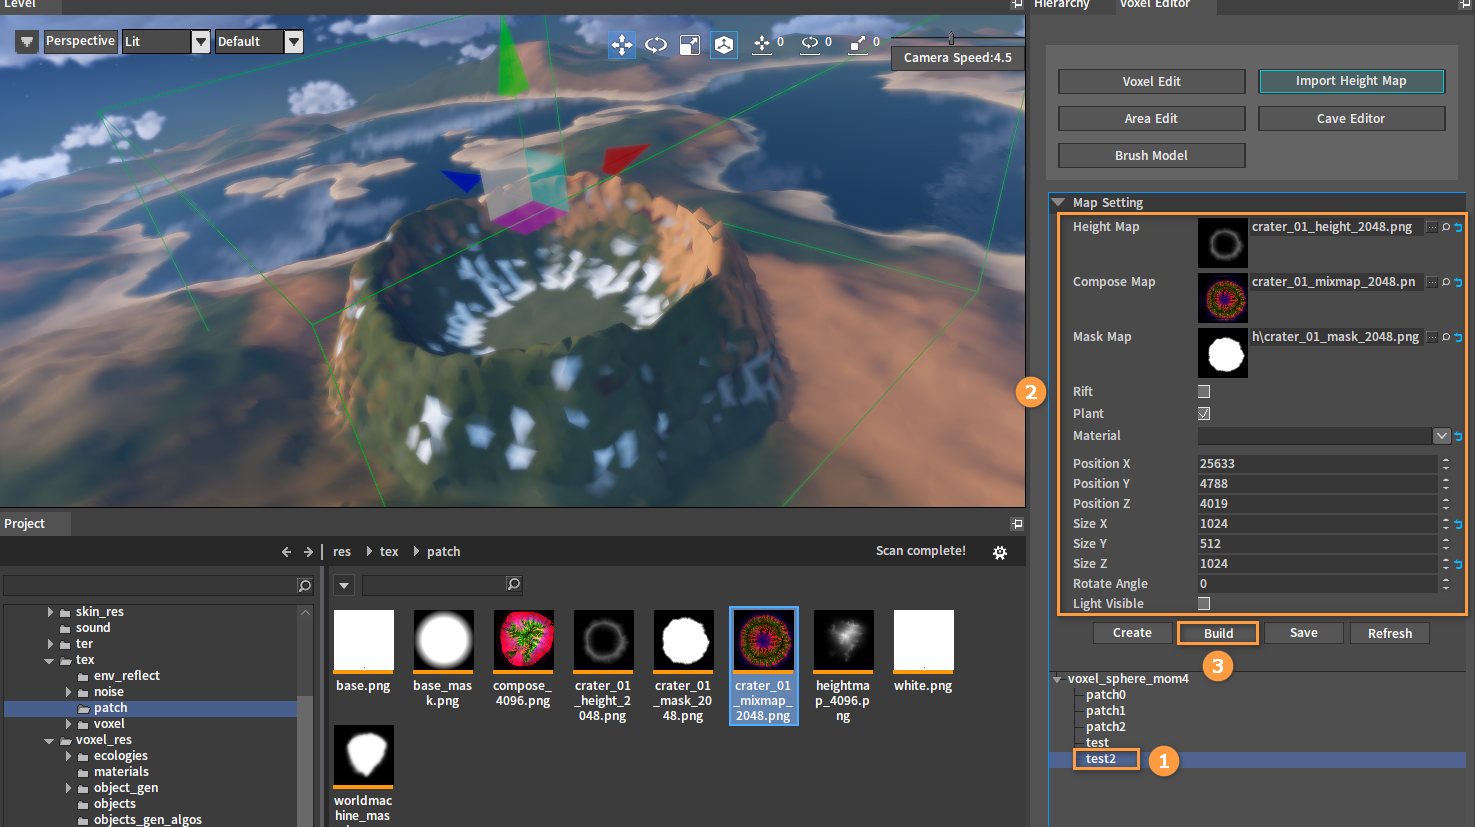
Creating Mountains
Select the corresponding maps in the Project panel, and drag them into the Height Map, Compose Map and Mask Map slots respectively.
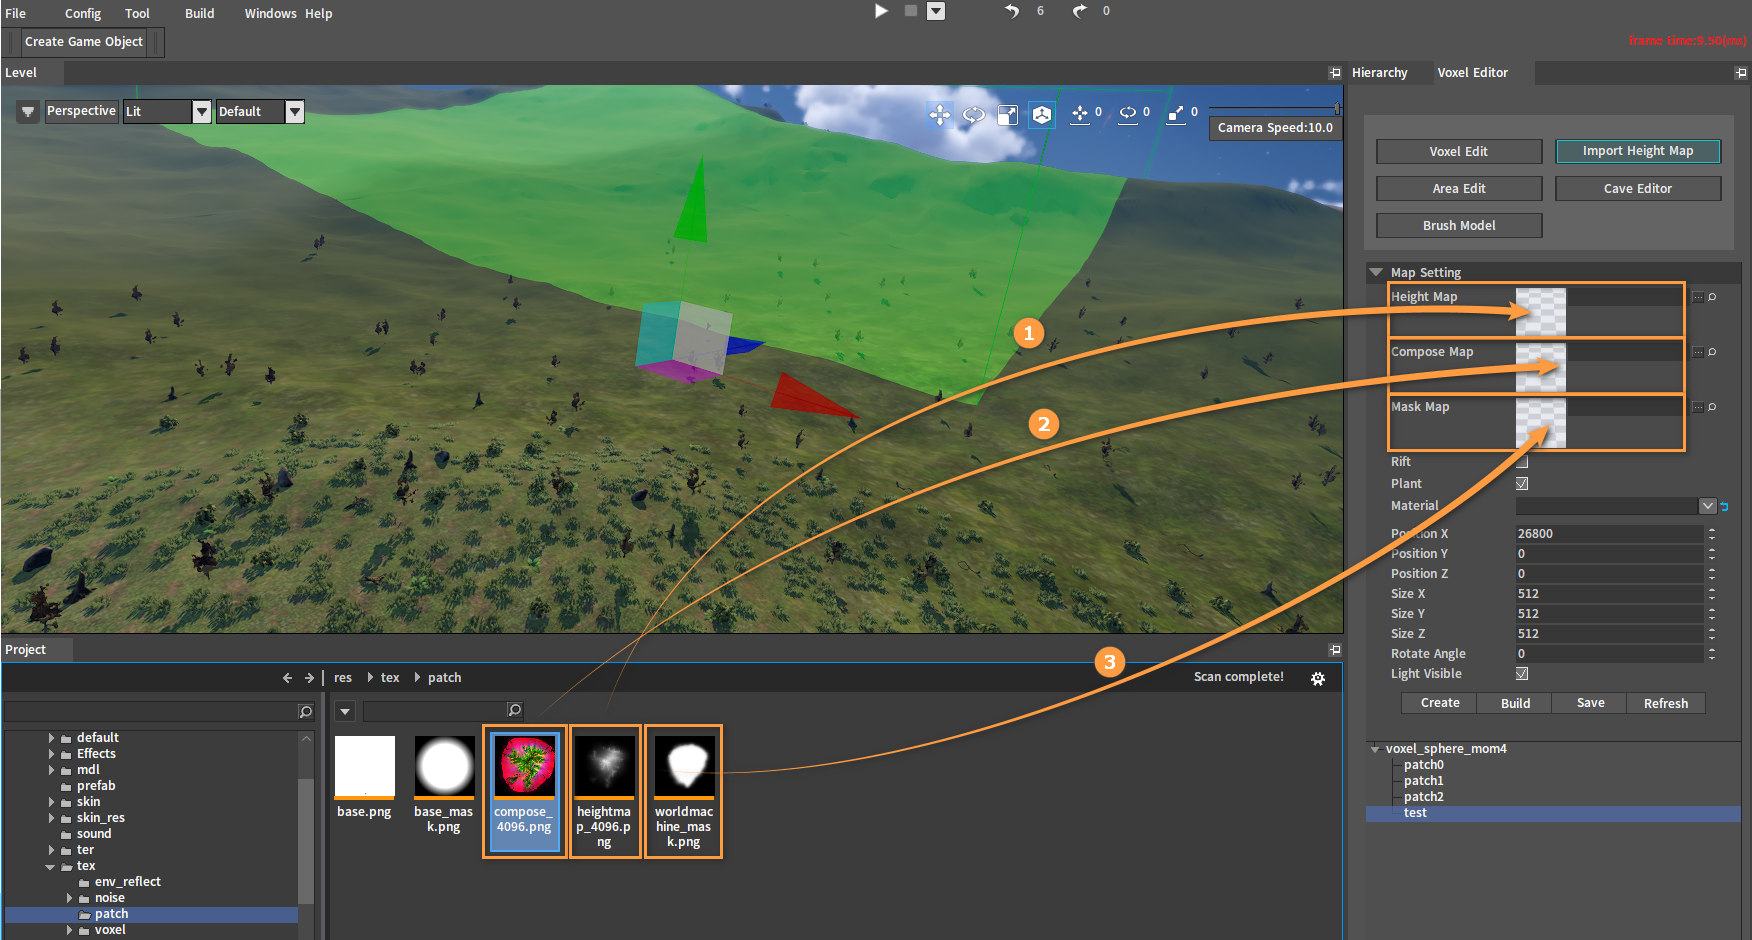
After dragging:
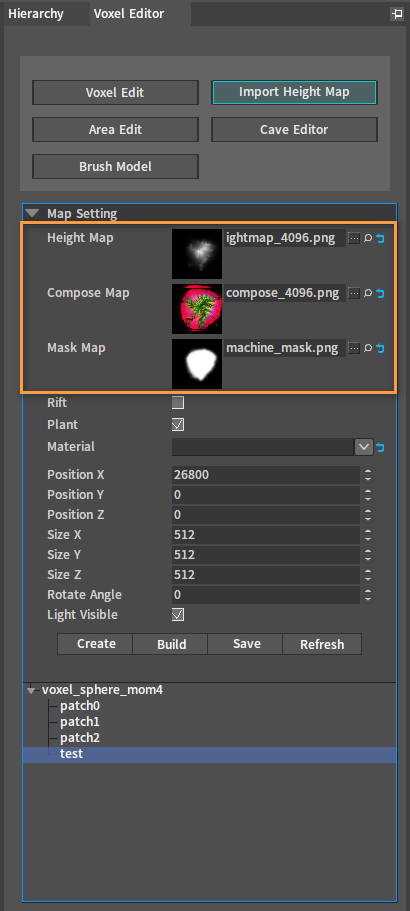
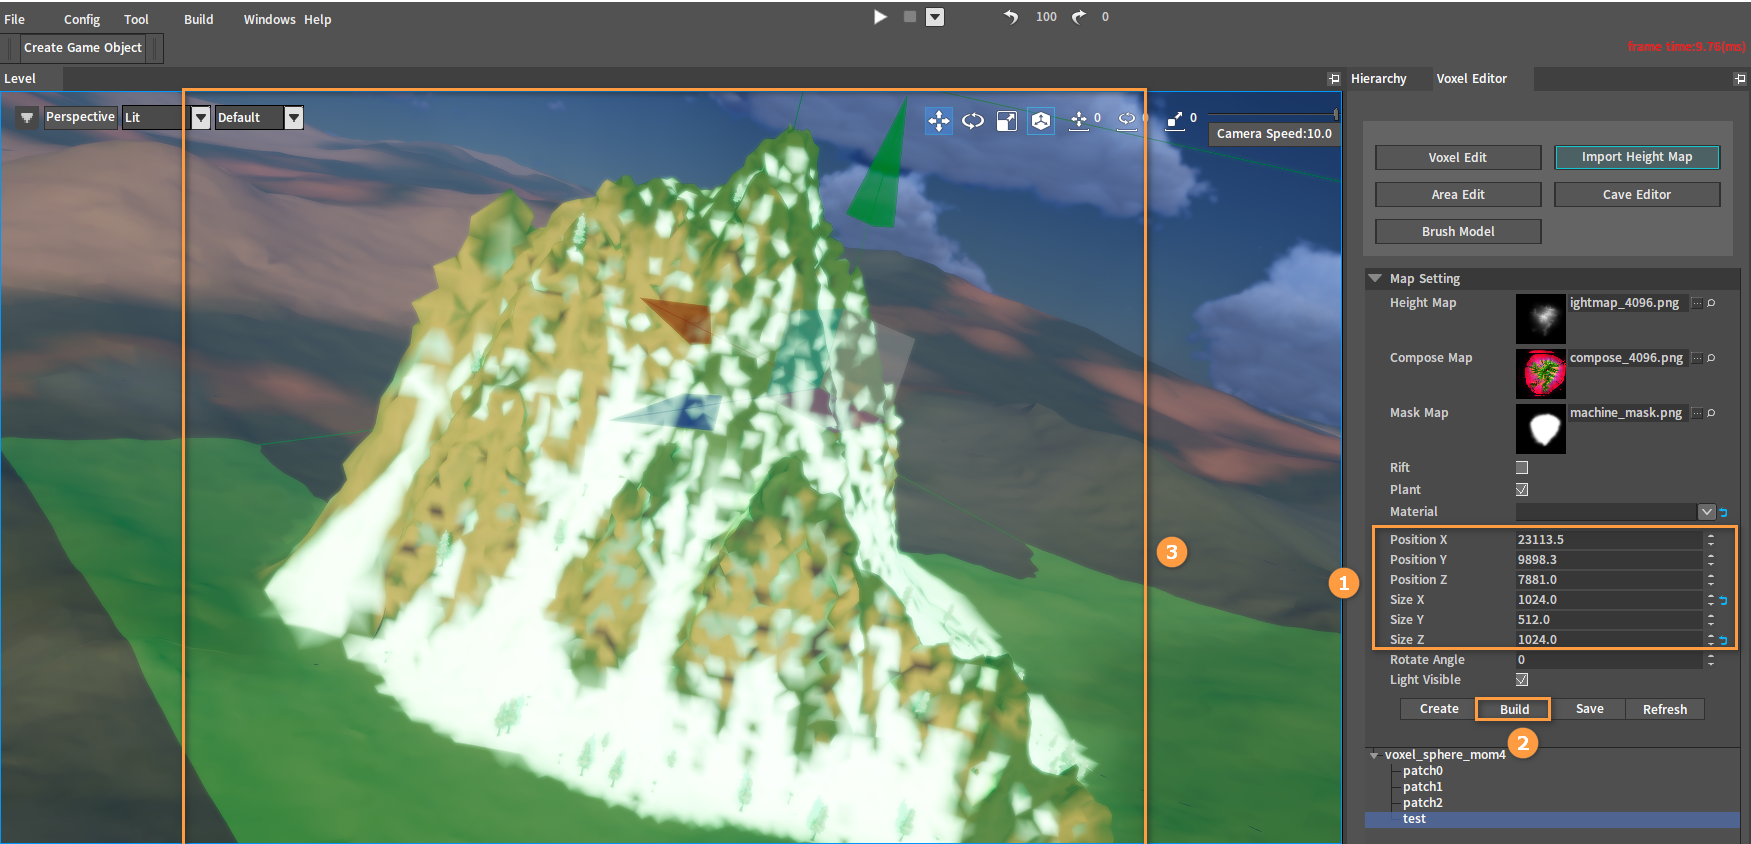
Edit the height map information. Drag the light box in the Level panel to determine the position of the height map. Enter the size of the height map you want to create in the Size (X/Y/Z) of the height map editing interface (dimensions X, Z, Y are the length, width and height of the height map respectively). Then click the Build button to generate the height map.
Note: Take the bottom of the light box as the standard when dragging it to adjust the position, and try to make the bottom flat on the surface.
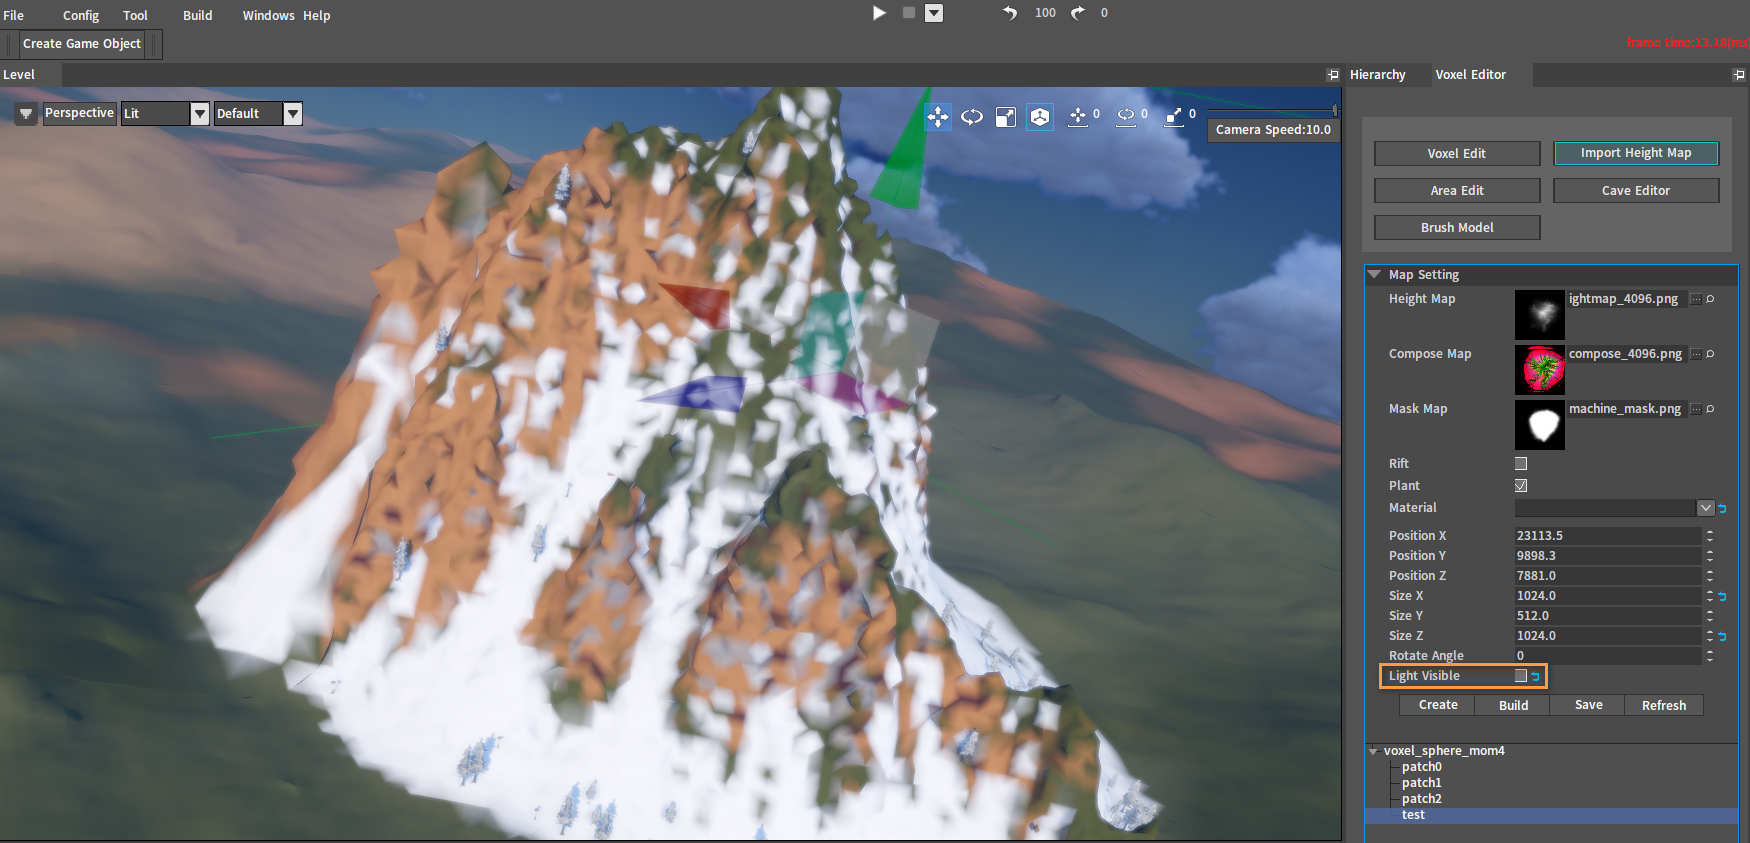
Uncheck Light Visible to turn off the display of the green light, which is convenient for viewing the generated mountain effect.
Creating Rifts
The previous operation is the same as that of creating mountains above (Click the Create button and add maps). Then check Rift in the height map editing interface, and adjust the position of the light box and the size of the height map as needed. Click the Build button to generate a height map which will dig down the surface.
Note: Different from creating mountains, it needs to take the top of the light box as the standard and try to make the top flat on the surface.
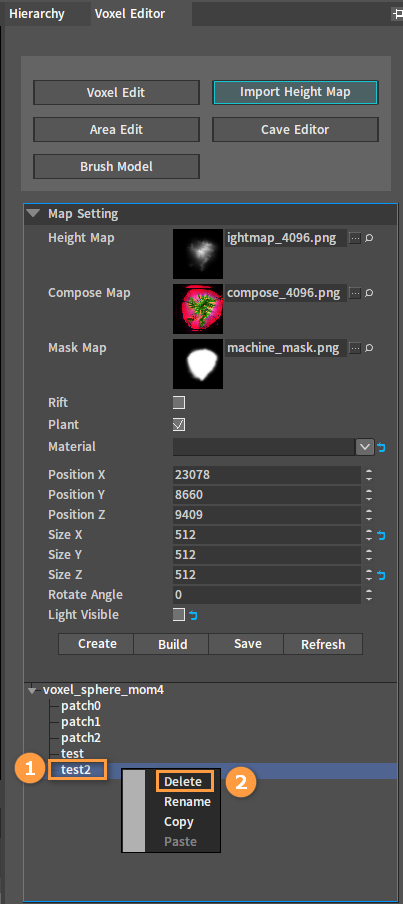
Modifying Height Maps
Select the height map to be deleted in the height map editing interface. Right-click to open the Shortcut Menu, and then click the Delete button to delete it.
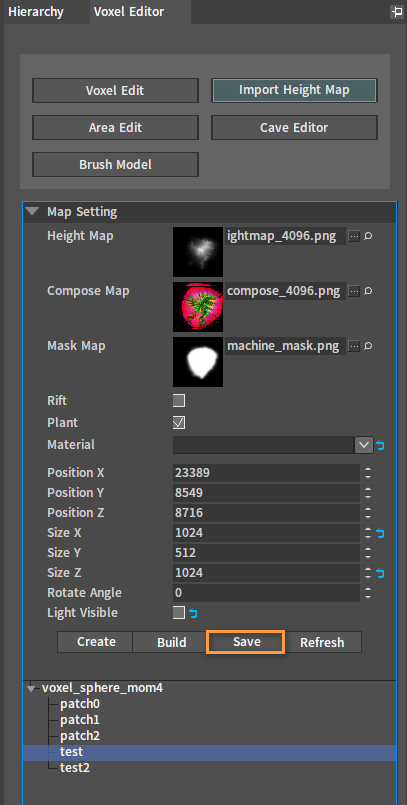
Edit existing height maps. Double-click the height map in the height map editing interface to jump to the corresponding landmass you want to edit. Edit it as needed (such as modifying the map, adjusting the size and position, etc.), and click the Build button to generate the new landmass.
Click the Save button to save all modified height maps.
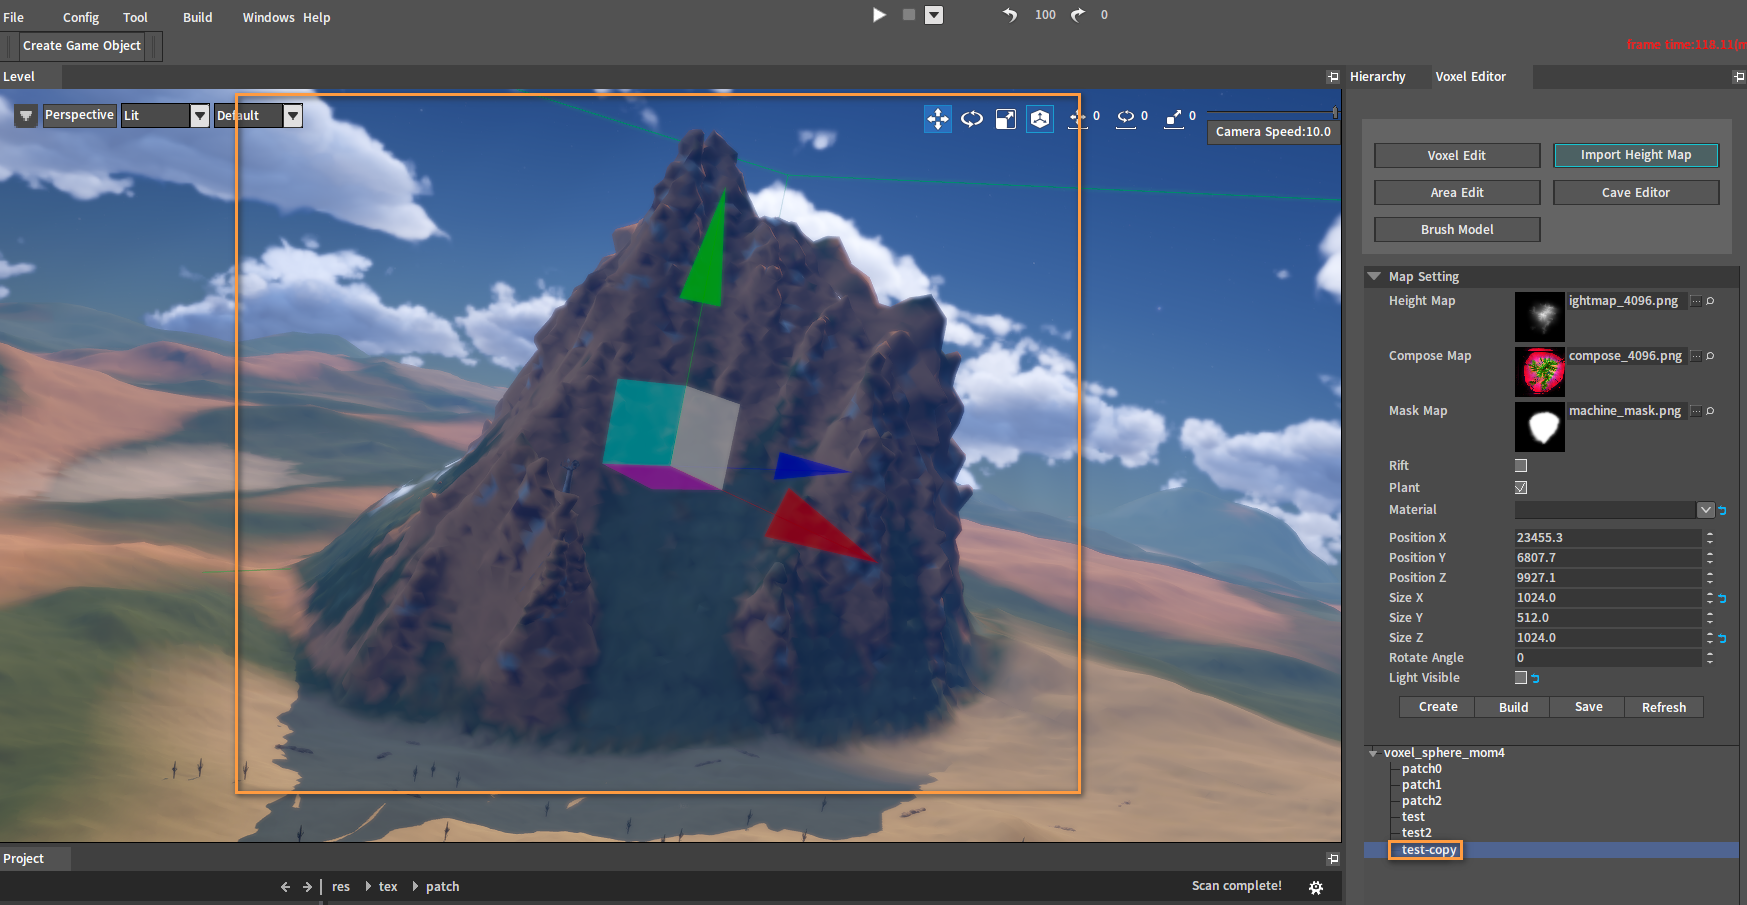
Copying and Pasting Height Maps
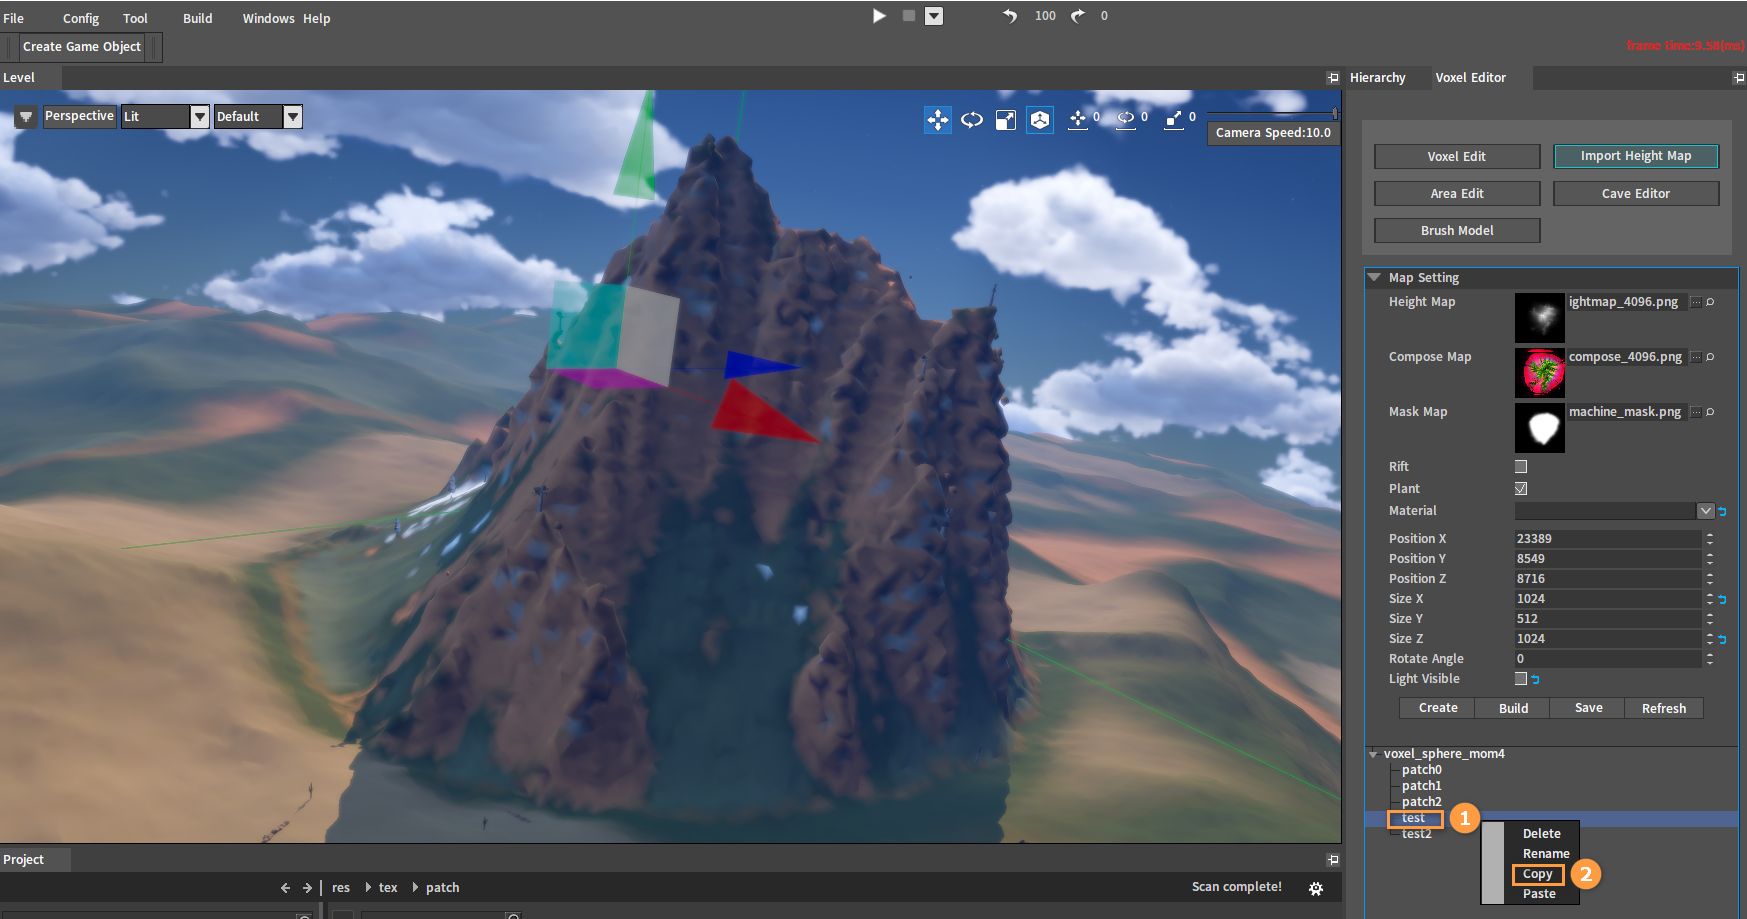
Select the height map you want to copy. Right-click to open the Shortcut Menu, and select Copy.
Move the camera to the location you want to paste (better closer to the surface). Right-click any node in the height map editing interface and select Paste. Enter a name in the pop-up window and click OK. Then the copied height map will be pasted at the current position.
Note: The position created by the paste feature is determined by the current camera position, so generally it is difficult to create a perfect spot for the first time, and the position needs to be adjusted later.
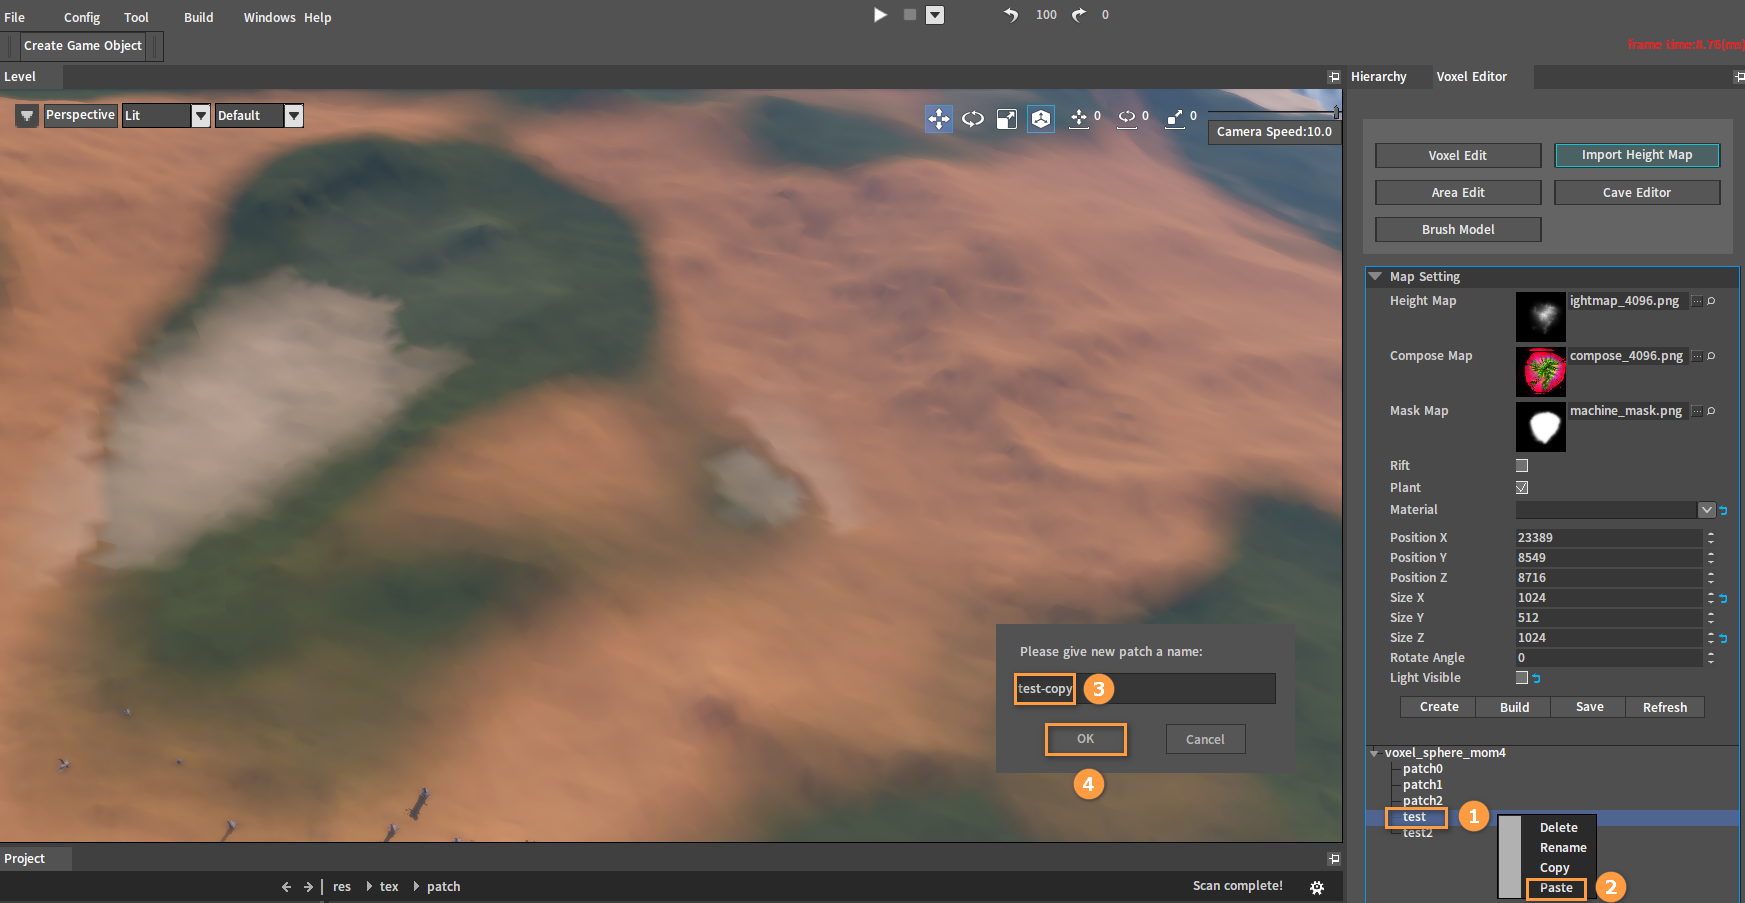
After pasting: