Cave Editor
Overview
Cave Editor is the Flexi Engine's built-in terrain editing tool, which can be used to create caves with their shapes and appearances being modified easily by setting related properties.
Creating Caves
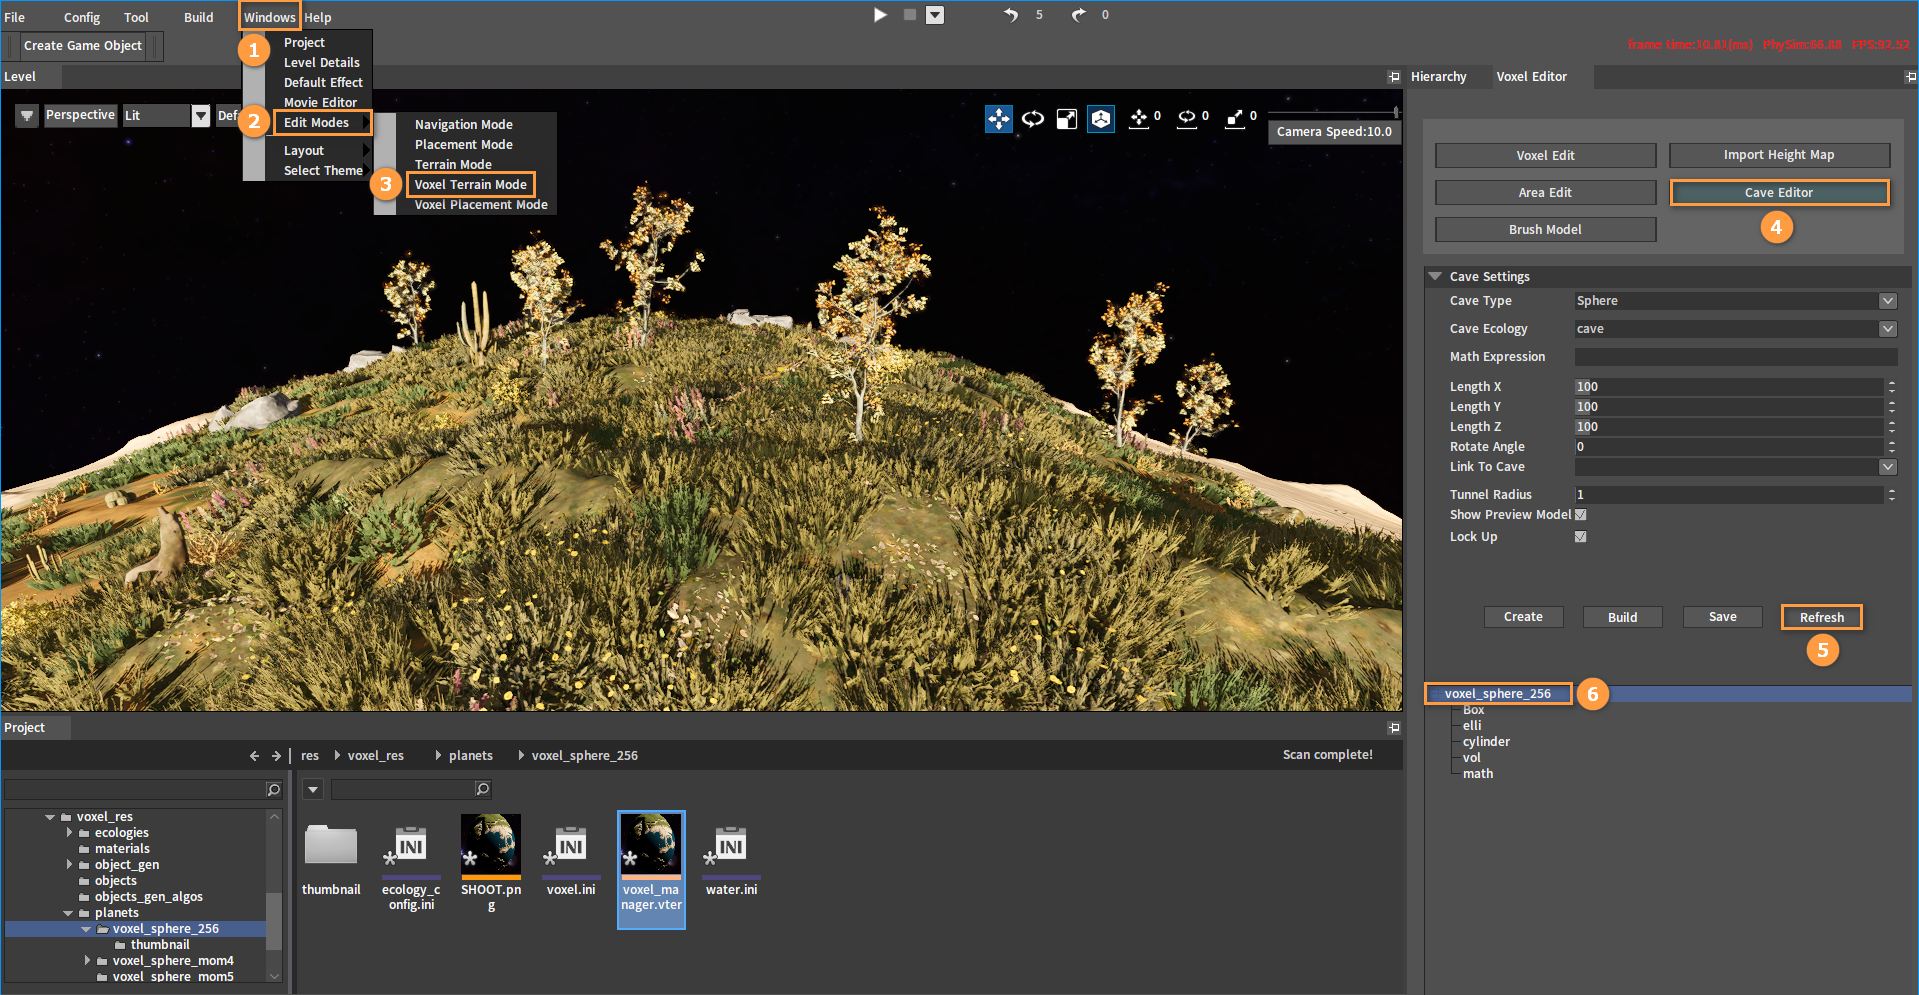
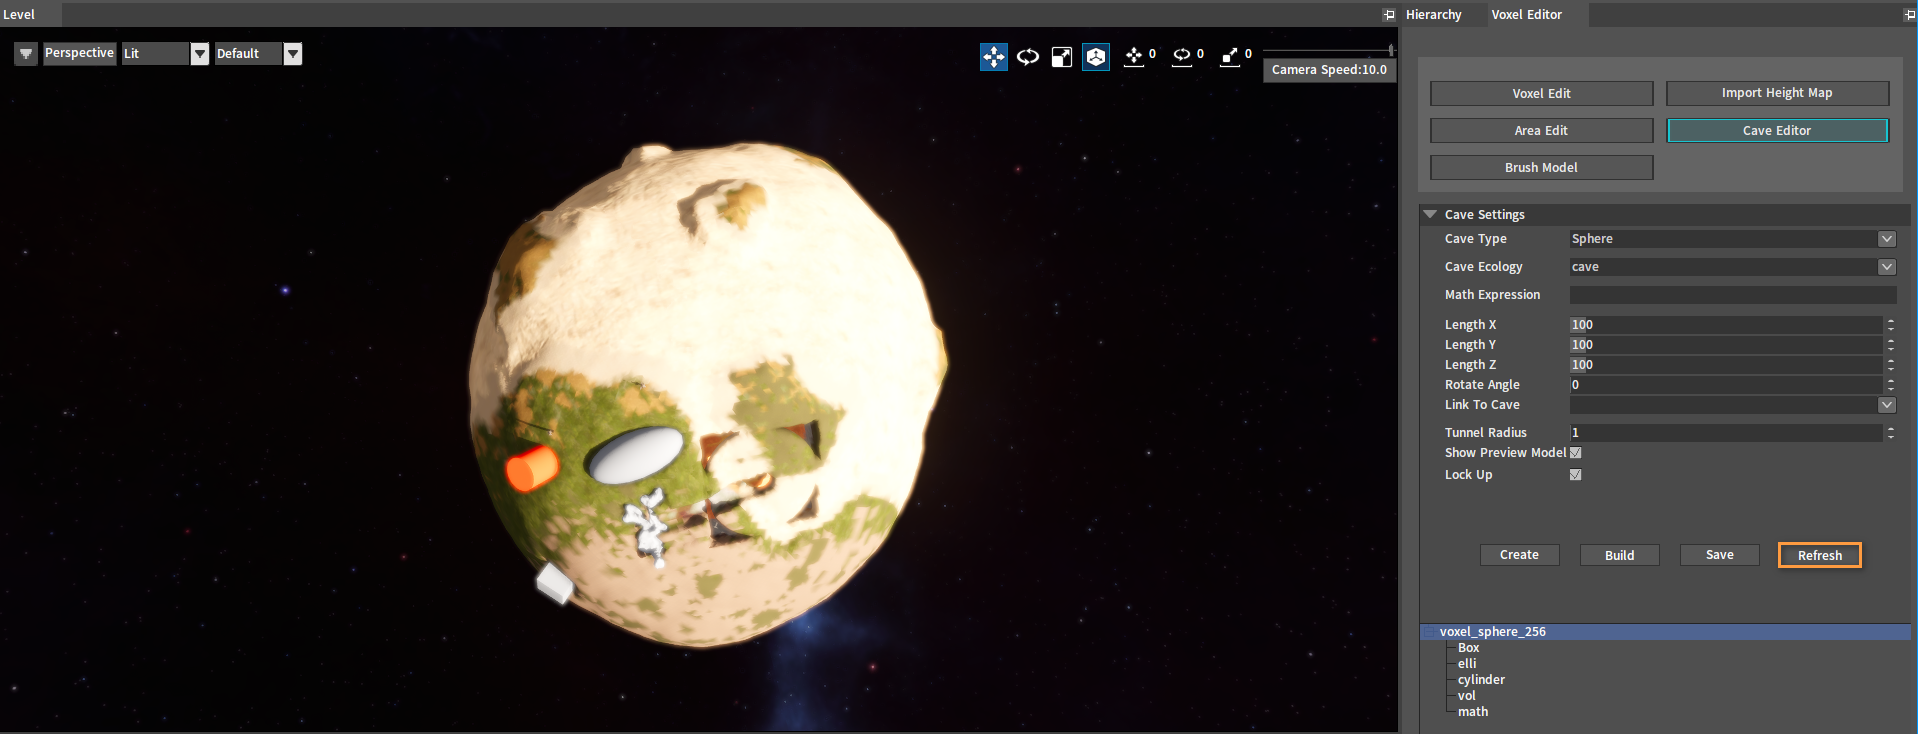
Click Windows -> Edit Modes -> Voxel Terrain Mode to open the Voxel Editor panel and select Cave Editor. Check the planet name in the Cave Editor panel to make sure the current planet is the one being edited. If they don't match, click the Refresh button to refresh the list.
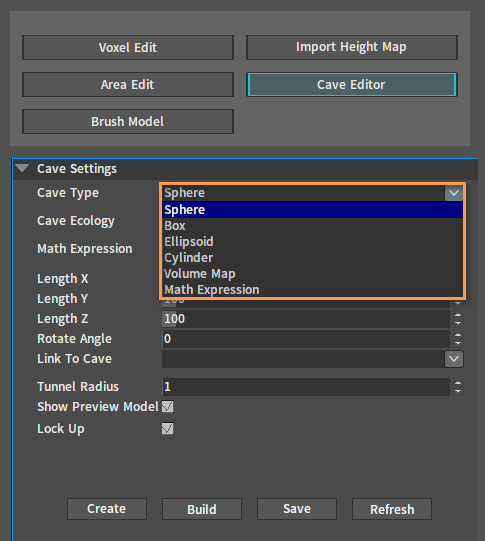
Select the cave type to be created in the Cave Type property under the Cave Settings. Click the ![]() button to bring up the drop-down menu, where Sphere, Box, Ellipsoid and Cylinder are the basic geometric shapes, and the last two are Volume Map and Math Expression.
button to bring up the drop-down menu, where Sphere, Box, Ellipsoid and Cylinder are the basic geometric shapes, and the last two are Volume Map and Math Expression.
Note: If you select the Math Expression type, please make sure to enter the correct expression in the Math Expression property below to create it successfully.
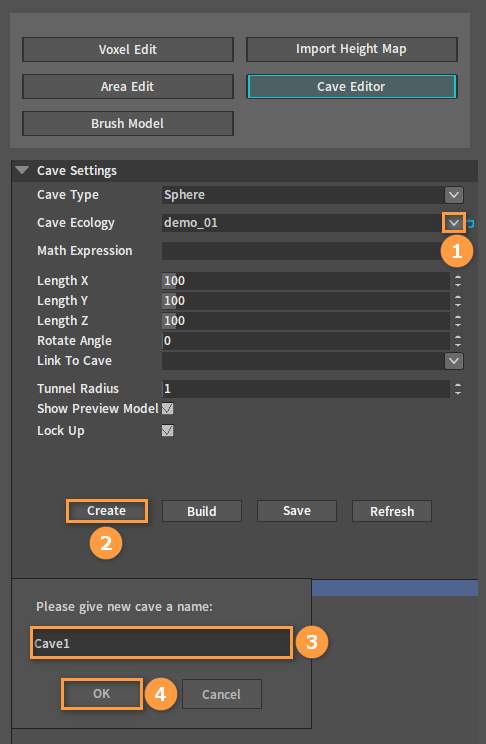
Select the cave ecology to be created in the Cave Ecology property under the Cave Settings. Click the ![]() button to bring up the drop-down menu, and select an ecology as needed. If no selection is made, the default ecology will be applied. Click Create to pop up the cave naming window. The corresponding cave model will be generated in the Level after entering the name.
button to bring up the drop-down menu, and select an ecology as needed. If no selection is made, the default ecology will be applied. Click Create to pop up the cave naming window. The corresponding cave model will be generated in the Level after entering the name.
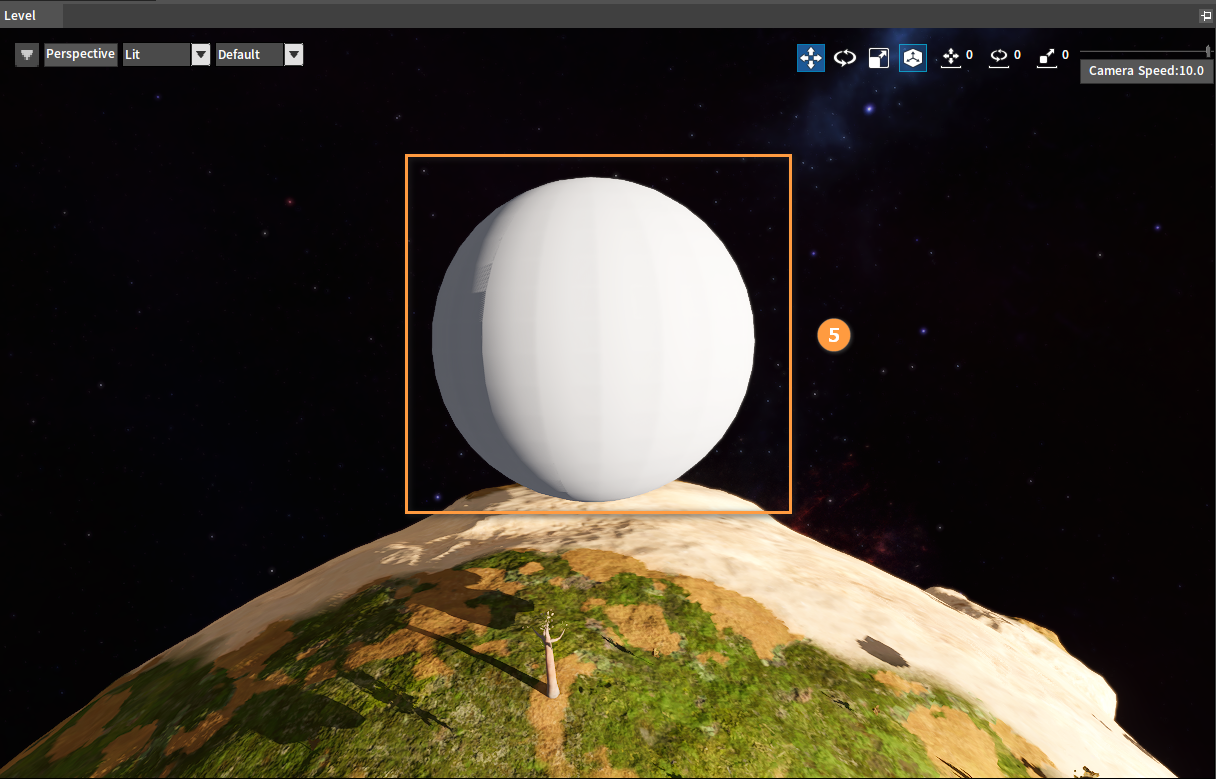
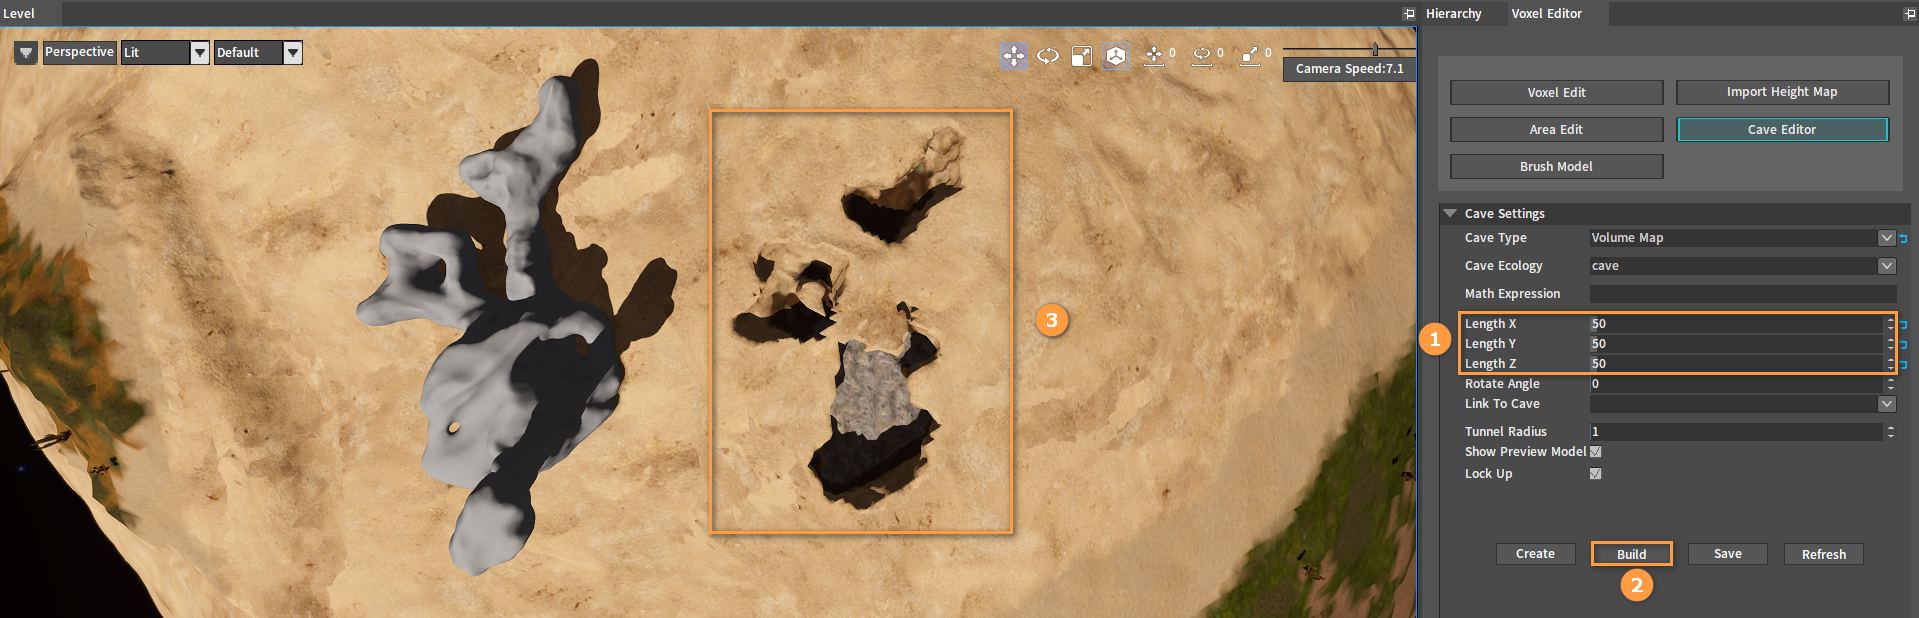
Adjust the cave position by dragging the model (Model must intersect with the ground) , and modify the values in the Length properties to alter the cave size, then click Build. Drag away the cave model or uncheck the Show Preview Model to view the created cave.
Note: When the bounding box is completely inside the planet, the created cave will be invisible on the surface, at which you need to zoom in to the inside of the planet to see it.
Creating Volume Map Caves
Select the Volume Map in the Cave Type property. Click Create to bring up the cave naming window. Enter a name and click OK.

Adjust the cave position by dragging the model (Model must intersect with the ground), and modify the values in the Length properties to alter the cave size, then click Build. Drag away the cave model or uncheck the Show Preview Model to view the created cave.
Creating Math Expression Caves
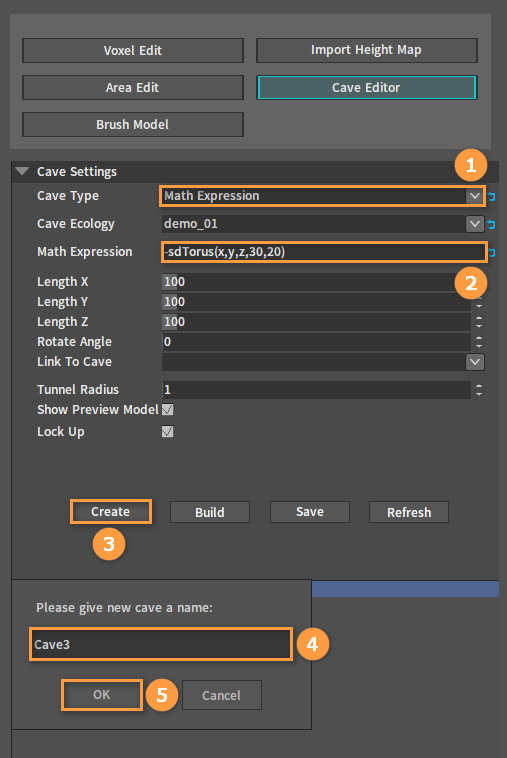
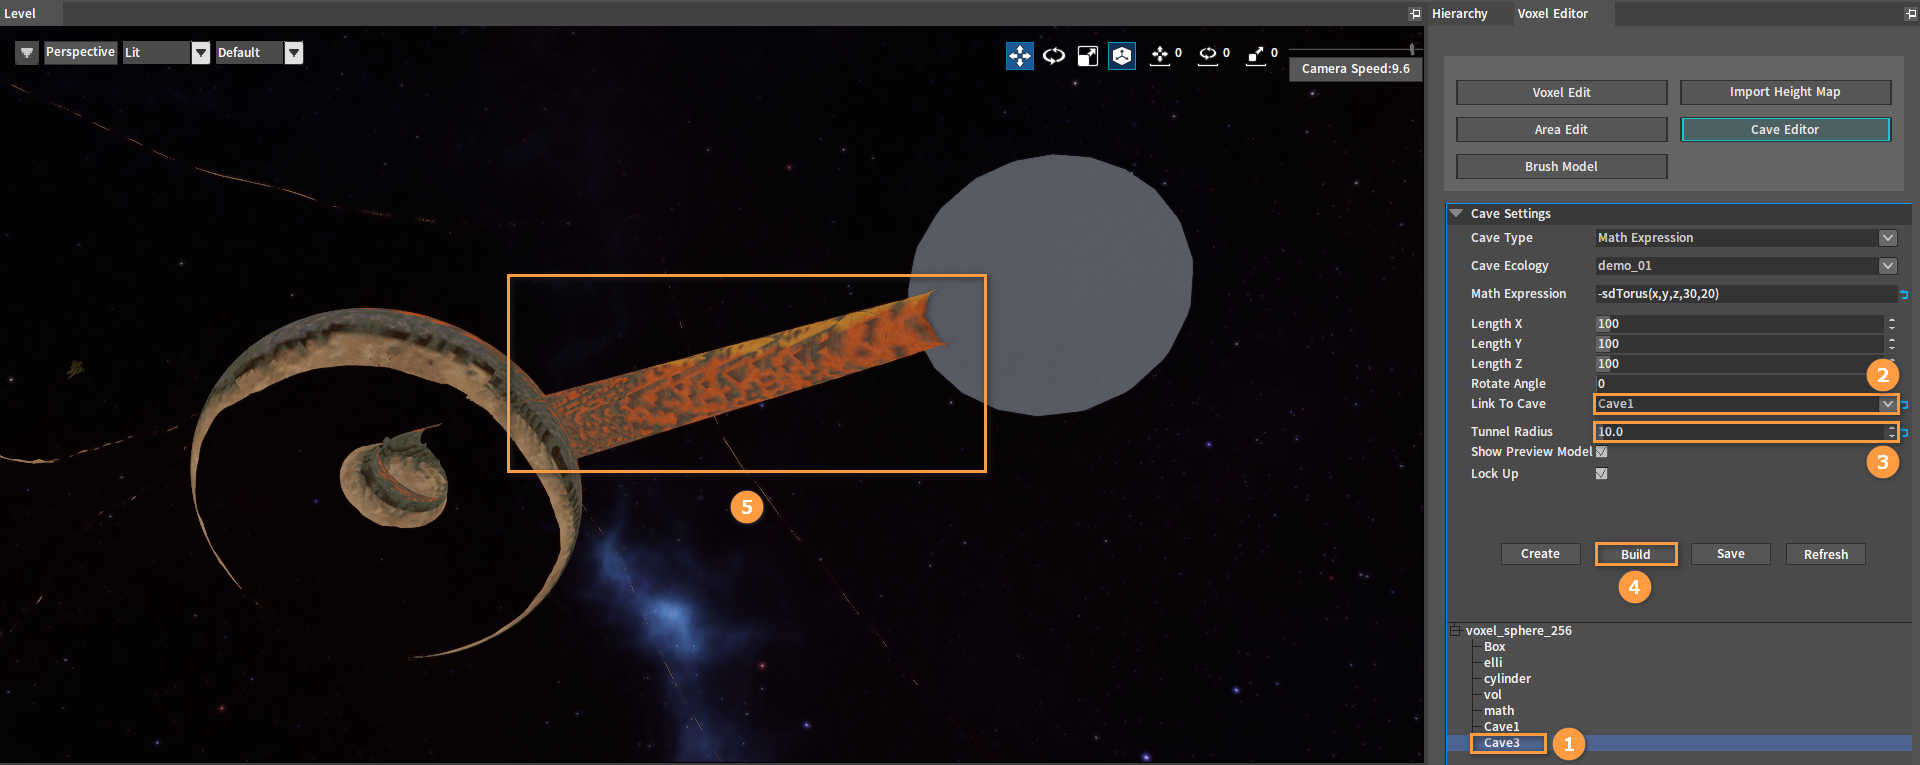
Select the Math Expression in the Cave Type property and then enter the mathematical formula of the desired shape in the Math Expression property. Click Create to bring up the cave naming window, enter a name and click OK.
Note: A minus sign needs to be added in front of the mathematical formula. Math Expression cave will not generate an actual cave model but only a bounding box.
Adjust the cave position of the cave by dragging the bounding box (Bounding box must intersect with the ground), and modify the values in the Length properties to alter the cave size, then click Build to view the cave.
Note: If you want to apply the settings of a created cave in the Cave List to create a new one directly, you need to reset the Cave Type property and then click Create.
- Common Math Expressions
- Torus: -sdTorus(x,y,z,30,20), the last two values are the radius of the outer circle and that of the inner circle respectively.
- Sphere: -sdSphere(x,y,z,50), the last value is the radius of the sphere.
- Capped Cone: -sdCappedCone(x,y,z,50,40,1), the last three values are the height of the cone, the radius of the larger side and that of the smaller side.
Creating Tunnels
Tunnels are used to link multiple caves, so the prerequisite for creating a tunnel is at least two caves. First, click the cave to be edited (the start point of the tunnel) in the Cave List and select the cave to be linked (the end point of the tunnel) in the drop-down menu of Link To Cave. Then set the radius of the tunnel in the Tunnel Radius property. Click Build to generate the tunnel with its link can be seen underground. Selecting Unlink in the Link To Cave drop-down menu and then clicking Build can cancel the link.
Editing Caves
Double-click the cave name to jump to the location of the cave whose type, size, link cave and other related properties can be reset in the Cave Settings panel. Then click Build to view the modified one.
Refreshing the Cave List
When opening the Cave Editor with the camera too far from the planet, a prompt box will pop up indicating that the current distance is too far, and the Cave Settings panel and Cave List will not be displayed in the Cave Editor.
Note: The Cave Settings panel will be displayed after clicking the OK button in the prompt box.
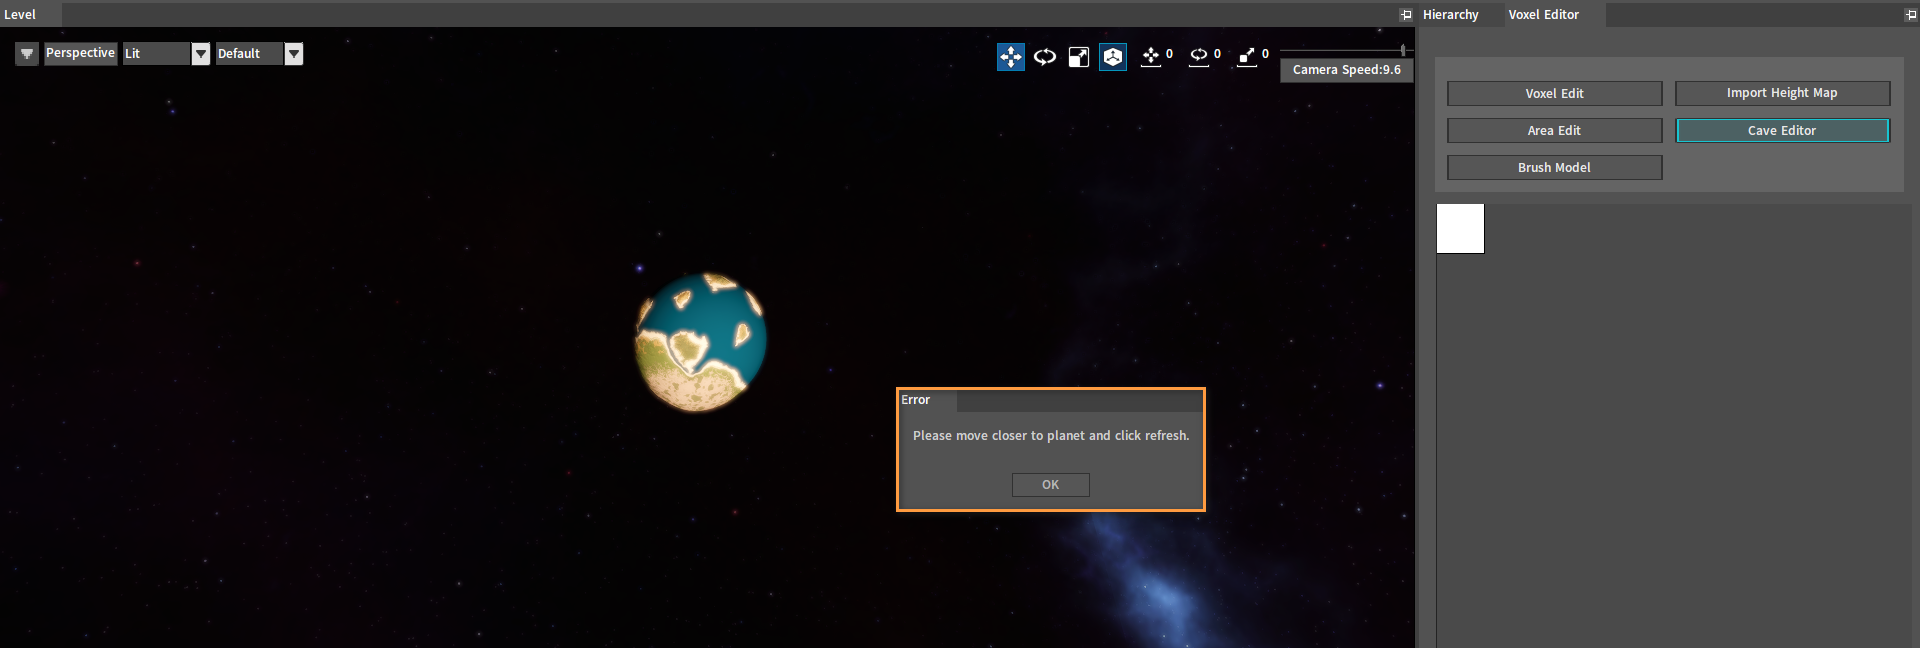
In this case, you need to zoom in to shorten the distance and click the Refresh button in the Cave Settings panel to display it normally.
Properties
The related properties of the created cave can be set under the Cave Settings.
| Property | Description |
|---|---|
| Cave Type | Set the type of the cave to be created. |
| Cave Ecology | Set the ecology of the cave to be created. |
| Math Expression | Enter the corresponding math expression here to create a Math Expression cave. |
| Length X | The size of the cave in the X-axis direction. |
| Length Y | The size of the cave in the Y-axis direction. |
| Length Z | The size of the cave in the Z-axis direction. |
| Rotate Angle | Set the rotation angle of the cave. |
| Link to Cave | Select the cave to be linked, which can be canceled by selecting Unlink. |
| Tunnel Radius | Radius of the tunnel used to link multiple caves together. |
| Show Preview Model | Preview model of the cave, making it easier to view the form, location, etc. of the cave when creating it. |
| Lock Up | When enabled, the model will always rotate around the planet when dragged, which means the center of the model always points to that of the planet. When not enabled, the model can move just like other normal objects. |