Balloon Components
Overview
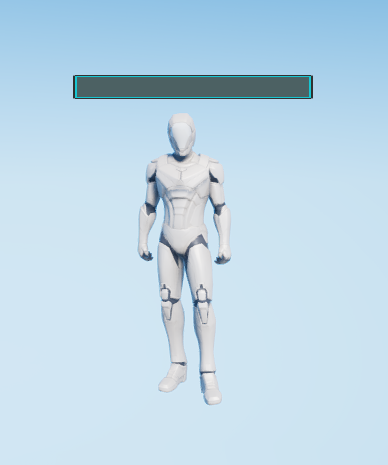
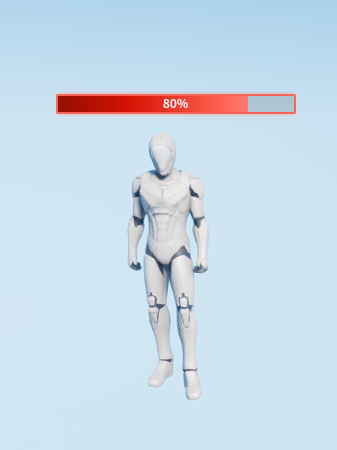
The Balloon Component can display the required content, for example, the character's Health Point or Name, at any position of the character or object, as shown in the picture below:
Creating Balloon Components
Creating Characters
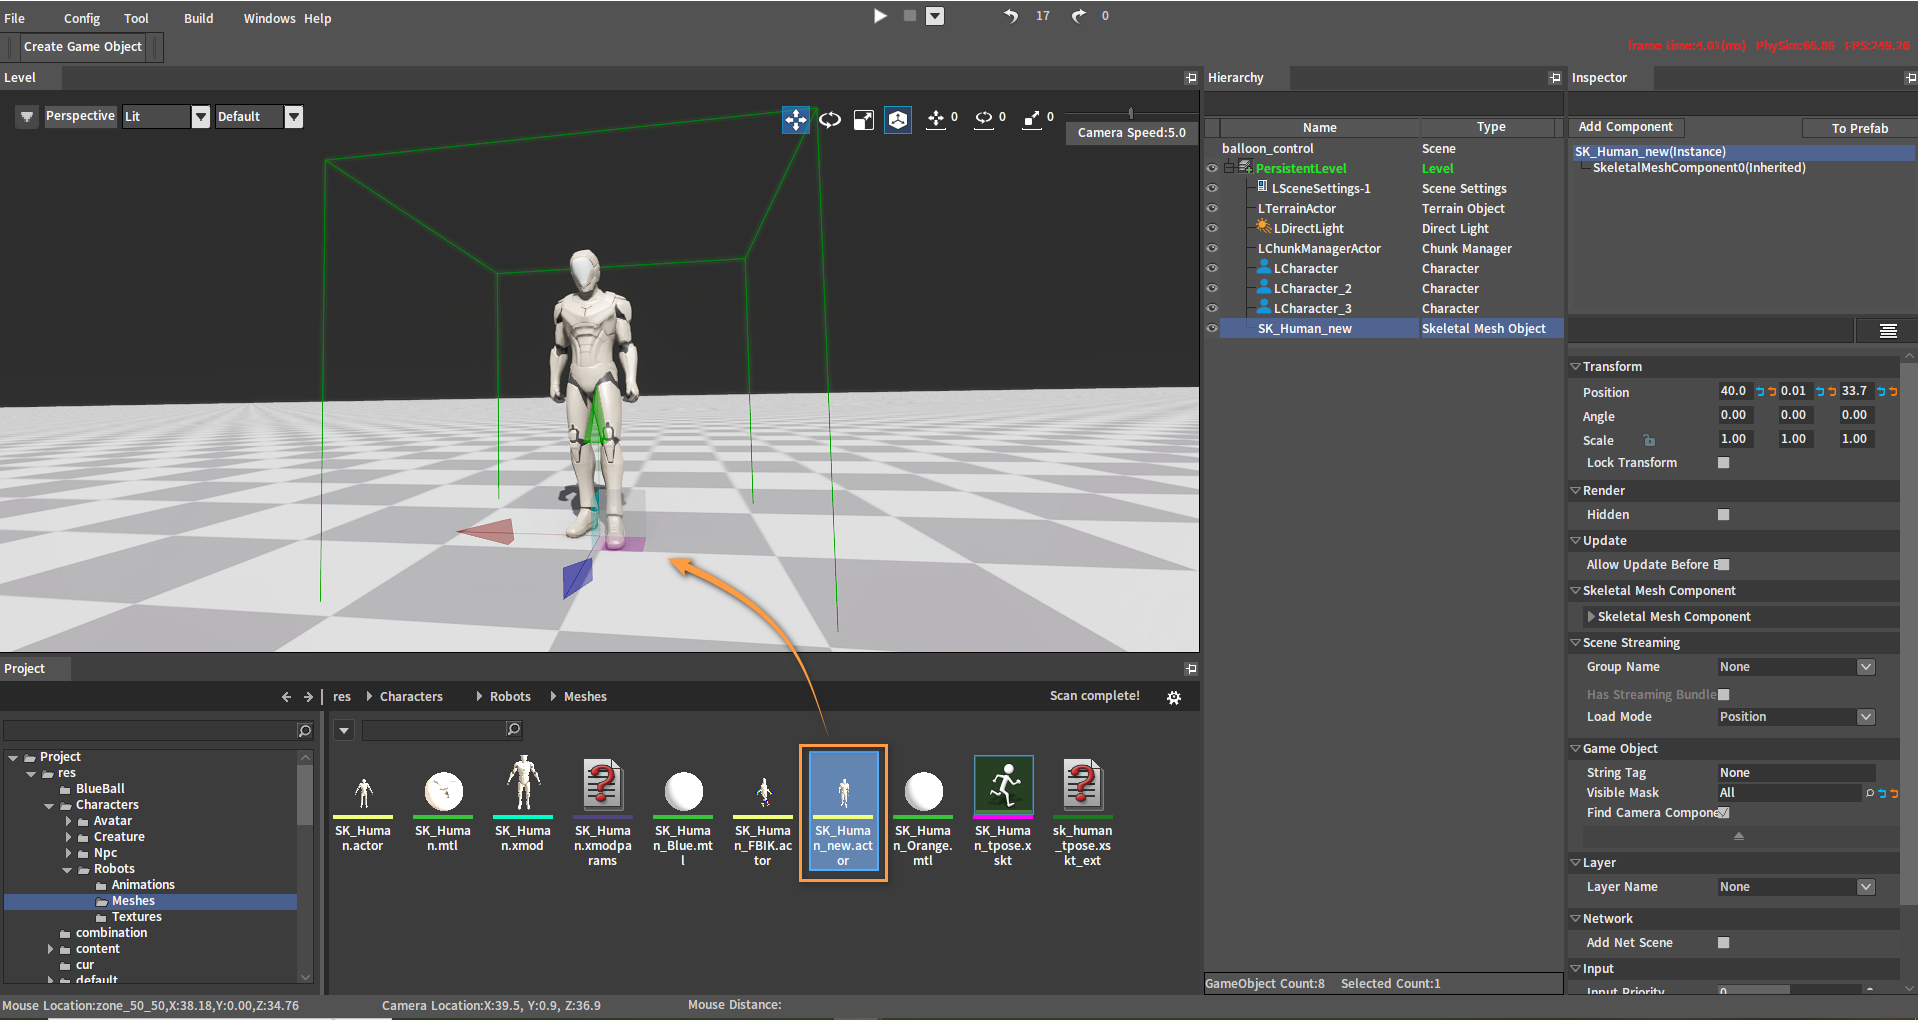
To create a Balloon Component, a character is needed first. Drag a character (SK_Human_new.actor) from the Resource Preview window into the scene.
Adding Balloon Components
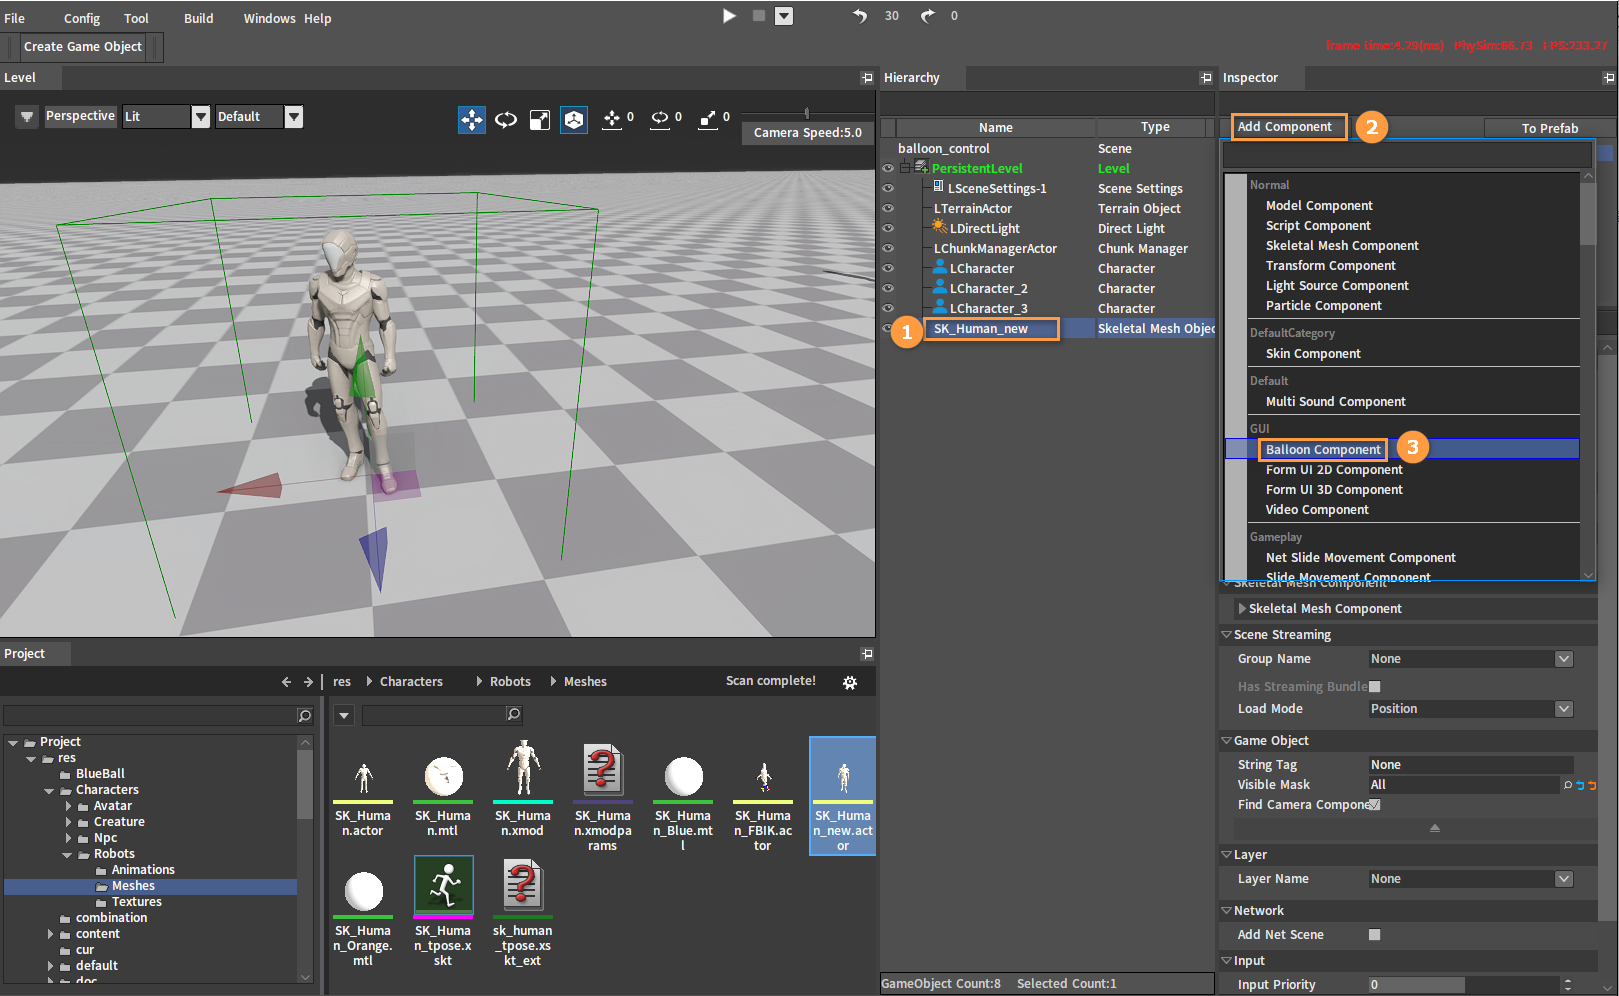
Select the character you just created (SK_Human_new.actor) in the Hierarchy panel, then click Add Component -> Balloon Component in the Inspector panel to add a Balloon Component.
Editing Balloon Components
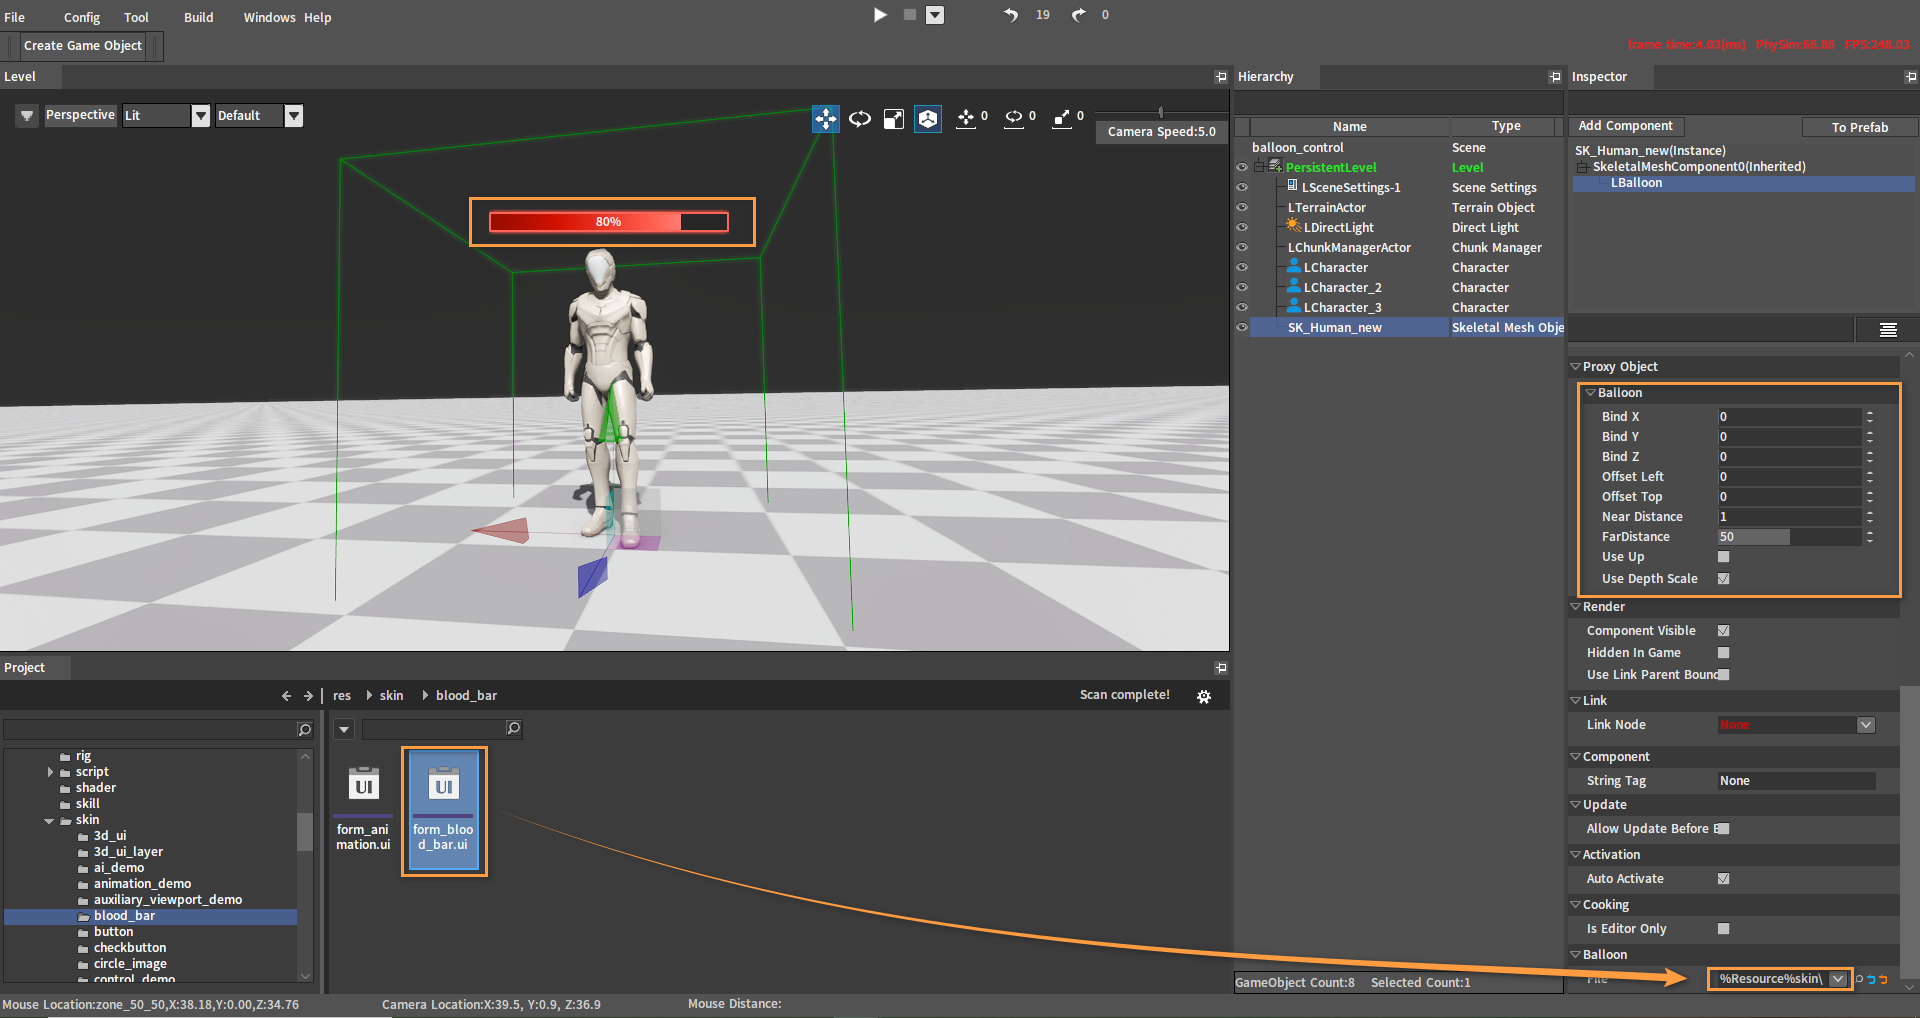
Select the Balloon Component you just added (LBalloon), then select any UI file in the Project panel (here we select the health point UI file form_blood-bar.ui) and drag it into the drop-down box of File under the Balloon category. Then the health point UI will be displayed over the character's head (by default). The properties of the balloon component can be modified in Balloon under Proxy Object.
Properties and Methods of Balloon Components
Properties
| Property | Description |
|---|---|
| Bind X | The offset (position) of the bound X-axis in 3D space |
| Bind Y | The offset (height) of the bound Y-axis in 3D space |
| Bind Z | The offset (distance) of the bound Z-axis in 3D space |
| Offset Left | Distance offset from left to right starting with Bind X |
| Offset Top | Distance offset from left to right starting with Bind Y |
| Near Distance | The nearest display distance from the current camera to the component. |
| Far Distance | The farthest display distance from the current camera to the component. |
| Use Up | Orientation mode If checked: Orientation offset away from the world center If unchecked: Orthogonal relative position (over the character's head by default, e.g. the health point) |
| Use Depth Scale | The GUI control scales synchronously with the bound object |
Methods
| Method | Description |
|---|---|
| LoadForm | This method needs to be passed in a UI file |
| AddControl | This method needs to add a custom control, no need to pass in the UI file |
Note: LoadForm passes in the UI file while AddControl passes in the custom control. Only one of the UI file and the custom control will take effect. You can choose to call LoadForm method or AddControl method as needed.
LoadForm
-- DECLARE_METHOD_1:LoadForm
-- Load the UI file, which is added over the character's head by default
LBalloonComponent* m_pBalloonComponent = NewObject<LBalloonComponent>(this, FXTEXT("BalloonComponent"));
m_pBalloonComponent->LoadForm("skin\\blood_bar\\form_blood_bar.ui")
AddControl
-- DECLARE_METHOD_1:AddControl
-- Add the custom GUI control,which is added over the character's head by default
IEntity* pGui = (IEntity*)CHelper::GetGlobalEntity("gui");
PERSISTID button = pGui->Create("Button")
IEntity* pButton = g_pCore->GetEntity(button);
CHelper::SetPropertyInt(pButton, "Width", 240);
CHelper::SetPropertyString(pButton, "DrawMode", "FitWindow");
CHelper::SetPropertyString(pButton, "BackImage", "skin_res\\button\\btn_push.png");
LBalloonComponent* m_pBalloonComponent = NewObject<LBalloonComponent>(this, FXTEXT("BalloonComponent"));
m_pBalloonComponent->AddControl(button)