Twist Modifier
Last Updated Time: 01/08/2024
Overview
Twist Modifier can rotate the specified bone chain around the specified axis.
Using Nodes
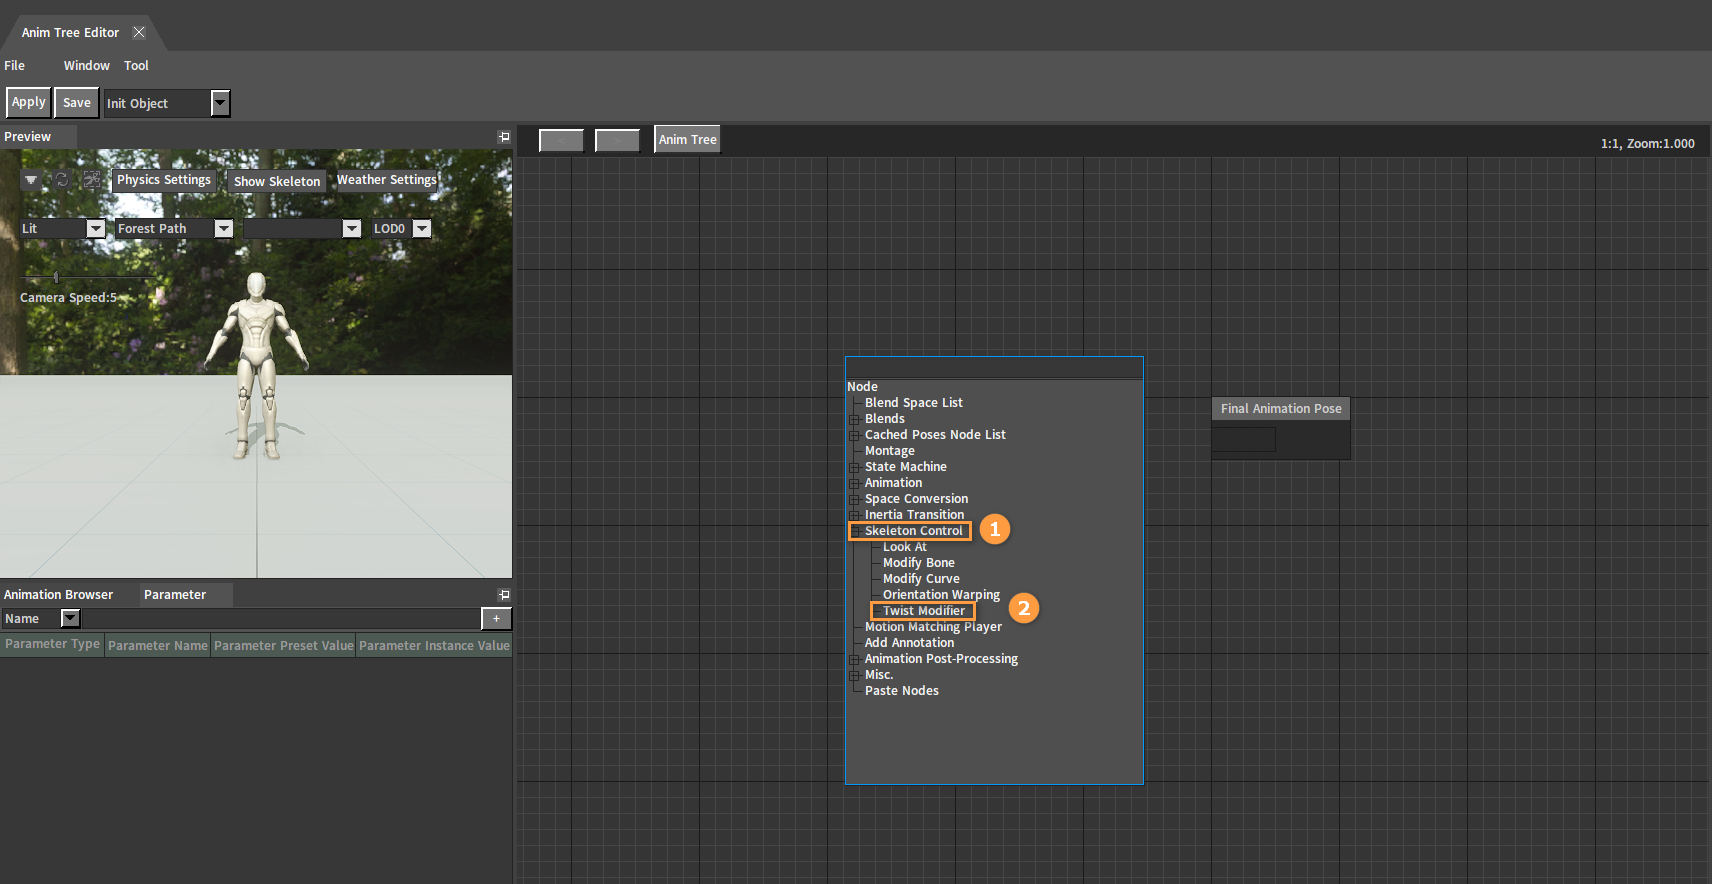
In Anim Tree Editor, right-click in the blank area of the editing area to open the Node Selection panel, expand Skeleton Control category, and select Twist Modifier to create a Twist Modifier node.
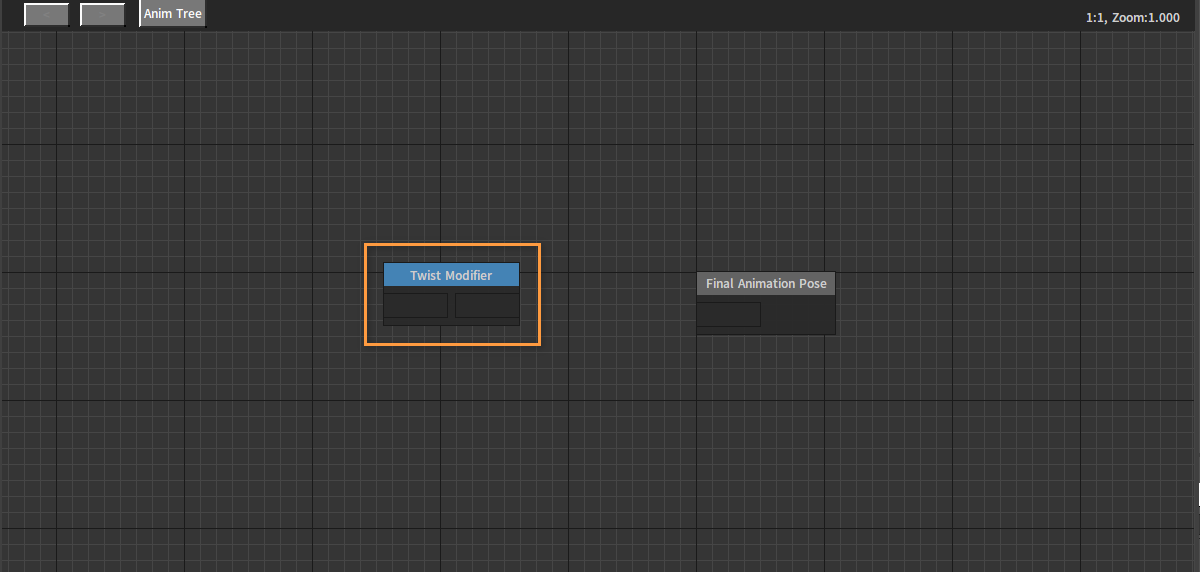
After creation:
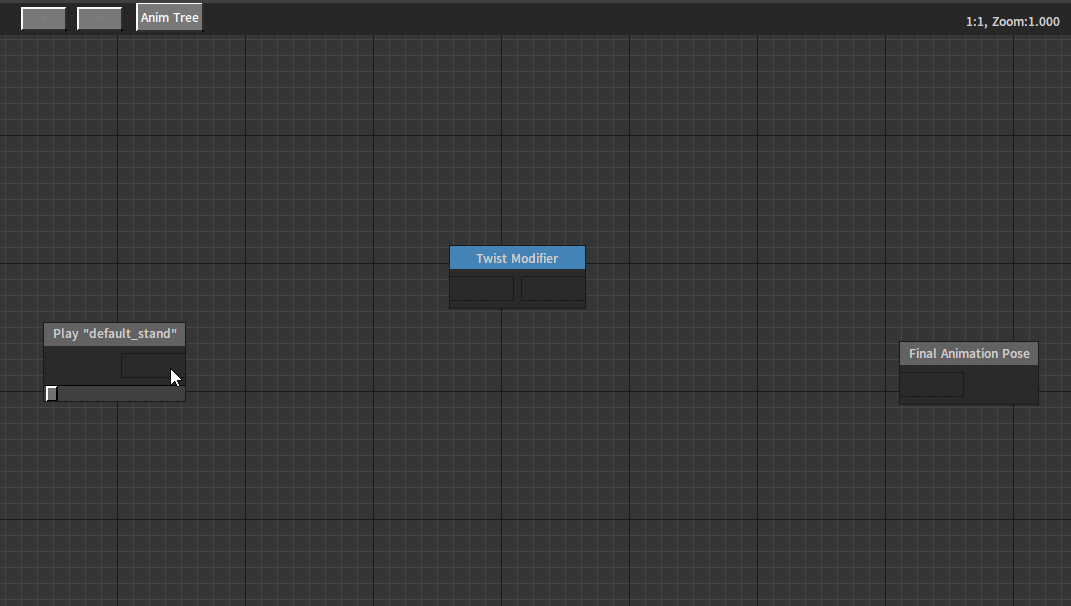
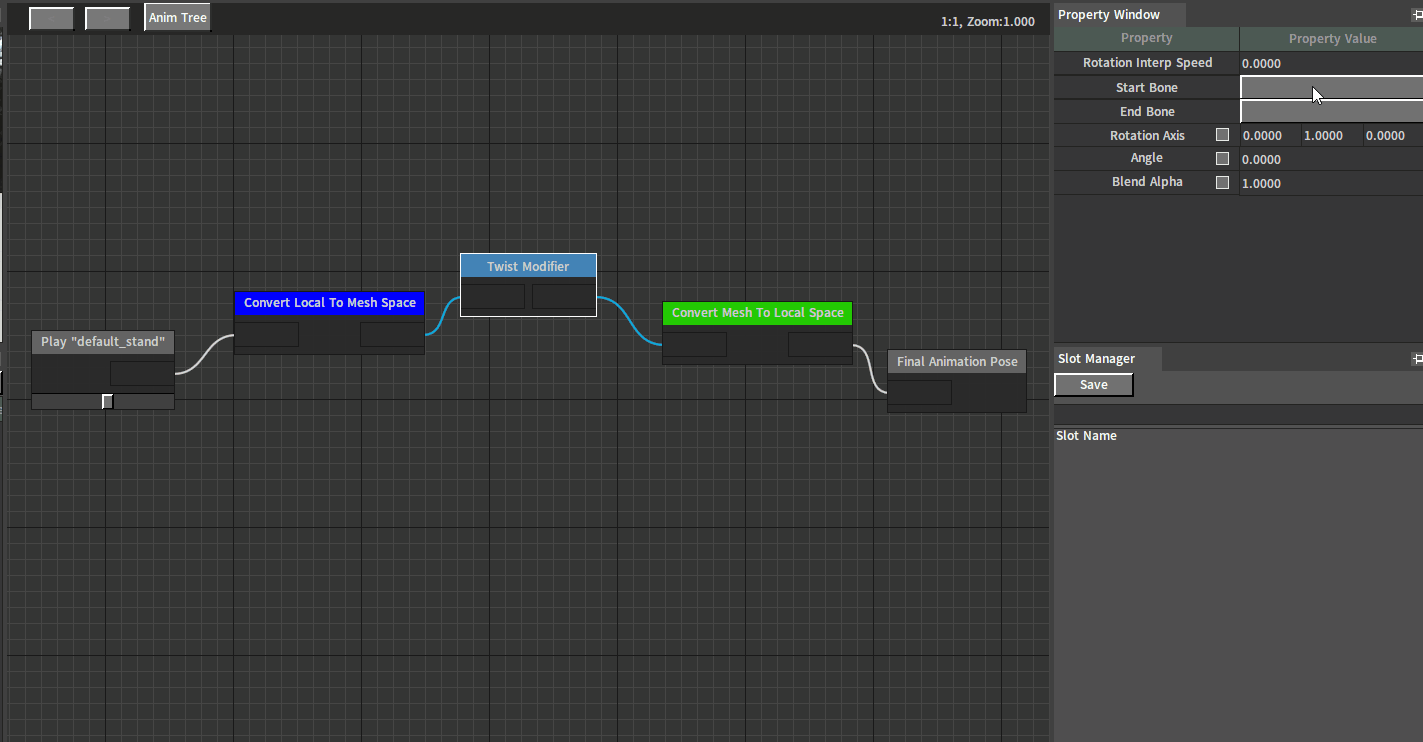
Configure the appropriate input/output for the Twist Modifier node.
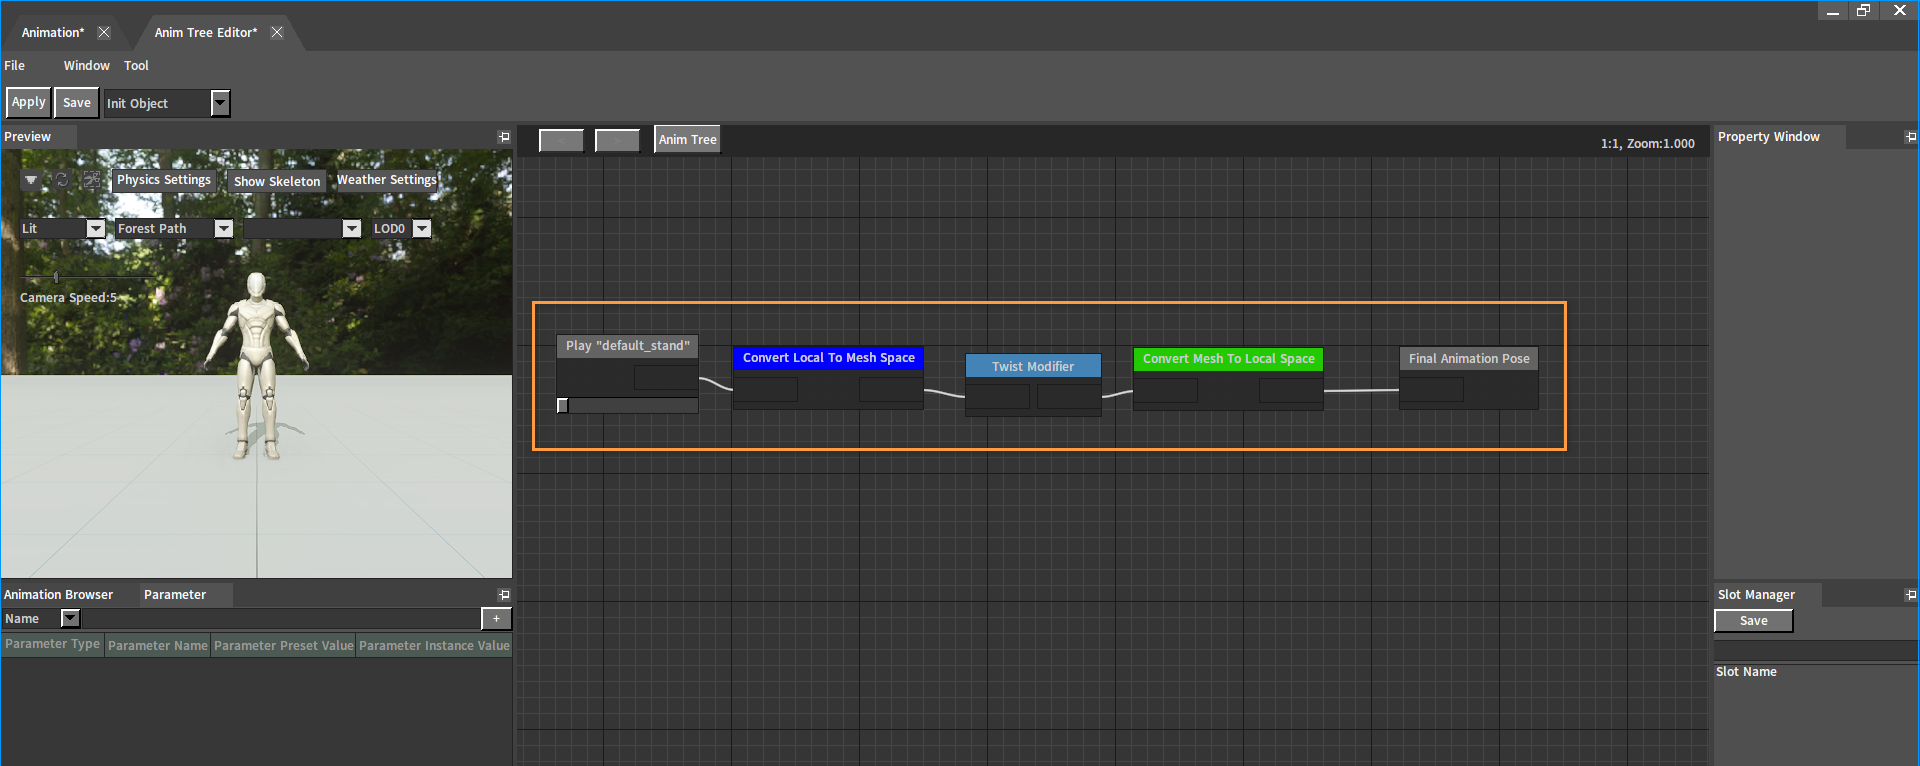
Both the input and output pose of the Twist Modifier node are in the Mesh Space, Space Conversion node will be automatically added when nodes are connected. As shown below:
Node Properties
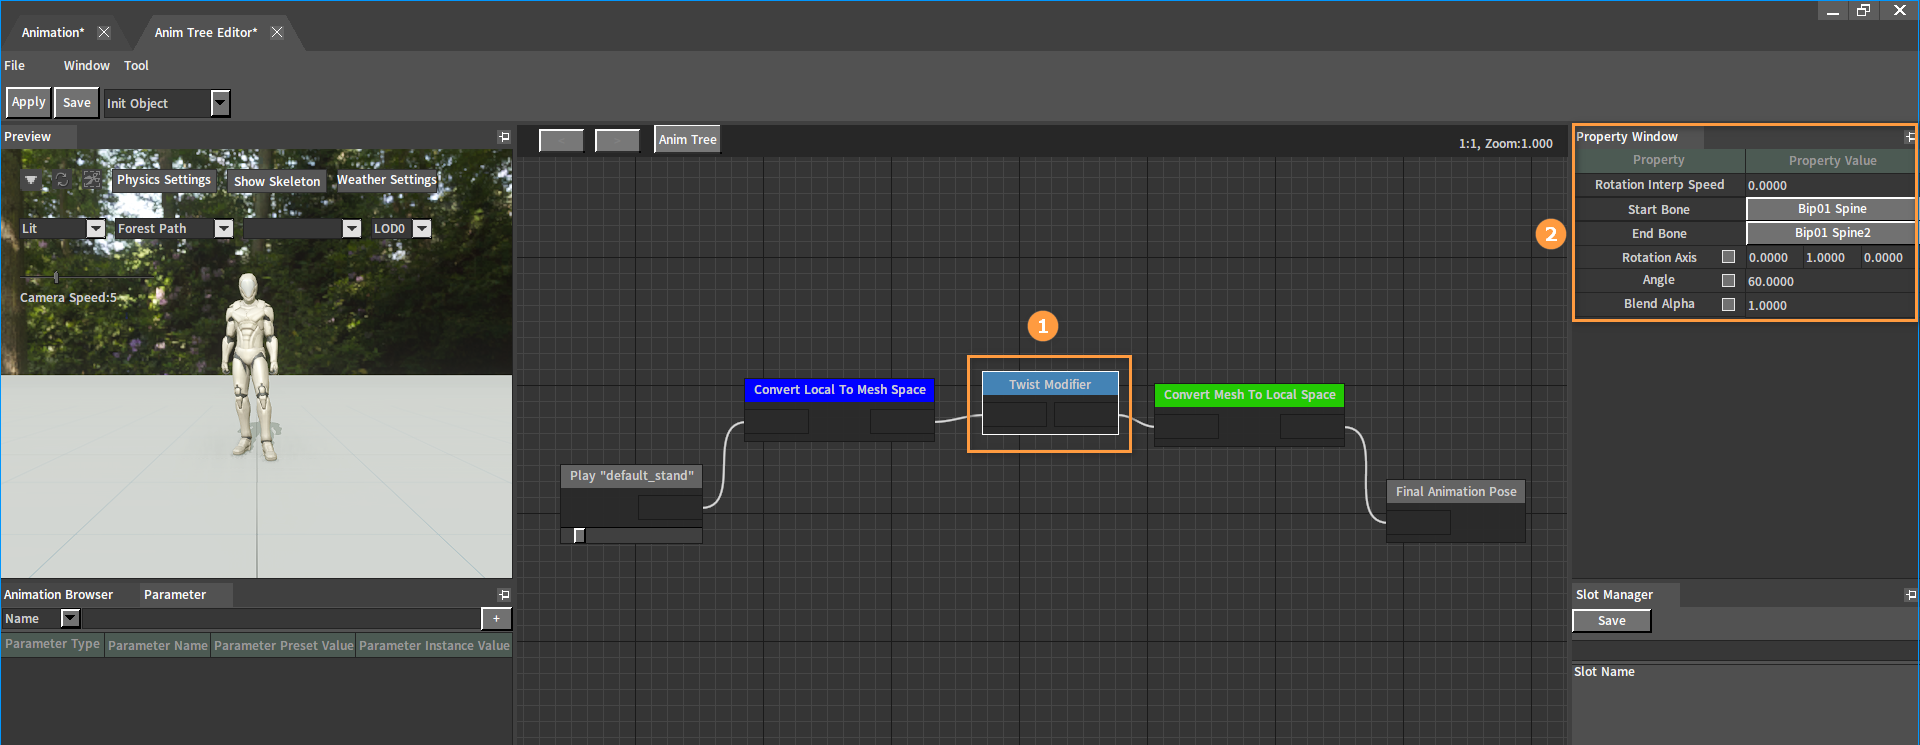
After selecting the Twist Modifier node, we can see the properties of the specified node in the Property Window.
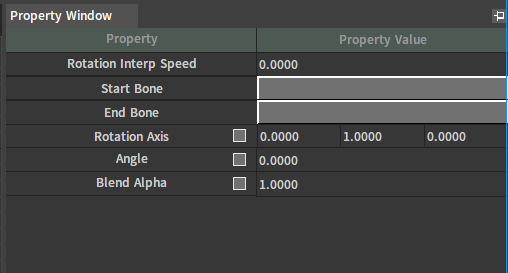
| Property | Description |
|---|---|
| Rotation Interp Speed | If this property value is greater than 0, when the Angle is modified, it will interpolate to the target Angle at the set speed. The greater the value, the faster the speed. |
| Start Bone | Used to specify Bone Chain, the Start Bone and the End Bone must be on the same Bone Chain, otherwise there is no effect. |
| End Bone | Used to specify Bone Chain, the Start Bone and the End Bone must be on the same Bone Chain, otherwise there is no effect. |
| Rotation Axis | Specify the axis of rotation, and each bone point in the chain rotates around the specified axis. Check the box to allow the property to use the animation vector parameter, and specifies which parameter to get the parameter control from in the drop-down list. |
| Angle | Rotating Angle Check the box to allow the property to use animated floating-point parameter, and specifies which parameter to get the parameter control from in the drop-down list. |
| Blend Alpha | The greater this property value, the stronger the Twist modifier effect, and 0 represents no effect at all. Check the box to allow the property to use animated floating-point parameter, and specifies which parameter to get the parameter control from in the drop-down list. |
:::Tips
Specified steps to set the Start Bone and End Bone:
Click on![]() ,in the pop-up Skeleton Tree window, double-click on the specified bone.
,in the pop-up Skeleton Tree window, double-click on the specified bone.
:::
Examples
Here is a simple example of using Twist Modifier node.
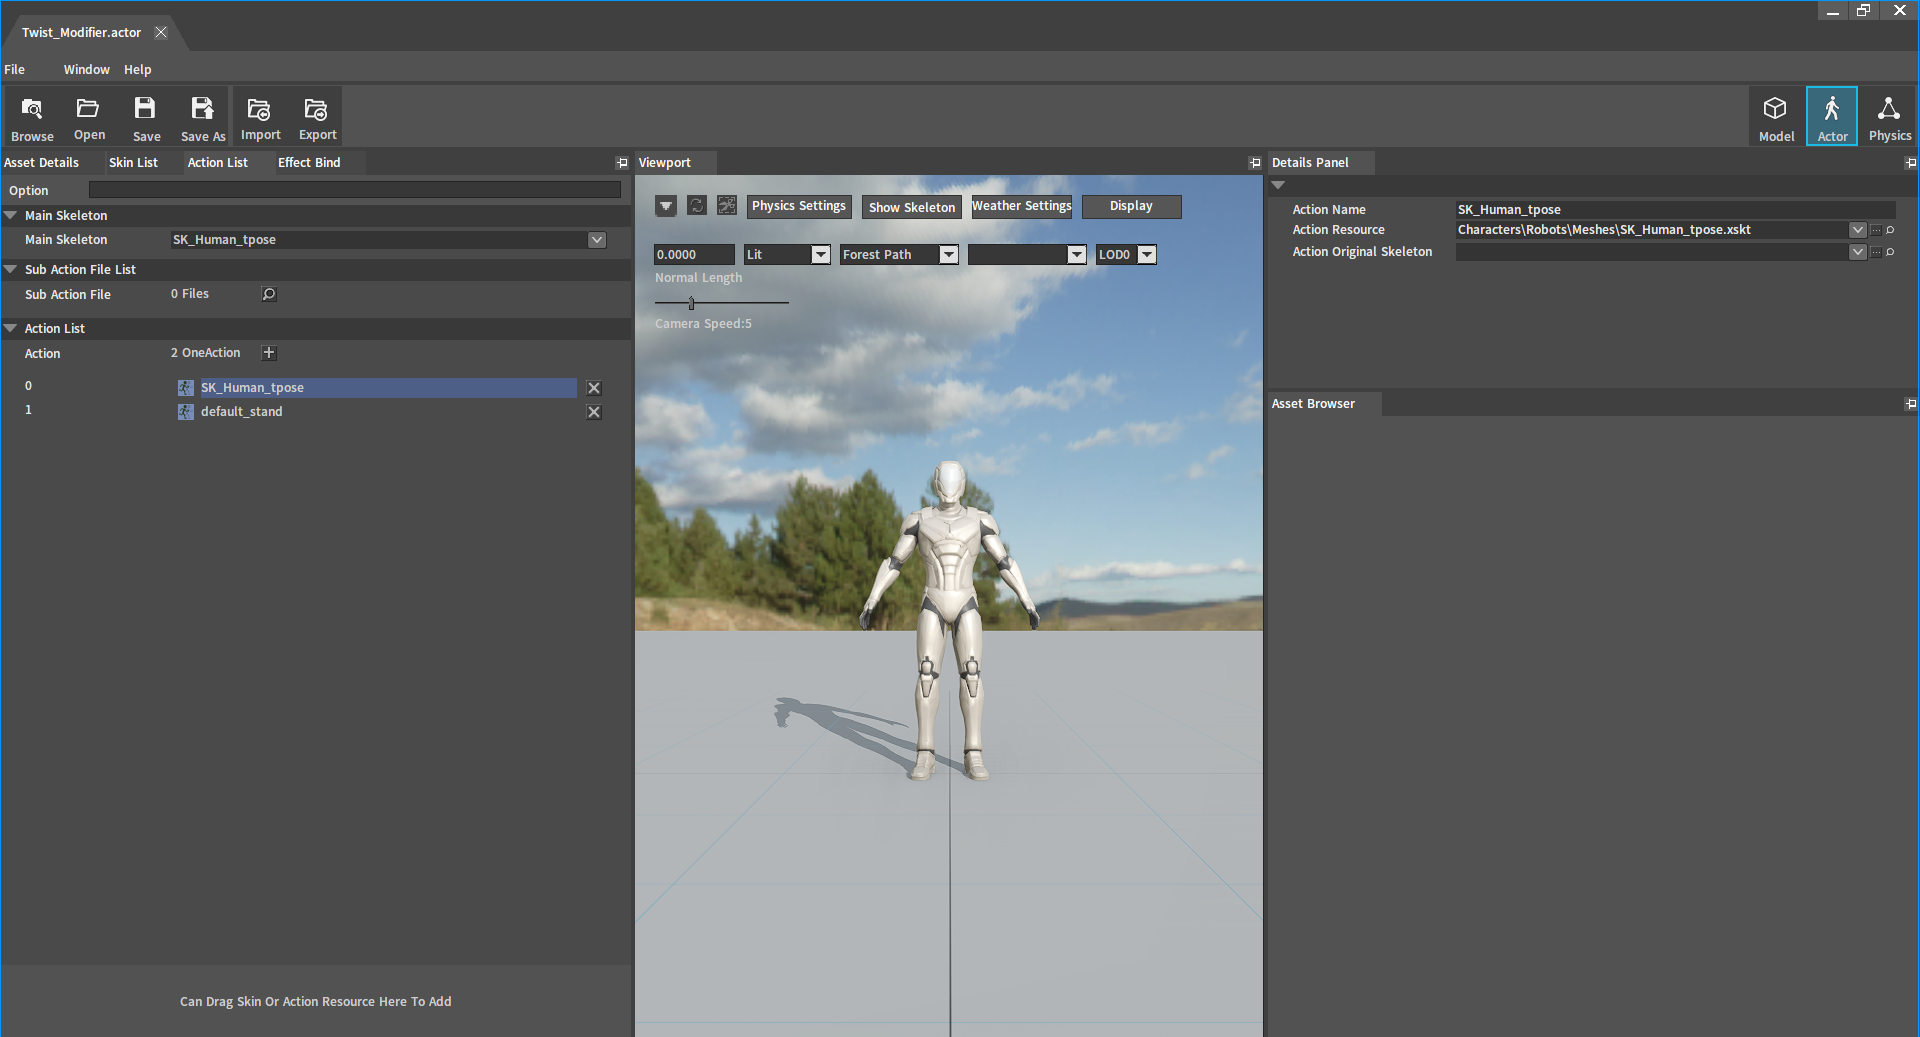
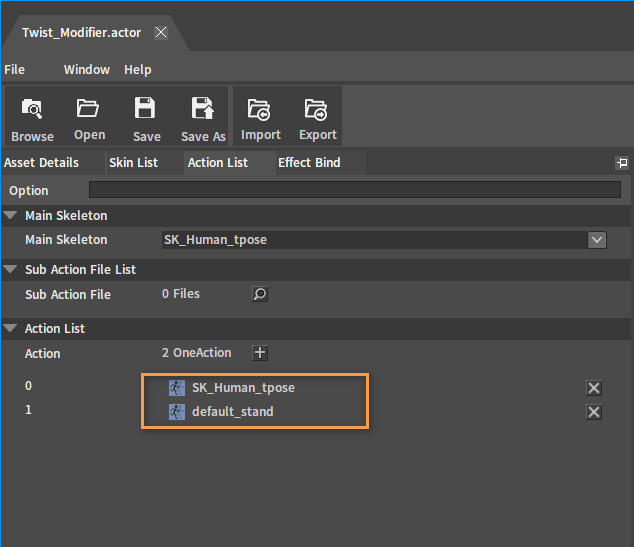
Creating Actors
Please refer to Assembling Actor document,create an Actor(.actor) that contains the SK_Human_tpose and default_stand animation assets.
Configuring Animation Tree
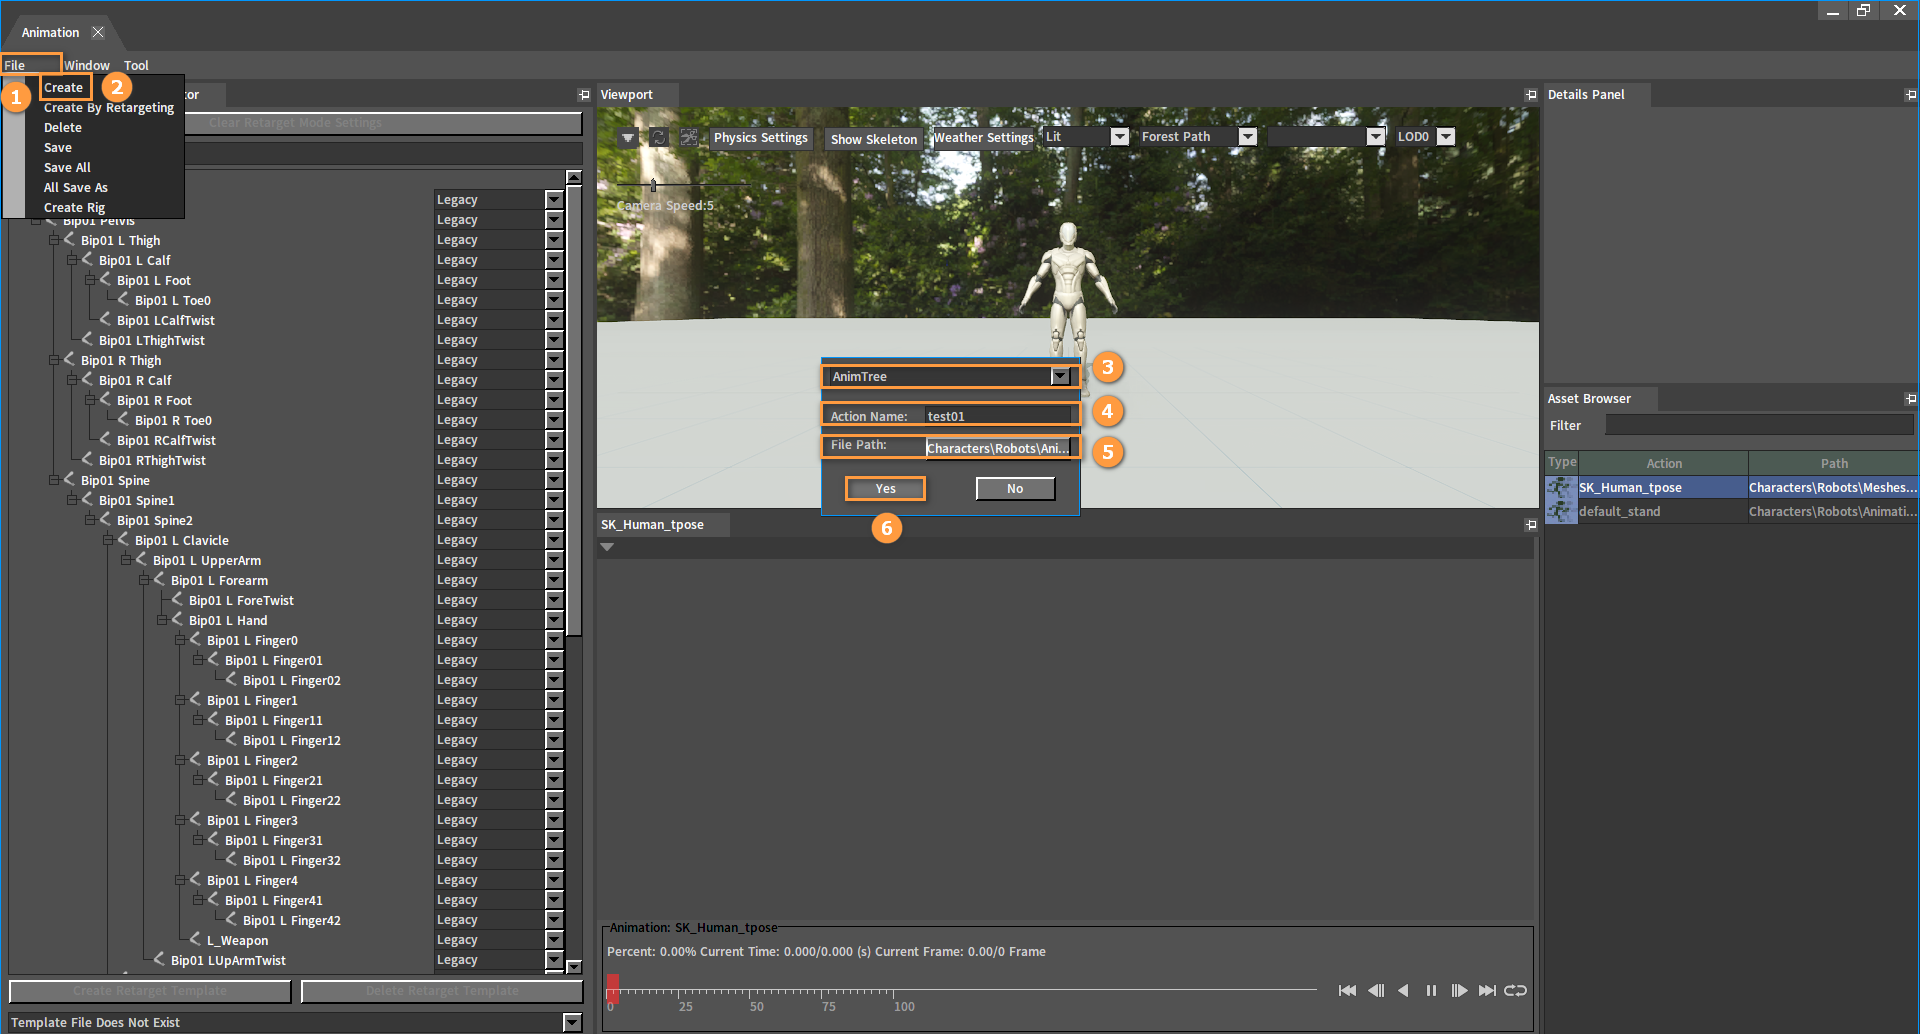
Double-click on a skeleton asset in the Action List of the Actor Editor to open the Animation Editor.
Create an Animation Tree. In the Animation Editor, click on File-> Create in the menu bar, select AnimTree in the drop-down box of the pop-up window, name it and select File Path for it, click on Yes to finish creation and go to the Anim Tree Editor.
Add a Twist Modifier node and a default_stand sequence player node in the Animation Tree, link the default_stand node to the Twist Modifier node, and link the Twist Modifier node to Final Animation Pose node.
Select the Twist Modifier node, set the node property in the Property Window. For example, set the specified bone chain for the Start Bone and the End Bone, set the Angle to 60.
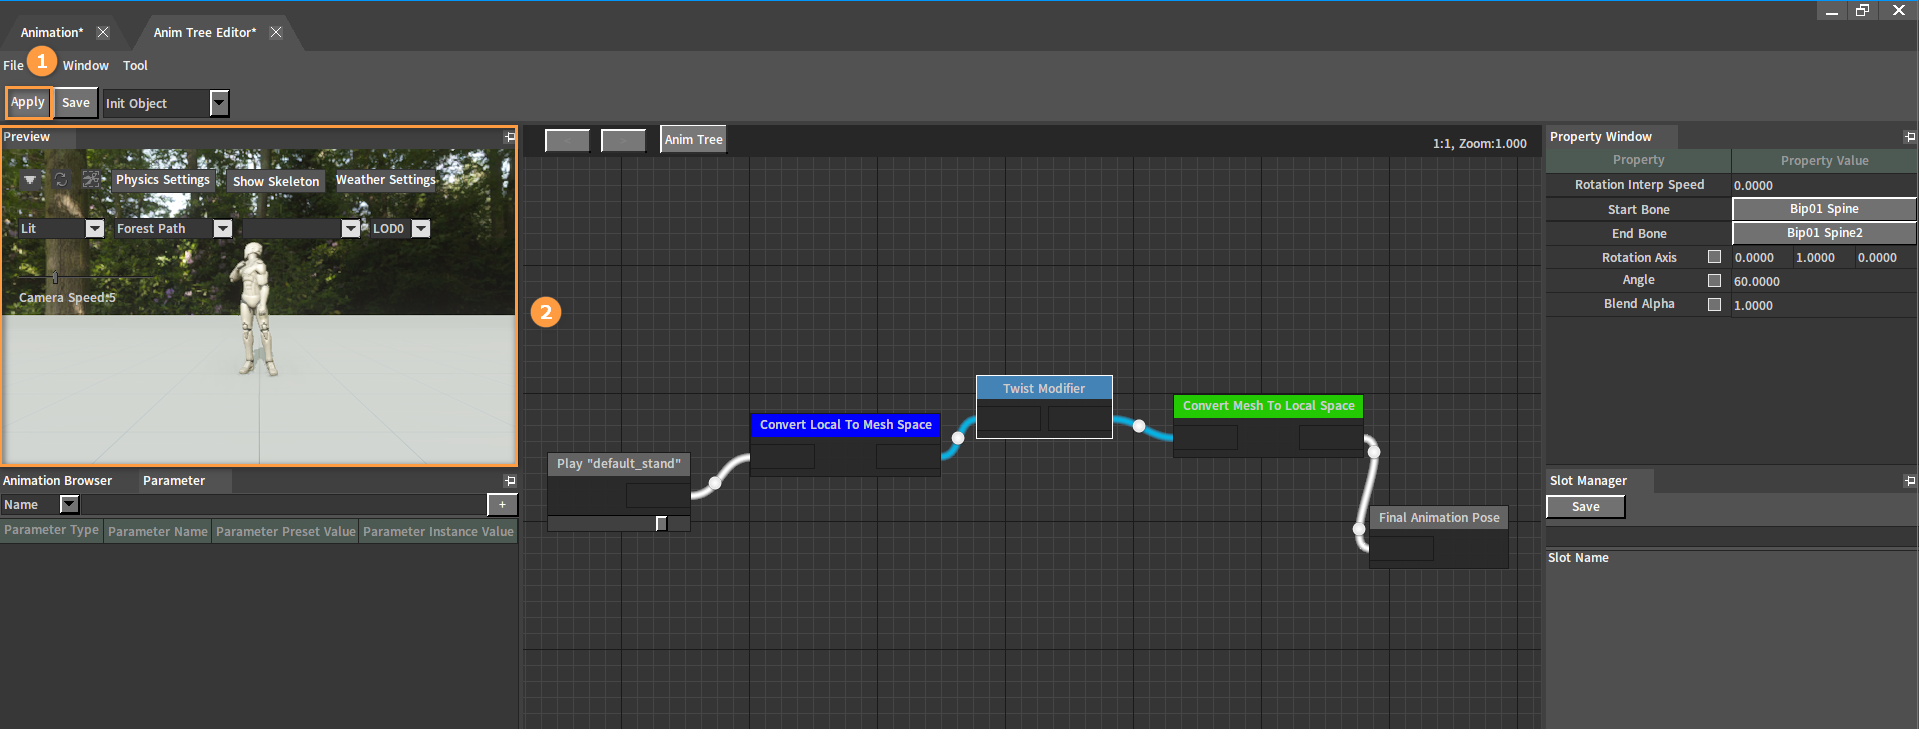
Click on Apply to see the character specified bone chain rotation effect in the Preview panel.
Below is the effect of specifying the same bone chain with the same rotation axis, but different rotation angles:
 Angle:60° Angle:60° |  Angle:-45° Angle:-45° |