Modify Bone Nodes
Overview
A Modify Bone node which supports bone modification in Bone Space, Parent Bone Space, Mesh Space, and World Space can control the Rotation, Scale, and Translation of a selected bone at which three operations are supported including Ignore, Replace, and Add To. Character poses can be fine-tuned to improve animation effects.
Creating Modify Bone Nodes
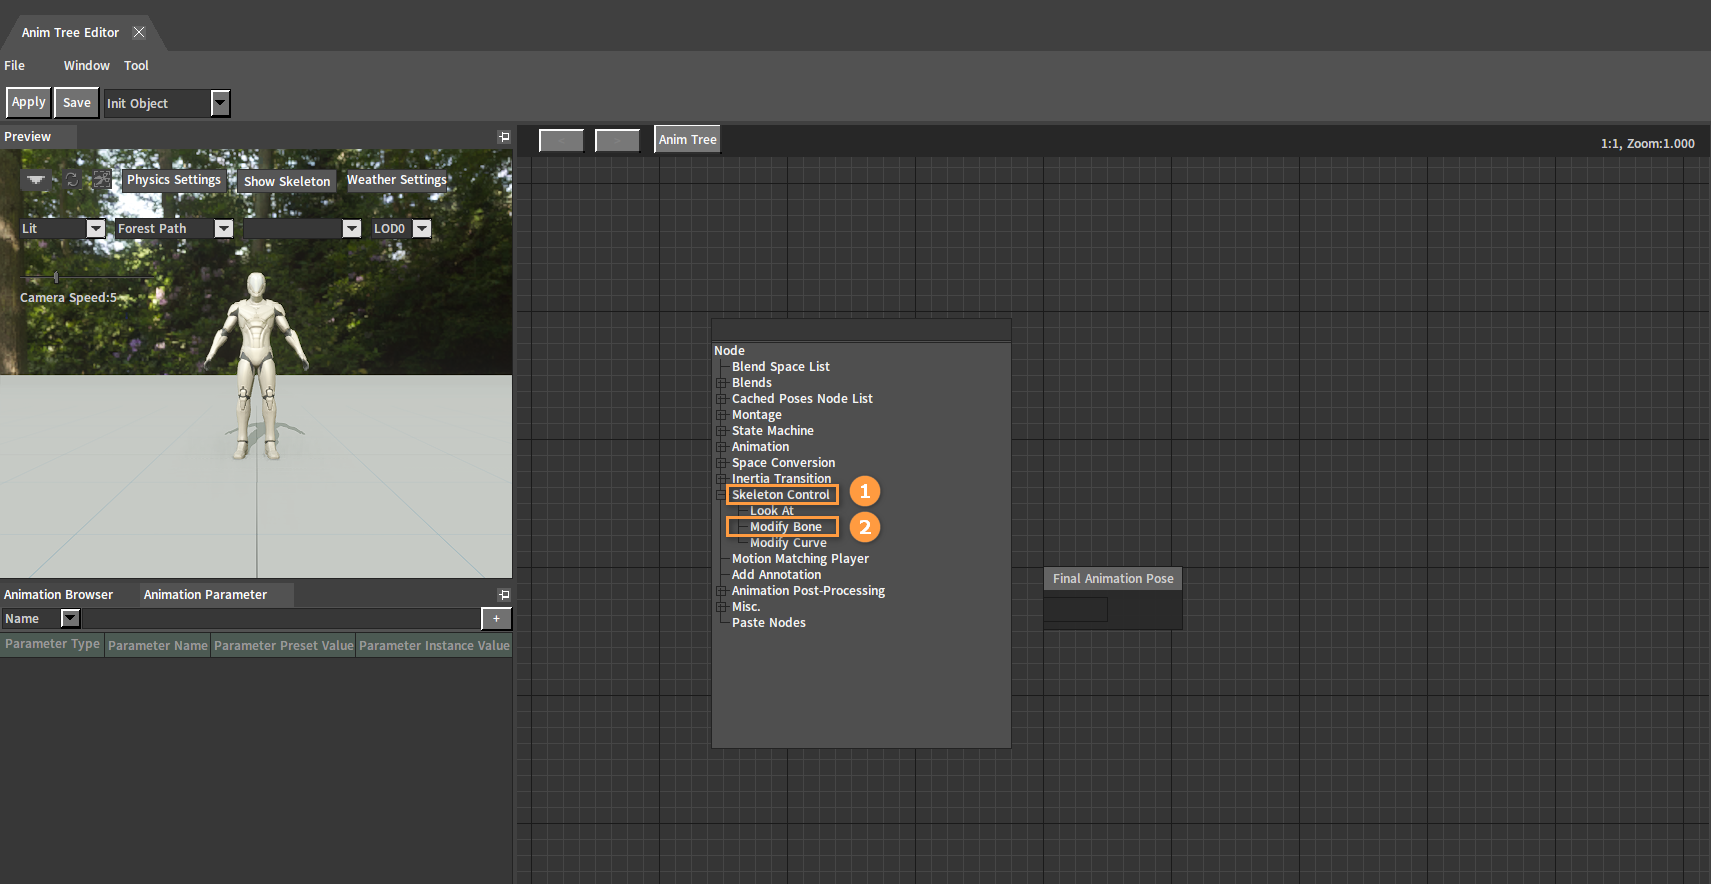
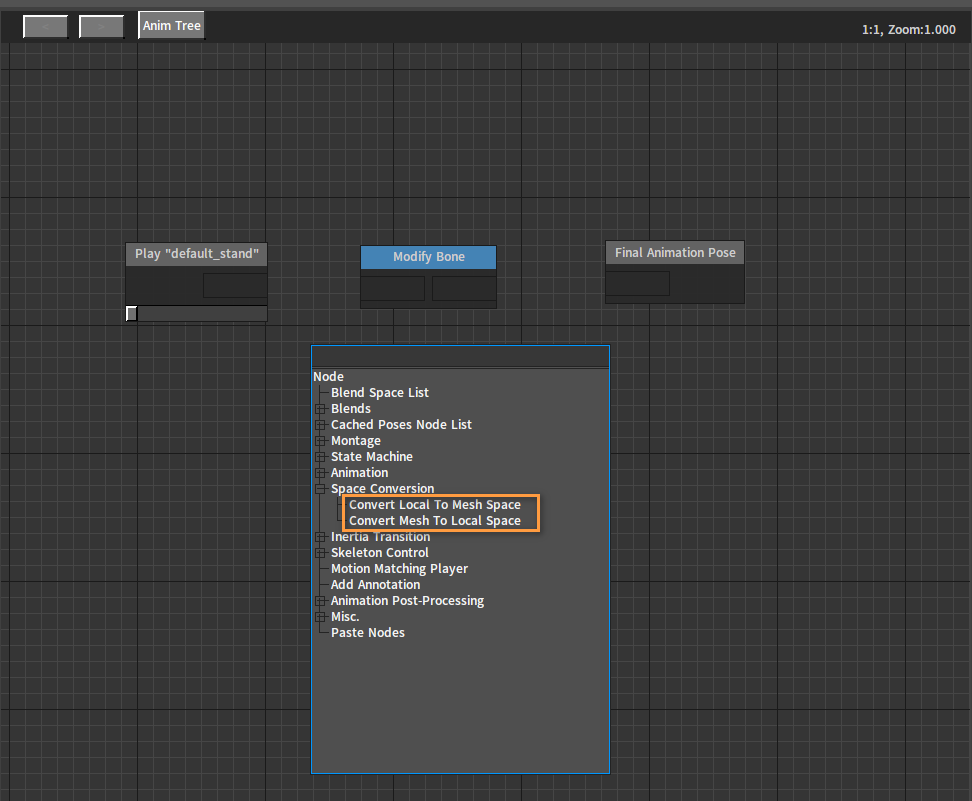
Right-click the blank space in the editing area to open the Node Selection panel in the Anim Tree Editor. Expand Skeleton Control, and select Modify Bone to create a Modify Bone node.
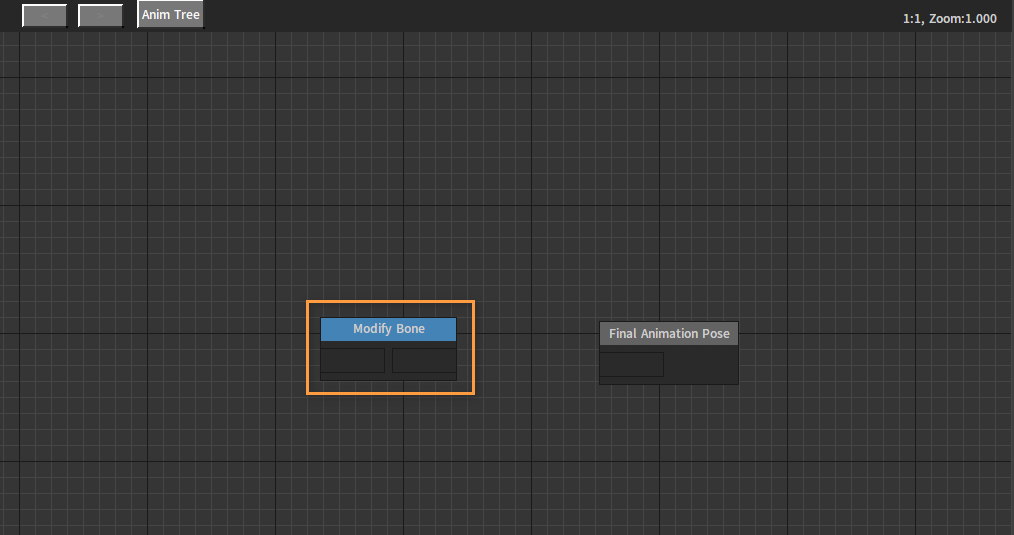
After creation:
Properties
The properties of the Modify Bone node are shown below:
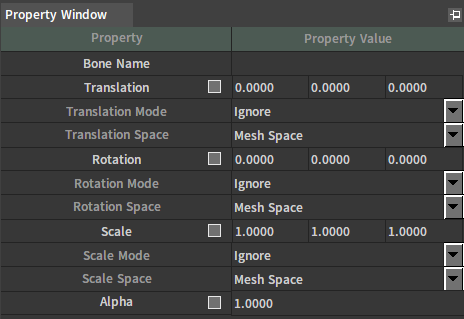
| Property | Description |
|---|---|
| Bone Name | Specify the name of the bone controlled by the current node. |
| Translation | Specify the translation vector of the modified bone. If checked, this property will use the animation vector parameter, and the drop-down list will specify which parameter the parameter control amount will be obtained from. |
| Translation Mode | Modes of translation:
|
| Translation Space | Spaces of translation:
|
| Rotation | Specify the rotation angle (Euler angle) of the modified bone. If checked, this property will use the animation vector parameter, and the drop-down list will specify which parameter the parameter control amount will be obtained from. |
| Rotation Mode | Modes of rotation:
|
| Rotation Space | Spaces of rotation:
|
| Scale | Specify the scaling vector of the modified bone. If checked, this property will use the animation vector parameter, and the drop-down list will specify which parameter the parameter control amount will be obtained from. |
| Scale Mode | Modes of scaling:
|
| Scale Space | Spaces of scaling:
|
| Alpha | Control how much influence this node exerts on the modified bone. If checked, this property will use the animation float parameter, and the drop-down list will specify which parameter the parameter control amount will be obtained from. |
Example
Here is an example of using the Modify Bone node:
Creating Actors
Refer to the documentation Assembling Actors to create an Actor (.actor), including SK_Human_tpose and default_stand animation assets.
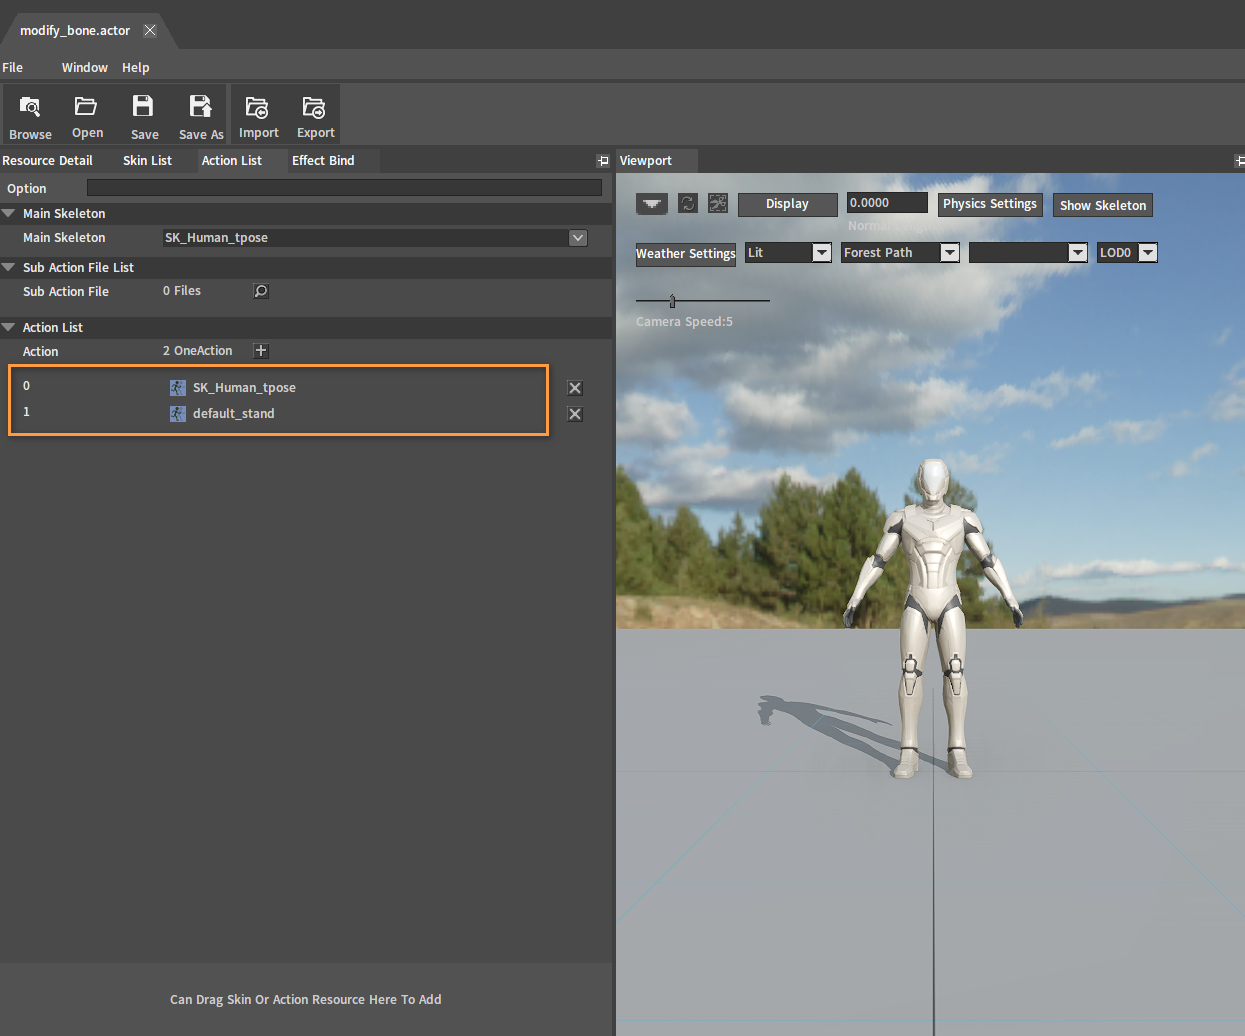
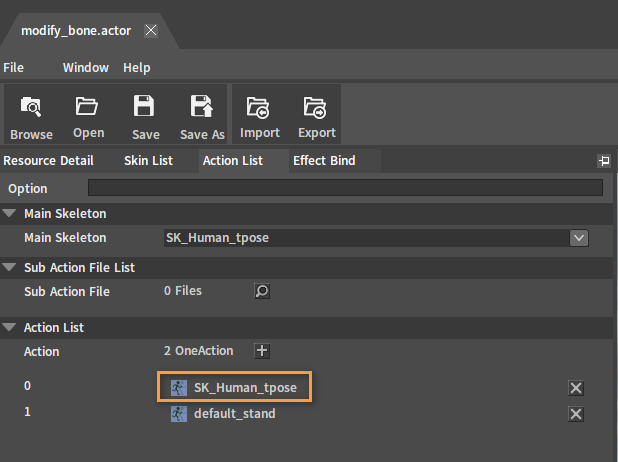
In the Actor Editor, double-click the animation asset in the Action List to open the Animation Editor.
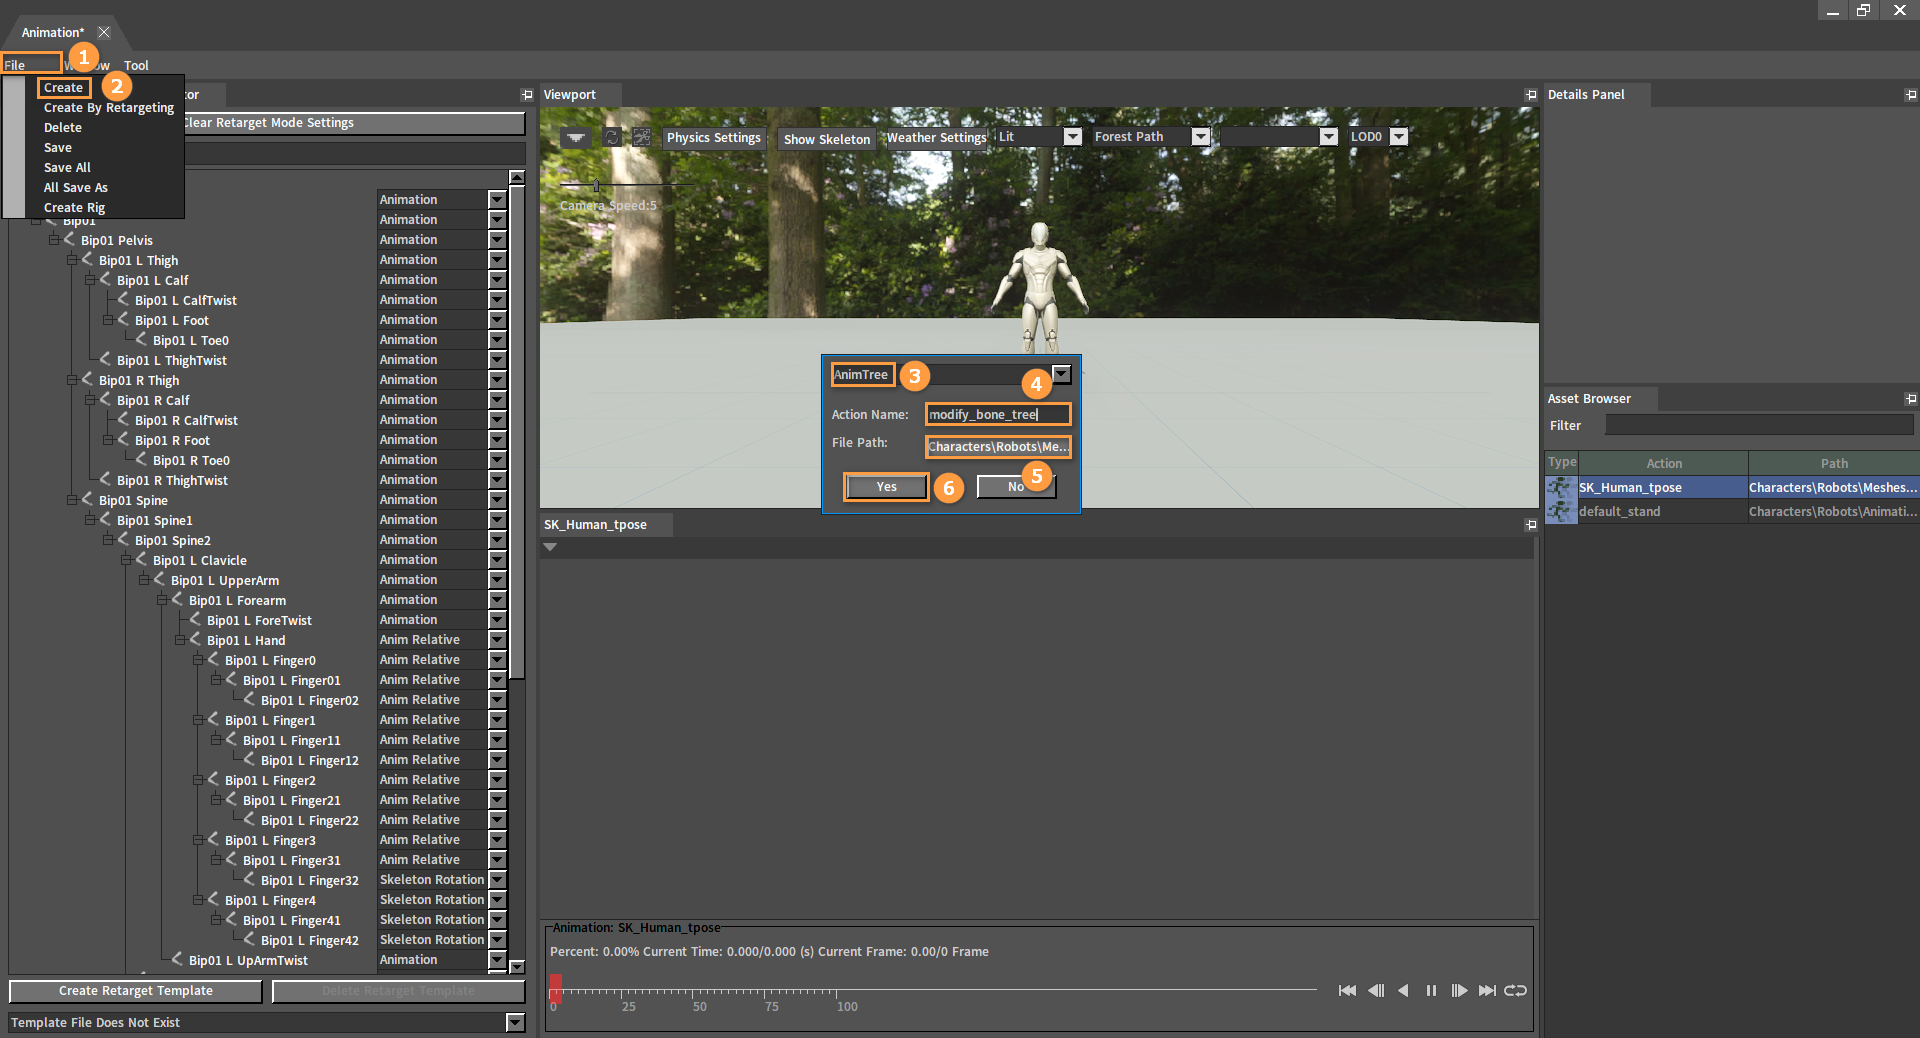
Click File (Menu Bar) -> Create in the Animation Editor to open a window. Select AnimTree, enter a name in Action Name, and select the save path of the Anim Tree in File Path. Click Yes to complete and enter the Anim Tree Editor.
Configuring Anim Trees
Add a default_stand Sequence Playback node and a Modify Bone node in the Anim Tree Editor.
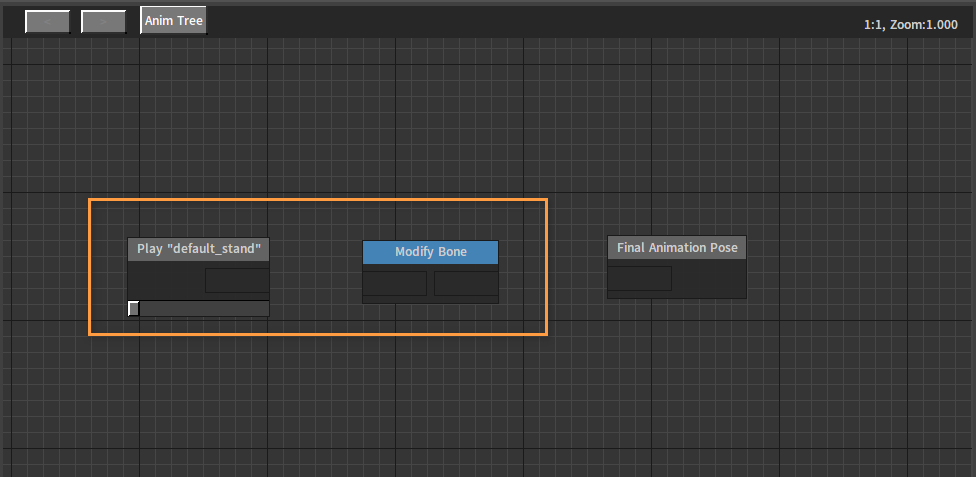
Add Convert Local To Mesh Space and Convert Mesh To Local Space nodes. Right-click to open the Node Selection panel, and select to add Convert Local To Mesh Space and Convert Mesh To Local Space nodes under Space Conversion.
Link the five nodes in the Anim Tree together as shown below.

Select the Modify Bone node, and modify its properties in the Property Window as follows:
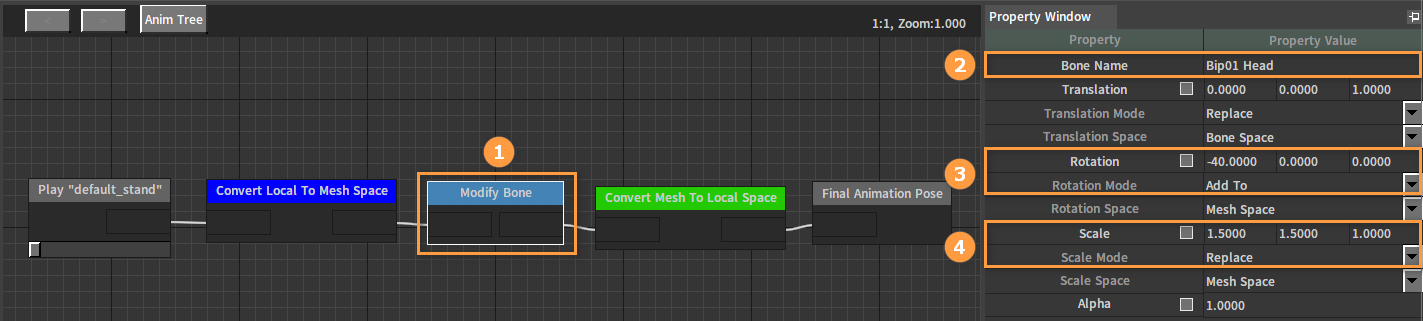
| Property | Setting |
|---|---|
| Bone Name | Bip01 Head |
| Rotation | -40,0,0 |
| Rotation Mode | Add To |
| Scale | 1.5,1.5,1.5 |
| Scale Mode | Replace |
Click the Apply button, and then you can see in the Preview window that the character's head is scaled 1.5 times larger and 40 degrees upward.
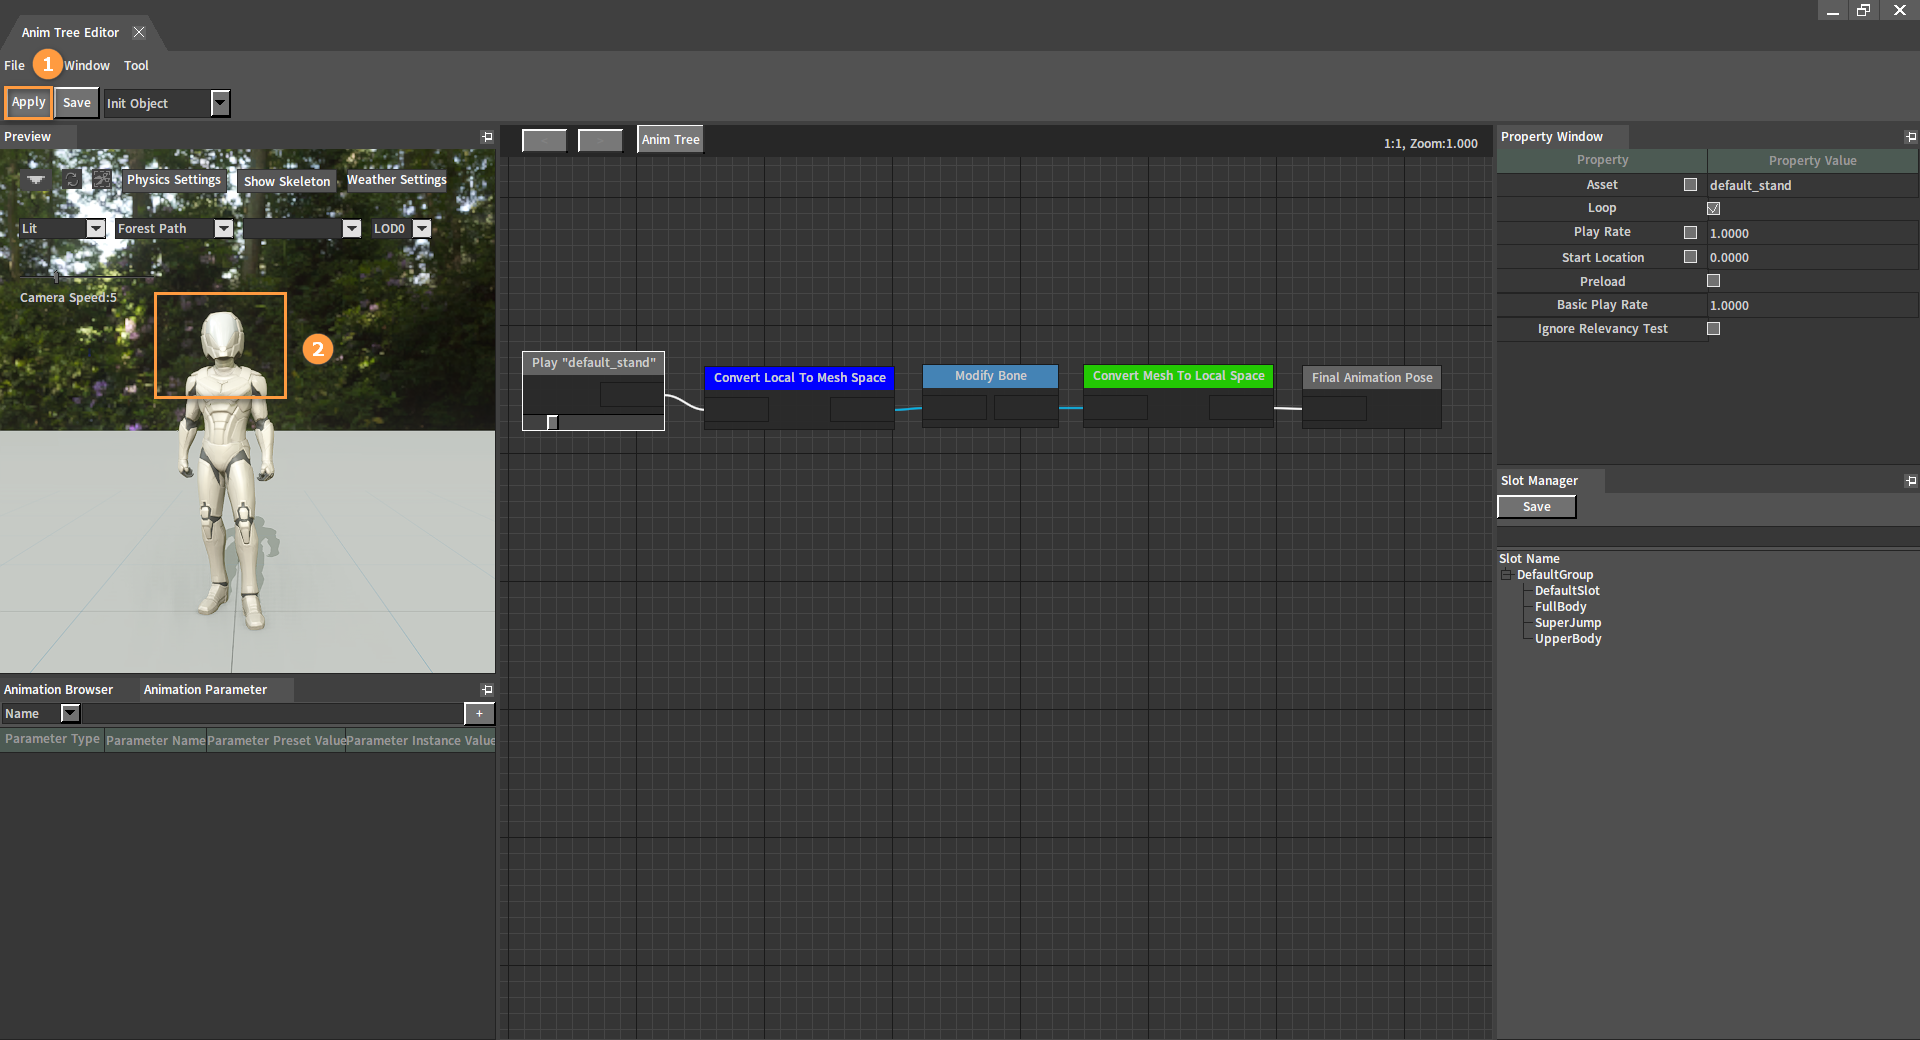
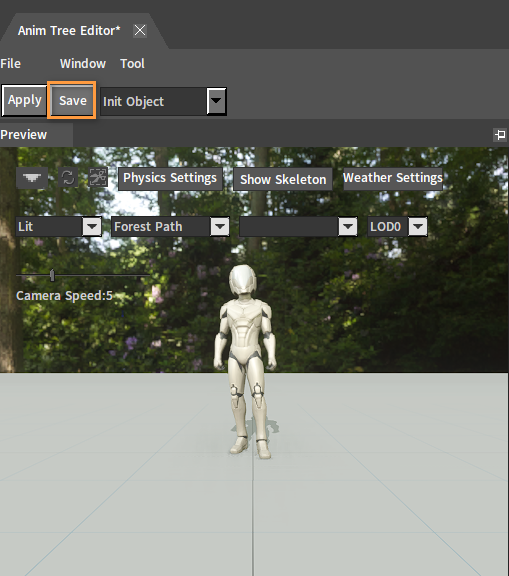
Click the Save button after completing.
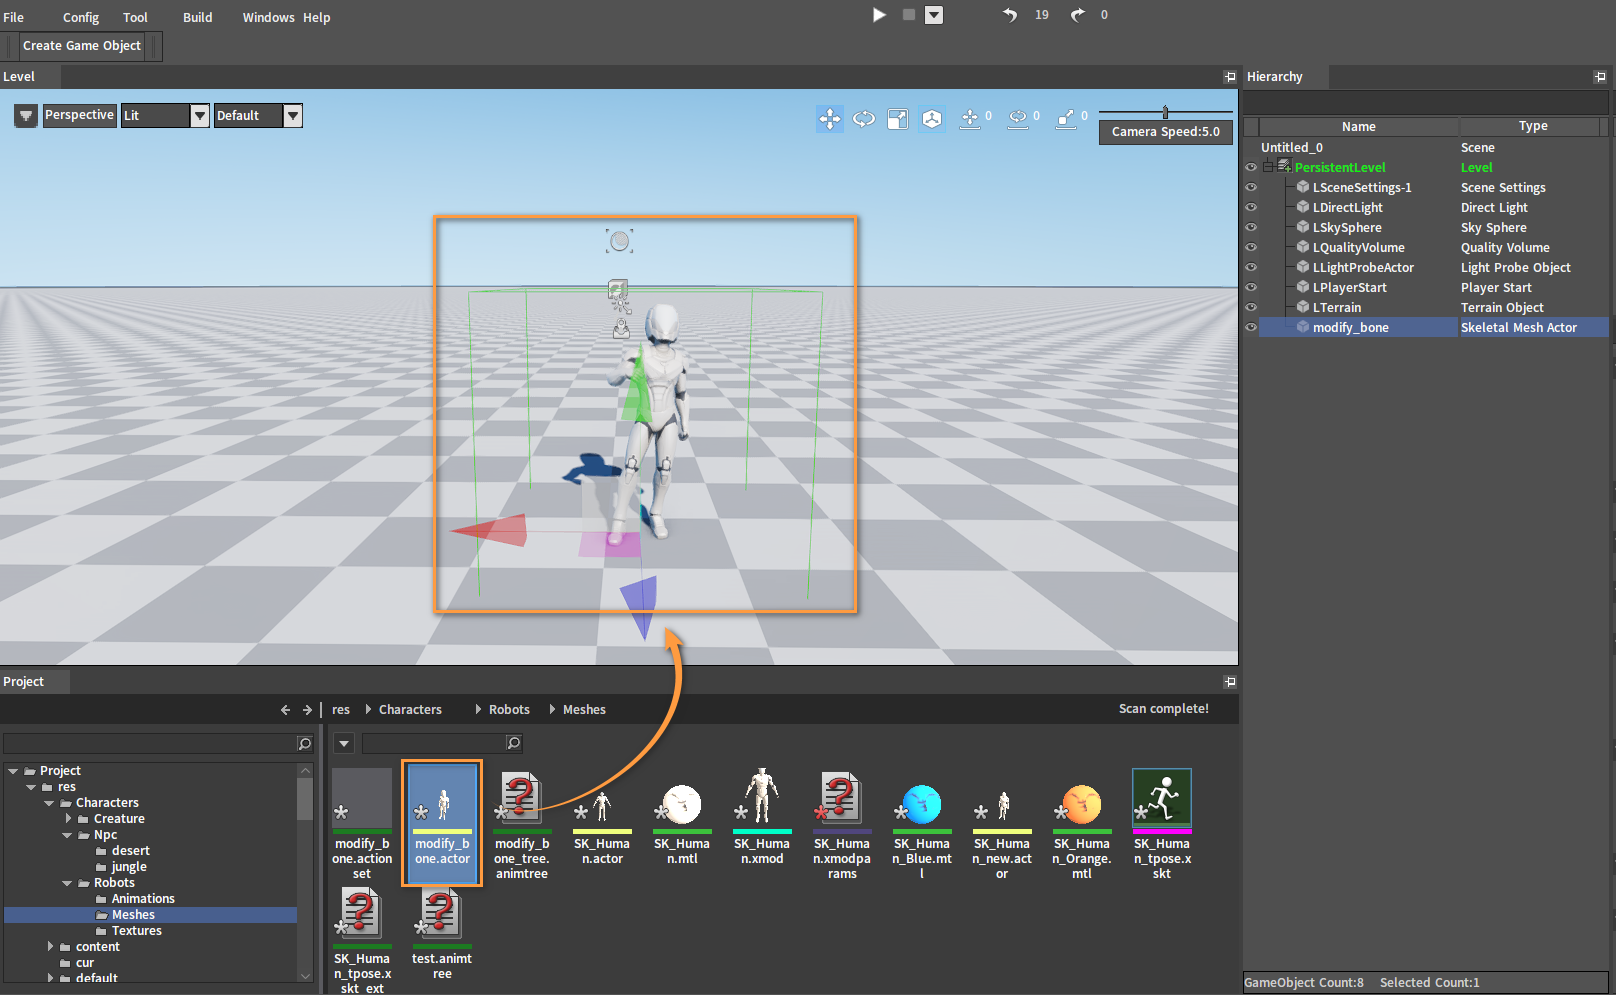
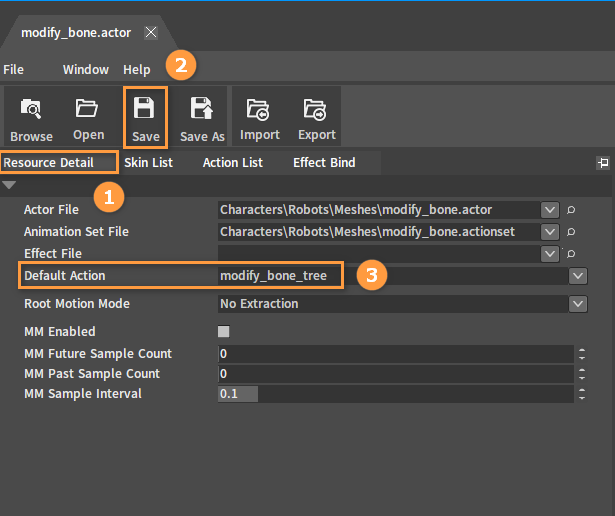
Viewing the Effect in the Level
Click Resource Detail and set the Default Action to Anim Tree modify_bone_tree in the Component Editor. After setting, click Save.
Drag the created Actor into the Level. The effect is as shown below: