Animation Curves
Overview
When curve data is attached to the animation, and the curves can blend with each other, the logic layer can use the curve data to drive different effects (e.g. drive IK intensity, material values, etc.). The animation data can be customized using the Animation Curve, which is the semantic description of the animation data.
The following image shows the effect of the Animation Curve feature, which allows the character's feet size to change continuously.
Animation Curve Panel
Animation Curves can be created and edited in the Animation Curve panel,which is displayed in Animation Sequences and Montages.
Creating Animation Curves
Open an Animation Sequence asset, and in the Animation Curve panel of the Animation Sequence Editor, click the ![]() button, then enter the curve name in the pop-up window, and click the OK button to finish the creation.
button, then enter the curve name in the pop-up window, and click the OK button to finish the creation.


Editing Animation Curves
After creating an Animation Curve, check the checkbox to expand the curve edit panel and uncheck it to fold it. The editing of the curve can be done in the curve edit panel after it is expanded.

The curve name can be modified in the text box.
![]()
Click the ![]() button to delete the curve.
button to delete the curve.
![]()
To reedit the previously created animation curve, click the ![]() button to select a previously created curve and open its curve editing panel.
button to select a previously created curve and open its curve editing panel.

Editing Keyframes
Double-click a blank space to add a keyframe. Click a keyframe and move it to change its Time and Value, or select a keyframe and change the values in the pop-up Time and Value input boxes at the top left.
Select a keyframe and right-click it, then you can select to delete it in the pop-up shortcut menu. Hold down the Ctrl key to multi-select keyframes, or directly left-click to box-select multiple keyframes.

Adjusting the Viewport
Click the two buttons at the top left corner to adjust the Viewport to the appropriate interval according to the curve's value range.

The Viewport can be adjusted manually by scrolling the wheel; Hold down the Ctrl key at the same time to only zoom horizontally; Hold down the Shift key at the same time to only zoom vertically.
Associating with Bones
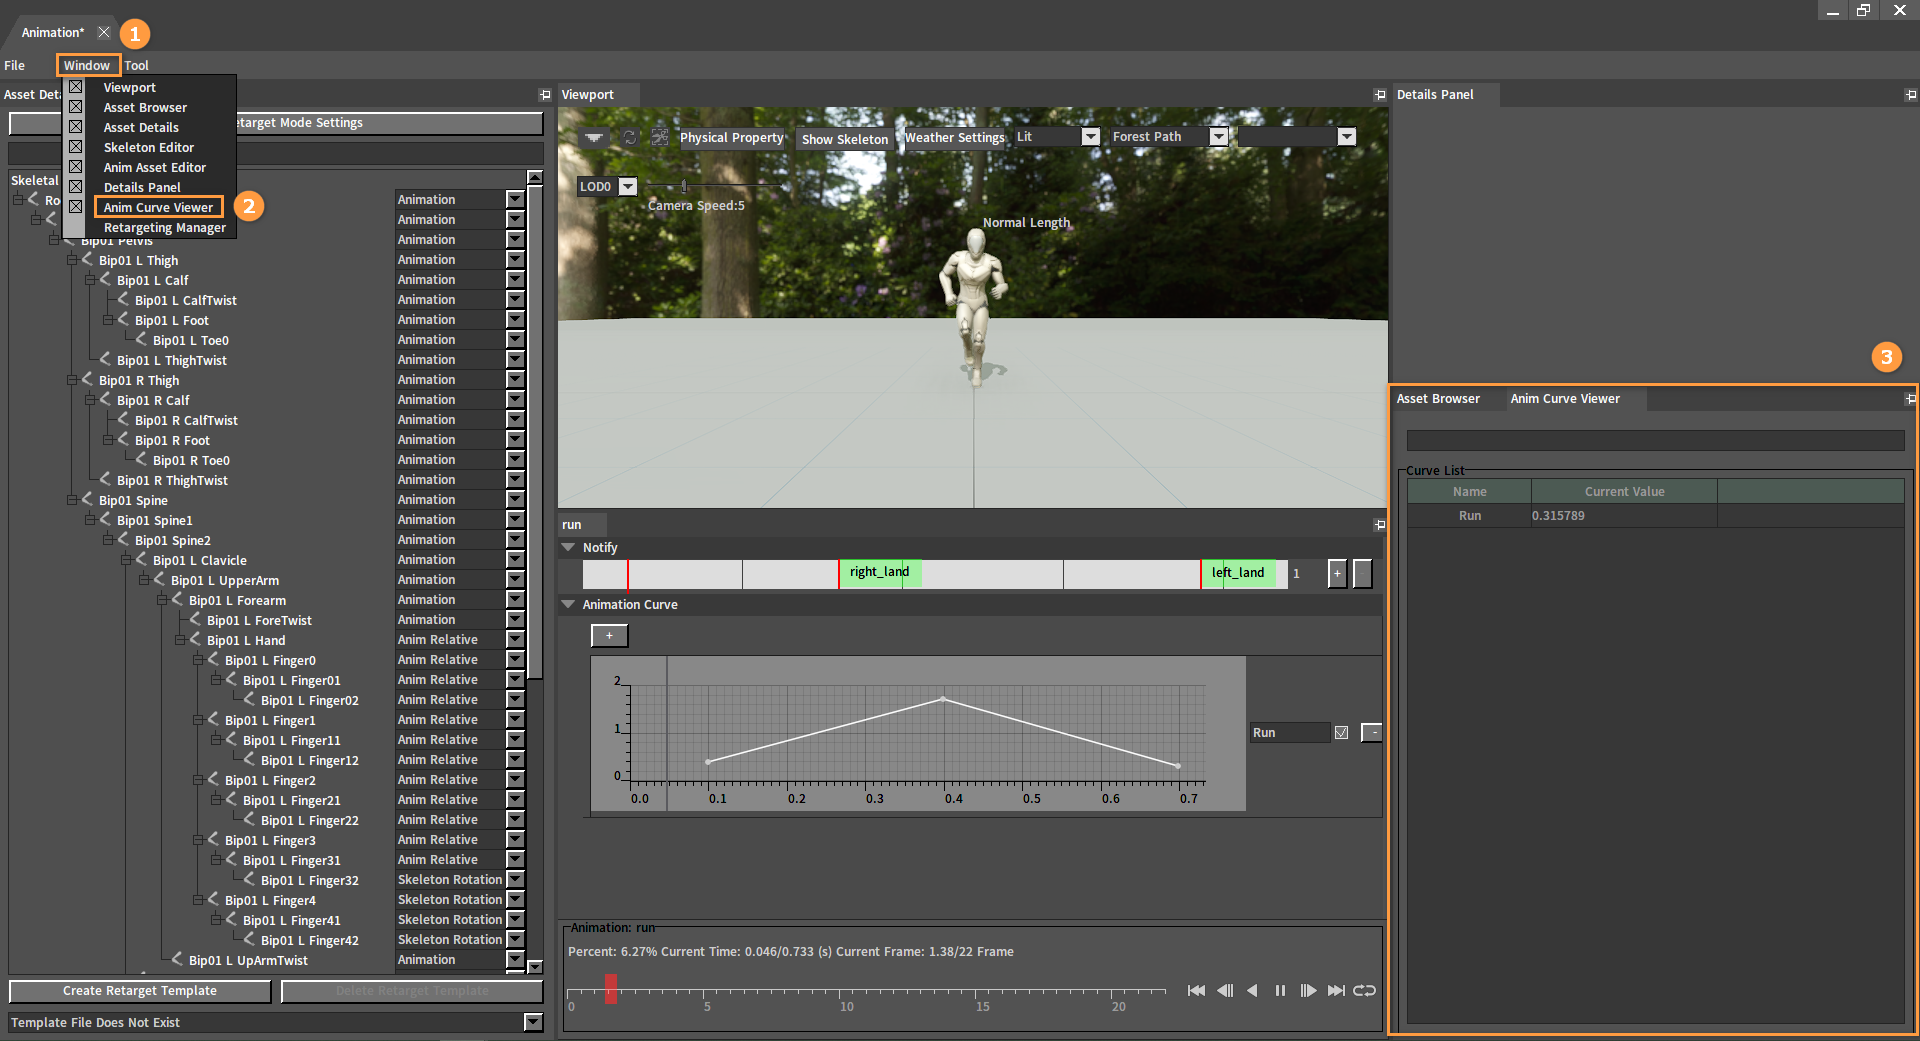
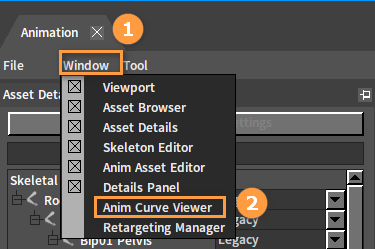
In the Animation Editor, click Window (Menu Bar) -> Anim Curve Viewer to open the Anim Curve Viewer panel, where you can view the real-time changes of the curve data.
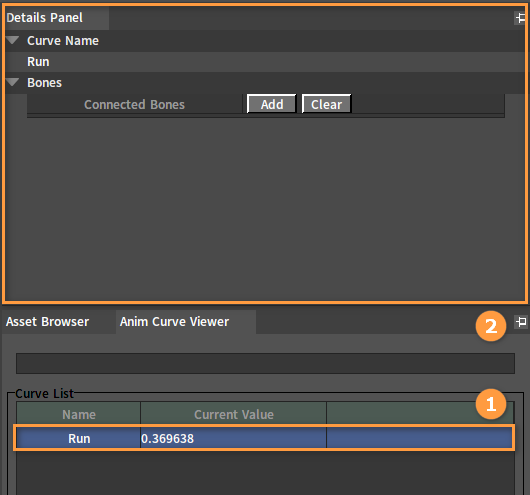
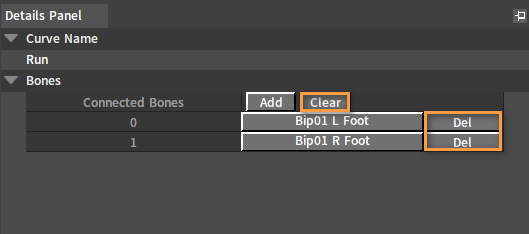
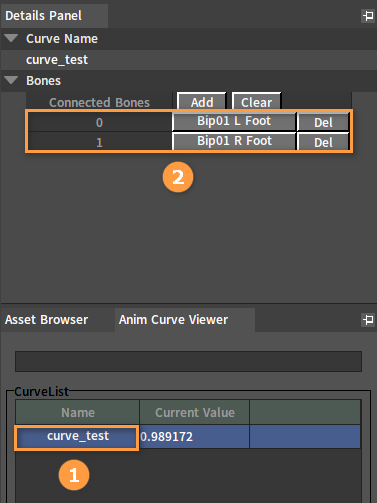
Select a curve in the Anim Curve Viewer panel and the relevant information on the curve will be displayed in the above Details Panel.
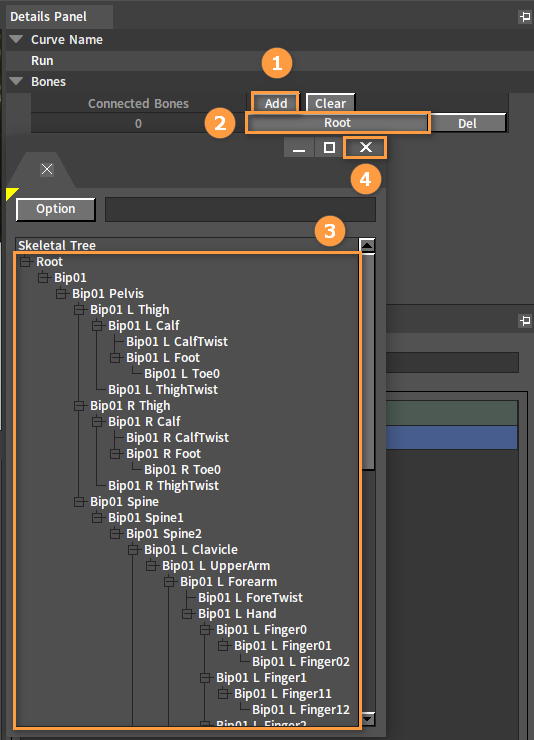
You can also associate bone data with the curve in the Details Panel. Click the Add button under Bones, then click the Root button and select the bones to be associated with in the pop-up window. Close the window after selection.
To delete a specific associated bone, click the Del button next to the associated bone in the Details Panel to disassociate the bone with the curve. Click the Clear button to disassociate all bones from the curve at once.
Example
The following is an example displaying the Animation Curve feature.
Creating Actors
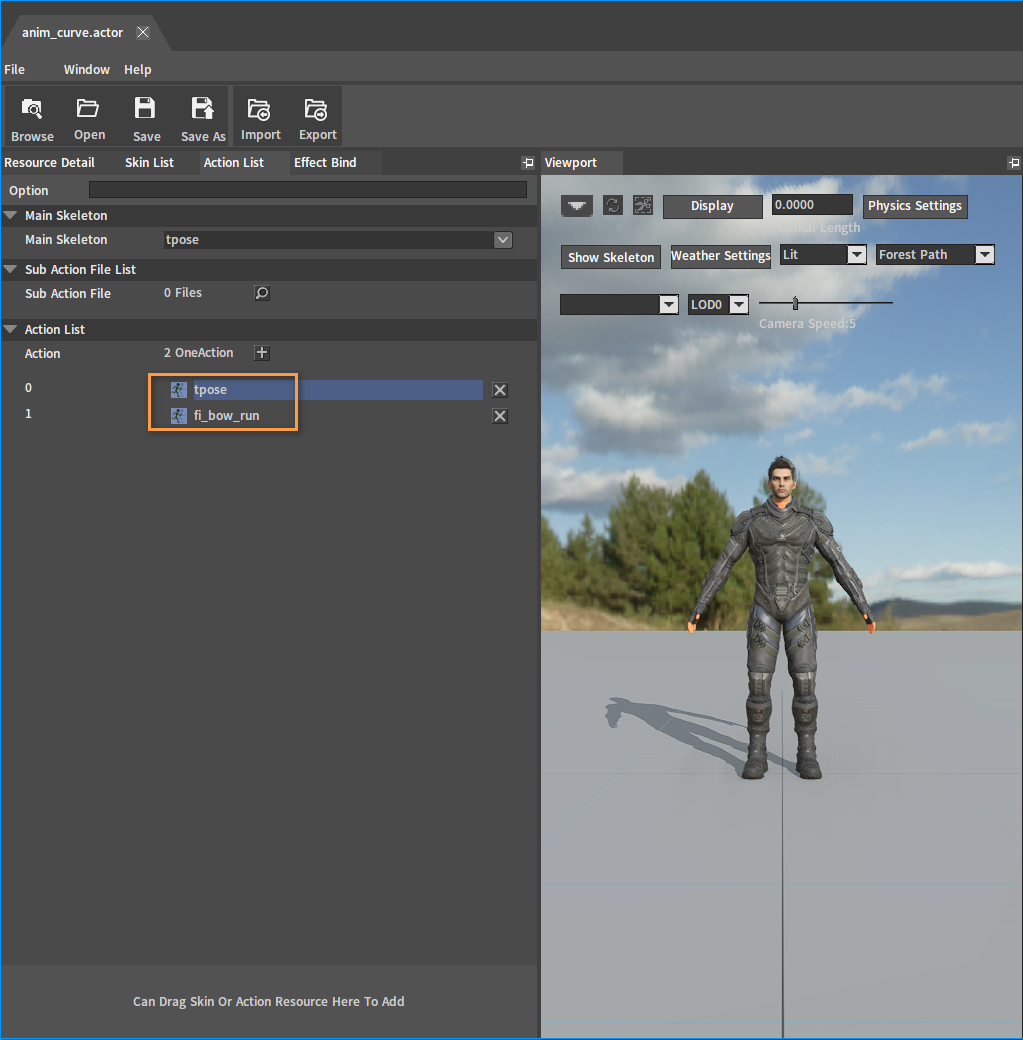
Refer to Assembling Actors to create an Actor (.actor) containing tpose animations and fi_bow_run animations.
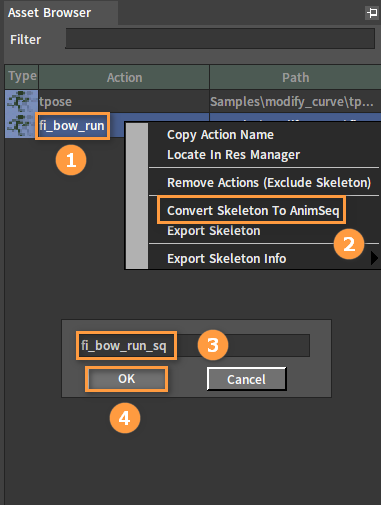
In the Asset Browser of the Animation Editor, select fi_bow_run, right-click and select Convert Skeleton To AnimSeq, then enter the name of the converted Animation Sequence in the pop-up window, and click the OK button to complete the conversion.
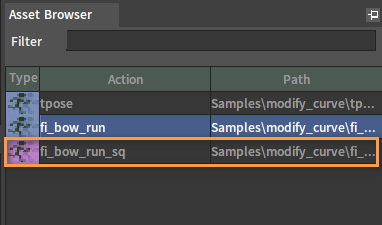
After conversion:
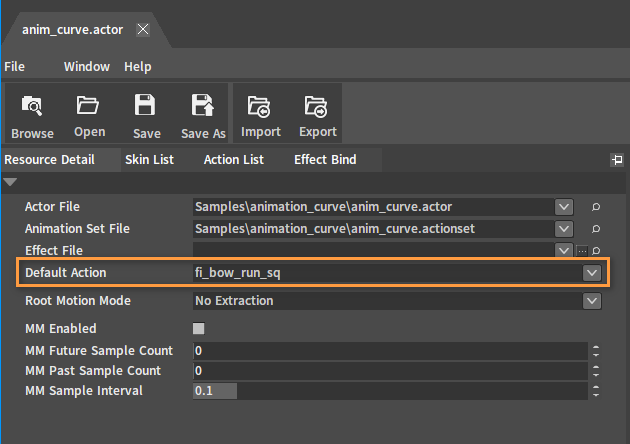
In the Actor Editor, click Resource Detail and set Default Action to Animation Sequence fi_bow_run_sq.
Editing Animation Assets
Creating Animation Curves
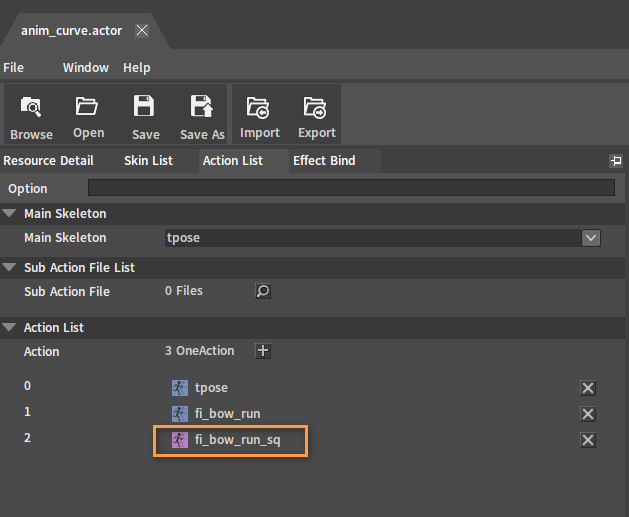
Double-click Animation Sequence fi_bow_run_sq in the Action List.
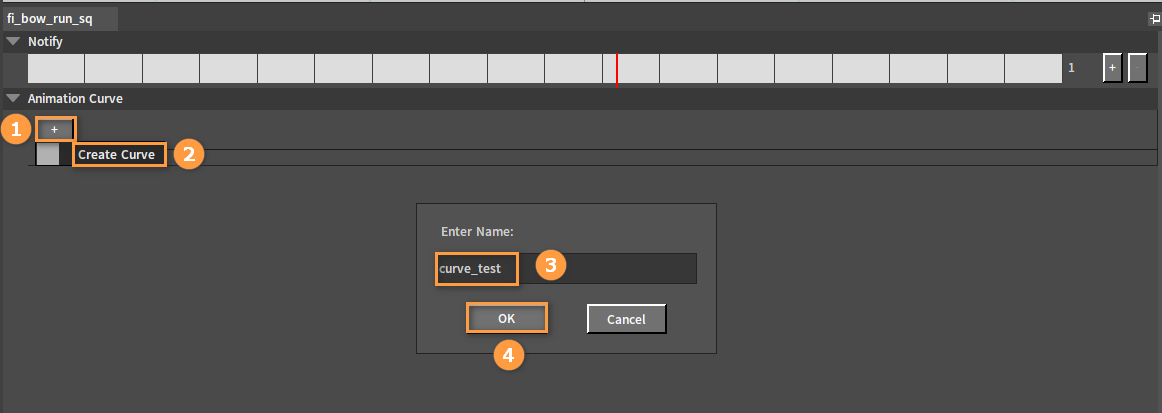
Click the ![]() button in Animation Curve, select Create Curve, then enter the name in the pop-up window and click the OK button to finish the creation.
button in Animation Curve, select Create Curve, then enter the name in the pop-up window and click the OK button to finish the creation.
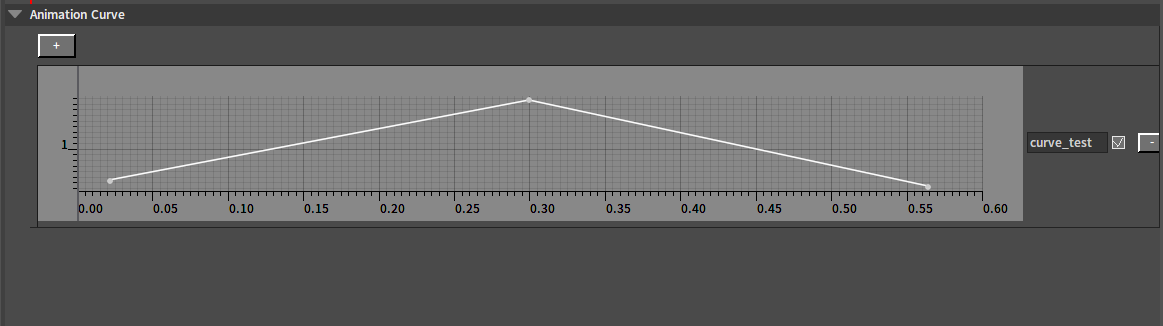
Editing Animation Curves
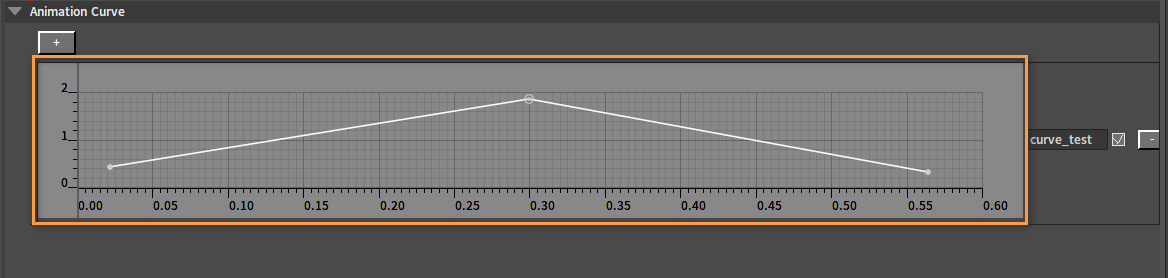
Add keyframes in the curve editing area. The curve is shown below:
In the Animation Editor, click Window (in the Menu Bar) -> Anim Curve Viewer to open the Anim Curve Viewer.
Select the created curve in the Anim Curve Viewer, then bind bones Bip01 L Foot and Bip01 R Foot in the Details Panel. Refer to section Associating with Bones to finish binding the bones.
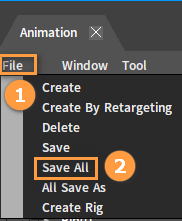
After editing, click File (Menu Bar) -> Save All to save.
Creating Characters
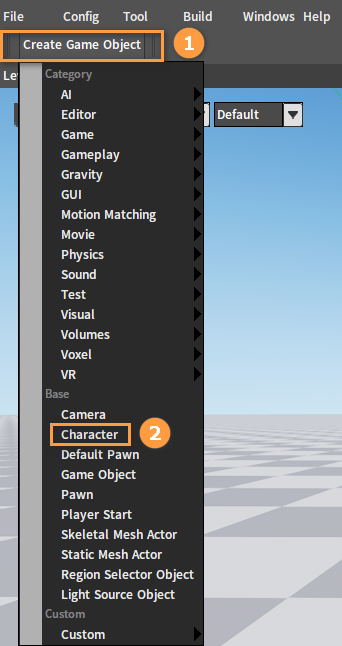
In the Component Editor, click Create Game Object (in the Tool Bar) -> Character.
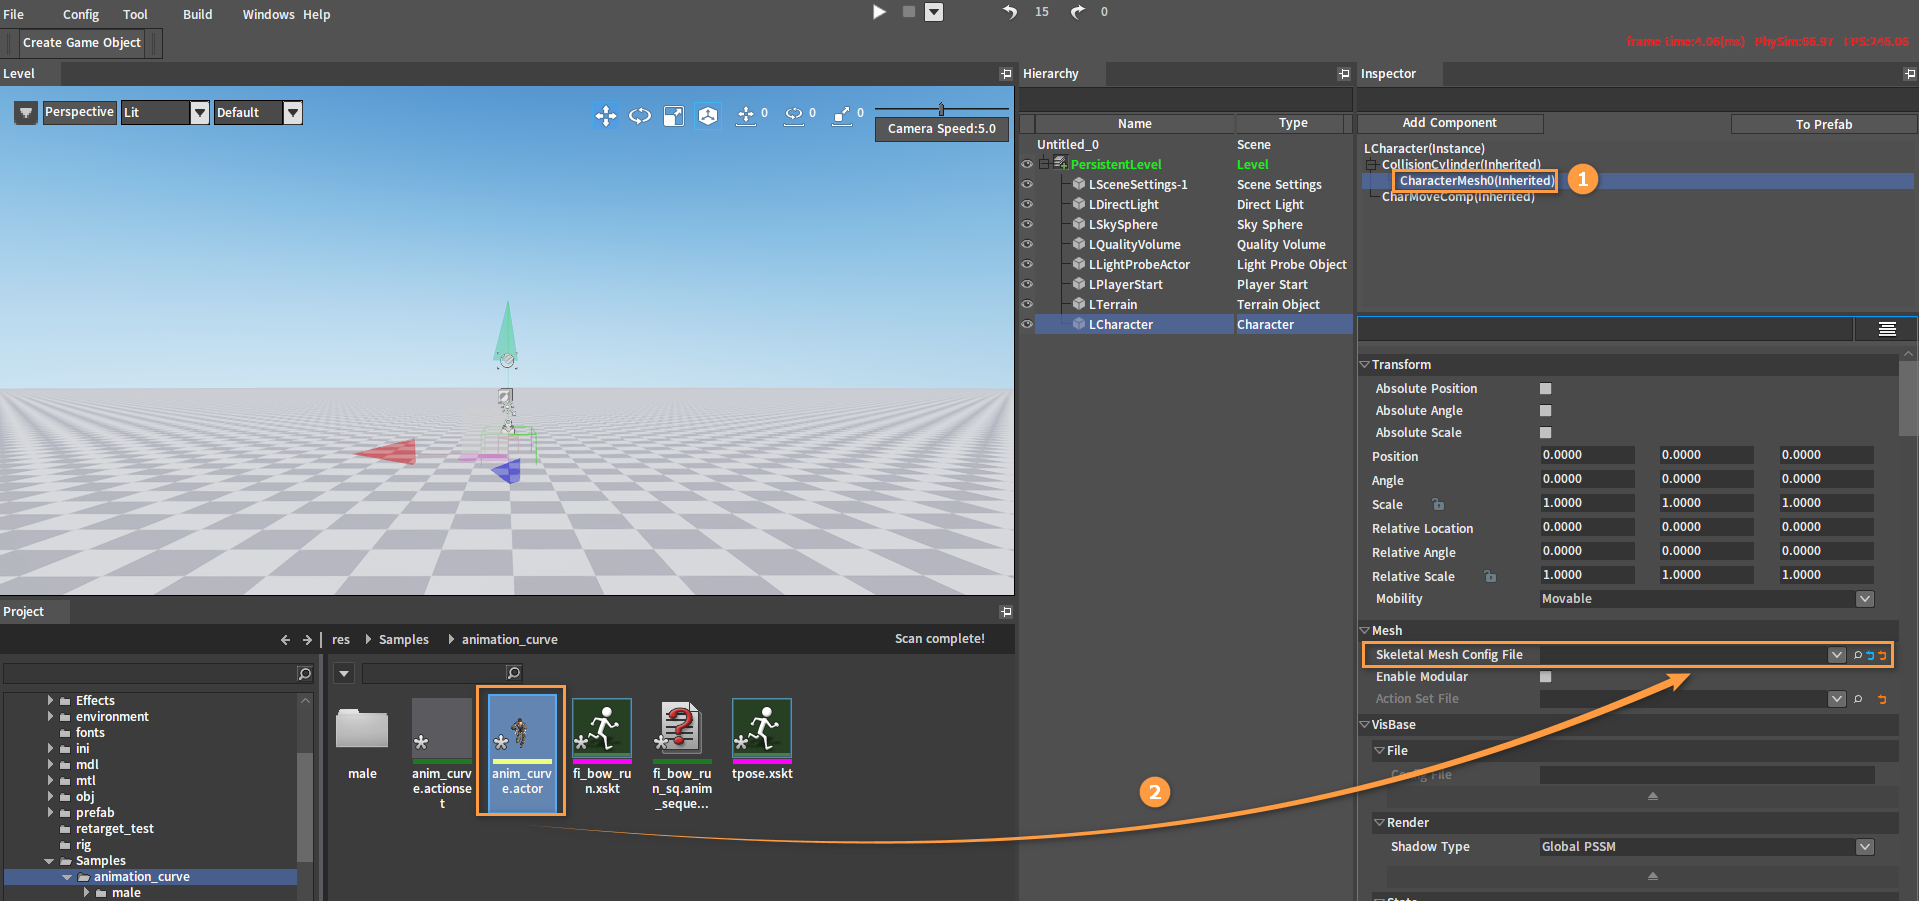
In the Inspector panel, select CharacterMesh0(Inherited) and drag the created Actor (.actor) from the Resource Preview window into the Skeletal Mesh Config File slot.
After dragging:
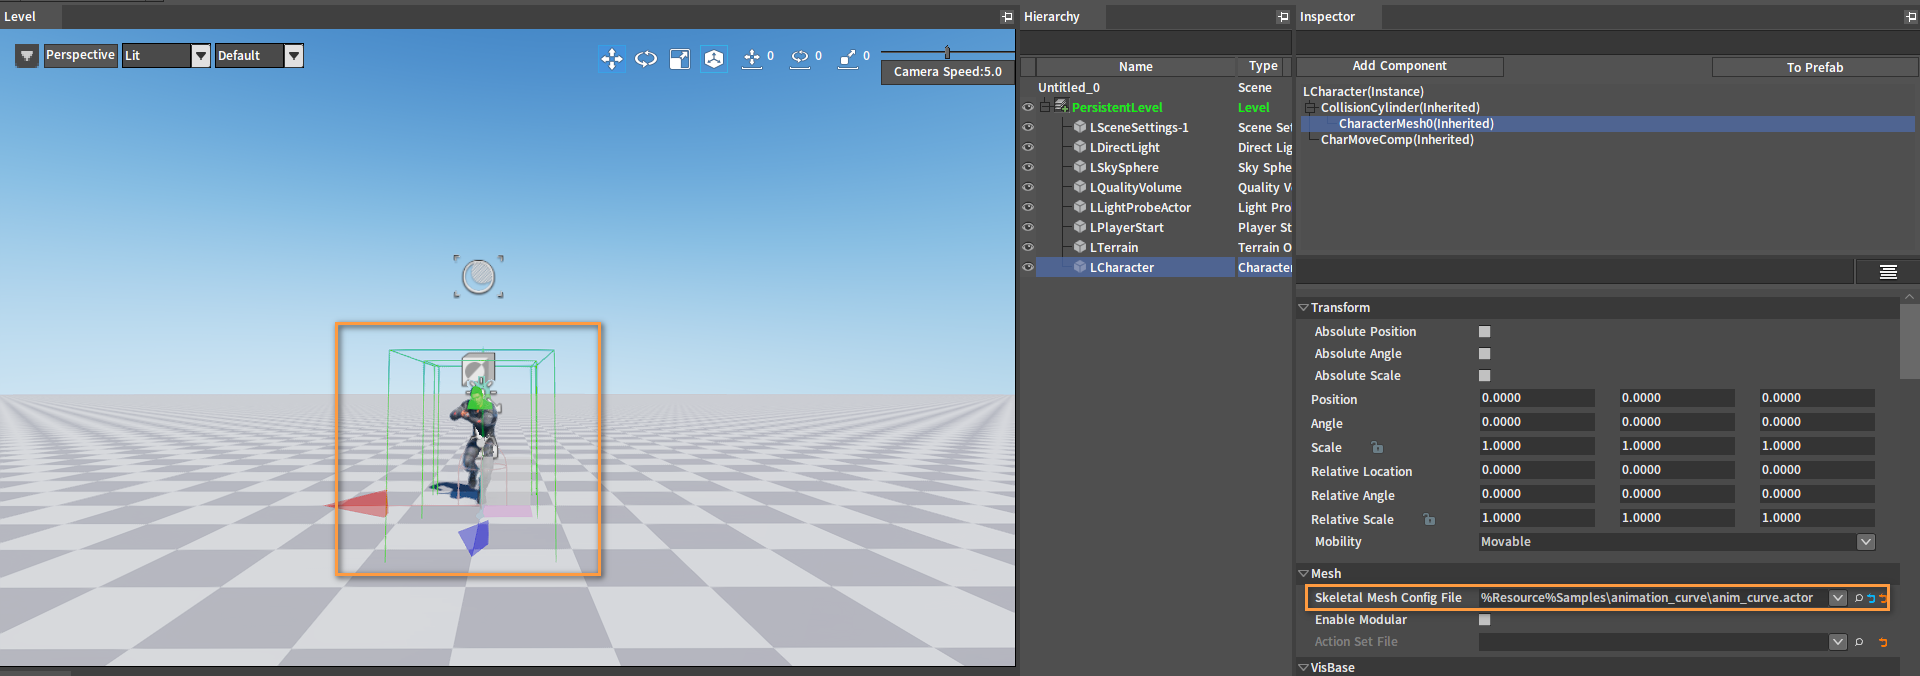
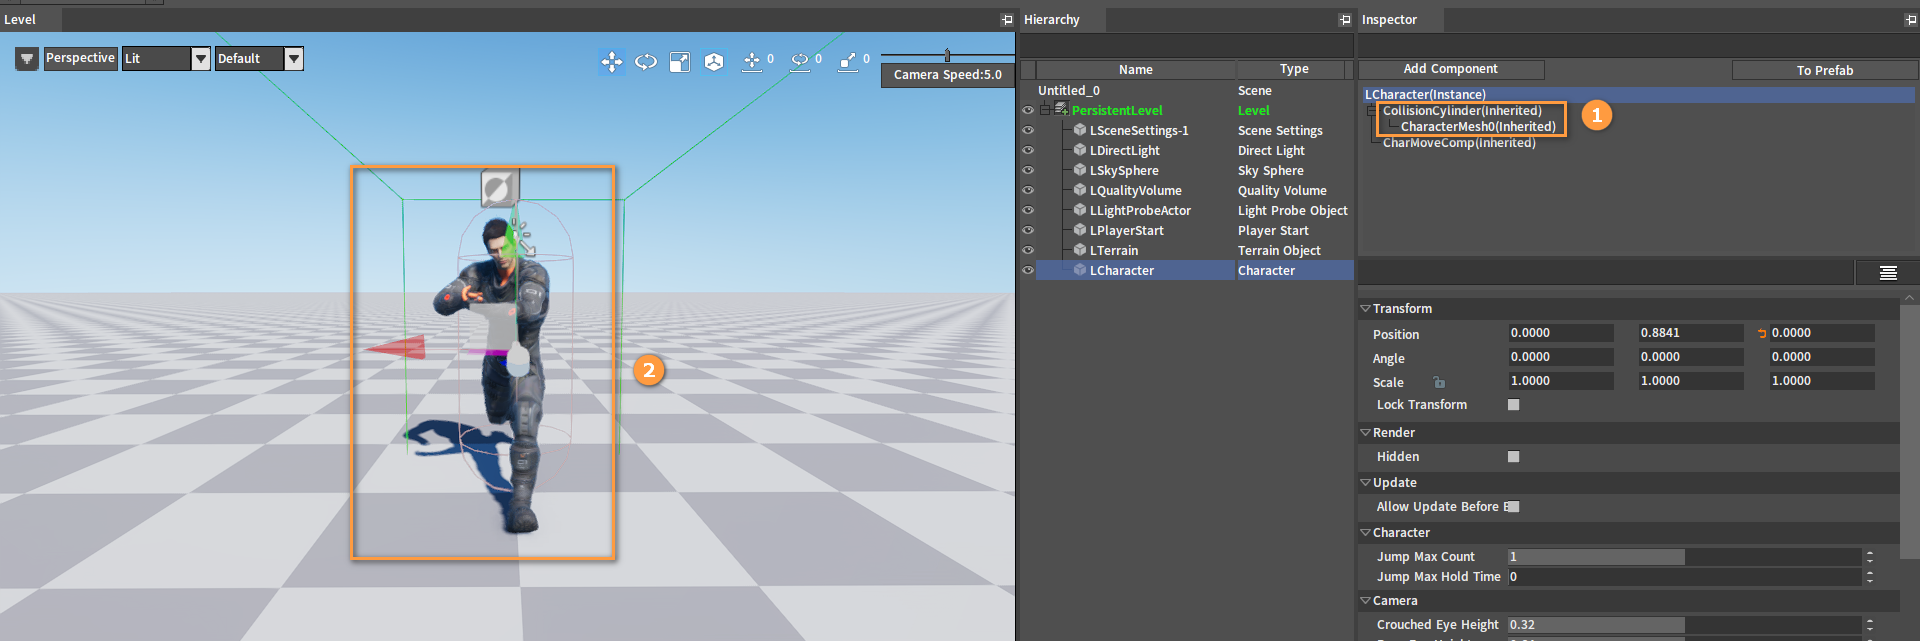
Select ColliderCylinder(Inherited) and CharacterMesh0(Inherited) in the Inspector panel, then adjust the position of the character's capsule and mesh respectively, so that the feet of the character skin are on the ground and the capsule is above the ground in the premise that the capsule wraps the character as much as possible.
Setting Characters
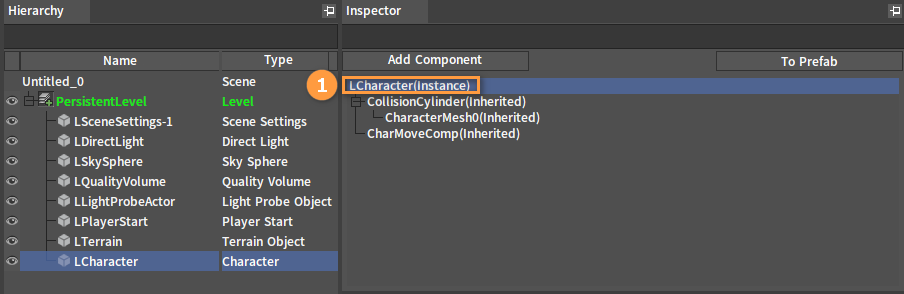
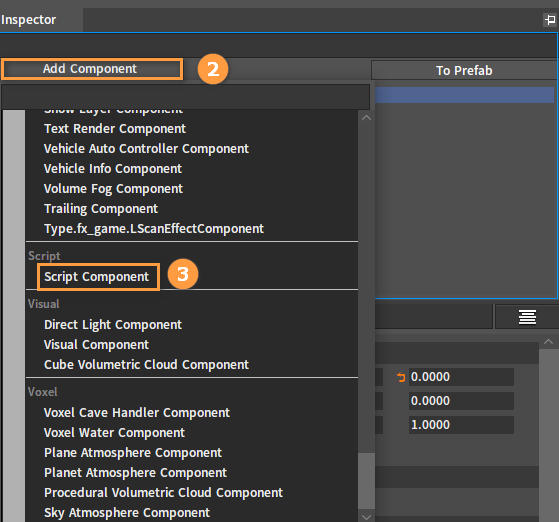
Select LCharacter(Instance) in the Inspector panel, then click the Add Component button and select Script Component to add a Script Component to the character.
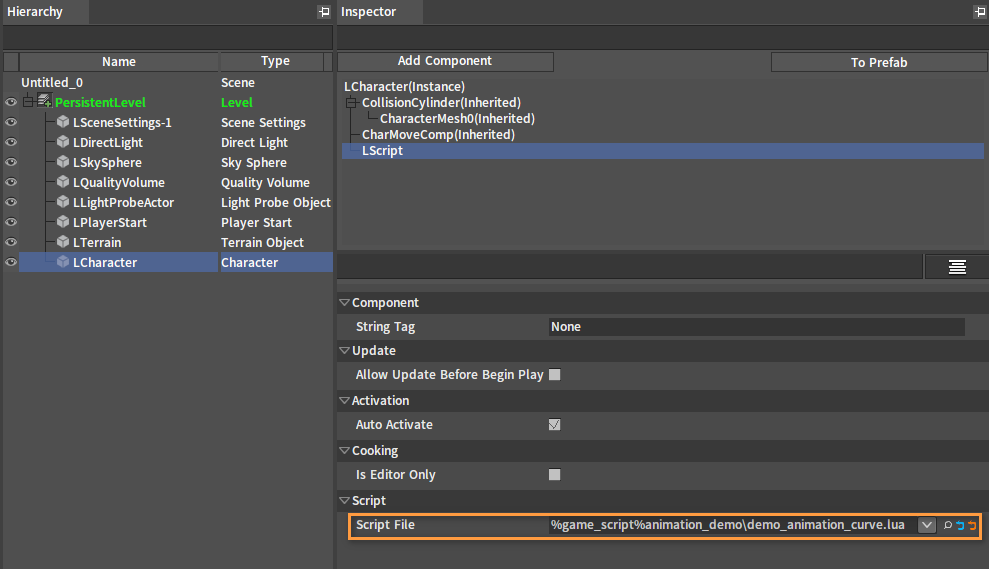
Drag the written Script file from the Resource Preview window into the Script File slot of this Script Component.
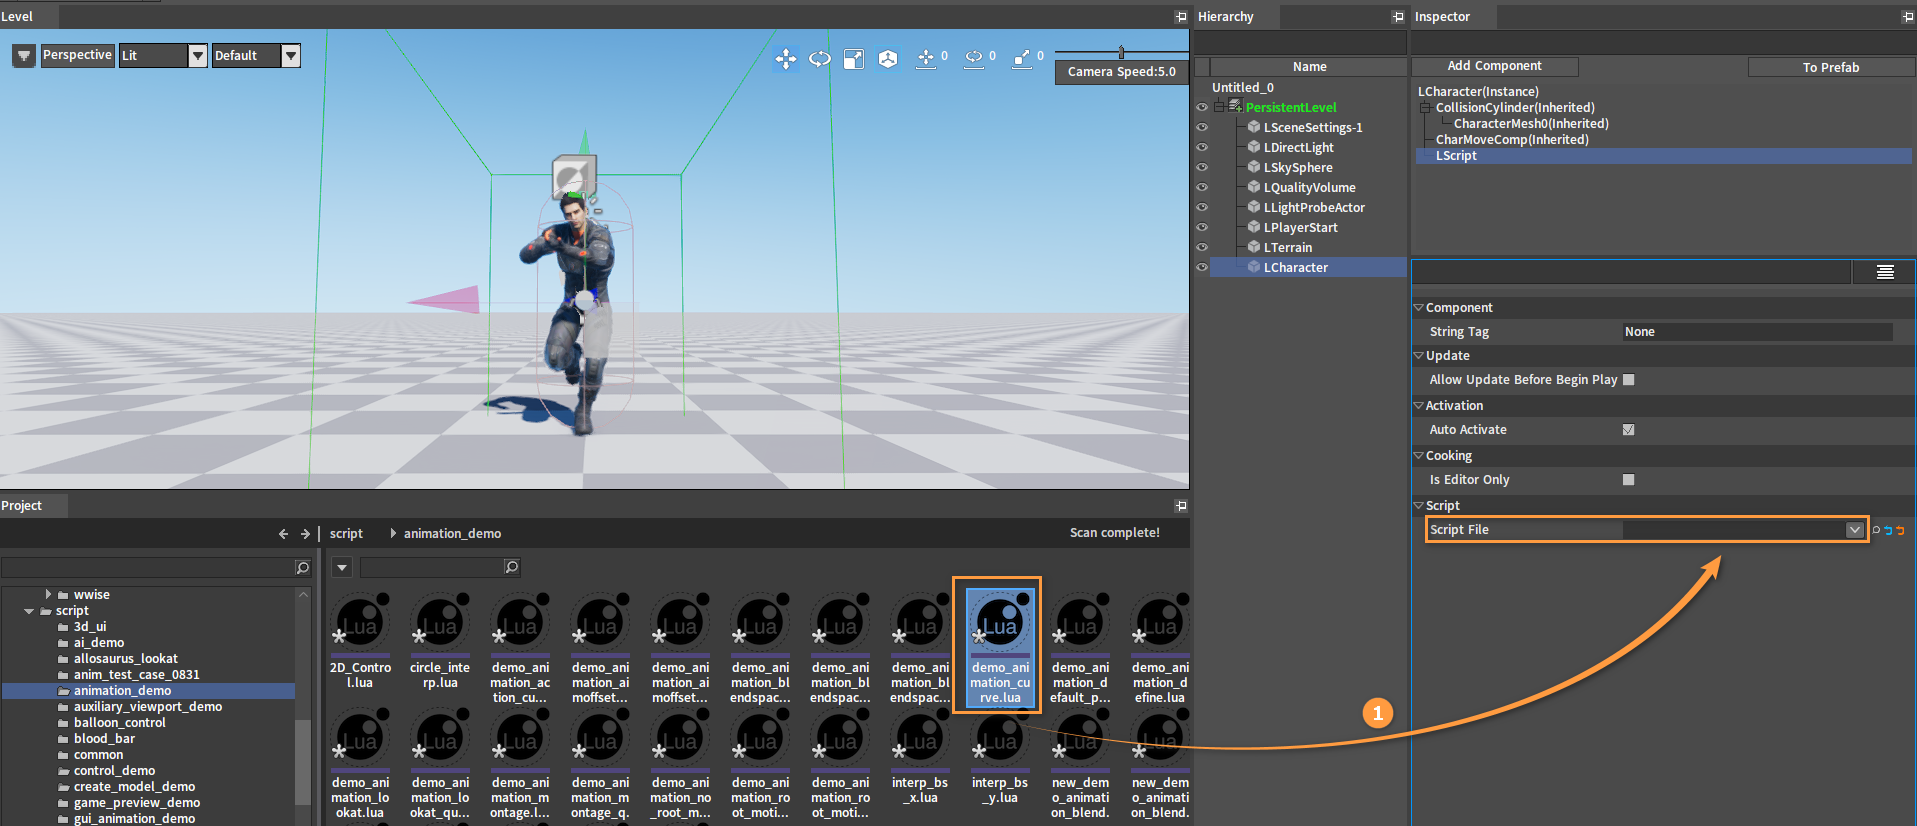
After binding:
Script
function on_begin_play(component)
    local owner = component.GameObjectOwner

    if not nx_is_valid(owner) then
        return
    end

    local mesh_com = owner.MeshComponent

    if not nx_is_valid(mesh_com) then
        return
    end

    local vis = mesh_com.VisBase

    if not nx_is_valid(mesh_com) then
        return
    end

    nx_callback(component, "on_tick", "tick")
end

function tick(component, delta_time)
    if not nx_is_valid(component) then
        return
    end

    local owner = component.GameObjectOwner

    if not nx_is_valid(owner) then
        return
    end

    local mesh_com = owner.MeshComponent

    if not nx_is_valid(mesh_com) then
        return
    end

    local vis = mesh_com.VisBase

    if not nx_is_valid(vis) then
        return
    end

    local curve_count = vis:GetCurveCountInSkeleton()

    if curve_count < 1 then
        return
    end

    local curve_name = "curve_test"
    local bone_count = vis:GetConnectedBoneCountFromSkeletonCurve(curve_name)
    if bone_count ~= 2 then
        return
    end

    vis.Speed = 0.5

    local bone_name1 = vis:GetConnectedBoneNameFromSkeletonCurve(curve_name, 0)
    local bone_name2 = vis:GetConnectedBoneNameFromSkeletonCurve(curve_name, 1)

    if not nx_find_custom(vis, "curve_index") then
        vis.curve_index = vis:GetCurveIDByNameInSkeleton(curve_name)
    end

    if vis.curve_index < 0 then
        return
    end

    local value = vis:GetCurveValue(vis.curve_index)

    if value > 1.0 then
        local v = 1.0 + (value - 1.0) * 2.0
        vis:SetBoneScale(bone_name1, 1.0, 1.0, 1.0)
        vis:SetBoneScale(bone_name2, v, v, v)
    elseif value < 1.0 then
        local v = 1.0 + (1.0 - value) * 2.0
        vis:SetBoneScale(bone_name1, v, v, v)
        vis:SetBoneScale(bone_name2, 1.0, 1.0, 1.0)
    else
        vis:SetBoneScale(bone_name1, 1.0, 1.0, 1.0)
        vis:SetBoneScale(bone_name2, 1.0, 1.0, 1.0)
    end
end
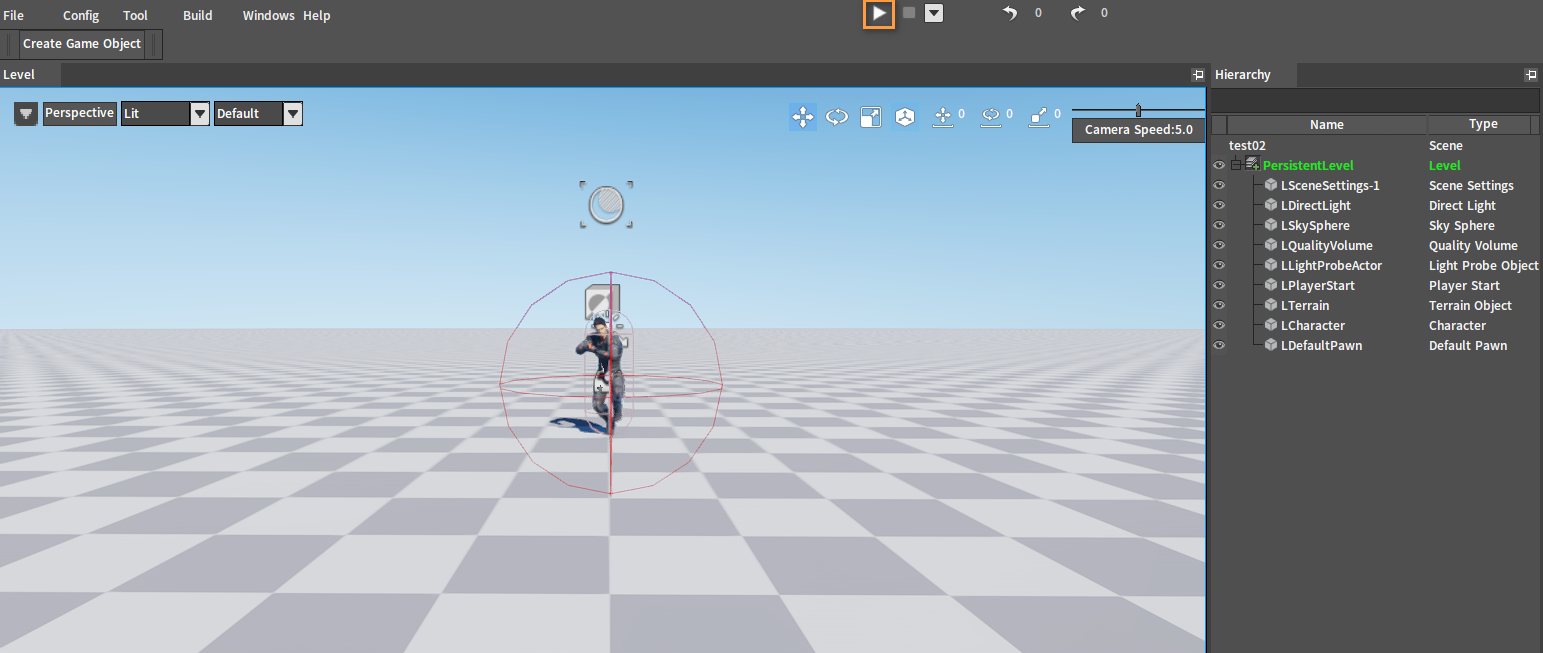
PIE
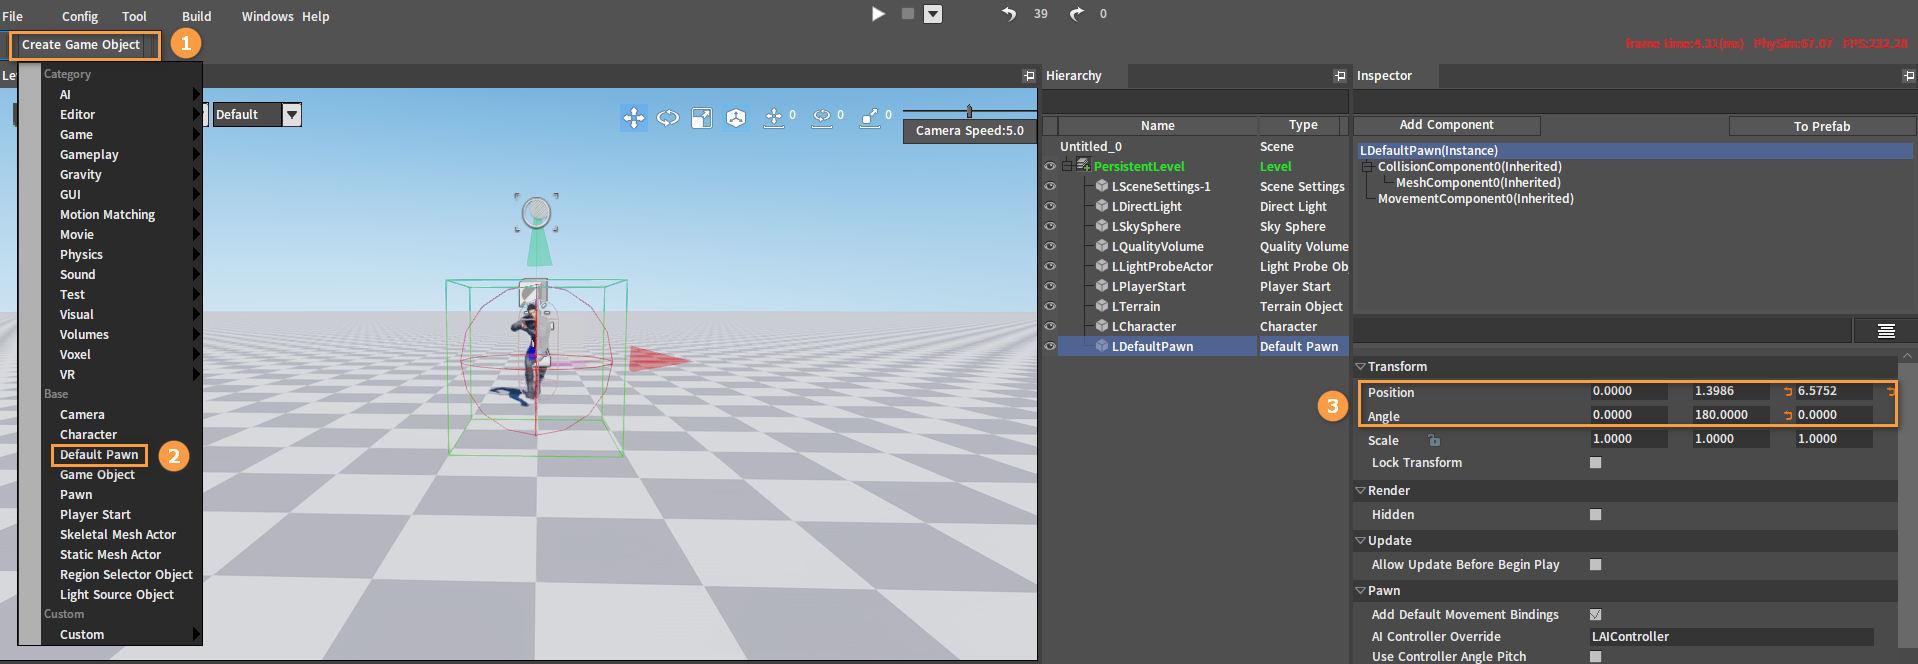
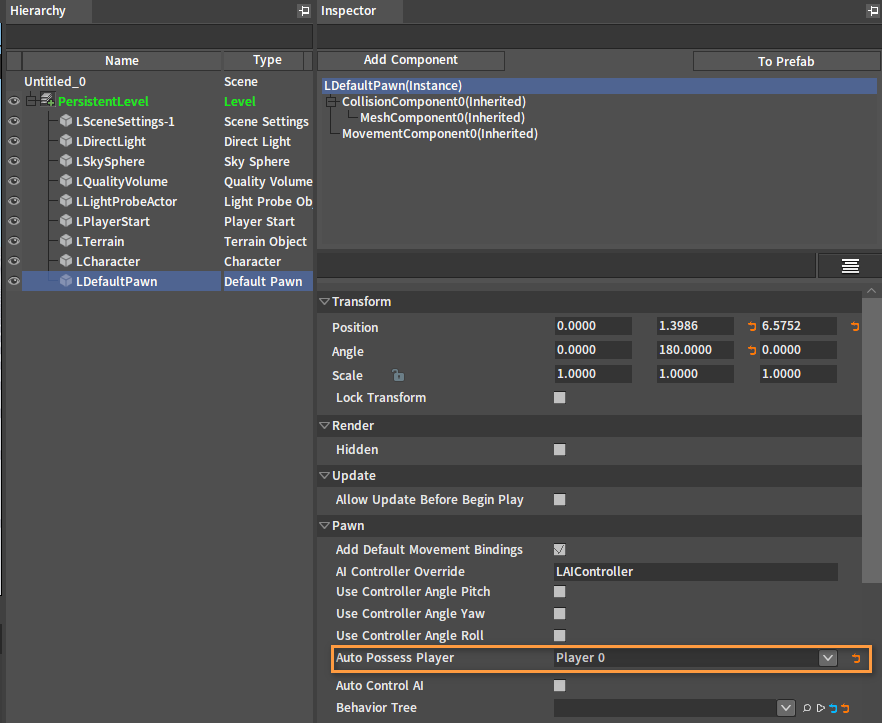
Click Create Game Object (in the Tool Bar) -> Default Pawn to create a Default Pawn, and then adjust its Angle and Position.
In the Inspector panel, set the Auto Possess Player property of the Default Pawn to Player 0.
Click the PIE button to see the effect.