Inertia Transition
Overview
Inertia Transition is an animation transition method that retains the inertia of the original animation during the transition. It makes animations more natural in some transitions from motion to stillness with its performance better than Cross Fade.
Using Cross Fade:
Using Inertia Transition:
Using Inertia Transition
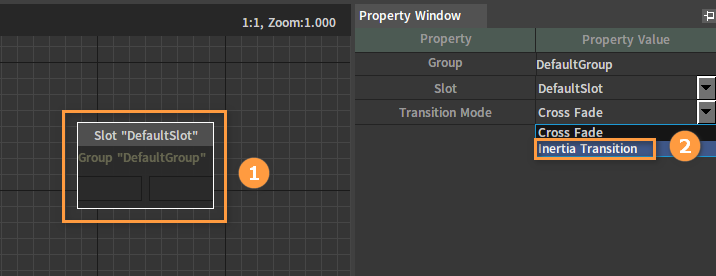
Applying in Slot Nodes
Set Transition Mode to Inertia Transition in the Property Window of the Slot node.
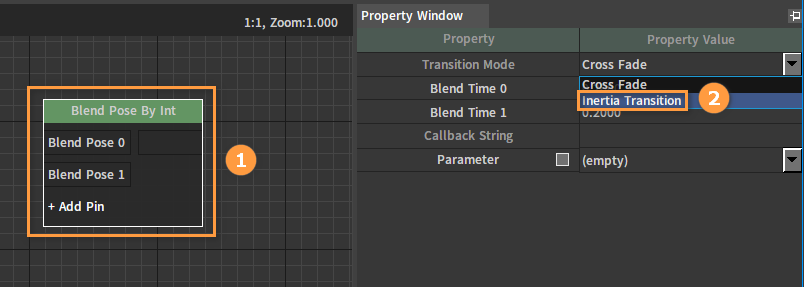
Applying in Blend Pose By Int/Boolean Nodes
Set Transition Mode to Inertia Transition in the Property Window of the Blend Pose By Int/Boolean node.
The Blend Pose By Int node:
The Blend Pose By Boolean node:

Applying in State Machines
The state transition modes of state machines. Set Transition Mode to Inertia Transition in the Property Window of the transition between two states.
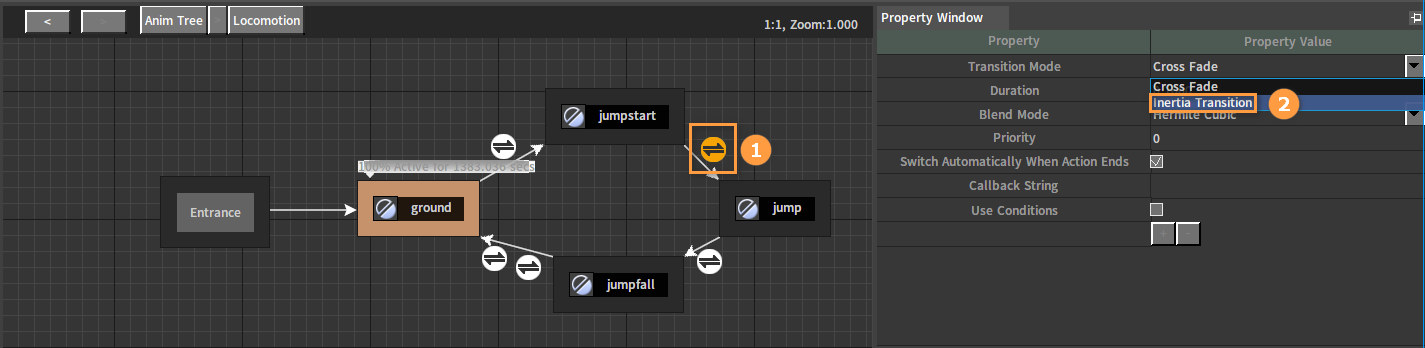
If Inertia Transition needs to be applied in the above three situations, Inertia Transition nodes must be linked behind them, as shown below:
Example
Here is a concrete example:
Creating Actors
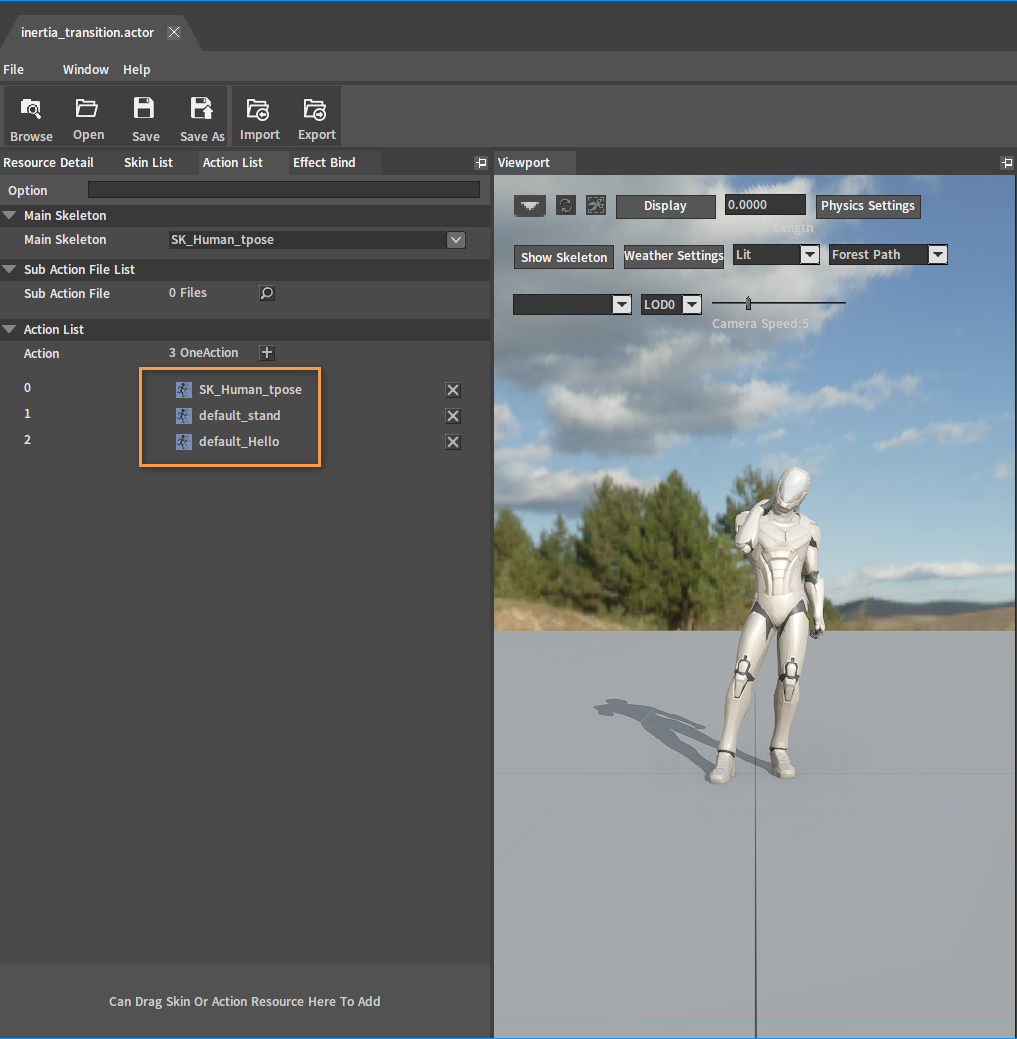
Refer to the documentation Assembling Actors to create an Actor (.actor), including SK_Human_tpose, default_stand, and default_Hello animation assets.
Editing Animation Assets
Create animation sequence assets that will be inserted into the UpperBody slot later in the Animation Editor.
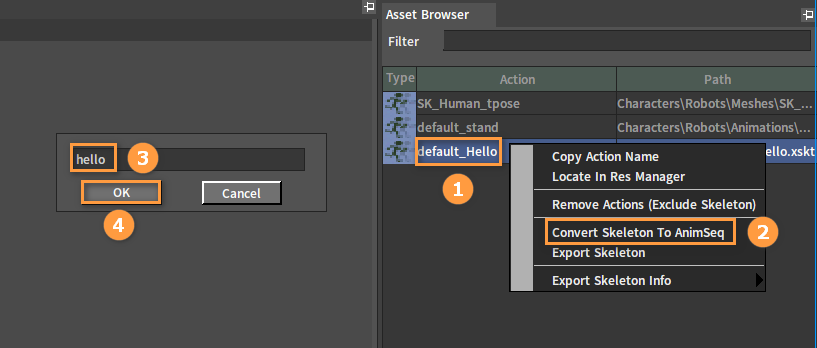
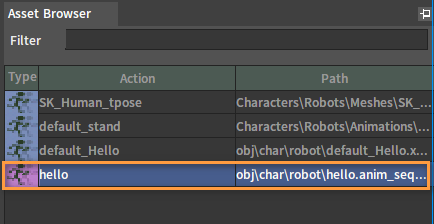
Find the required skeleton asset default_Hello in the Asset Browser. Right-click it to open a Shortcut Menu and select Convert Skeleton To AnimSeq. Modify the name of the animation sequence in the pop-up window, and click the OK button to complete the conversion.
After conversion:
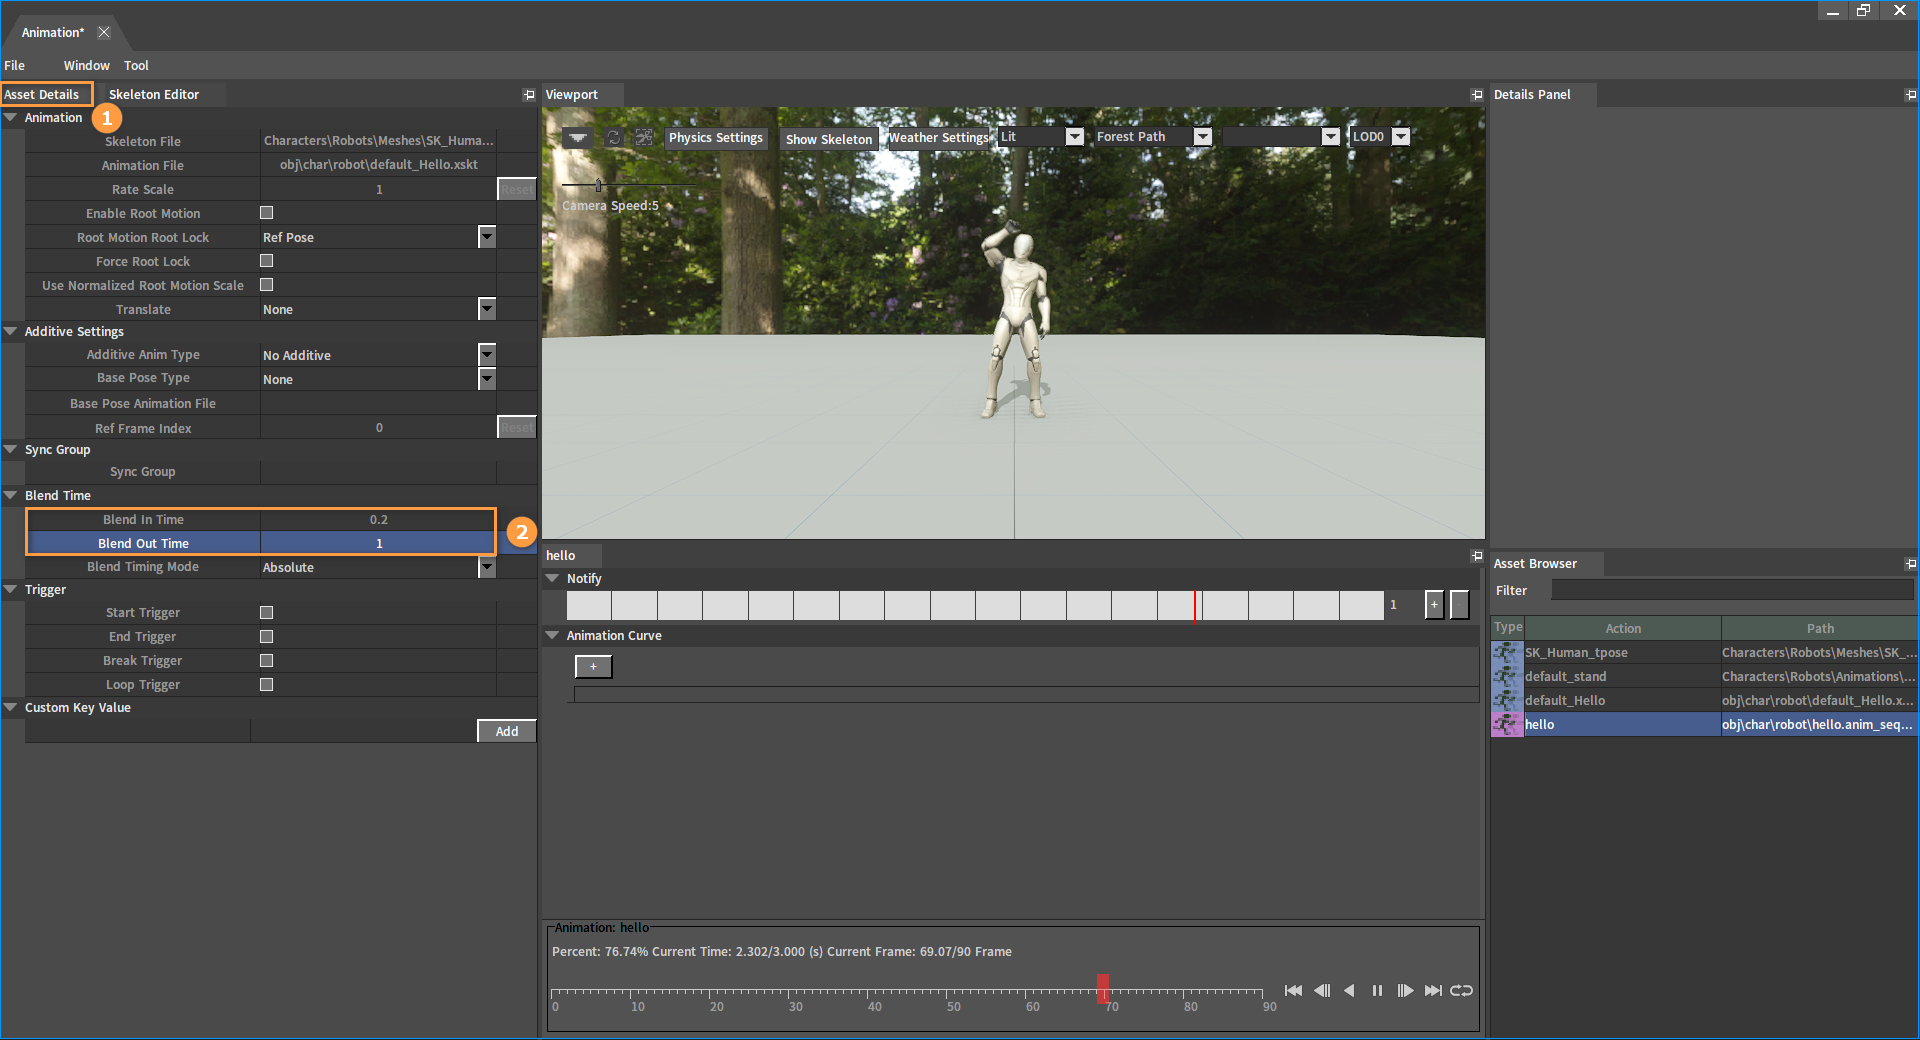
Set the animation's Blend In Time and Blend Out Time in the Asset Details panel of the hello animation sequence.
Right-click the Notify track to open the Shortcut Menu, and click Add Notify -> New Notify. Enter a name in the pop-up New Notify window, and click the OK button to complete.
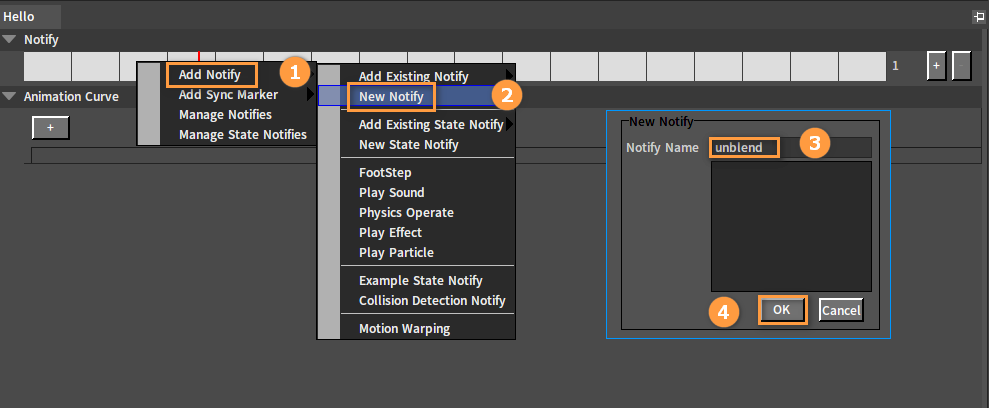
After creation, you can adjust the fade-out timing of the animation by adjusting the position of the Notify.

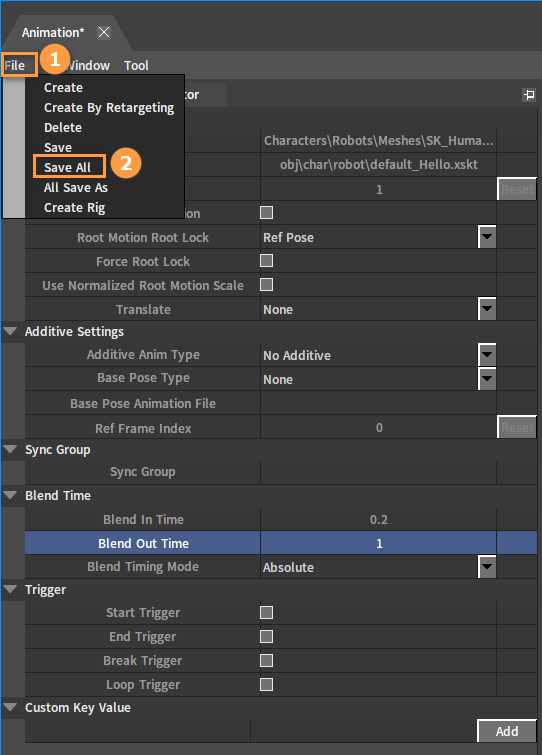
Click File (Menu Bar) -> Save All to save after editing in the Animation Editor.
Configuring Anim Trees
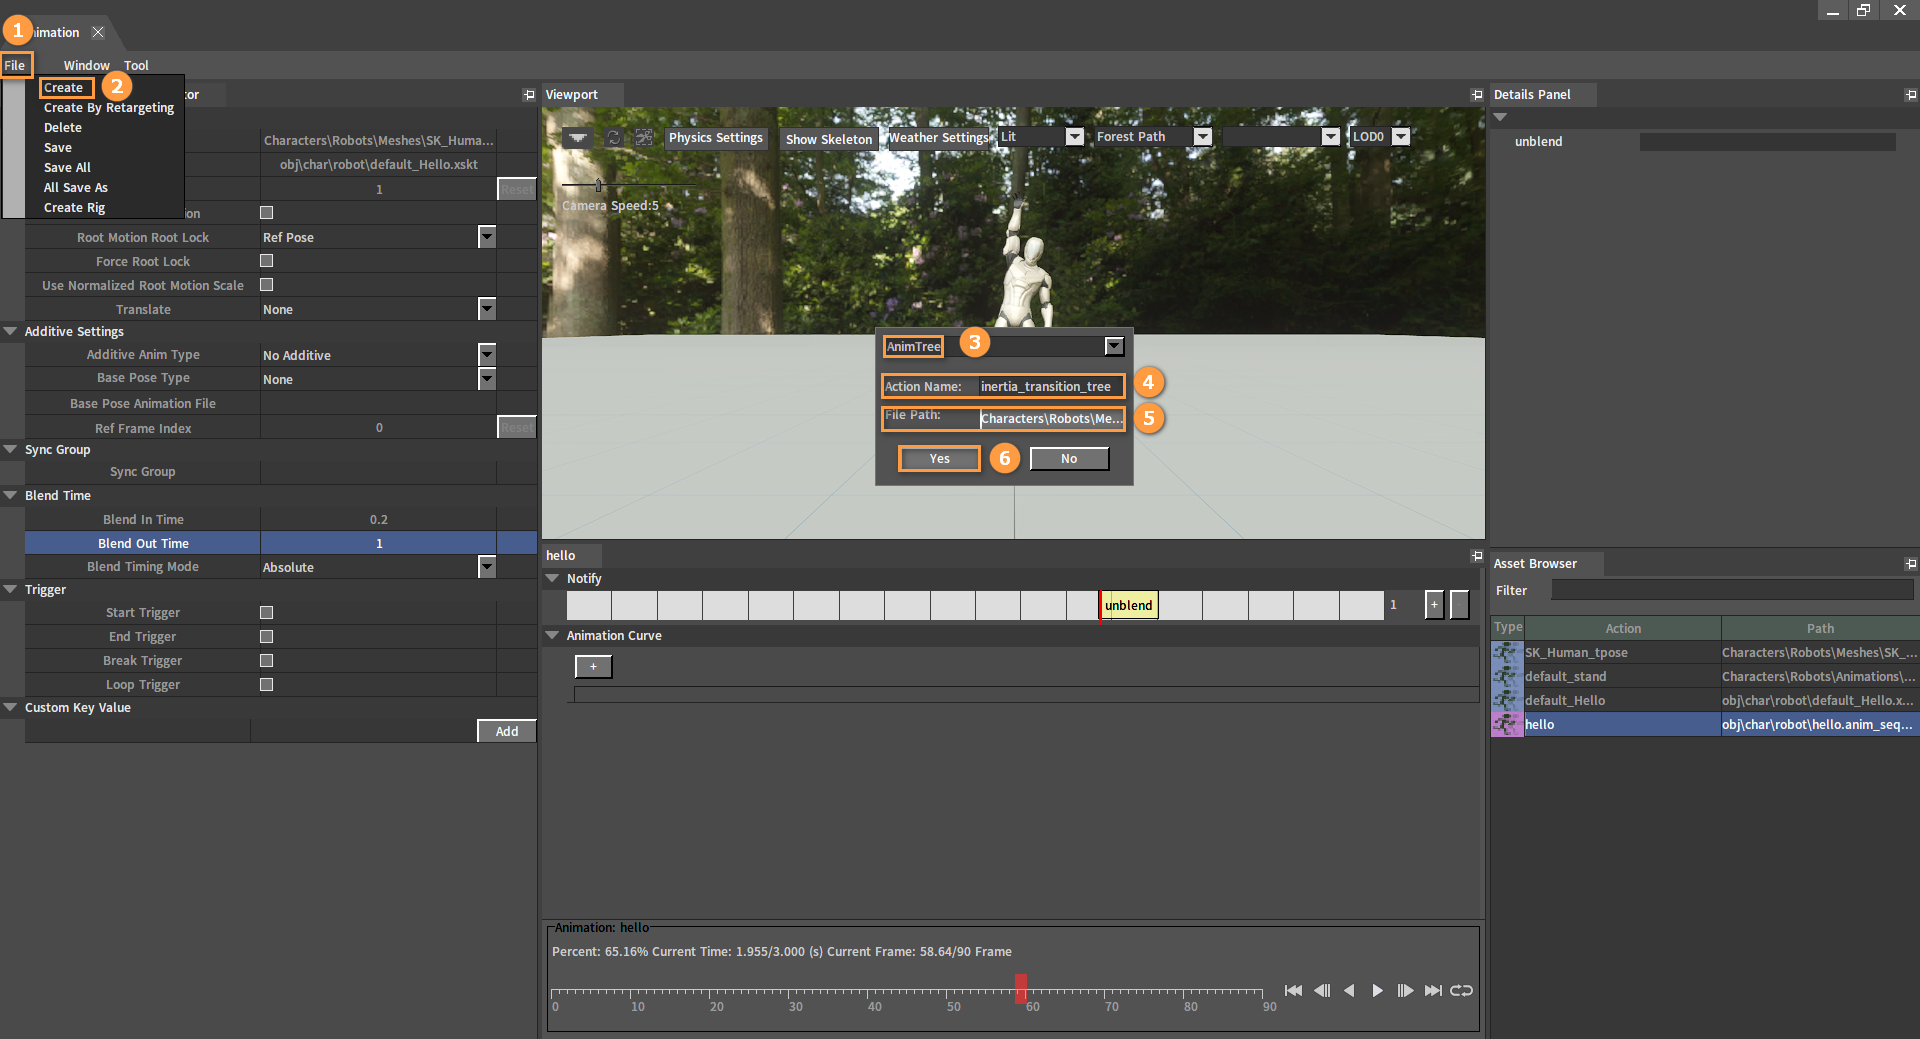
Click File (Menu Bar) -> Create in the Animation Editor to open a window. Select AnimTree, enter a name in Action Name, and select the save path of the Anim Tree in File Path. Click Yes to complete and enter the Anim Tree Editor.
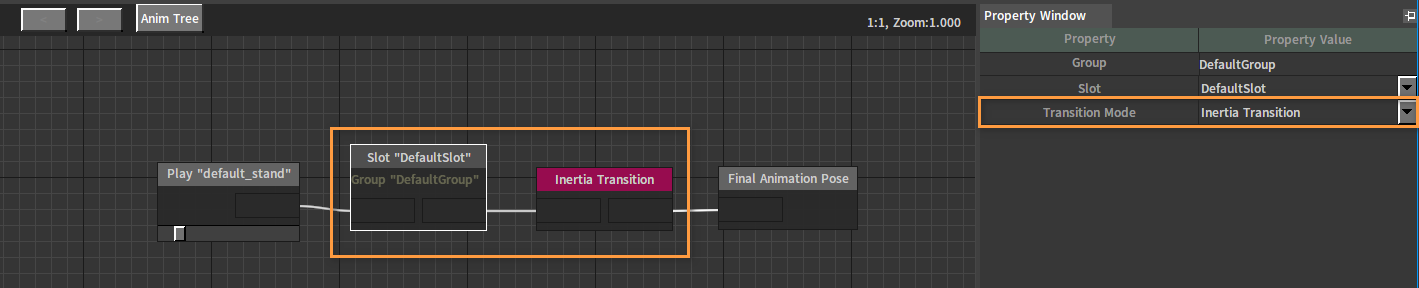
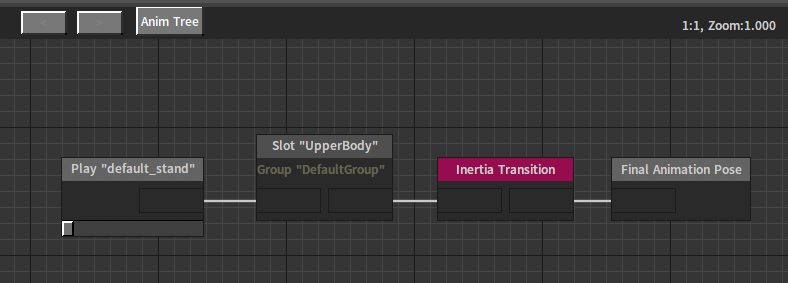
Add the default_stand Sequence Playback node, Slot node, and Inertia Transition node respectively in the Anim Tree, and link them together as follows.
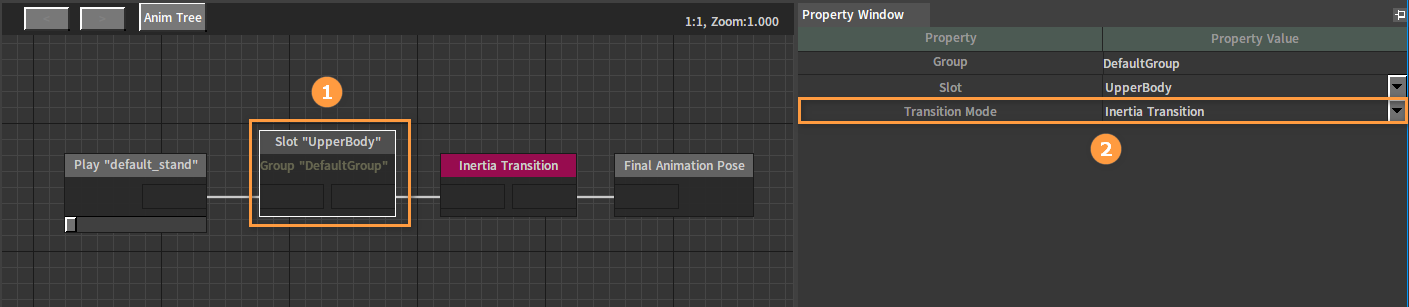
Click the Slot node, and set Transition Mode to Inertia Transition in its Property Window.
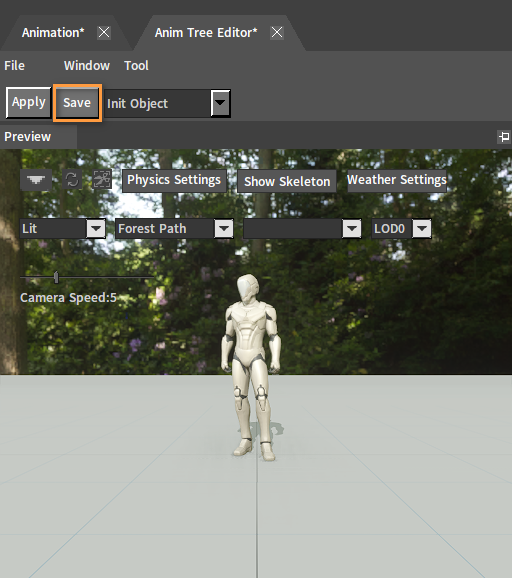
Click the Save button to save the Anim Tree.
Input Settings
Click Config (Menu Bar) -> Project Settings in the Component Editor to open the Project Settings window. Select the Input Settings tab, and click the ![]() button in the Combination Mapping List column to add a new Combination Mapping.
button in the Combination Mapping List column to add a new Combination Mapping.
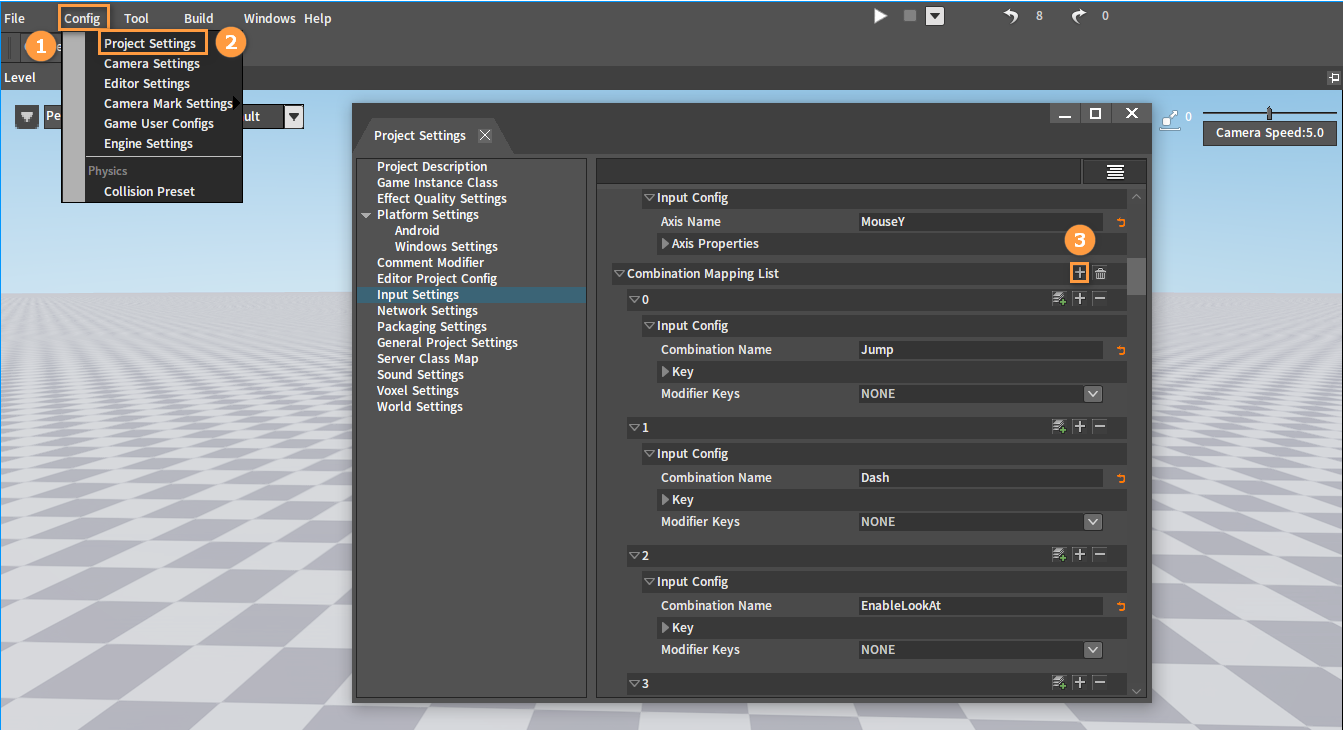
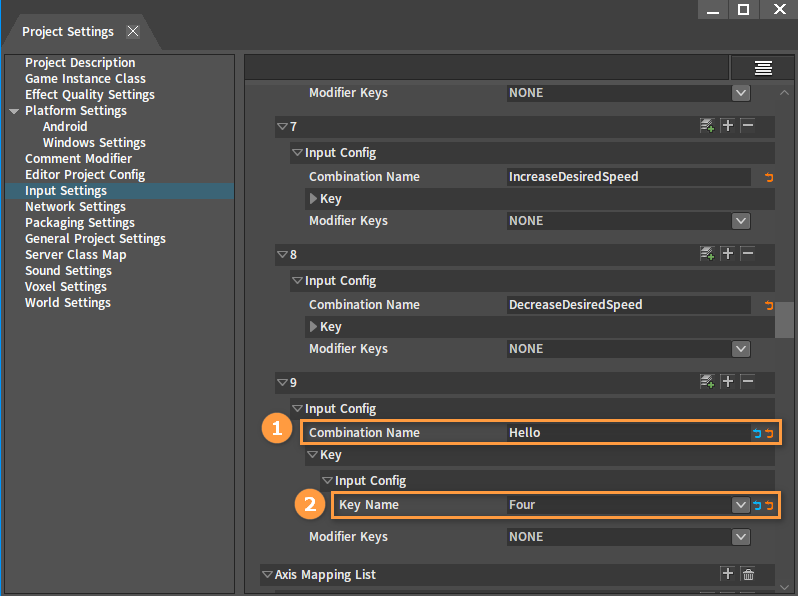
Enter Combination Name as Hello in the new Combination Mapping. Expand the Key, and specify a trigger button for the animation in Key Name, such as Four.
Configuring Actors
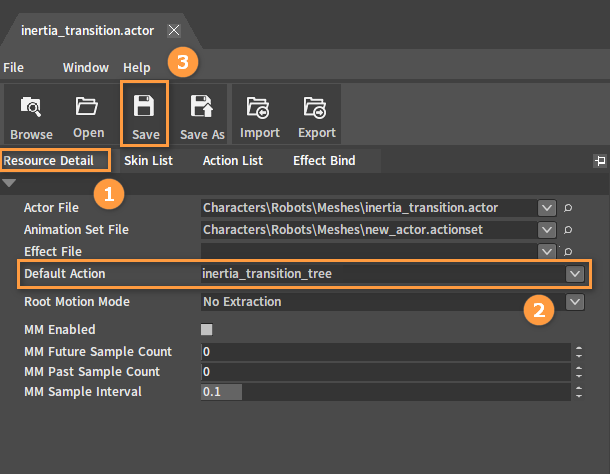
Click Resource Detail in the Actor Editor. Then set the Default Action to the created Anim Tree, and click the Save button after completing.
Creating Characters
Click Create Game Object (Toolbar) -> Character in the Component Editor.

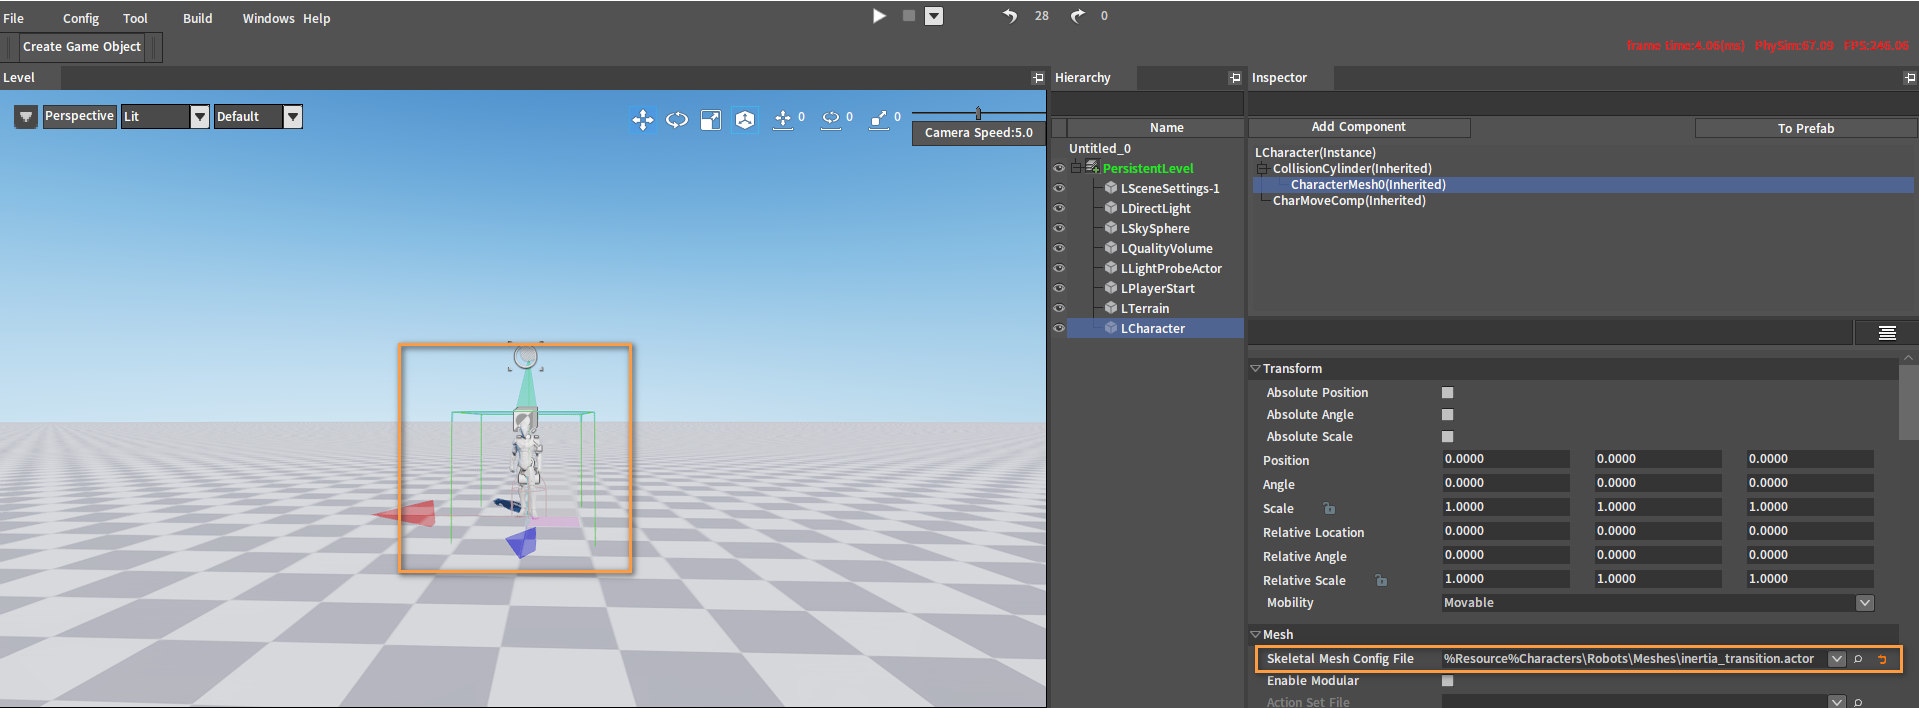
Select the created character in the Hierarchy panel, and select CharacterMesh0(Inherited) in the Inspector panel. Drag the created Actor into the Skeletal Mesh Config File slot.
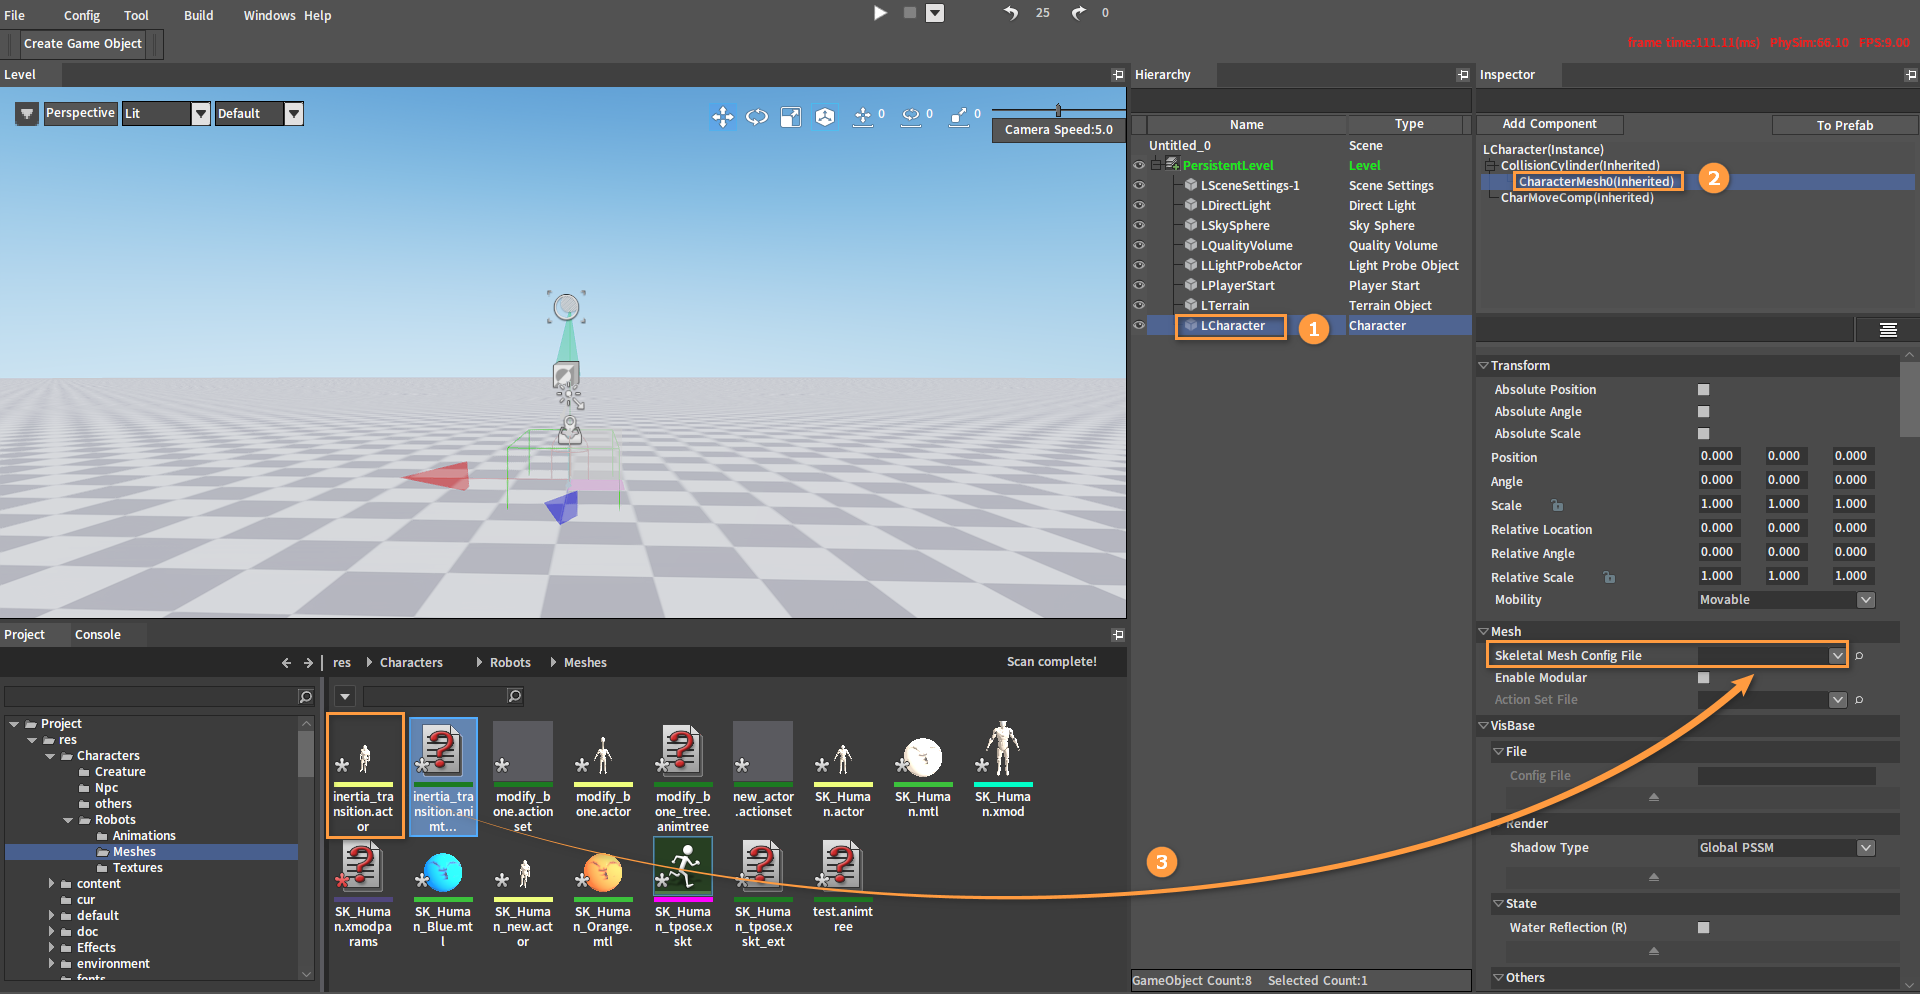
After dragging:
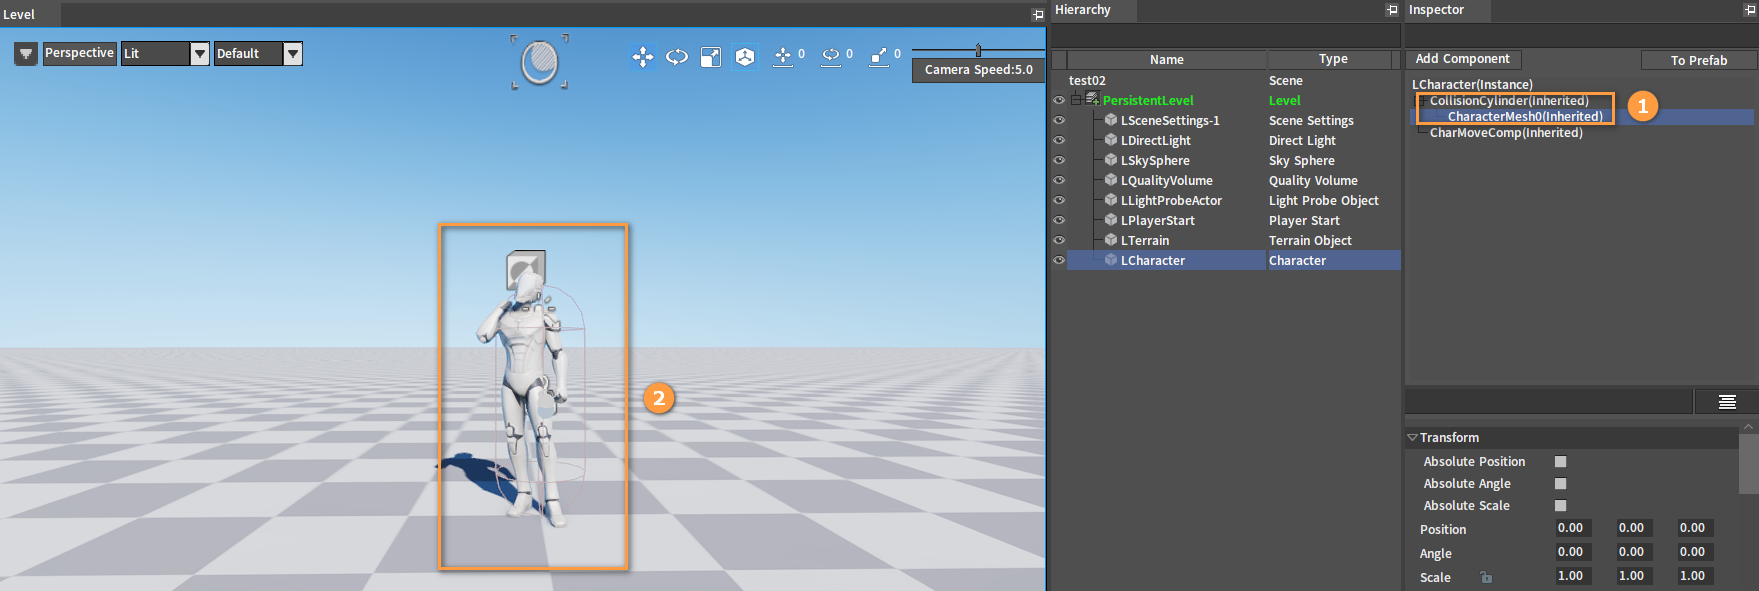
Select CollisionCylinder(Inherited) and CharacterMesh0(Inherited) in the Inspector panel to adjust the positions of the character's capsule and mesh respectively, so that the feet of the character's skin are close to the ground in the premise that the capsule wraps the character as much as possible with the capsule above the ground.
Binding Scripts
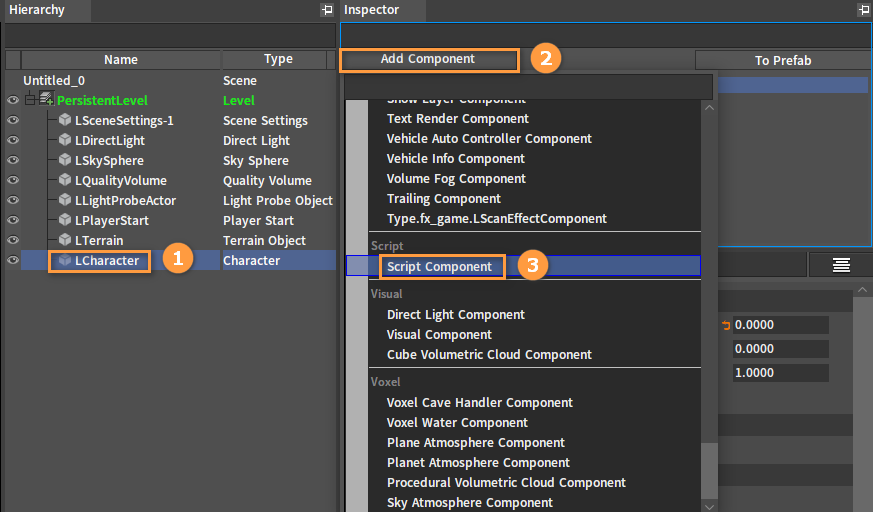
Select the character, then click the Add Component button in the Inspector panel, and select Script Component to bind a script for it.
Scripts
Bind input in script initialization.
input_comp:AddCombinationBinding("Hello", IE_Pressed, true, false, true, "Hello_Pressed")
nx_callback(owner, "Hello_Pressed", "on_hello_pressed")
Define callback functions. Insert the waving animation into the UpperBody slot in the Anim Tree through the BlendAction interface:
function on_hello_pressed(owner)
    local actor = character_get_actor(owner)
    if not nx_is_valid(actor) then
        return
    end

    actor:BlendAction("hello", false, false, true, 1.0, true, "UpperBody", true)
end
Animation Notify callback processing functions. When unblend Notify is triggered, call role:UnblendAction("hello") to fade out the animation.
function on_action_event(callee, role, action_name, event_name, frame, info)
    if event_name == "unblend" then
        role:UnblendAction("hello")
    end
end