Blend Spaces
Overview
A Blend Space is a composite asset based on Skeleton and/or Animation Sequence, which can accept multiple input controls (currently two at most) to control the blend of multiple animation sample points.
The Blend Space supports standalone playback, playback nodes for Anim Tree, and Anim Tree Slot nodes input.

Blend Spaces Creation and Types
Different types of Blend Space provide numerous features in the Asset Editor.
Different Blend Space types can be created in the following steps:
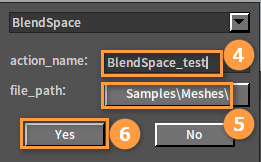
Click File -> Create to open the Asset Creation window. Then you can create a Blend Space asset in it.

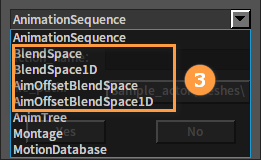
Blend Spaces
The Blend Space (Blend Space 2D) allows sampling and blending in a 2D action pose sample space based on specified sample points, for example, it can be used for a character's movement in eight directions, etc.
Blend Space 1D
Blend Space 1D allows sampling and blending in a 1D action pose sample space based on specified sample points.
Blend Space 1D is a one-dimensional variant of Blend Space. It is created, edited and used in the same way as Blend Spaces.

Aim Offset Blend Spaces
An Aim Offset Blend Space is a special Blend Space asset for processing demands including weapon or character look-at aiming. It only blends mesh space additive type poses and adds the result to the inputted base pose.
Aim Offset Blend Space 1D is a one-dimensional variant of Aim Offset Blend Space. It is created, edited and used in the same way as Aim Offset Blend Space.
See Aim Offsets for more details on this section.
Asset Details
Blend Spaces can be set by modifying the related properties in the Asset Details panel.
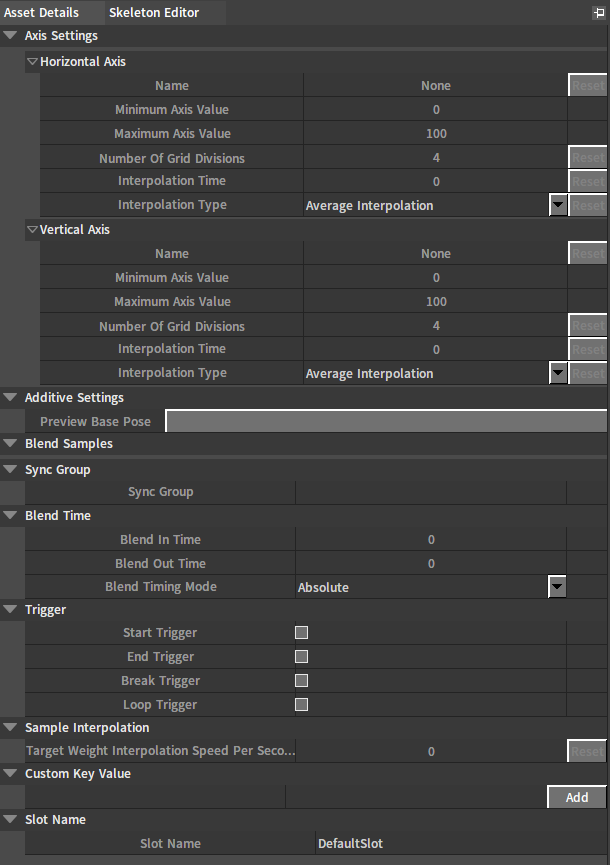
| Option | Property | Description |
|---|---|---|
| Horizontal Axis | Name | Horizontal axis name. |
| Minimum Axis Value | Minimum horizontal axis value. | |
| Maximum Axis Value | Maximum horizontal axis value. | |
| Number of Grid Divisions | Number of horizontal axis grid divisions. | |
| Interpolation Time | Horizontal axis interpolation time. | |
| Interpolation Type | Horizontal axis interpolation type.
| |
| Vertical Axis | Name | Vertical axis name. |
| Minimum Axis Value | Minimum vertical axis value. | |
| Maximum Axis Value | Maximum vertical axis value. | |
| Number of Grid Divisions | Number of vertical axis grid divisions. | |
| Interpolation Time | Vertical axis interpolation time. | |
| Interpolation Type | Vertical axis interpolation type.
| |
| Additive Settings | Preview Base Pose | Preview base pose. |
| Blend Samples | Blend Samples | Sample Animation List: List members are dynamically adjusted with the addition or deletion of samples. Each member provides horizontal axis coordinates, vertical axis coordinates, associated animation and play rate. |
| Sync Group | Sync Group | Sync group. |
| Blend Time | Blend In Time | Blend in time. |
| Blend Out Time | Blend out time. | |
| Blend Timing Mode | ||
| Trigger | Start Trigger | Start playing trigger event. |
| End Trigger | End playing trigger event. | |
| Break Trigger | Break playing trigger event. | |
| Loop Trigger | Loop playing trigger event. | |
| Sample Interpolation | Target Weight Interpolation Speed Per Second | Speed of interpolating to target. |
| Custom Key Value | Custom Key Value | Custom key value. |
| Slot Name | Slot Name | Slot name. |
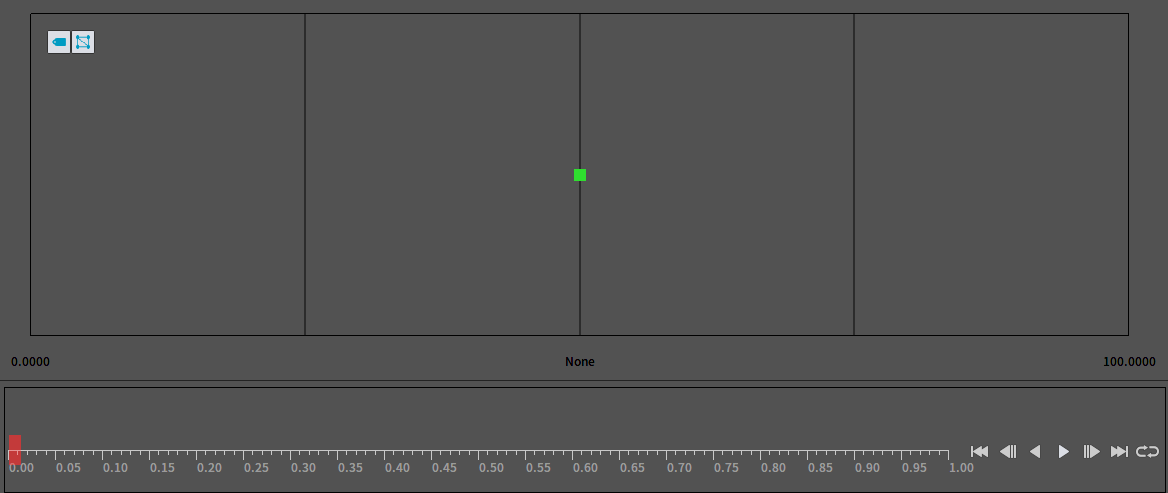
Sample Grid Editing Area
A two-dimensional grid is generated in the Blend Space sample grid editing area, whose number of grid divisions is determined by the Number Of Grid Divisions under Axis Settings in the Asset Details panel. A sample point can be set on any grid line intersection point.

Sample points can be added by dragging Skeleton or Animation Sequence assets from the Action List to specific intersections.
Click the ![]() icon to enable or disable the animation name associated with the sample point.
icon to enable or disable the animation name associated with the sample point.

Click the ![]() icon to enable or disable the display of the triangles in the grid section.
icon to enable or disable the display of the triangles in the grid section.
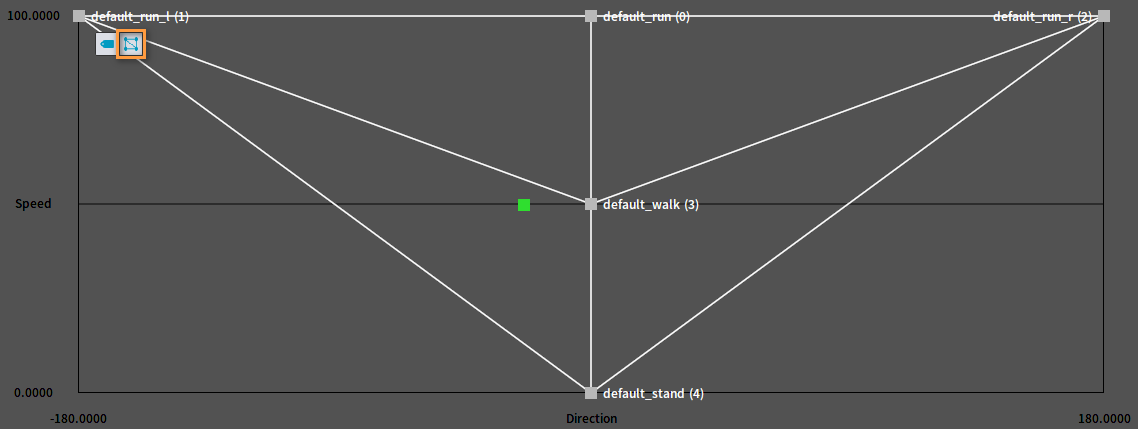
Drag the sample point to adjust its position.

Right-click on a sample point to open the Sample Point Edit window where you can adjust its settings. (Note: The settings here are the same as those in Blend Samples of the Asset Details panel.)
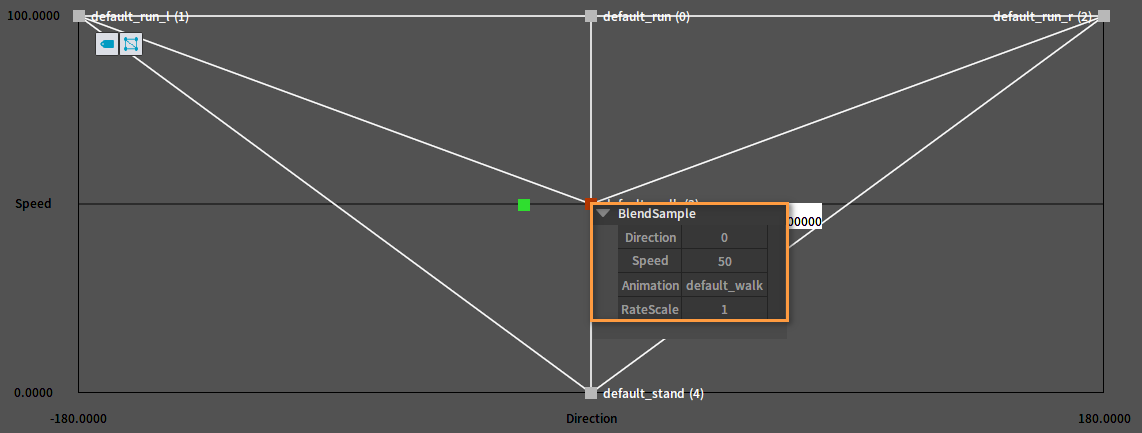
Select a sample point first and press Delete key to delete it.
After deleting the centered sample point:
Simulate the change of the input control by dragging the green square in the panel, observing whether the blend result is as expected in the Viewport. In addition, a prompt window containing current blend state information will pop up in the panel during the dragging. It will display the current input control. Press and hold the Ctrl key while dragging to view the blend weight details of each node, which will help us better analyze the causes of blend results.
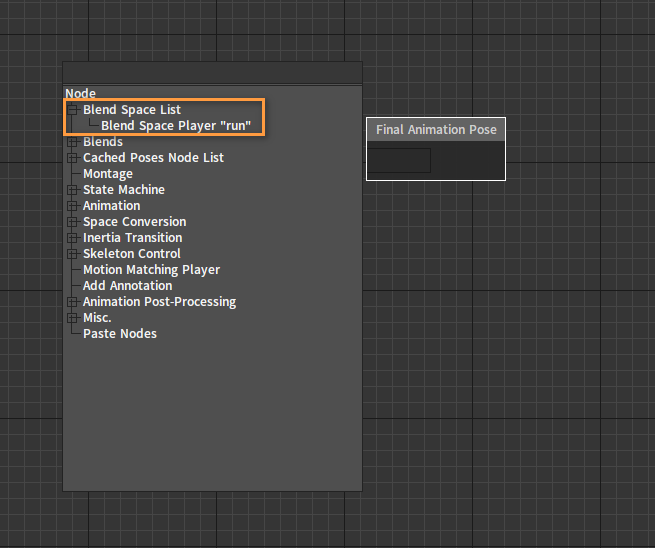
Using Nodes
After creating a Blend Space, it can be used as a player in the Animation Tree, and you can enter a slot node of the Animation Tree. See Blend Space Nodes in Animation Trees for more details.