Assembling Actors
Overview
This documentation will introduce how to create Actors, add skins and actions, and save Actors.
Importing Resources
For details, please check Importing Skeletal Meshes and Importing Animations of Model Resources in the Resources Workflow.
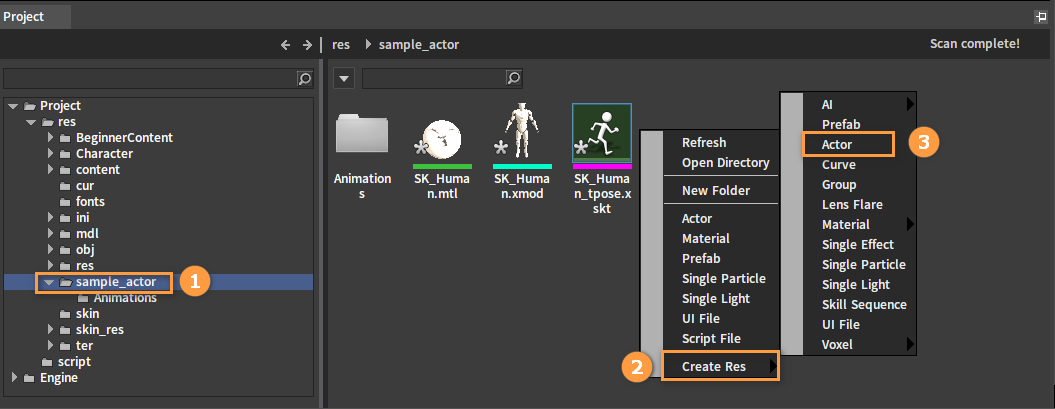
Creating Actors
Select the folder where the resource is imported, then right-click on the blank space in the Resource Preview window, and click Create Res -> Actor to create a new Actor.
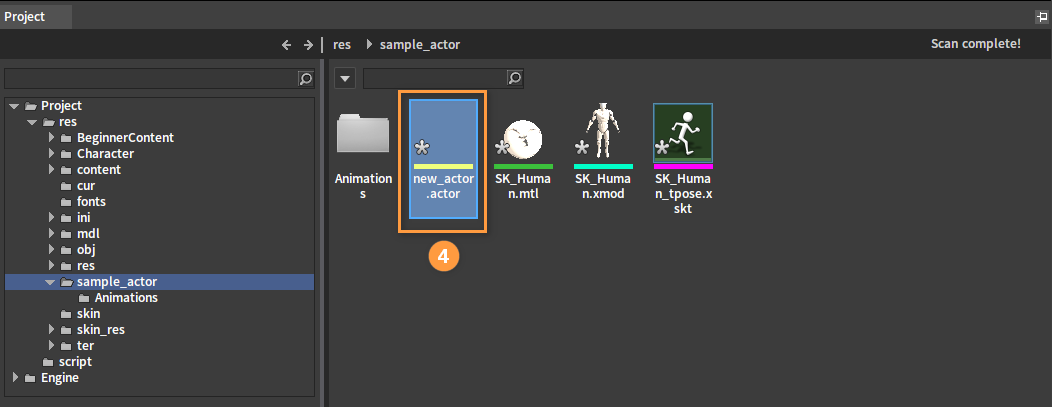
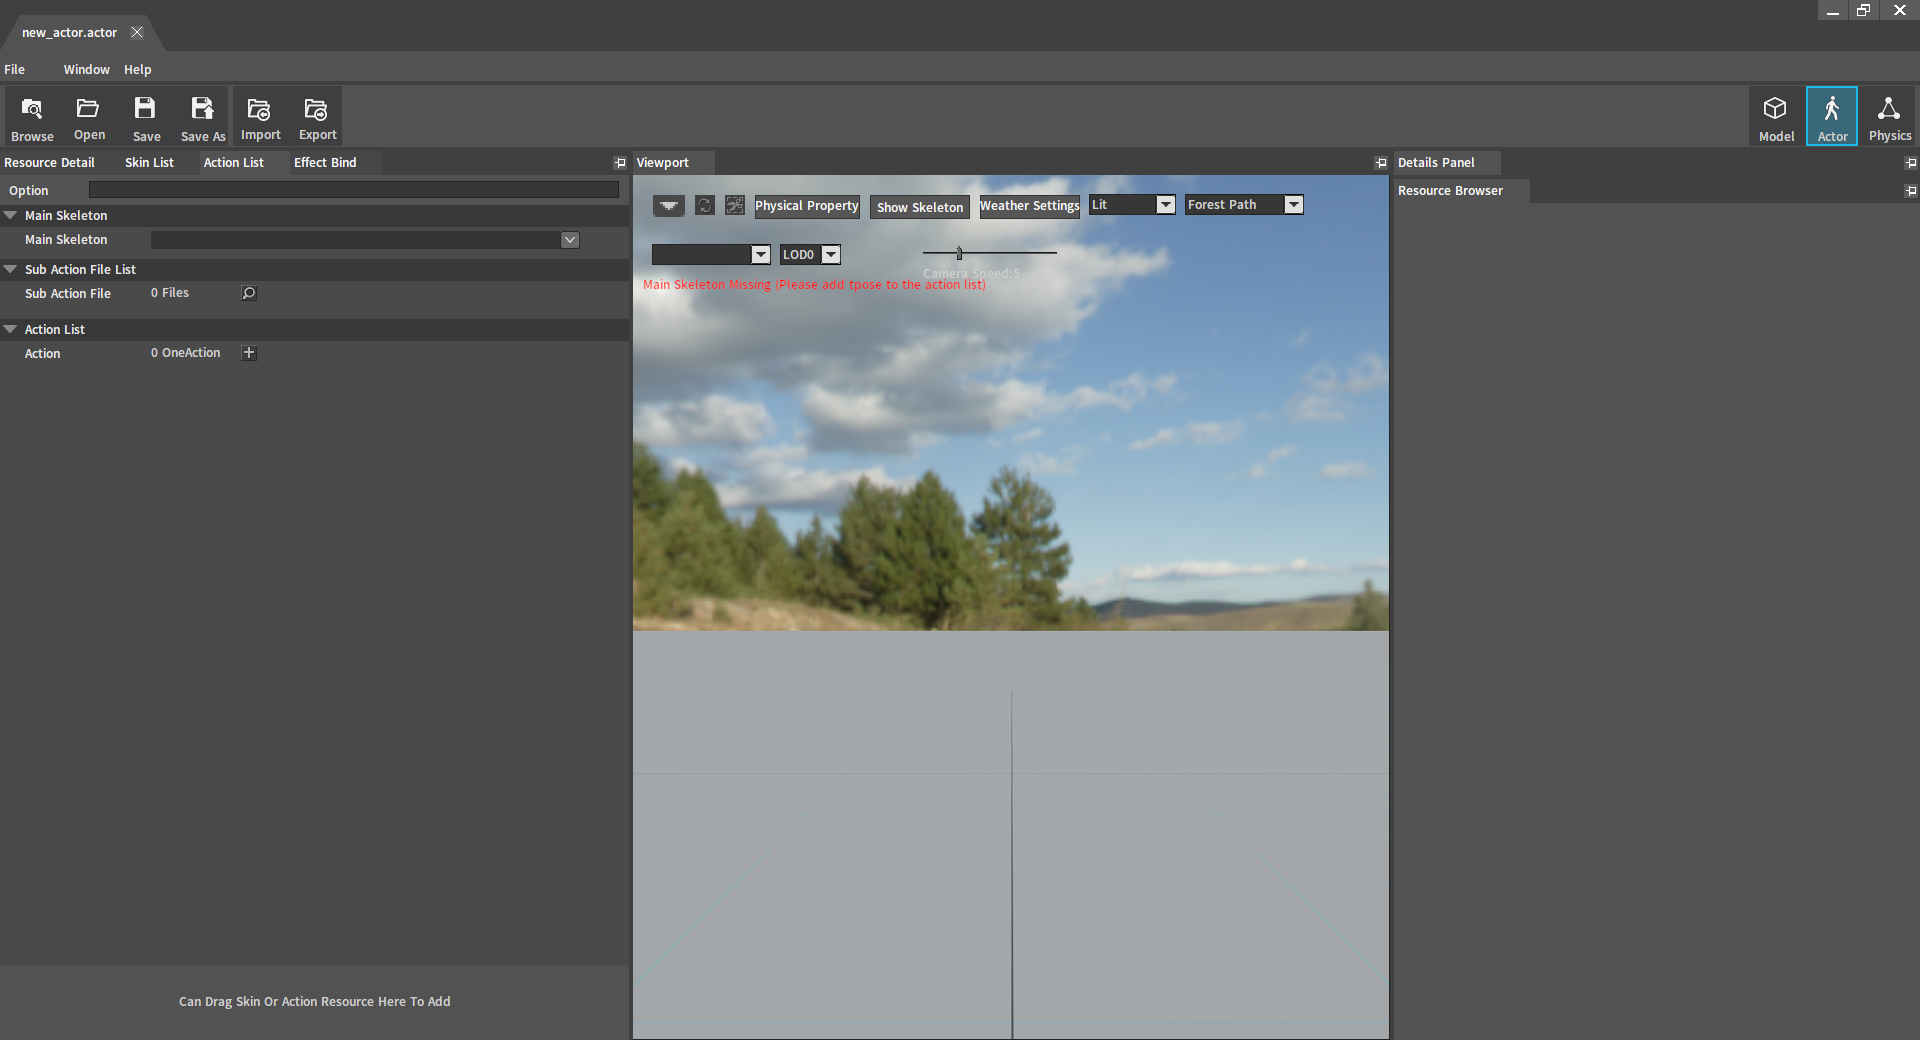
Actor Editor
Double-click on the new Actor to open the Actor Editor interface.
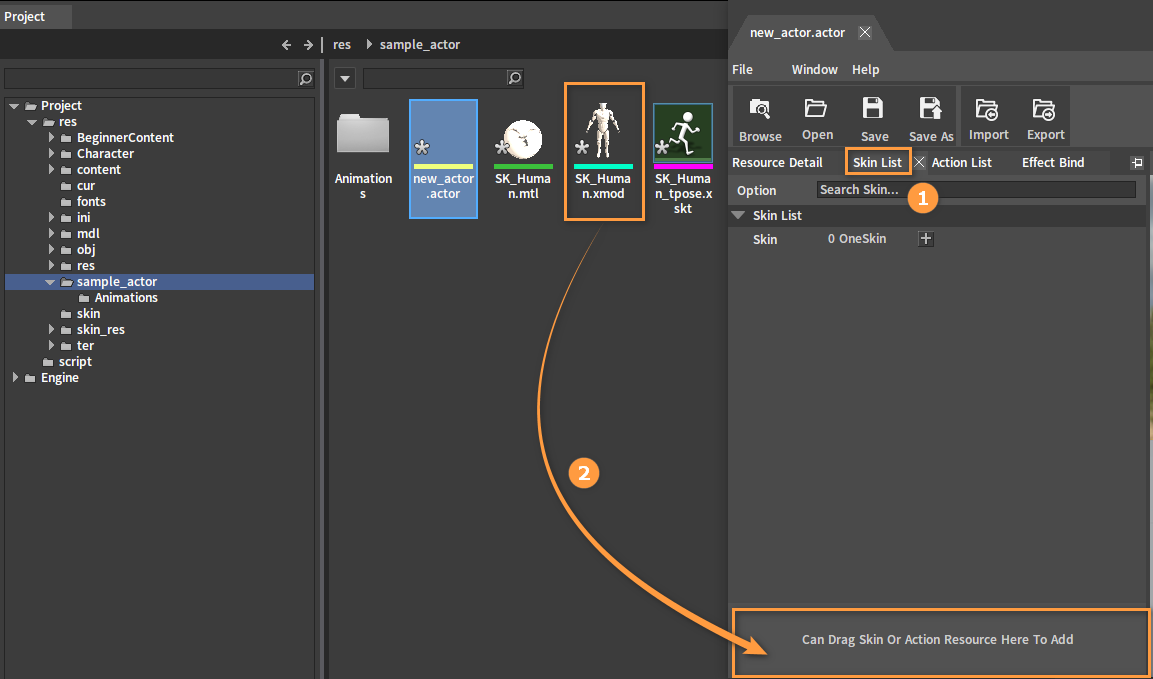
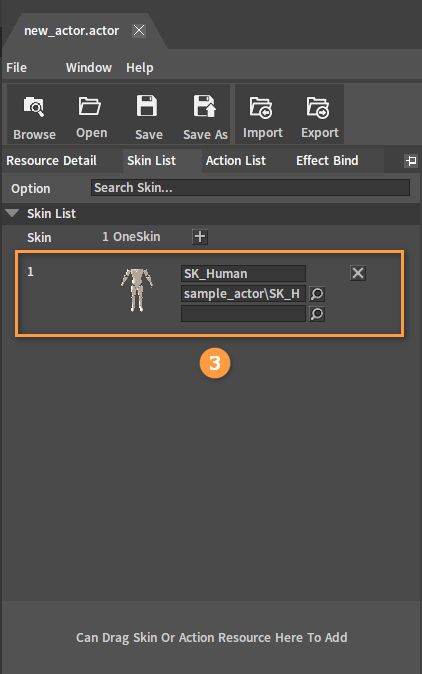
Select Skin List, drag the file into the area, and check if it is imported correctly.
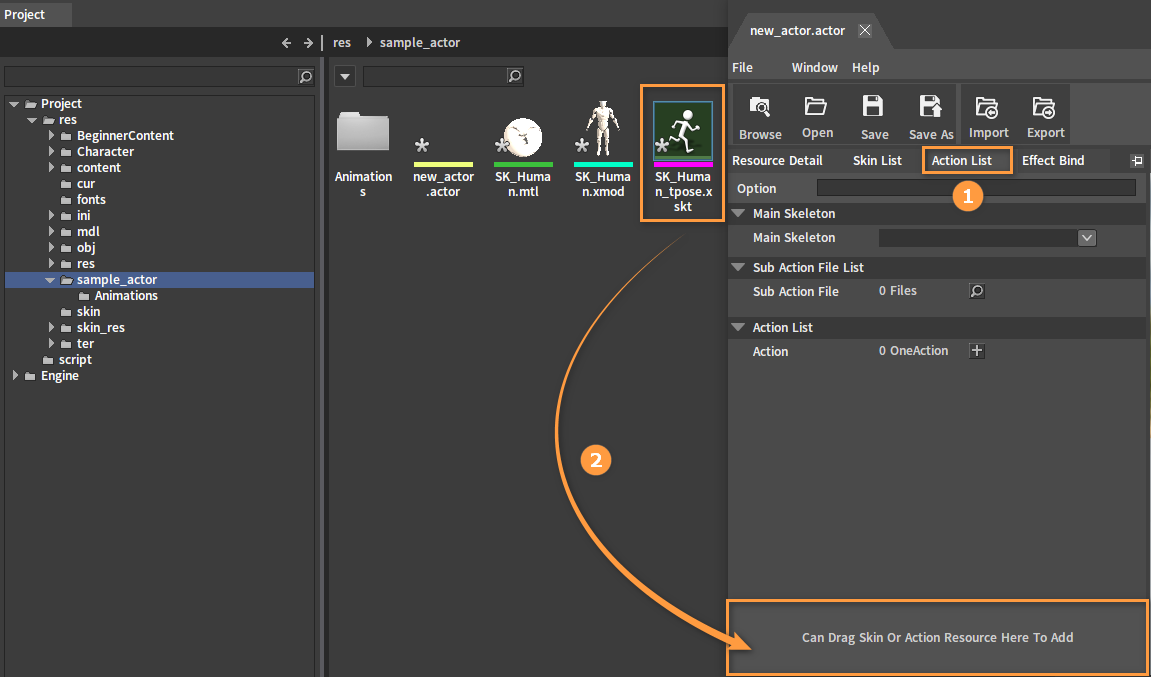
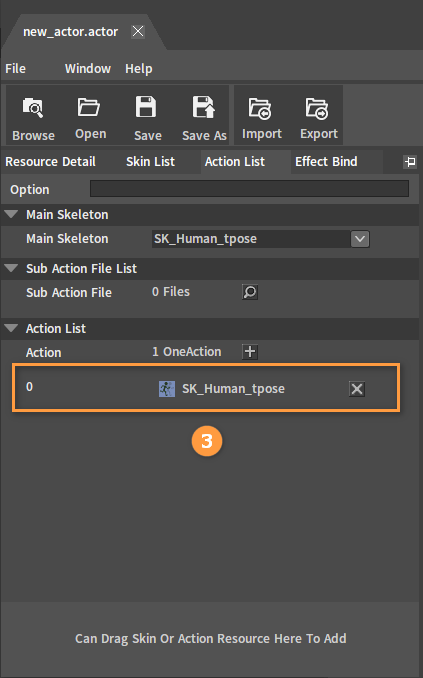
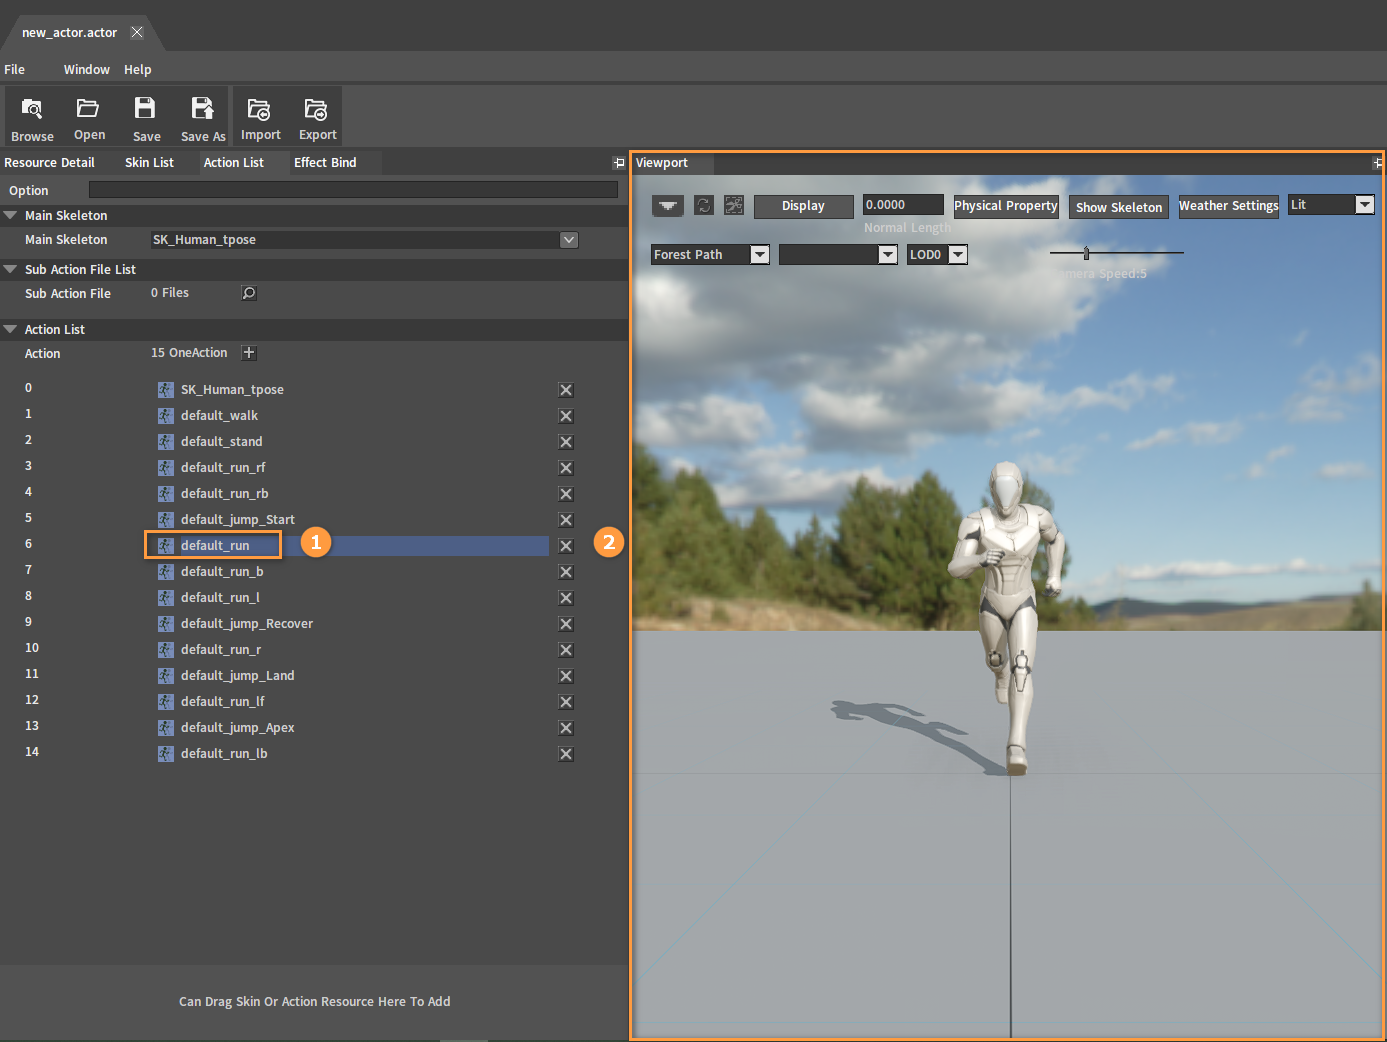
Select Action List, drag the Action file into the area, and check if it is imported correctly.
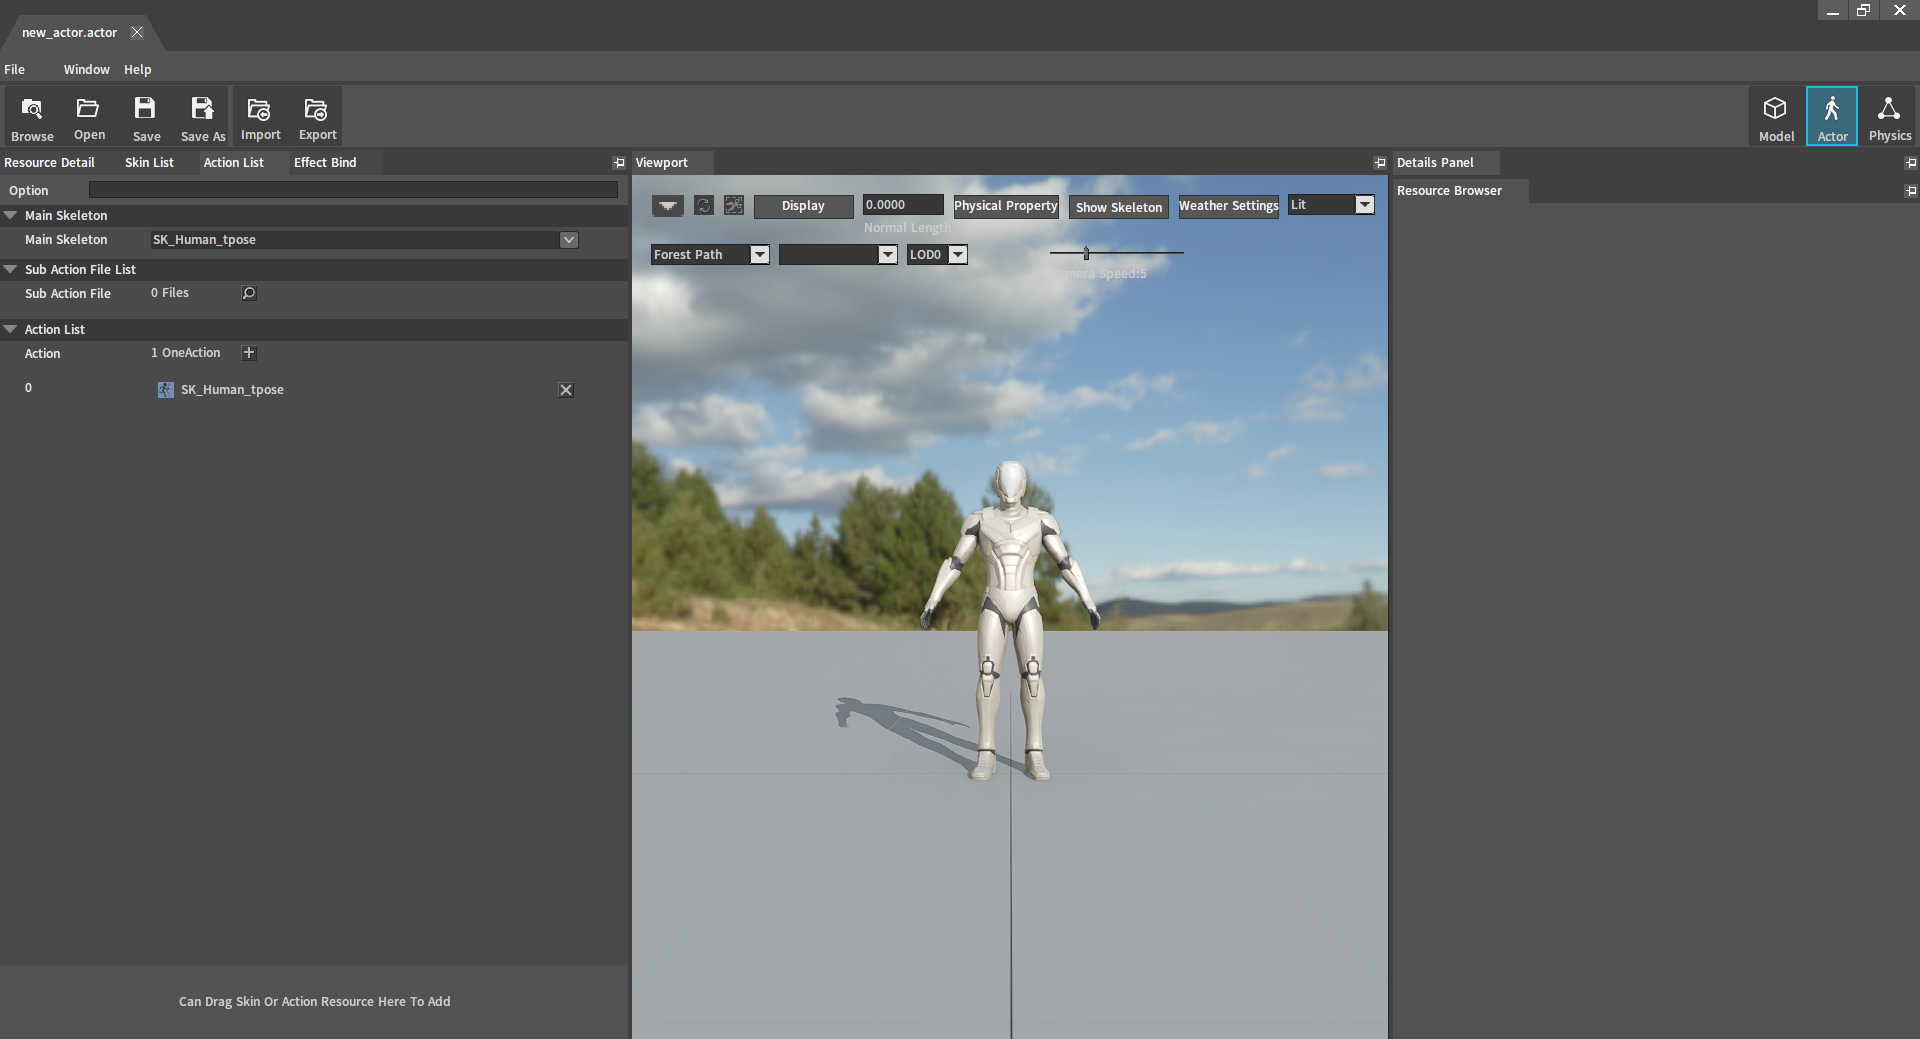
The imported tpose model can be seen in Viewport.
Importing and Previewing XSKT files
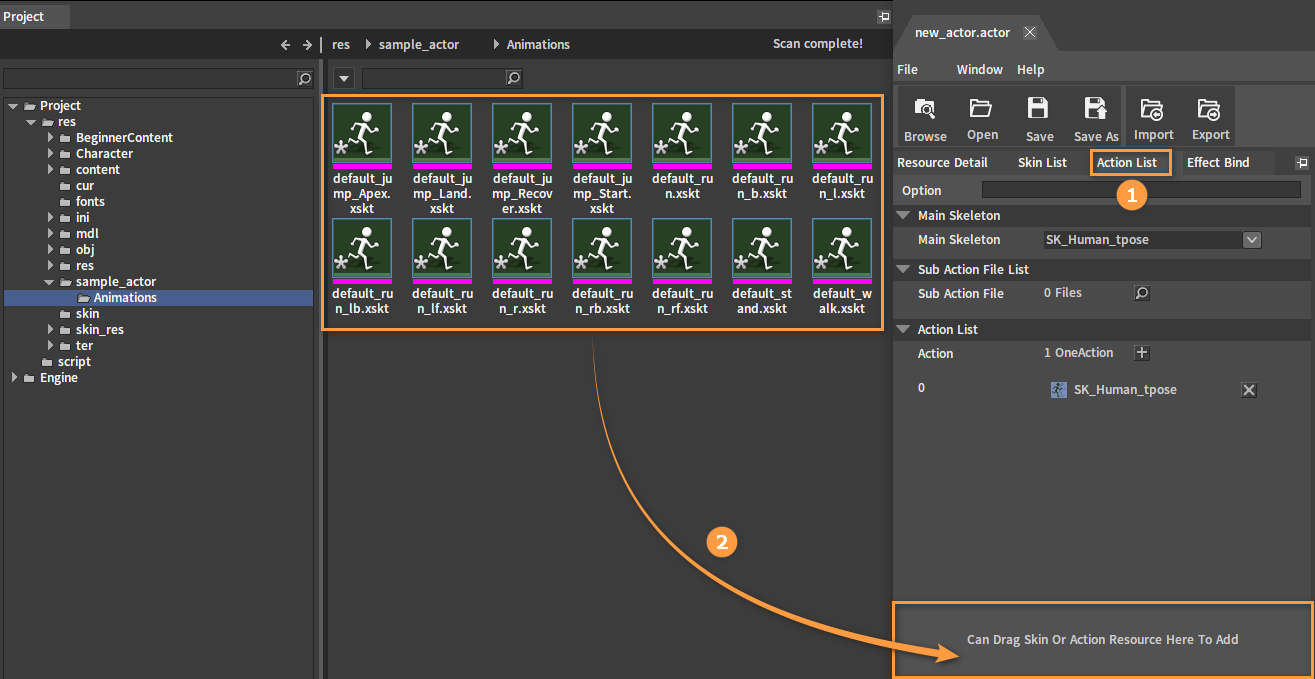
Select Action List, drag the XSKT files into the area, and check if they are imported correctly.
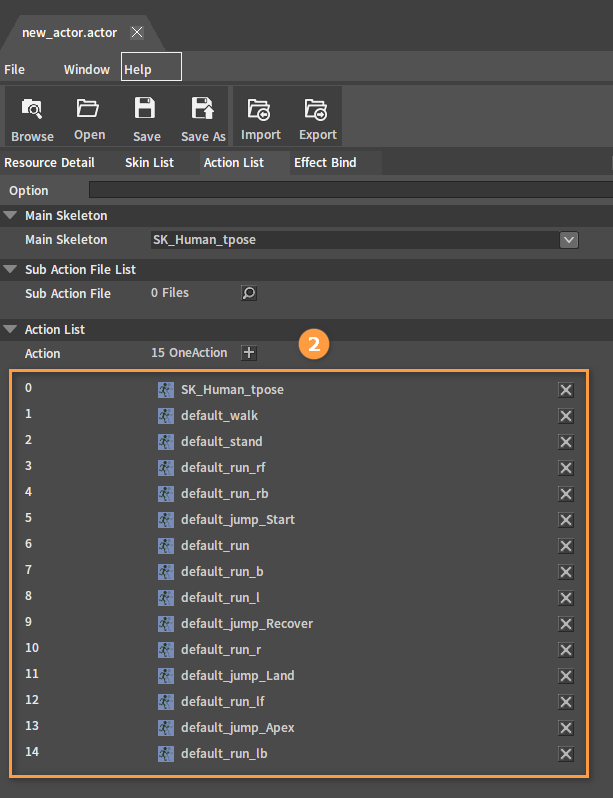
Select an action file in Action List and you can check it in Viewport.
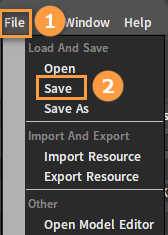
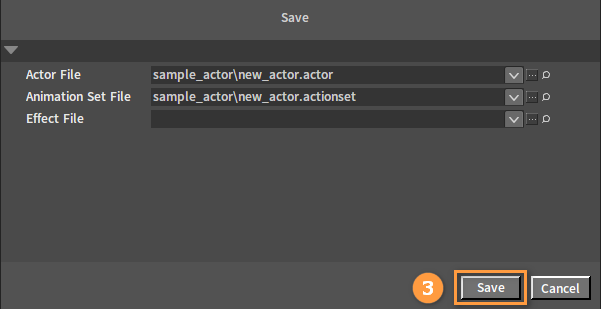
Saving
Click File -> Save to bring up the Save window, and click the Save button.