Editing Objects
Overview
The settings of the initially created Object are default. Edit it (such as changing the position, adjusting the angle, etc.) to achieve the effect as needed and to improve efficiency.
Selecting Objects
Select a Single Object
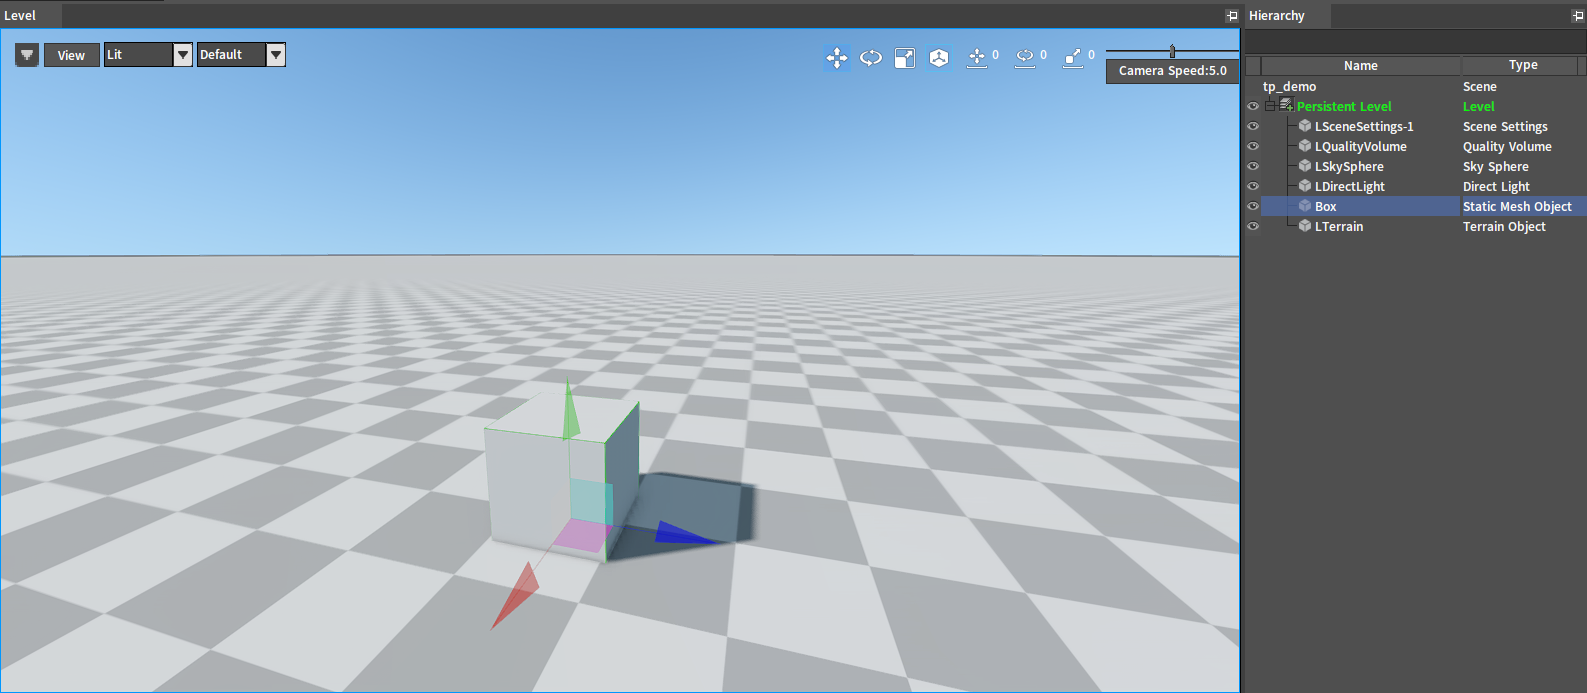
Single-click an Object in the Scene Panel. When a green stroke appears and the Object is highlighted in the Hierarchy panel, the Object is selected.
Marquee Selection
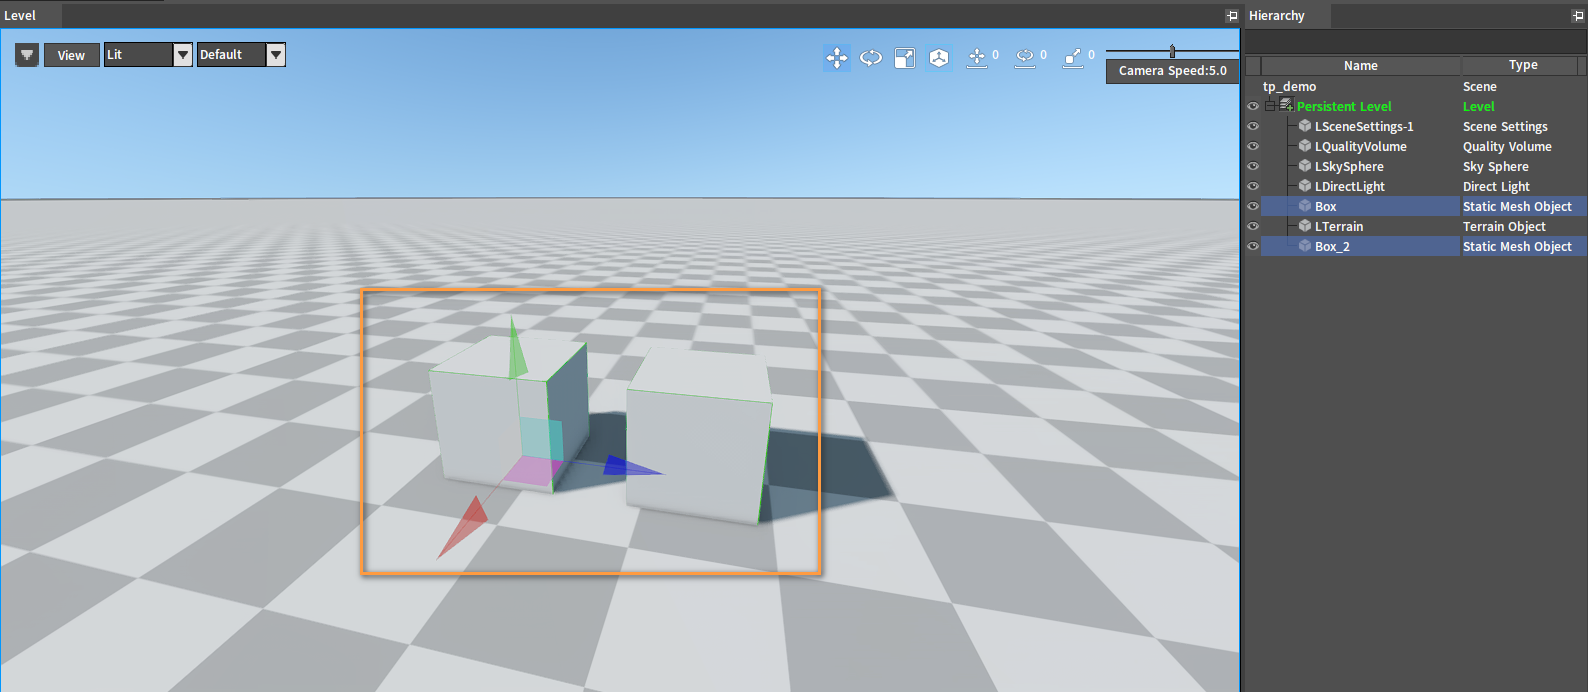
Use the left mouse button to create a rectangle area in the Scene panel, shown as below, and all the Objects inside the orange rectangle will be selected. The selected Objects will be highlighted in the Hierarchy panel.
Using Ctrl, Shift and Alt to Select Objects
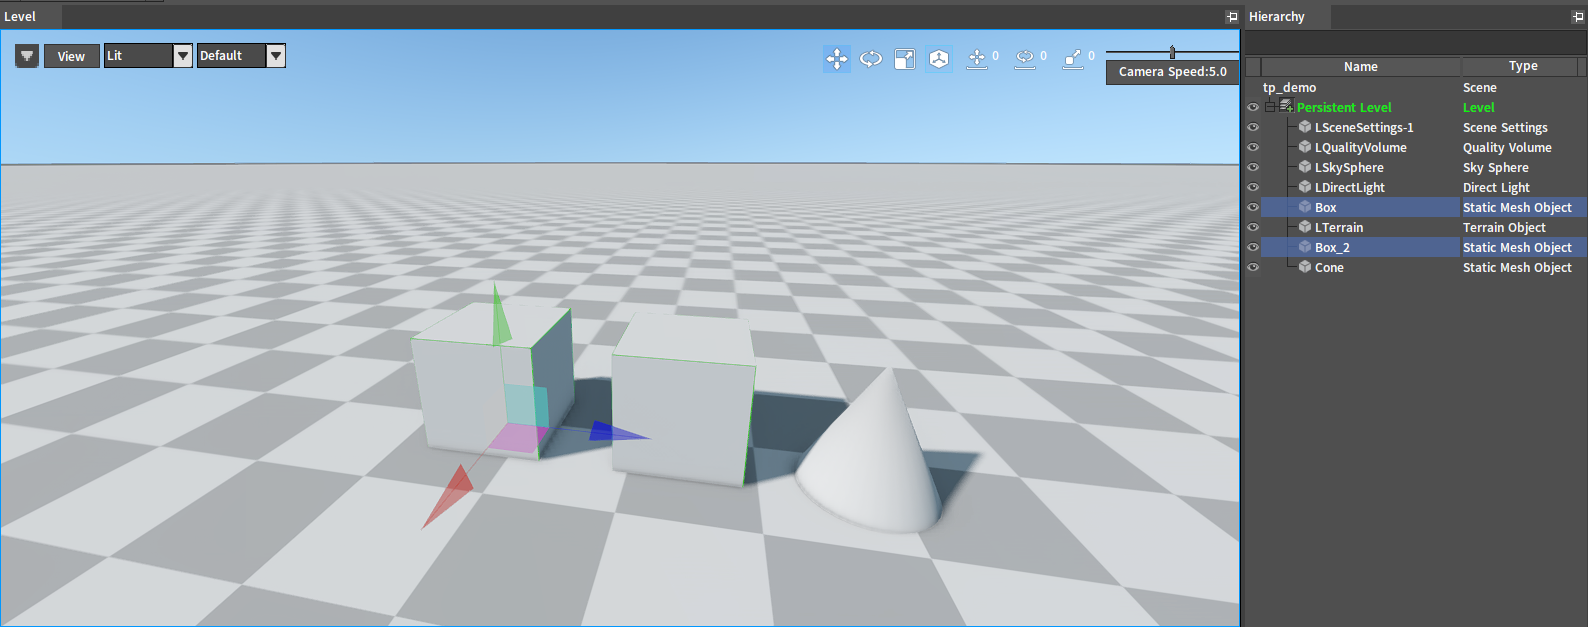
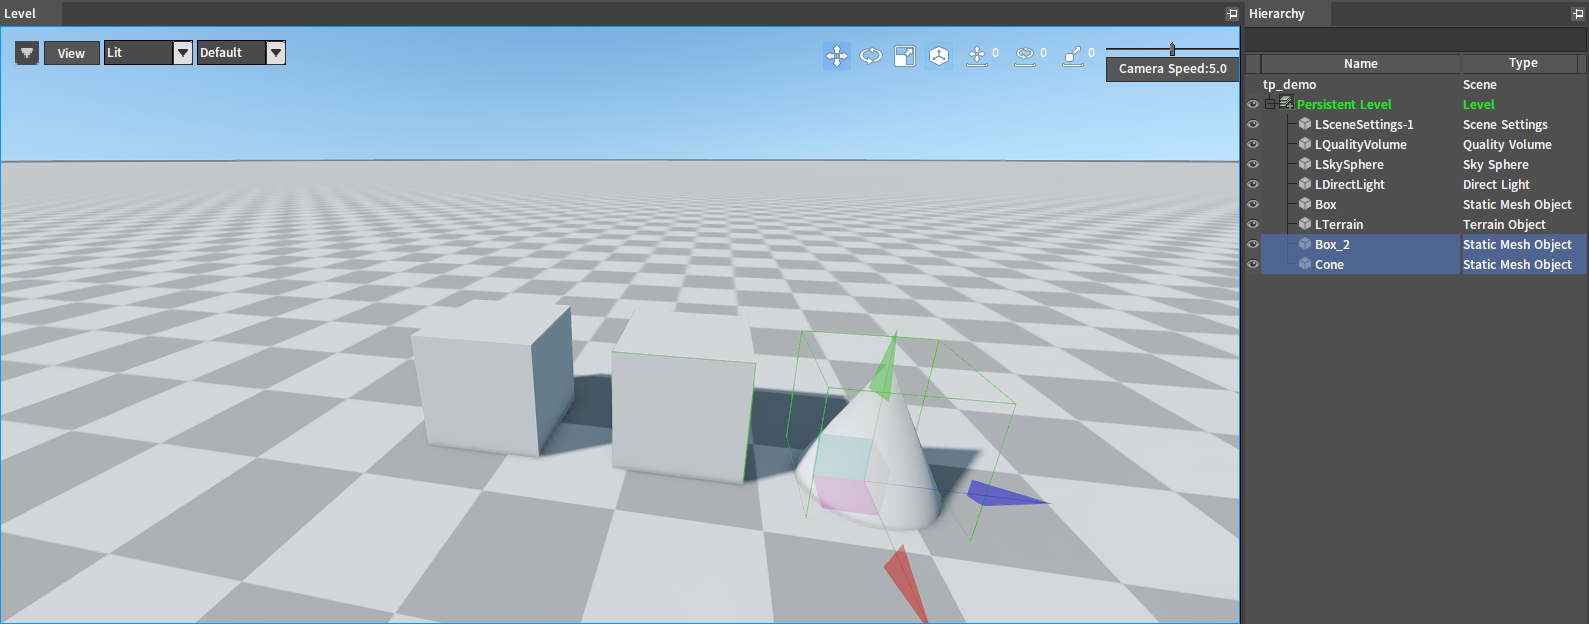
Ctrl: If several Objects have already been selected, the combination of Ctrl and the left mouse button can be used to add or deselect the selected Objects. Objects can be deselected in either the Scene panel or the Hierarchy panel. In the following three pictures, the first one shows the initially selected Objects, the second one shows a new Object added to the collection, and the third one shows the deselected Object.

Shift: The combination of Shift and left mouse button is used for selection, the Object(s) will only be selected when they are not selected; otherwise, there will be no changes.
Alt: Use Alt and left mouse button together to drag and copy the selected Object collection, and the copies will maintain their original relative positions.
Viewing and Modifying Properties
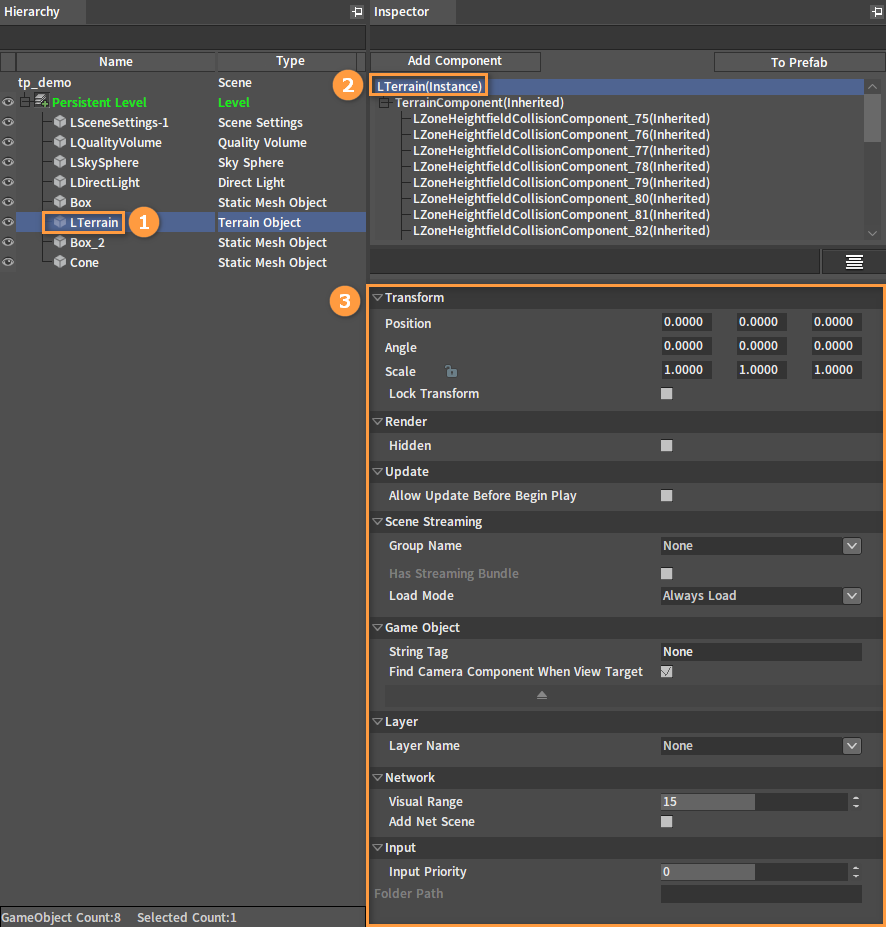
To view the properties of an Object, just click the Object in the Hierarchy panel. At this time, the Object is selected in the component tree of the Inspector panel. The property names and values of the Object can be viewed in the lower part of the Inspector panel. Click the value parameter to modify the property values.
Editing Properties
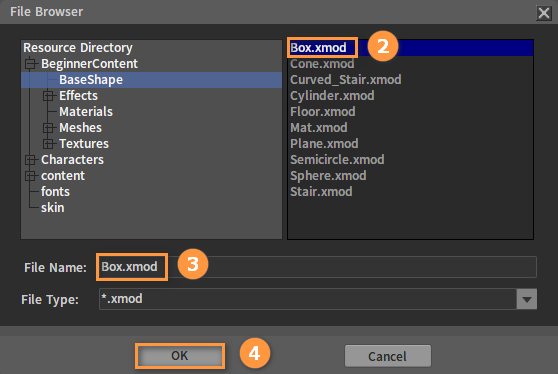
Model File: A Model File is a reference resource whose file format is .xmod. Click on the ![]() button next to the file, and a Browser File window will pop out, then select Model File and click OK to open.
button next to the file, and a Browser File window will pop out, then select Model File and click OK to open.

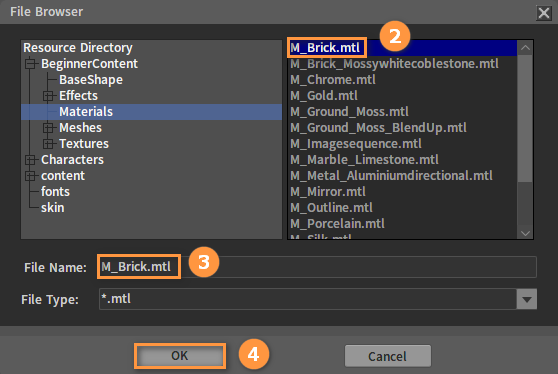
Material File: A Material File is a reference resource whose file format is .mtl. Click the ![]() button next to it, and a Browser File window will pop out, then select Material File and click OK to open.
button next to it, and a Browser File window will pop out, then select Material File and click OK to open.

Switch: Check the ![]() button to modify the value.
button to modify the value.

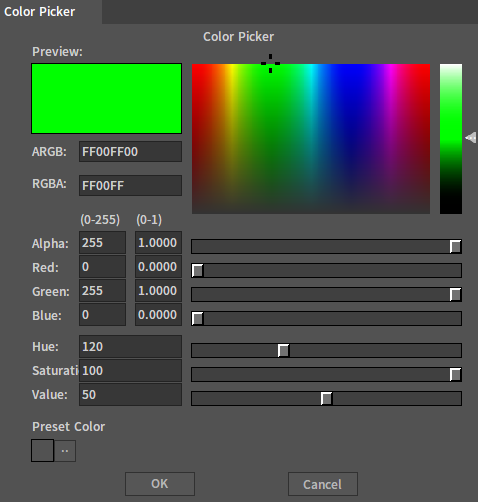
Color: Click the color bar to open the Color Picker window, and reselect the color to change the value.
Text and Values: Modify the values in the text boxes directly.

Undoing and Redoing after Modifying the Property
The modified properties will be followed by ![]() buttons. Click the blue button to return to the last edited value, and click on the orange button to return to the system default value.
buttons. Click the blue button to return to the last edited value, and click on the orange button to return to the system default value.

Advanced Properties
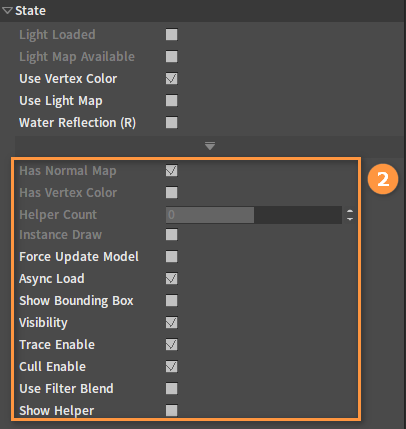
Advanced properties are hidden by default. Click the ![]() button to show these properties.
button to show these properties.

Displaying Changed Values and Properties
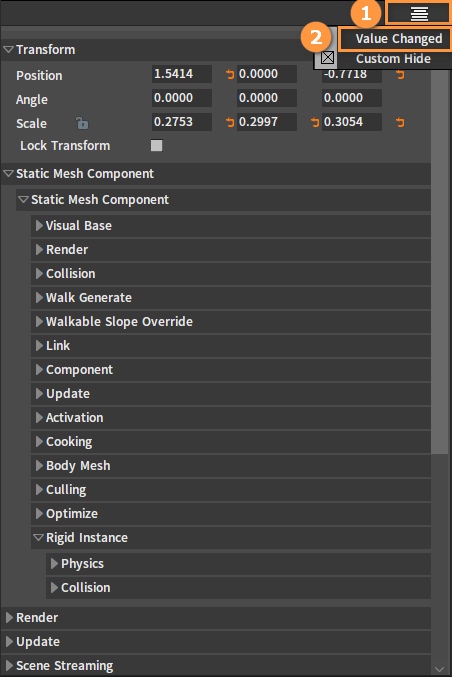
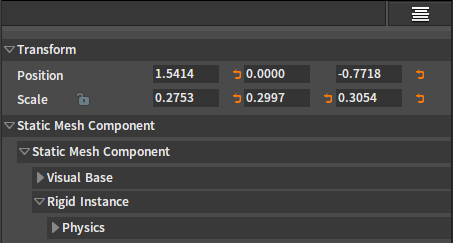
You can click the ![]() button in the right side of the search box if you are not sure which values have been changed. In the drop-down box, click Value Changed option, and the system will automatically hide the unmodified properties and display only the changed values of the modified properties.
button in the right side of the search box if you are not sure which values have been changed. In the drop-down box, click Value Changed option, and the system will automatically hide the unmodified properties and display only the changed values of the modified properties.
There will be small buttons next to the properties:

 : For reference resources only, click this button to modify the reference value.
 : Open the local directory of the reference resources.
 : Cancel the last step to restore the modified property value.
 : Restore the system default values.
Translating, Rotating and Scaling Objects
Modifying the Current Editing Mode
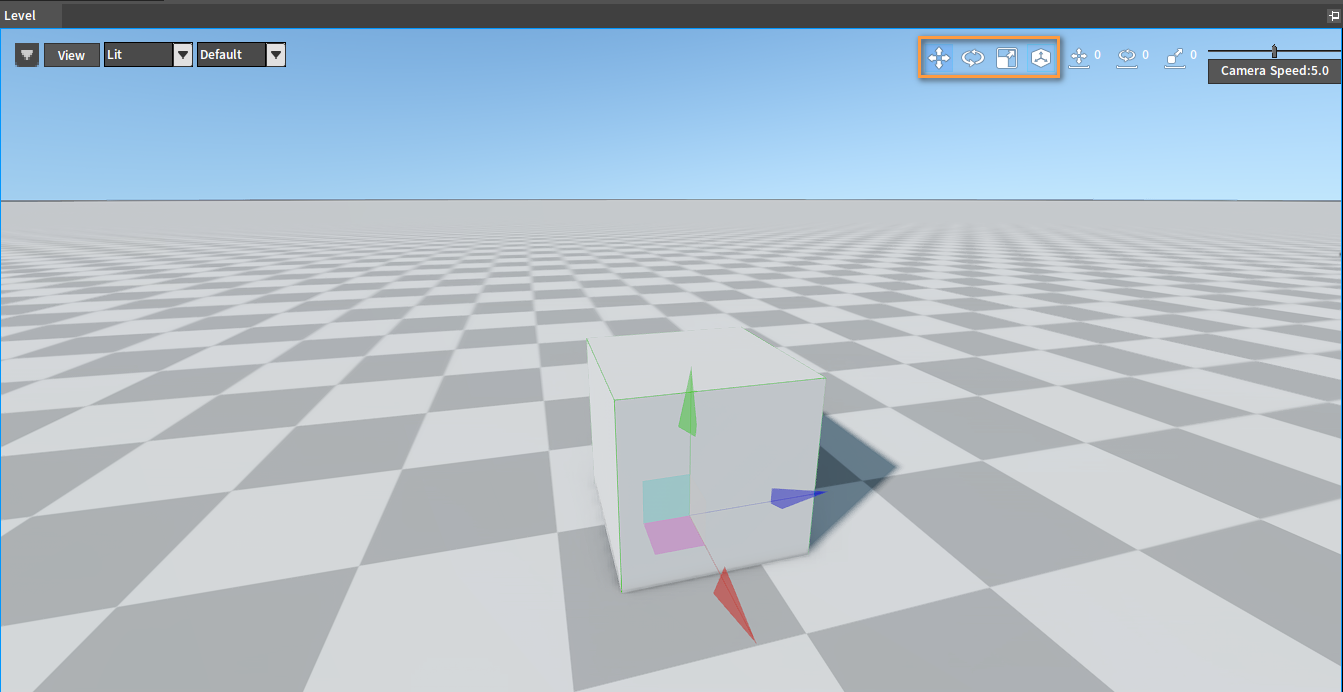
There are two ways to modify the current editing mode: one is to left-click the edit mode button in the Scene panel; the other is to press the Number Keys 1,2,3,4 on the main keyboard area, corresponding to the translation, rotation, scaling and current space respectively.
Modifying the Current Space
If you want to modify the current space, you can left-click the switch space button, and there will be a change in the icon. When the icon is displayed as an earth shape, the space is switched to world reference mode. Under this setting, the translation, rotation and scaling of the Object will take the world as the reference system. When the icon is displayed as a model, the space is switched to local reference mode. Under this setting, the translation, rotation and scaling of the Object will take the local coordinates as the reference system. By comparing the changes of the Gizmo in the pictures below, you can see the effect clearly.
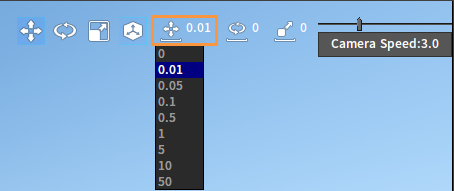
Modifying the Step Value
The granularity can be modified by changing the step value of translation, rotation and scaling. The smaller the step value is, the smoother the change of the operation will be, and vice versa. It can be applied to modifying Objects as needed, such as the operation of aligning two boxes.
Gizmo
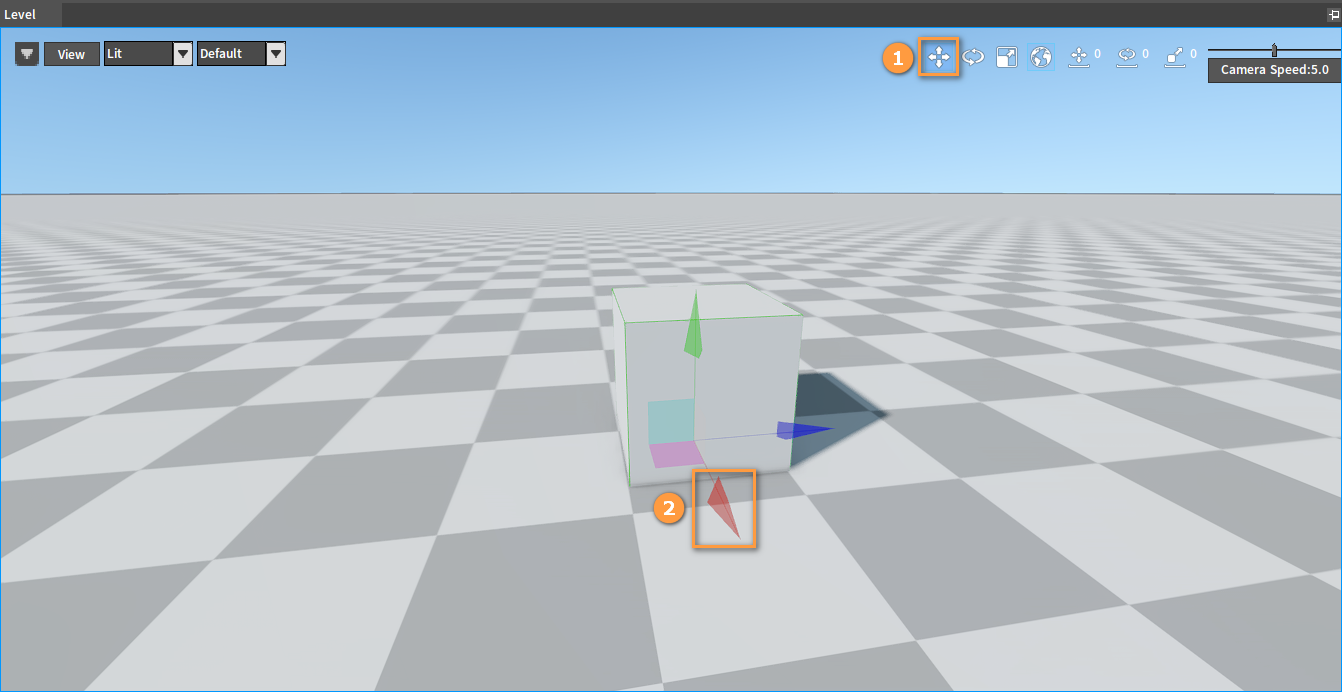
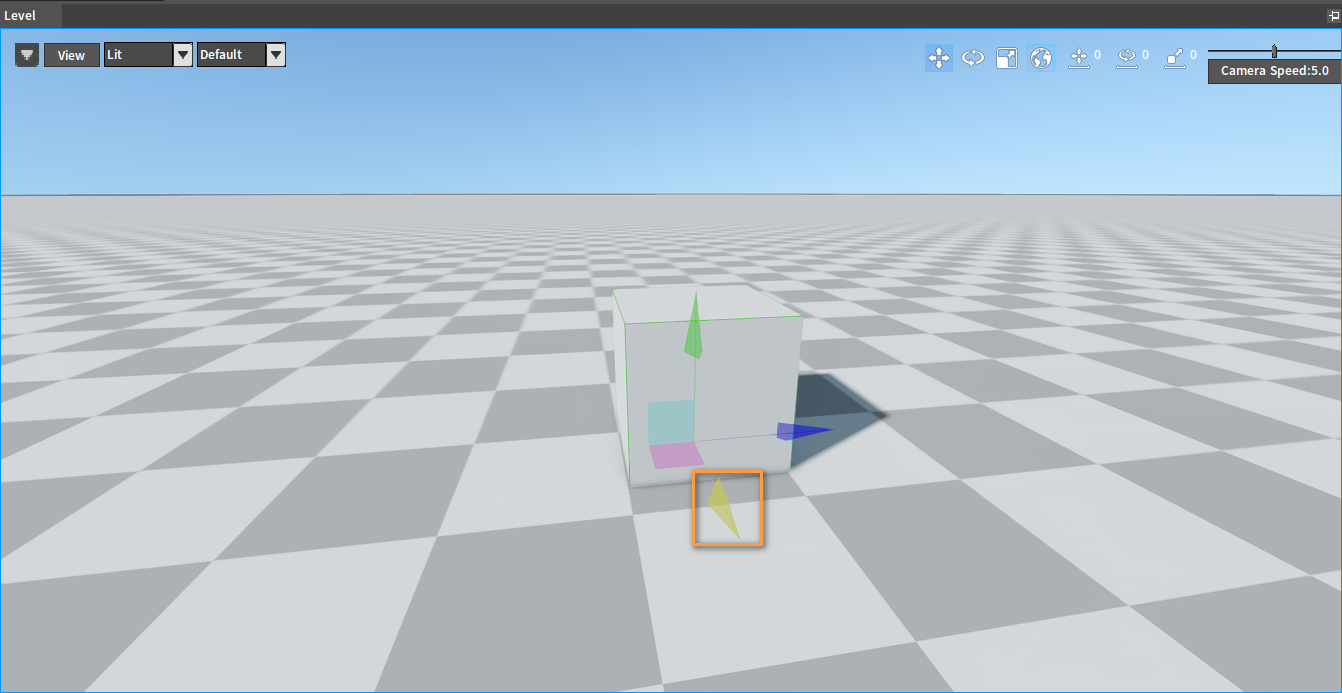
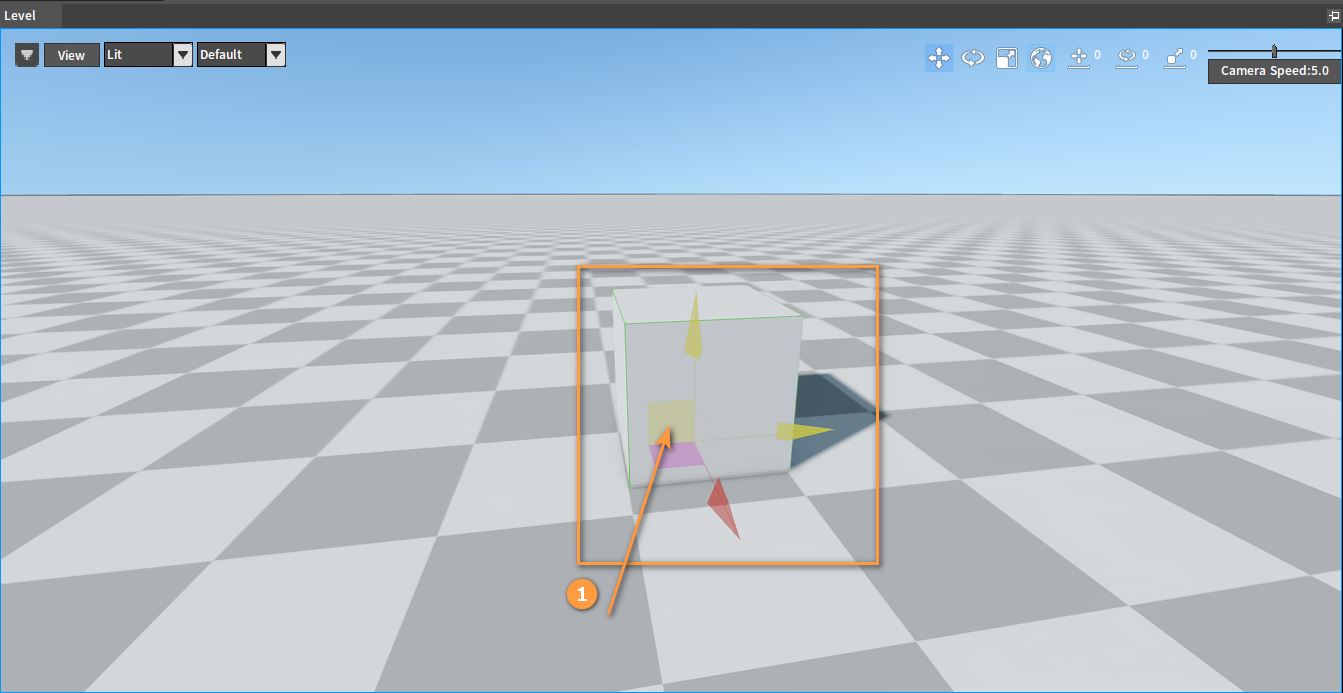
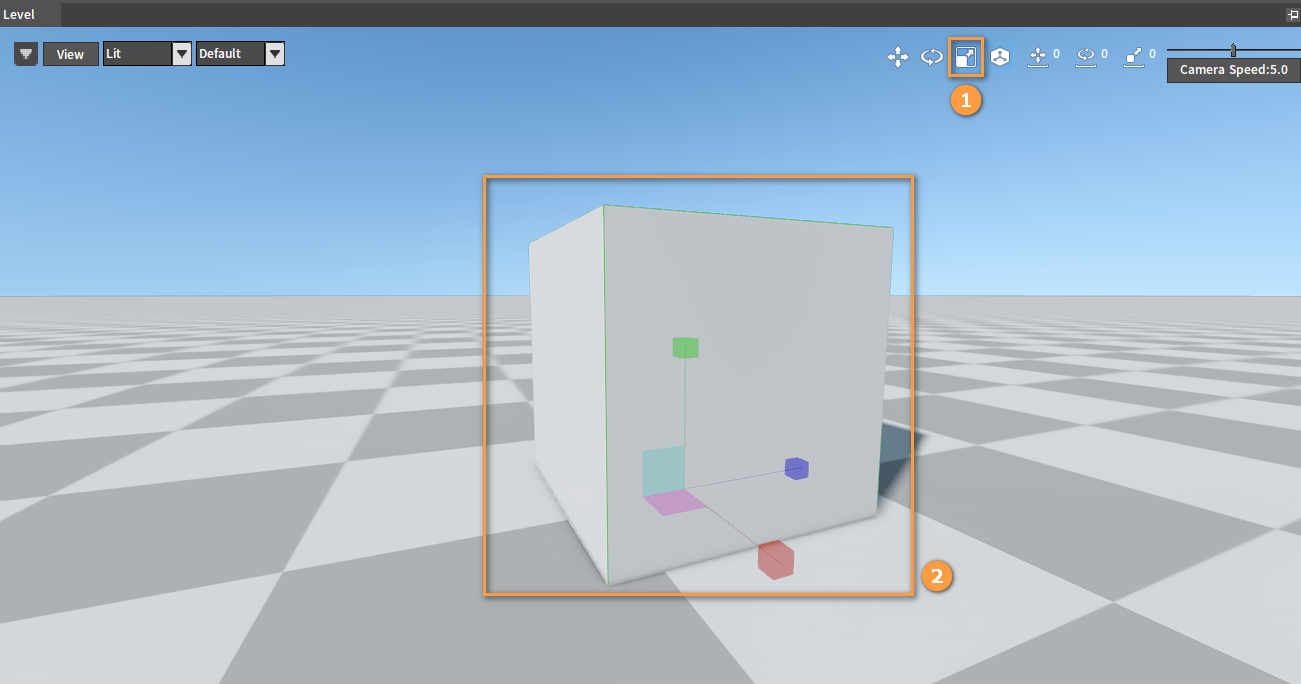
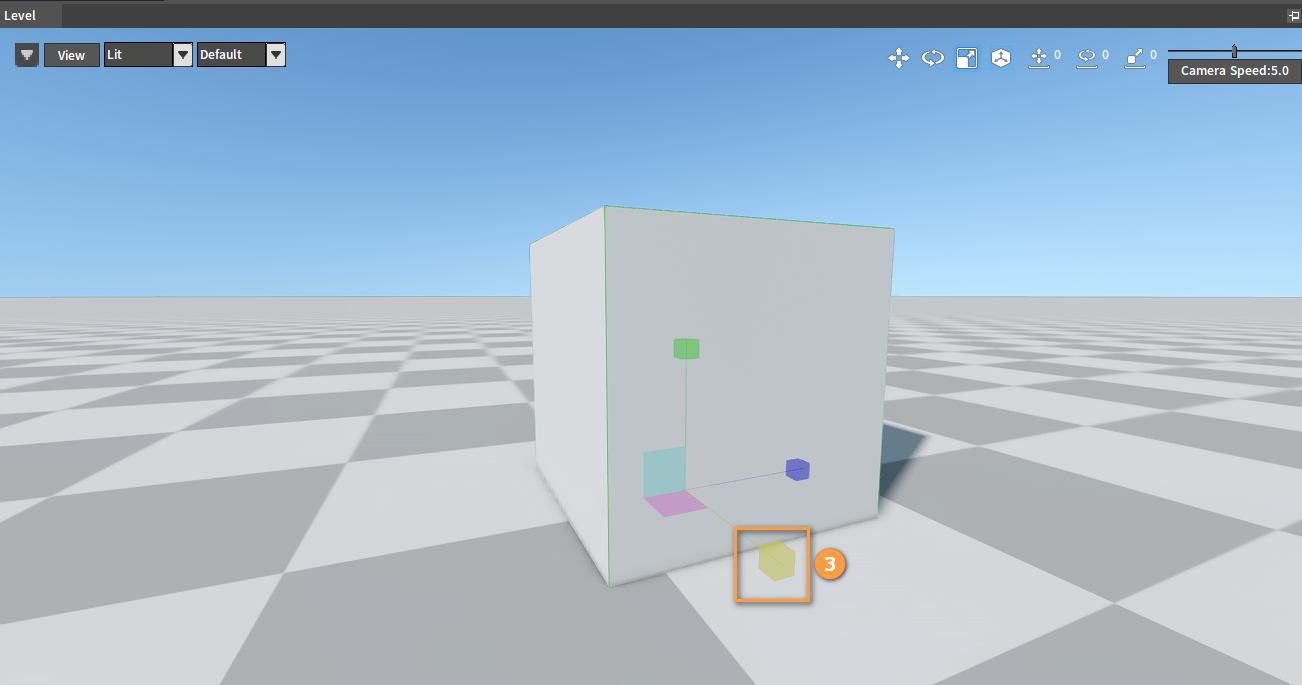
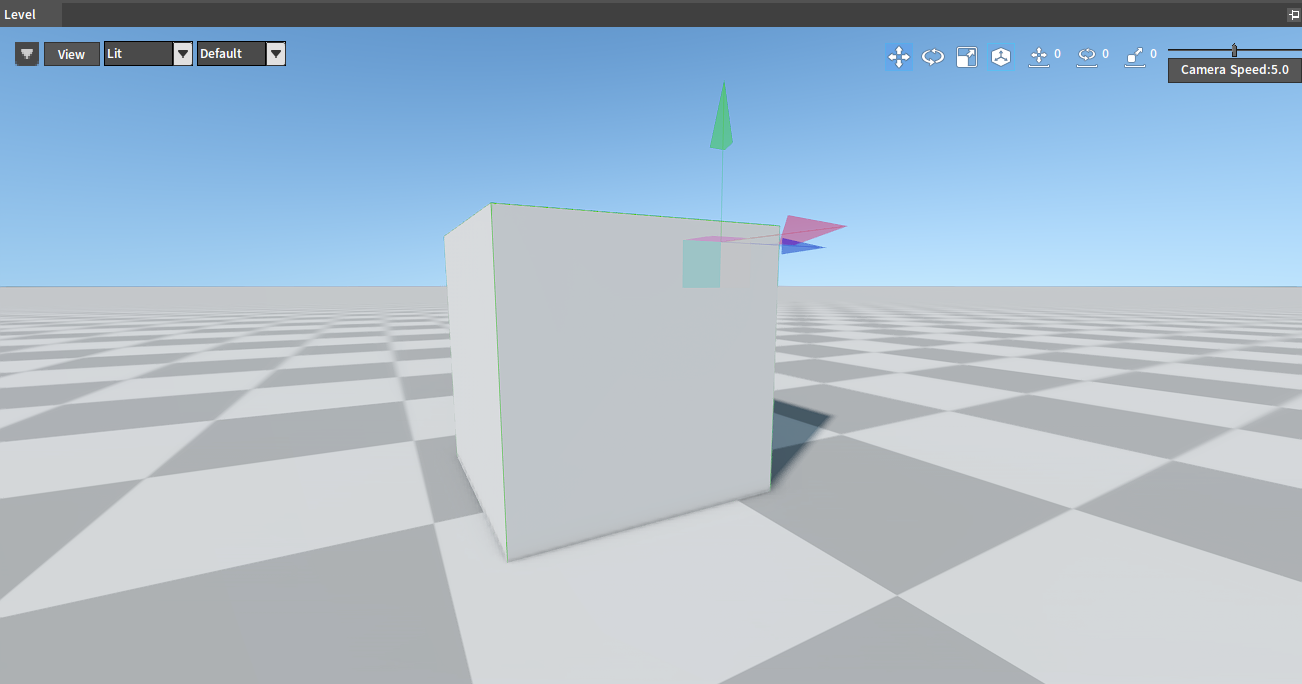
Translation: You can use Gizmo to change the position of an Object in the Scene panel. Click the ![]() button to enter the move mode. Left-click the Object to be translated, and Gizmo will appear. Then select a direction arrow of the Gizmo, which will be highlighted in yellow. Select and drag the arrow along its positive or negative direction to adjust the position of the Object in a single dimension.
button to enter the move mode. Left-click the Object to be translated, and Gizmo will appear. Then select a direction arrow of the Gizmo, which will be highlighted in yellow. Select and drag the arrow along its positive or negative direction to adjust the position of the Object in a single dimension.
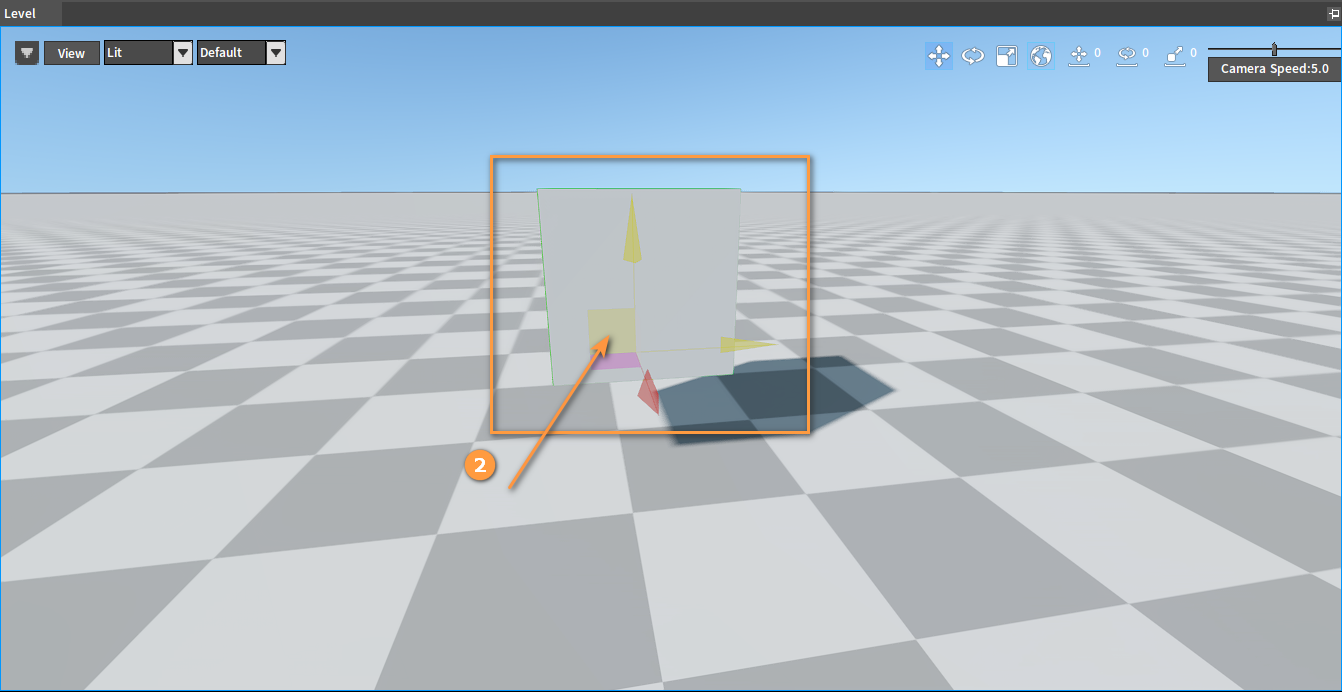
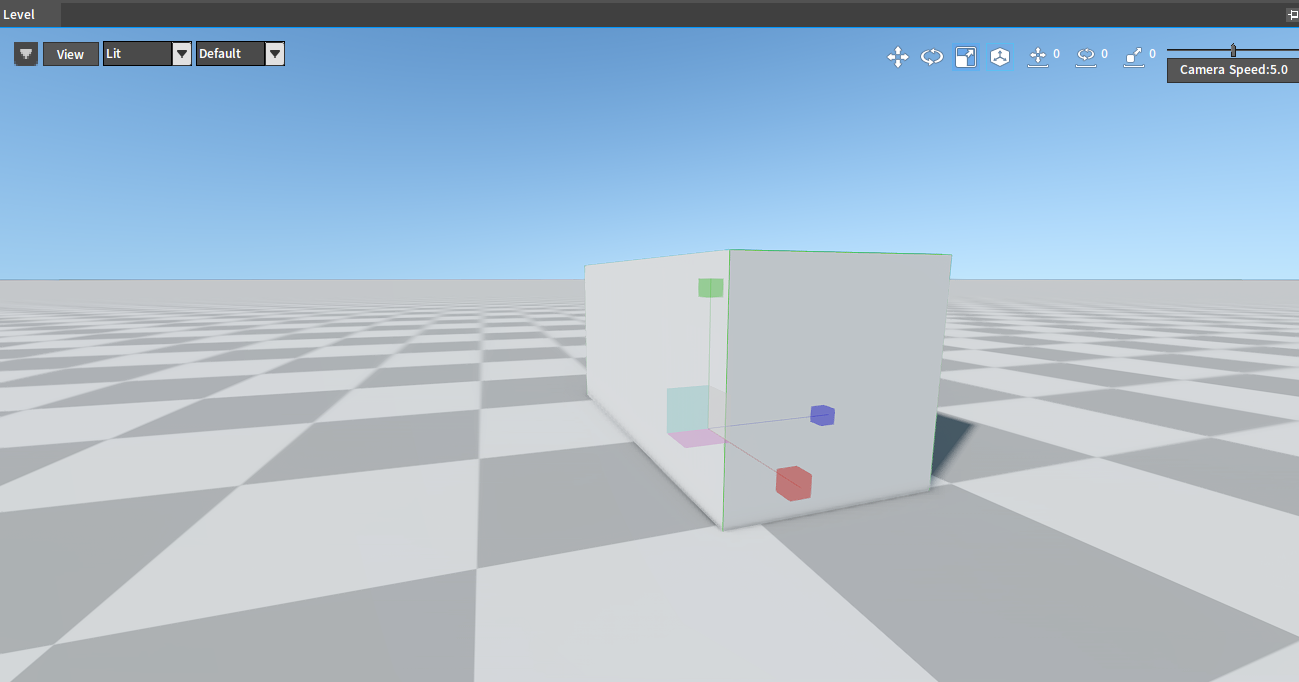
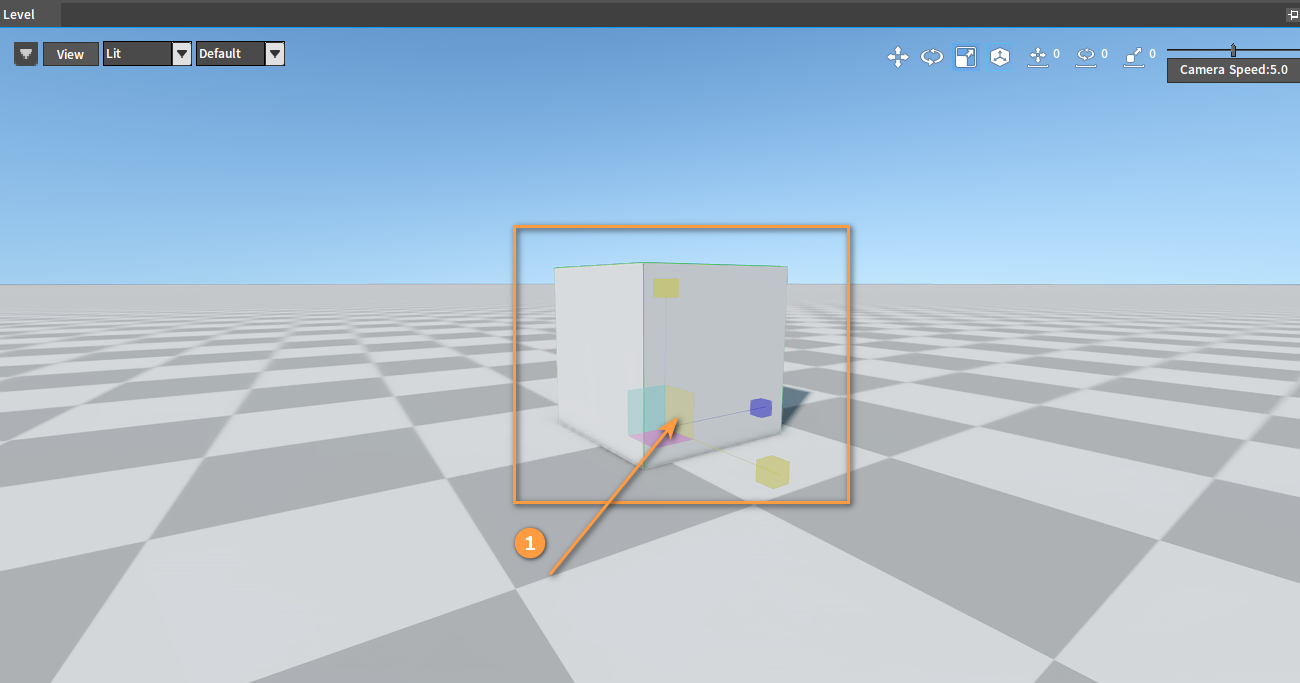
You can also click a plane of the Gizmo, which will be highlighted in yellow. Select and drag the plane freely to adjust the position of the Object in the two dimensions.
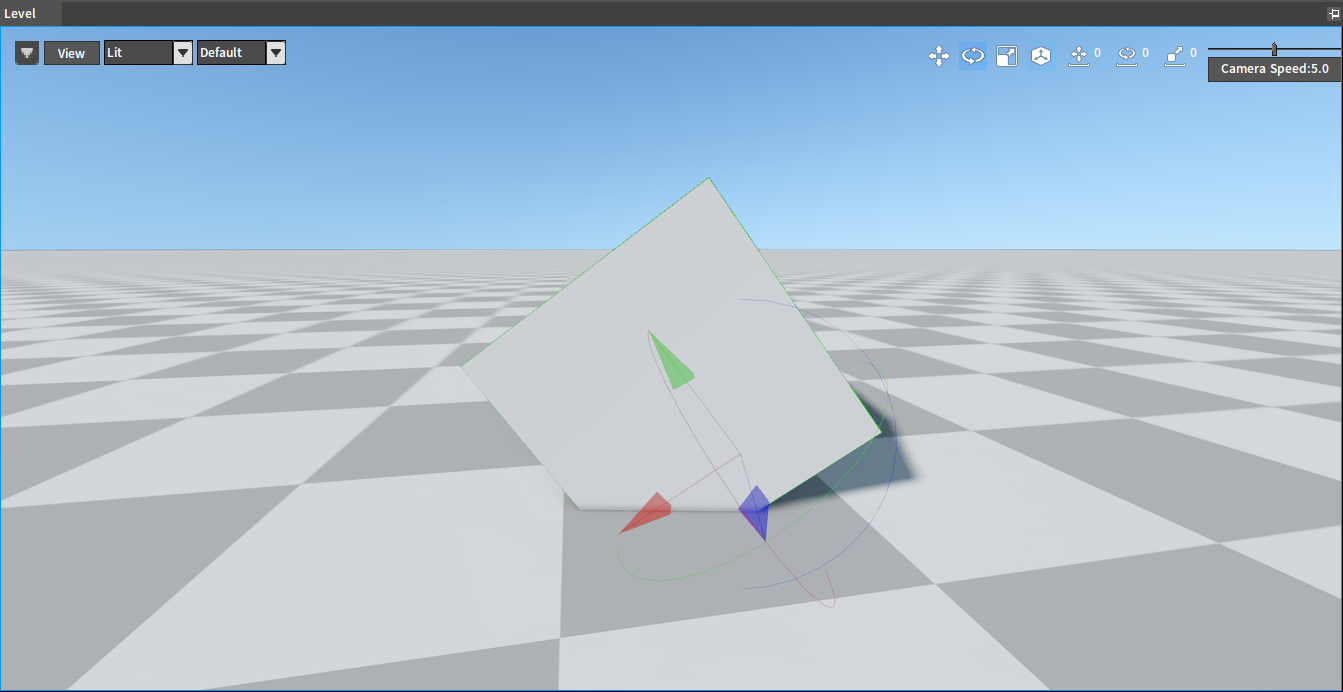
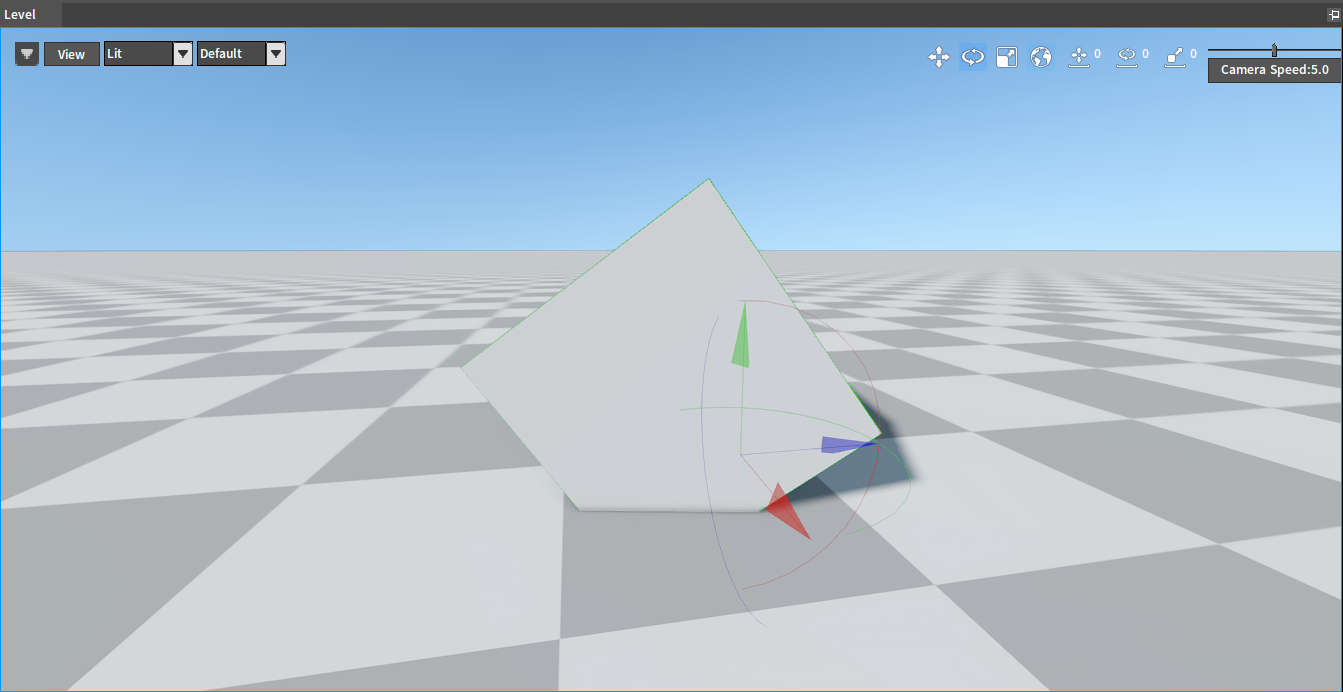
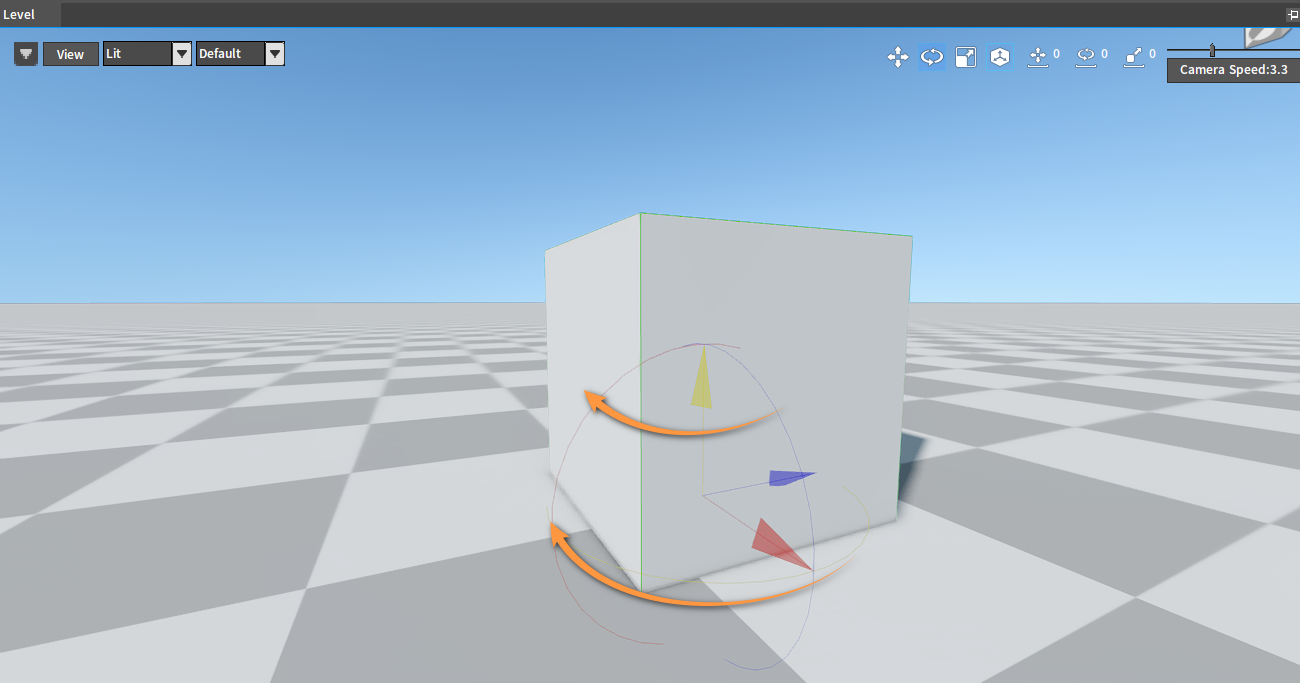
Rotation: Switch to the rotate mode. Left-click the Object to be rotated, and Gizmo will appear, which will be a little different from the previous one. Outside the coordinates are arcs. It can be seen that axes and arcs of the same color are orthogonal and they have the same rotation effect.
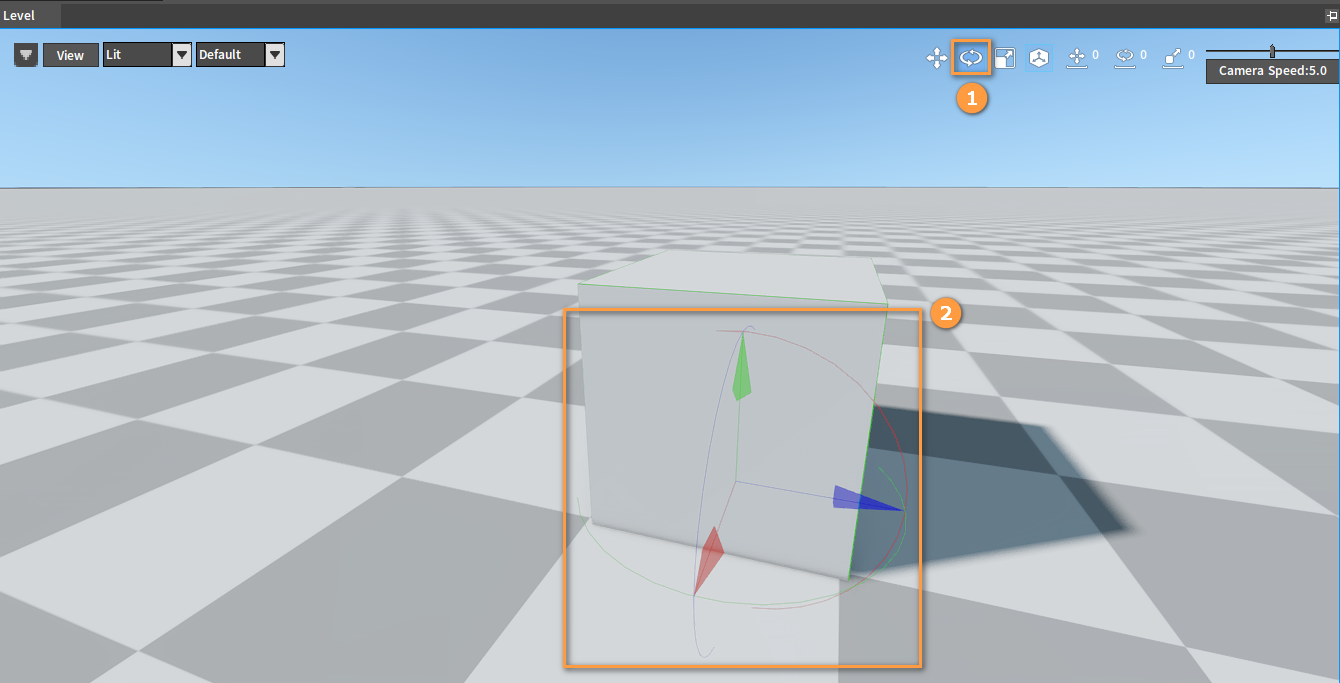
When hover over the axes or arcs, the orthogonal ones of them will be highlighted in yellow. You can left-click and drag the arcs or axes to rotate the Object.
Scaling: Switch to the scaling mode. Left-click the Object to be scaled, and Gizmo will appear, which will be a little different from the previous one. The arrows of the coordinate axes become cubes. Click on a cube, and then it will be highlighted in yellow. The Object will be stretched or shortened along two directions of a dimension, when you left-click and drag the highlighted cube to move away from or towards the origin of the coordinate system.
Left-click and drag the cube in the middle of the Gizmo. Then you can scale up or down the Object equally by moving it away from or towards the origin of the coordinate system.

Copying Objects
Right-click Menu
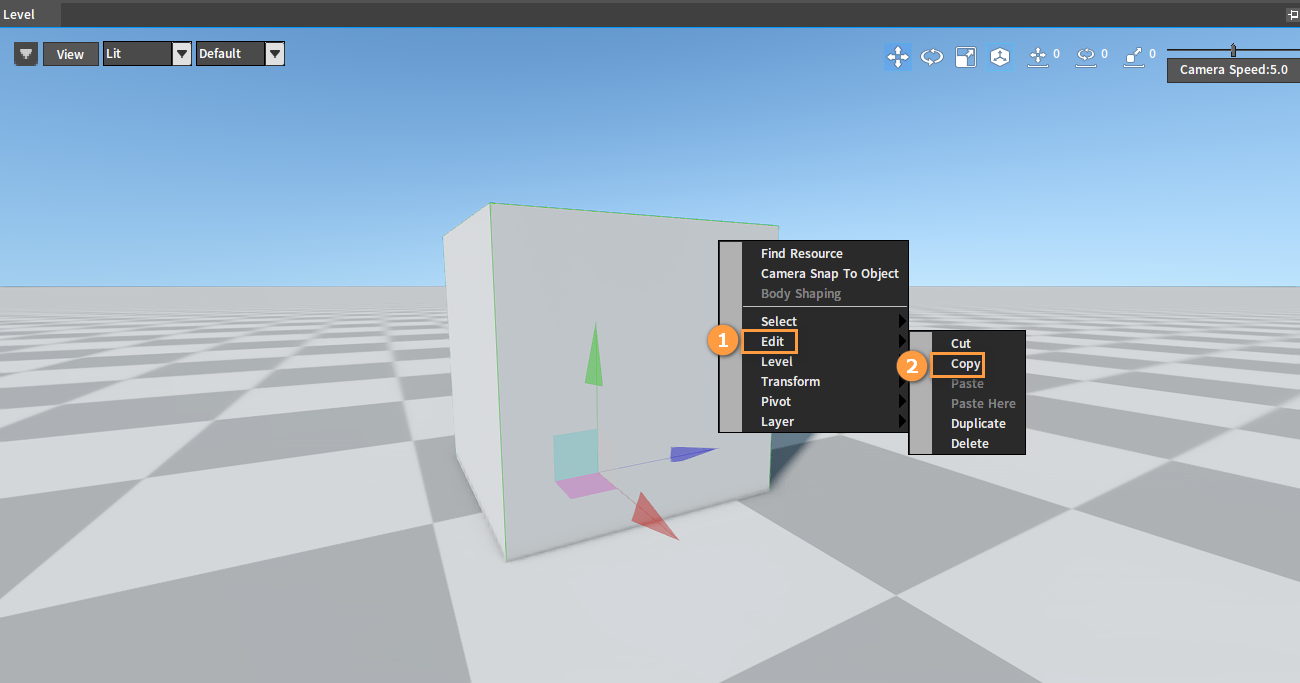
Copy Objects in the Scene panel:
Right-click on the selected Object in the Scene, and the menu will pop up. Click Edit -> Copy, and the Object will be copied to the clipboard.
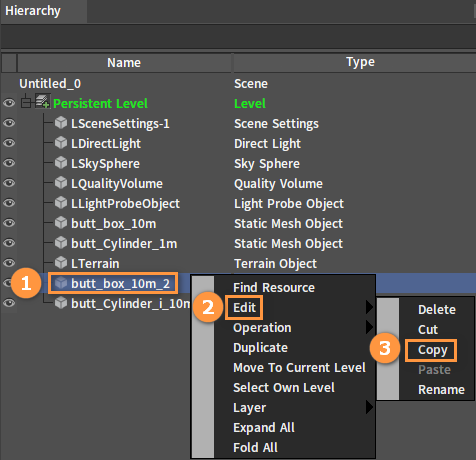
Copy Objects in the Hierarchy panel:
Right-click on the selected Object in the Hierarchy panel to bring up the menu, click the Copy button, and the Object will be copied to the clipboard.
Shortcut Key
For selected Objects in both the Scene panel and the Hierarchy panel, you can copy them to the clipboard by using Ctrl + C.
Duplicating
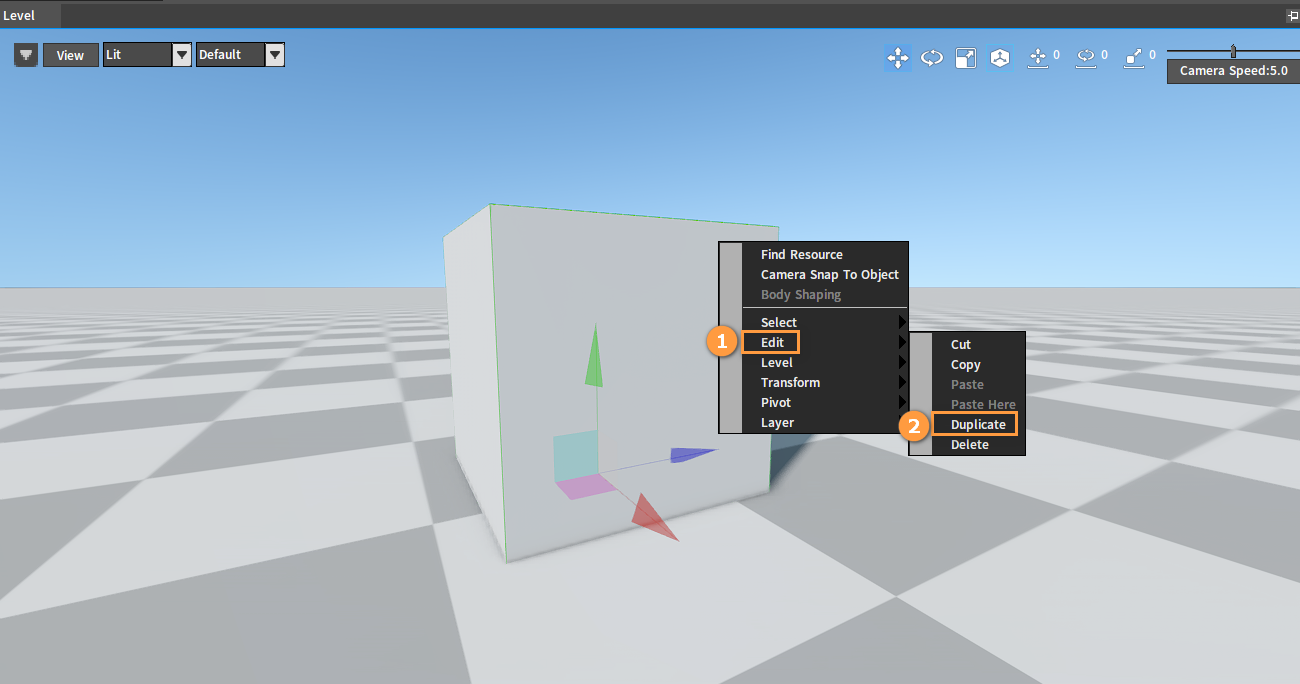
To duplicate is a copy and paste operation performed in a project at the same time. Except for the name of the copy, all the properties of the copy are the same. To prevent the duplicated copy from overlapping with the original copy, simply drag the duplicated copy around. Right-click the selected Object and click Edit -> Duplicate.
Copying Objects in Multiple Editors
When multiple Editors are open, you can paste the copied Objects in other Editors by using the right-click menu or shortcut keys.
Dragging and Dropping
For the selected Object, hold Alt and the left mouse button, and drag the mouse to copy the Object.
Modifying the Pivot
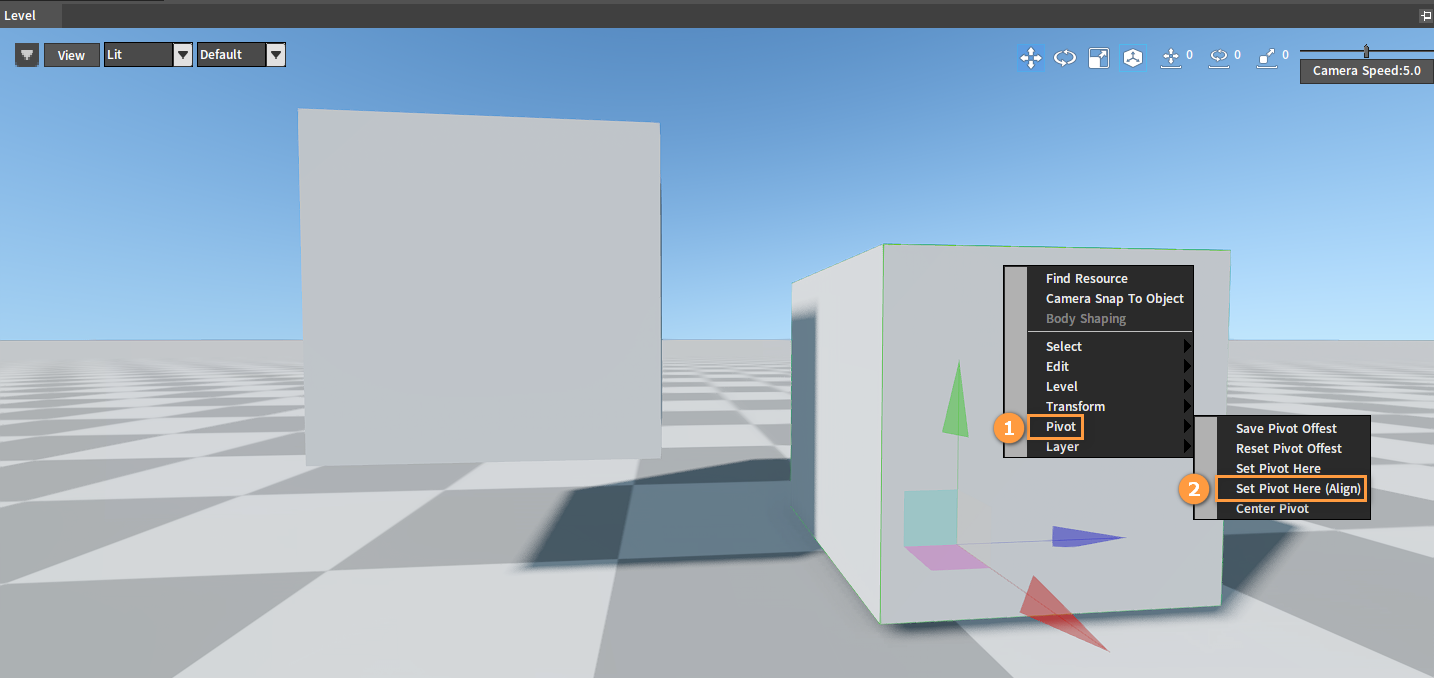
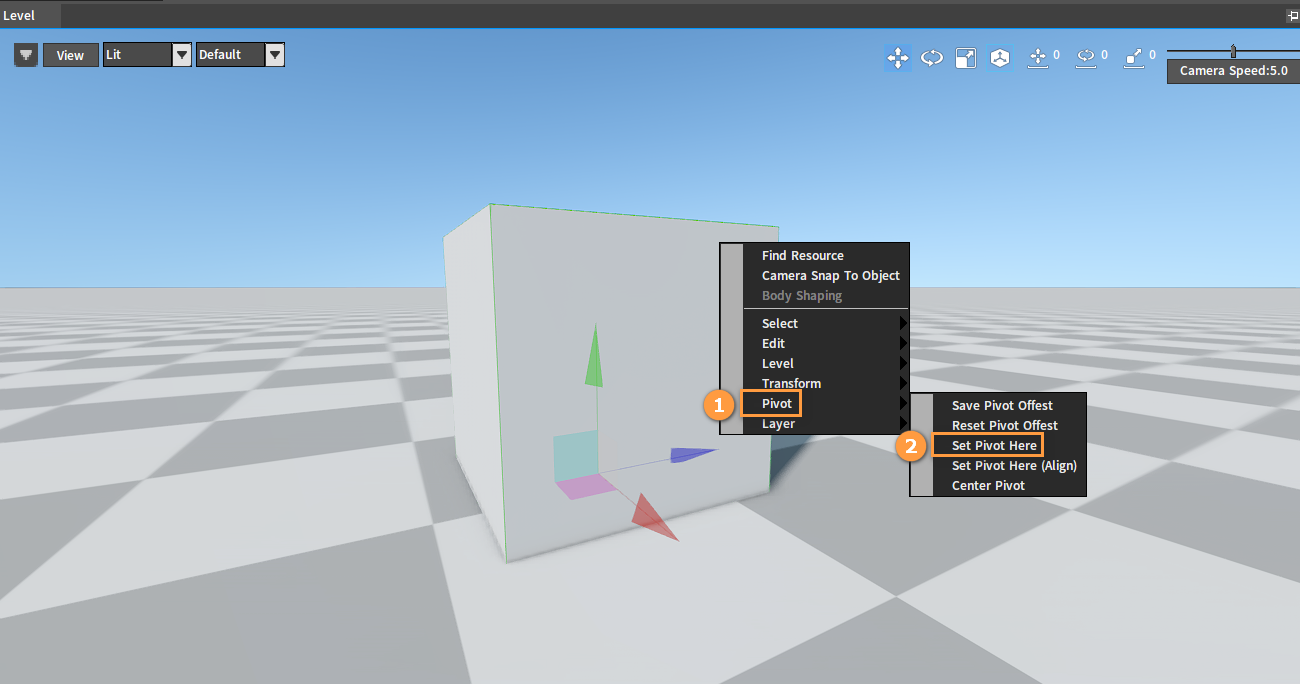
When an Object is selected, it has its default Pivot. To modify the pivot, right-click on the Object’s target place to open the menu bar, then click Pivot -> Set Pivot Here to change the pivot of the selected Object, and reset the Gizmo.
The Editor provides two ways to set pivot, Align and Non-Align. Click Set Pivot Here (Align) to automatically align the Object to the vertex closest to the mouse pointer.

Finding Object Resources
When locating the resource of the Object in the Resource Preview window, right-click the target Object to bring up the right menu and click Find Asset, the Resource Preview window will display the Object and highlight it.


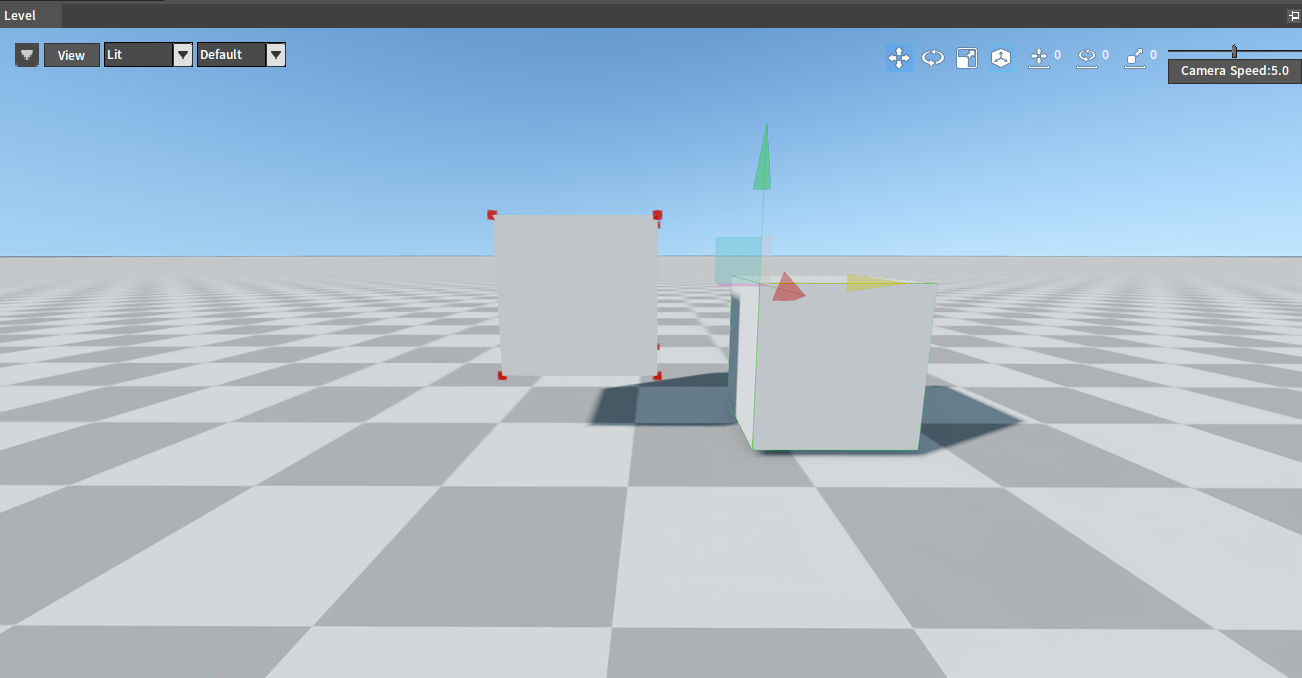
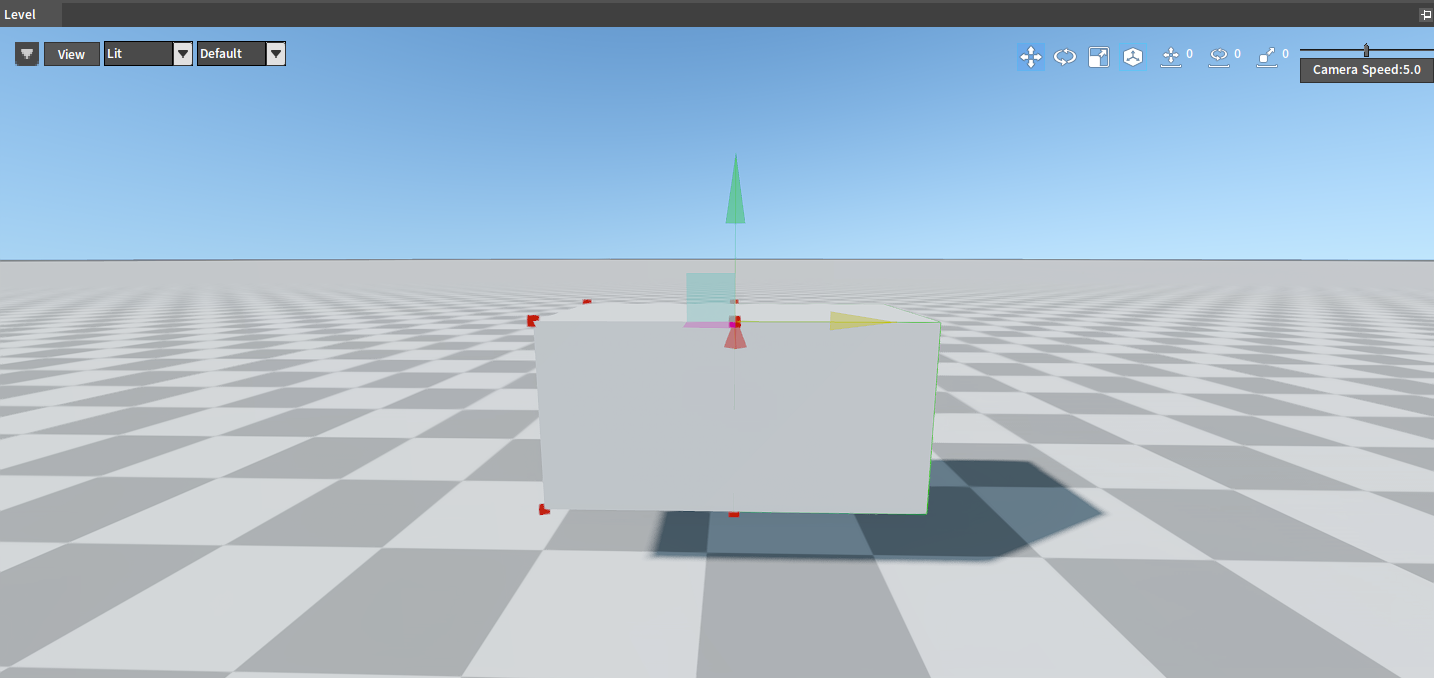
Aligning Objects
Right-click the selected Object, click Set Pivot Here (Align), hold the Ctrl key and drag the Gizmo with the mouse, and then the closest Object will be marked. When the mouse pointer moves close to the marked Object, the pivots will automatically align to it.