Font
Overview
The styles of Font are diverse and can be customized in the Font Editor. This documentation will introduce how to use the Font Editor and its related features in detail.
Font Editor
Opening the Font Editor
Please refer to Opening the UI Editor section in UI Editor.
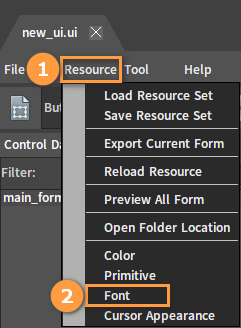
Click Resource (Menu Bar) -> Font in the UI Editor to open the Font Editor.
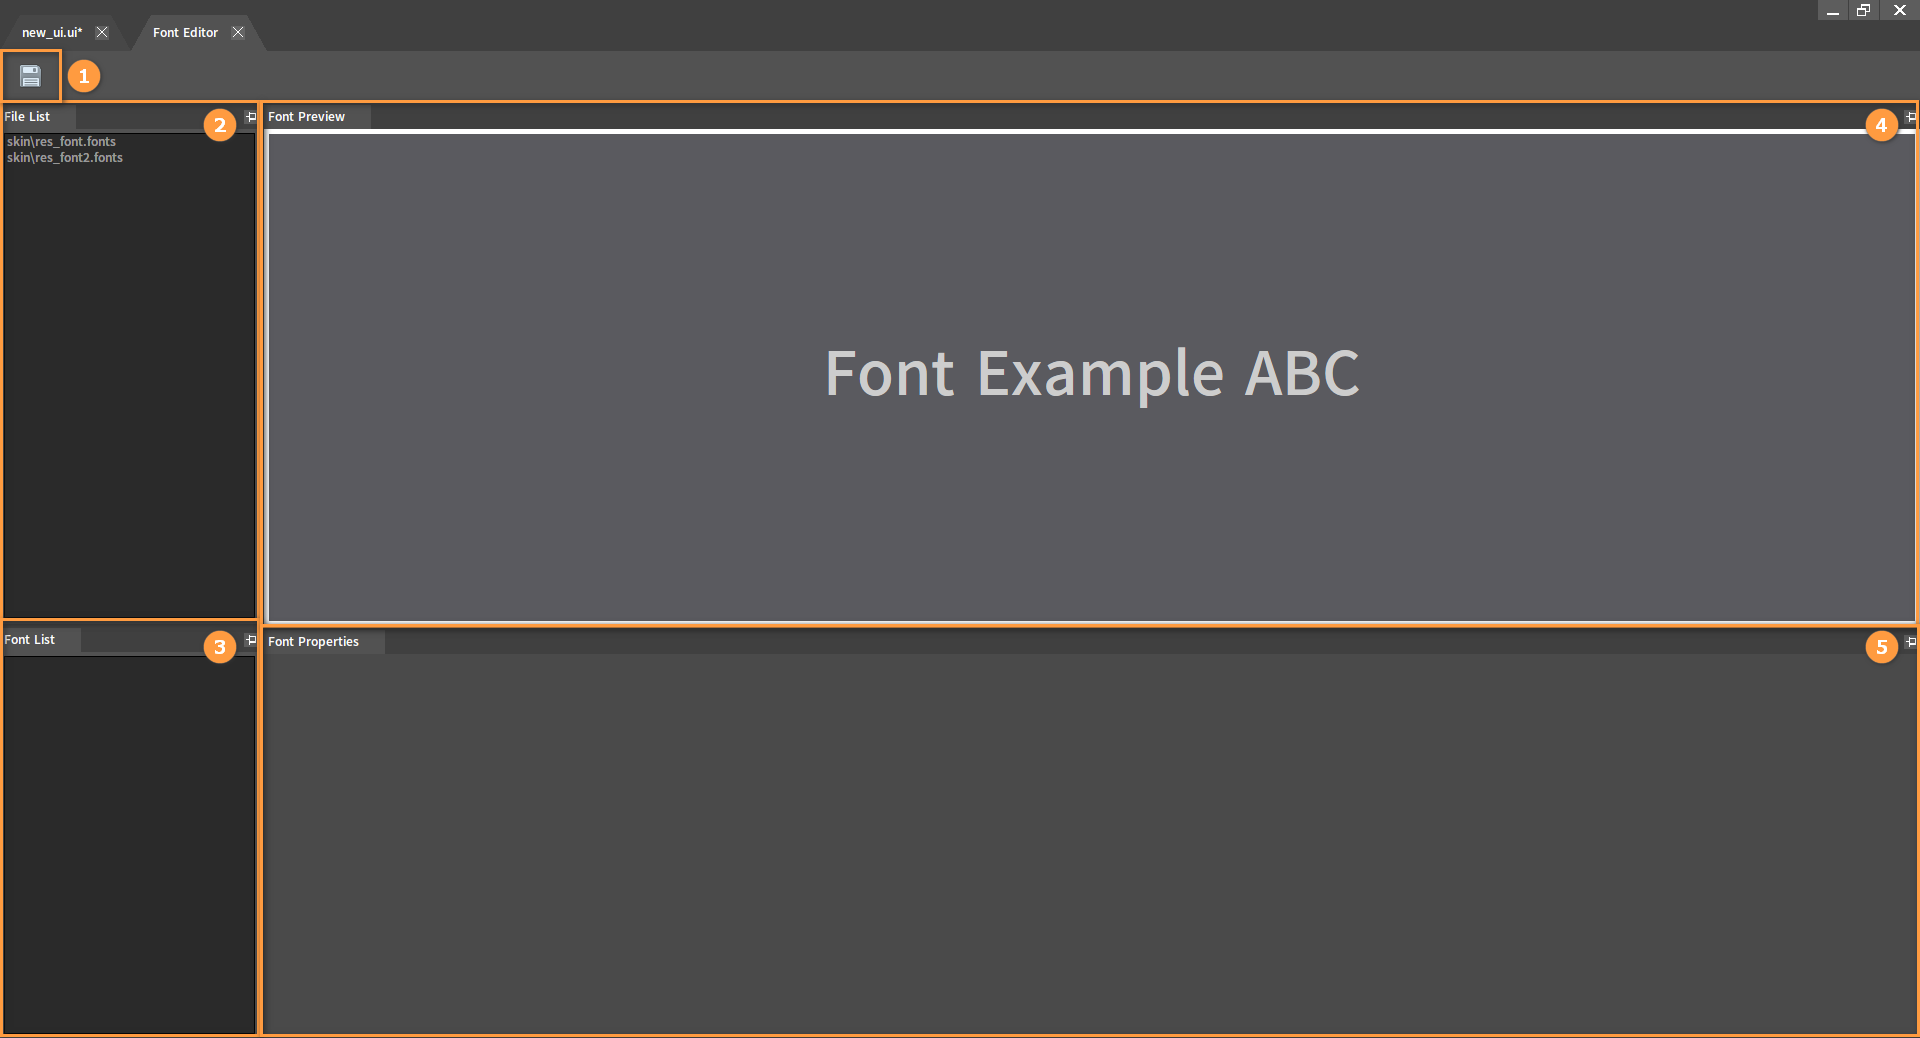
The interface is shown below.
| No. | Name | Description |
|---|---|---|
| 1 | Menu Bar | Save fonts, which is temporarily the only feature. |
| 2 | File List | Display all files storing fonts. They can be deleted or modified here. |
| 3 | Font List | Display all fonts in the file after it is selected. |
| 4 | Font Preview | Preview the effect of the current font. |
| 5 | Font Properties | View and edit any property of the font and the modification will be directly displayed in the Font Preview window. |
Previewing Fonts
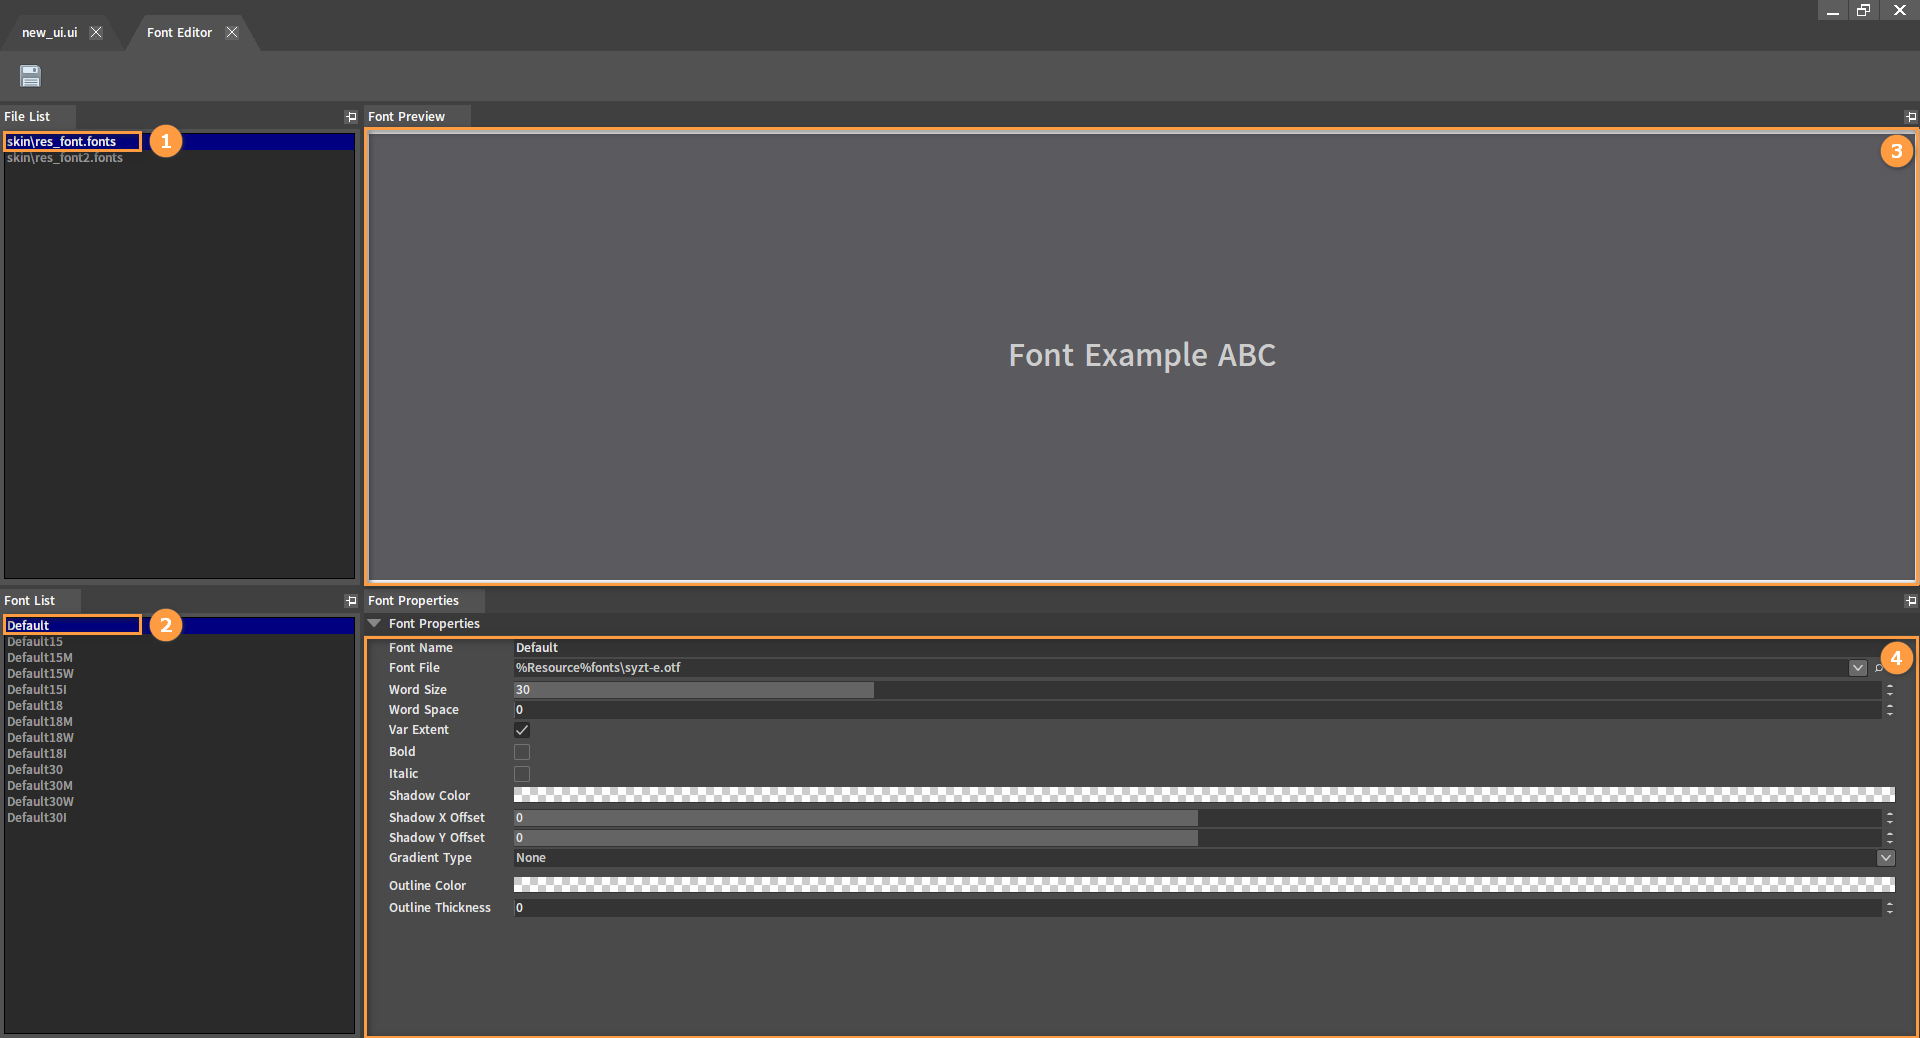
All fonts used in the Flexi Editor are stored in several font files with each of them being able to contain multiple fonts. After selecting a font file in the File List panel, all fonts contained in it will be displayed in the Font List panel.

Click to select any font in the Font List panel, and then it can be previewed in the Font Preview panel on the right with its related properties being displayed in the Font Properties panel.
Font Files
Editing Font Files
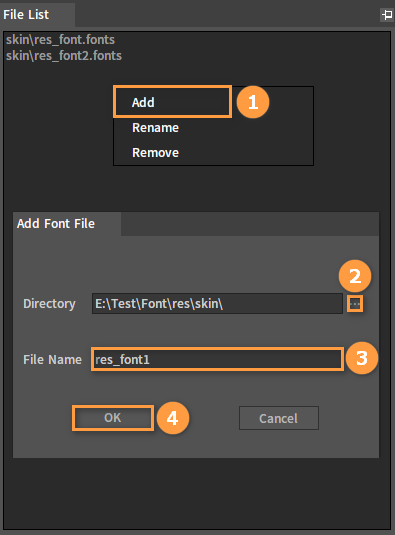
Right-click any space in the File List panel to bring up a Shortcut Menu. Click Add to bring up the Add Font File window. Click the ![]() button next to the Directory property and set the save path of the font file in the pop-up window. Then enter a file name in the File Name property (No extension required, it will be added automatically). Click OK to add a new empty font file with no font contained.
button next to the Directory property and set the save path of the font file in the pop-up window. Then enter a file name in the File Name property (No extension required, it will be added automatically). Click OK to add a new empty font file with no font contained.
Select the created font file. Right-click to pop up a Shortcut Menu to Rename or Remove the current font file.

Editing Fonts
Select a font file in the File List panel, and right-click any space in the Font List panel to pop up a Shortcut Menu. Click Add to bring up the Add Font window, then enter a font name here and click OK to add a new font.
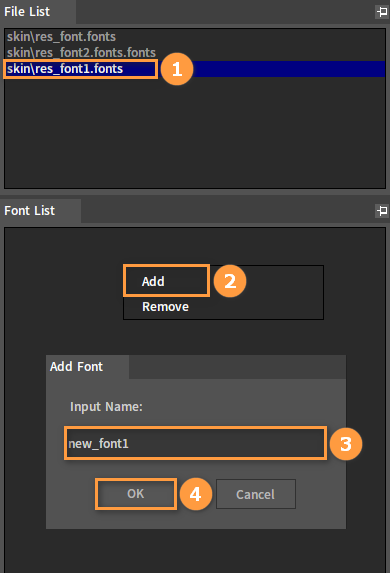
Select the created font and right-click to pop up a Shortcut Menu. Click Remove to remove the current font.

Note: No name-sharing while creating/renaming a font or font file, and the font with the same name cannot exist in any two files simultaneously. If the naming is not standardized, a prompt will pop up to undo the related operations.

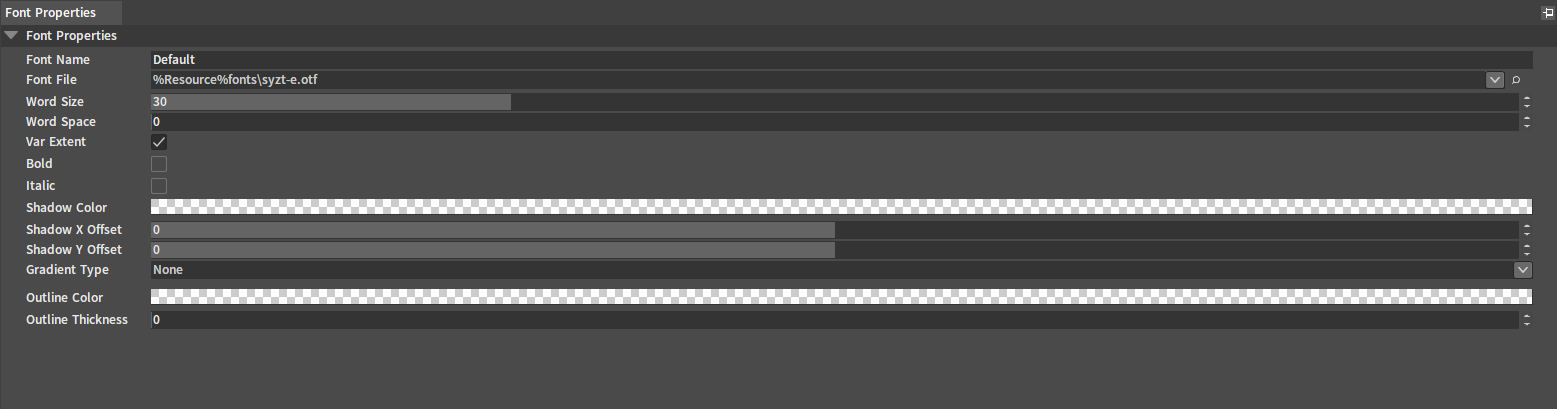
Font Properties
Property Description
| Name | Description |
|---|---|
| Font Name | Name of the font, which is used to distinguish different fonts. |
| Font File | Font file used by the font. The visual effects of different font files vary from each other. |
| Word Size | Determine the size of the font. |
| Word Space | Determine the spacing between each letter in the current font. |
| Var Extent | Keep the same spacing between each letter in the font to avoid some of them being overlapped. |
| Bold | Make the font bold. |
| Italic | Make the font italic. |
| Shadow Color | Determine the font shadow color. |
| Shadow X Offset | Make the font shadow offset in the horizontal direction. The negative number is the left offset, while the positive number is the right offset. |
| Shadow Y Offset | Make the font shadow offset in the vertical direction. The negative number is the upward offset, while the positive number is the downward offset. |
| Gradient Type | Make the font color gradient from dark to light. There are four types: None, To Up, To Down, From Middle. |
| Outline Color | Determine the font outline color. |
| Outline Thickness | Determine the thickness of the font outline. If the property value is 0, no outline effect will be displayed. |
Property Editing
The visual effects of the font can be changed by modifying Font Properties.
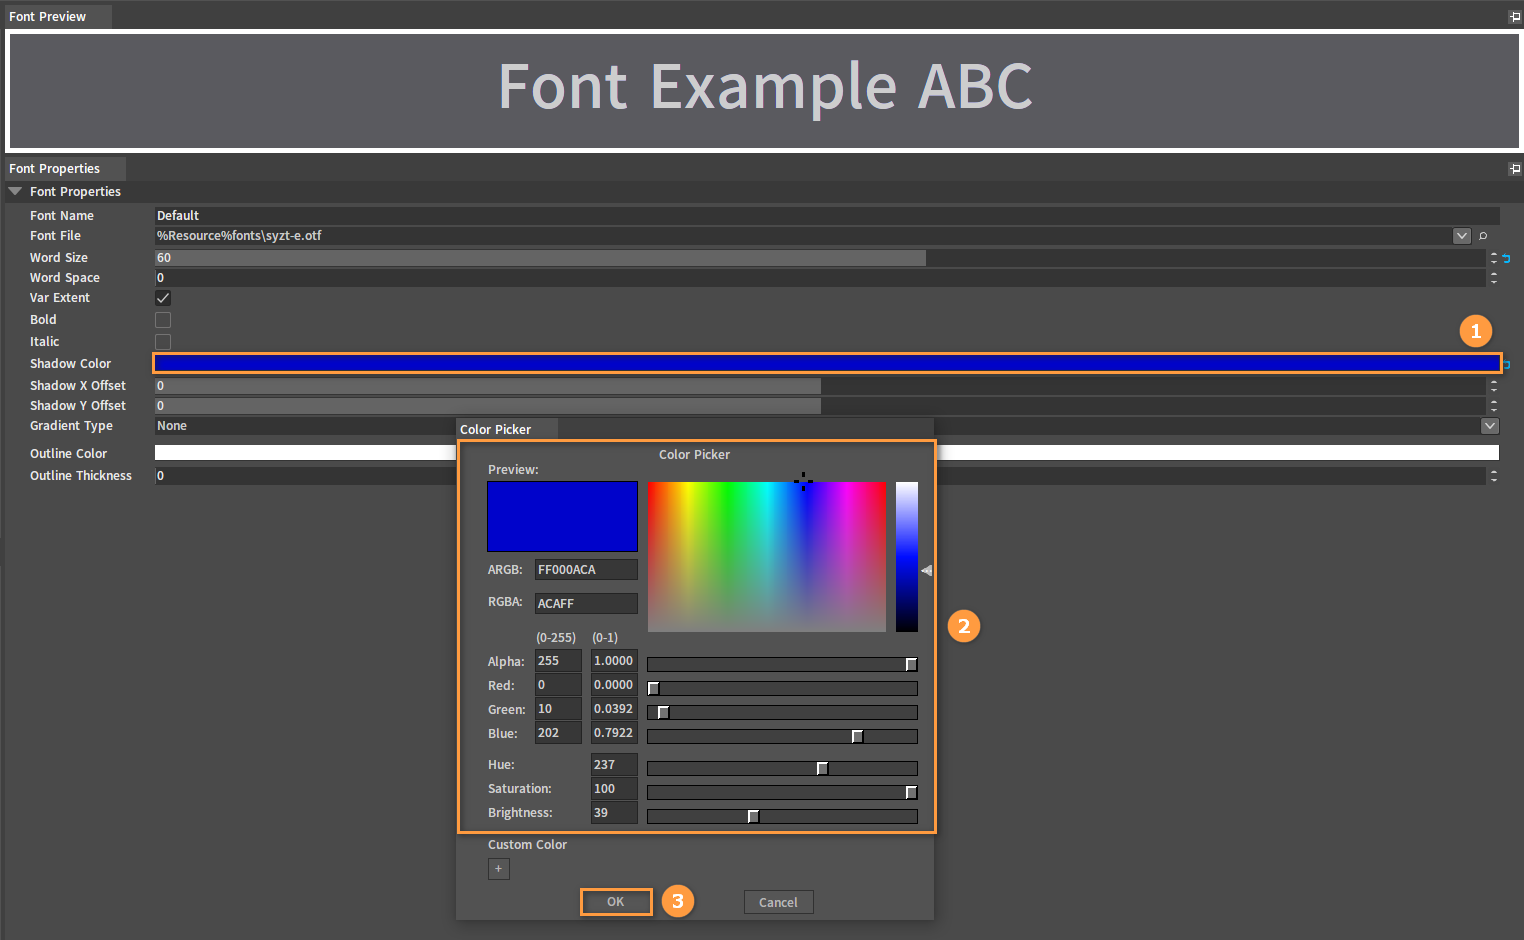
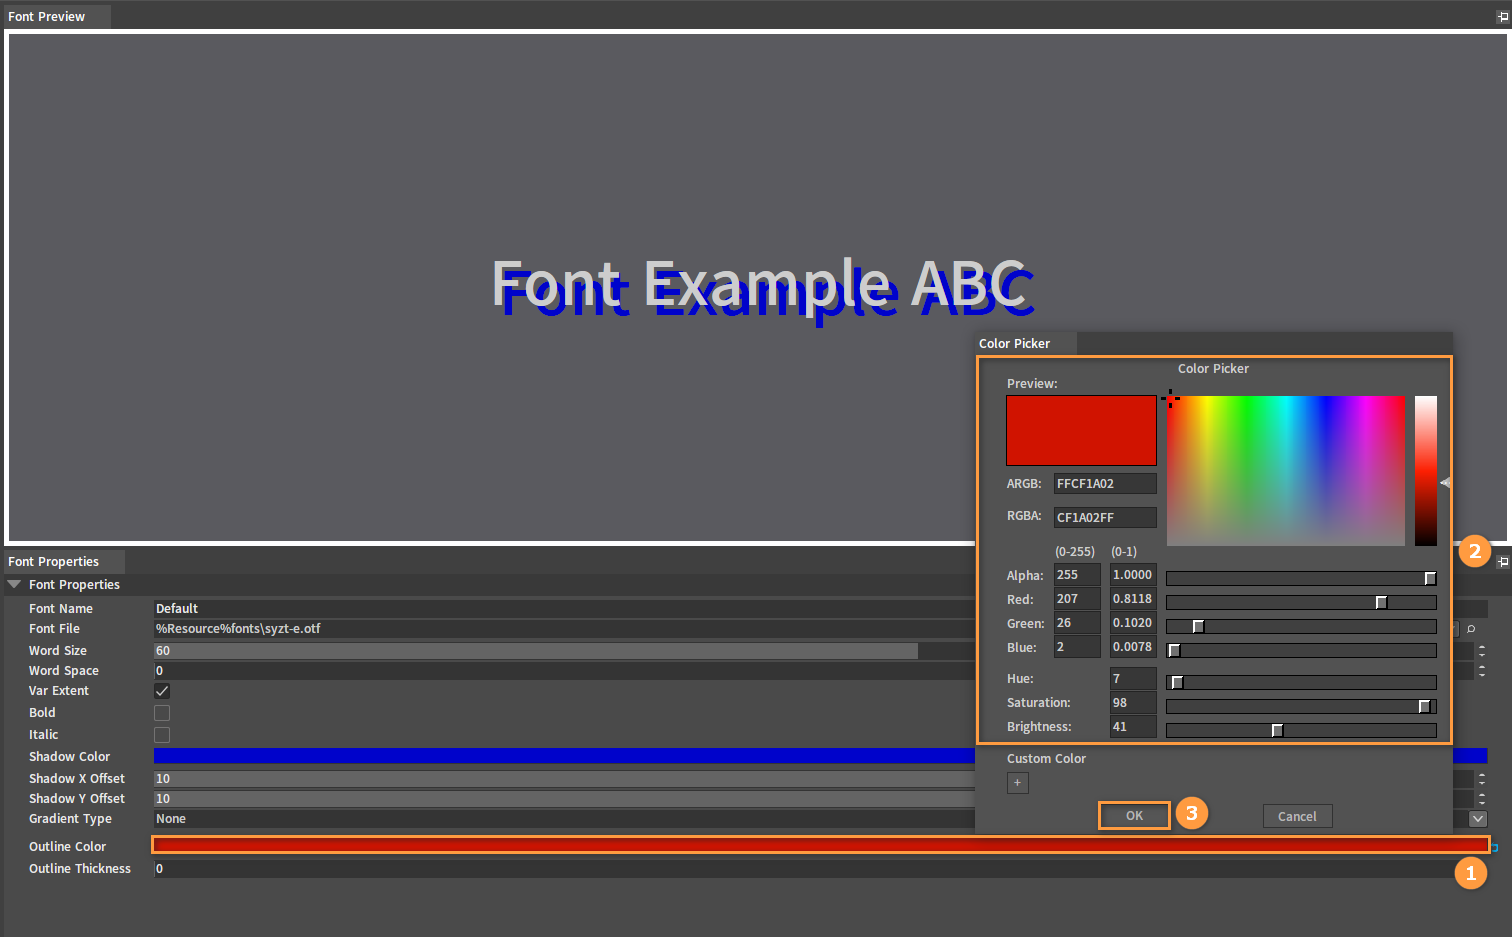
Change the Shadow Color of the font (The initial state is no shadow). Click the Color Bar to the right of the Shadow Color property, and the Color Picker window will pop up. Set the color as needed, and click OK.
Note: In the Color Picker window, the value of Alpha is 0 by default. Only by adjusting this value properly can you see the font shadow color effect. Also, the effect is not obvious and only a slight outline can be seen because the font shadow offset is not set causing the shadow overlaps the initial position of the font.
Change the shadow offset of the font. Modify the offset values in the Shadow X Offset and Shadow Y Offset properties to set the font shadow offset effect.

Change the Outline Color of the font (The initial state is no outline). Click the Color Bar to the right of the Outline Color property, and the Color Picker window will pop up. Set the color as needed, and click OK.
Note: As the default value of the Outline Thickness property is 0, there is no outline effect displayed here.
Change the Outline Thickness of the font (The initial value is 0). Modify the thickness value in the Outline Thickness property to set the font outline effect.

Saving Edits
Click the ![]() button in the Menu Bar to save all changes after completing edits.
button in the Menu Bar to save all changes after completing edits.
Note: If you do not save after editing, the modification will not take effect. Exiting the Font Editor directly will cause the modification to be undone. If there are unsaved changes in the Font Editor, an asterisk will be displayed on the tab.
![]()
Applying Fonts
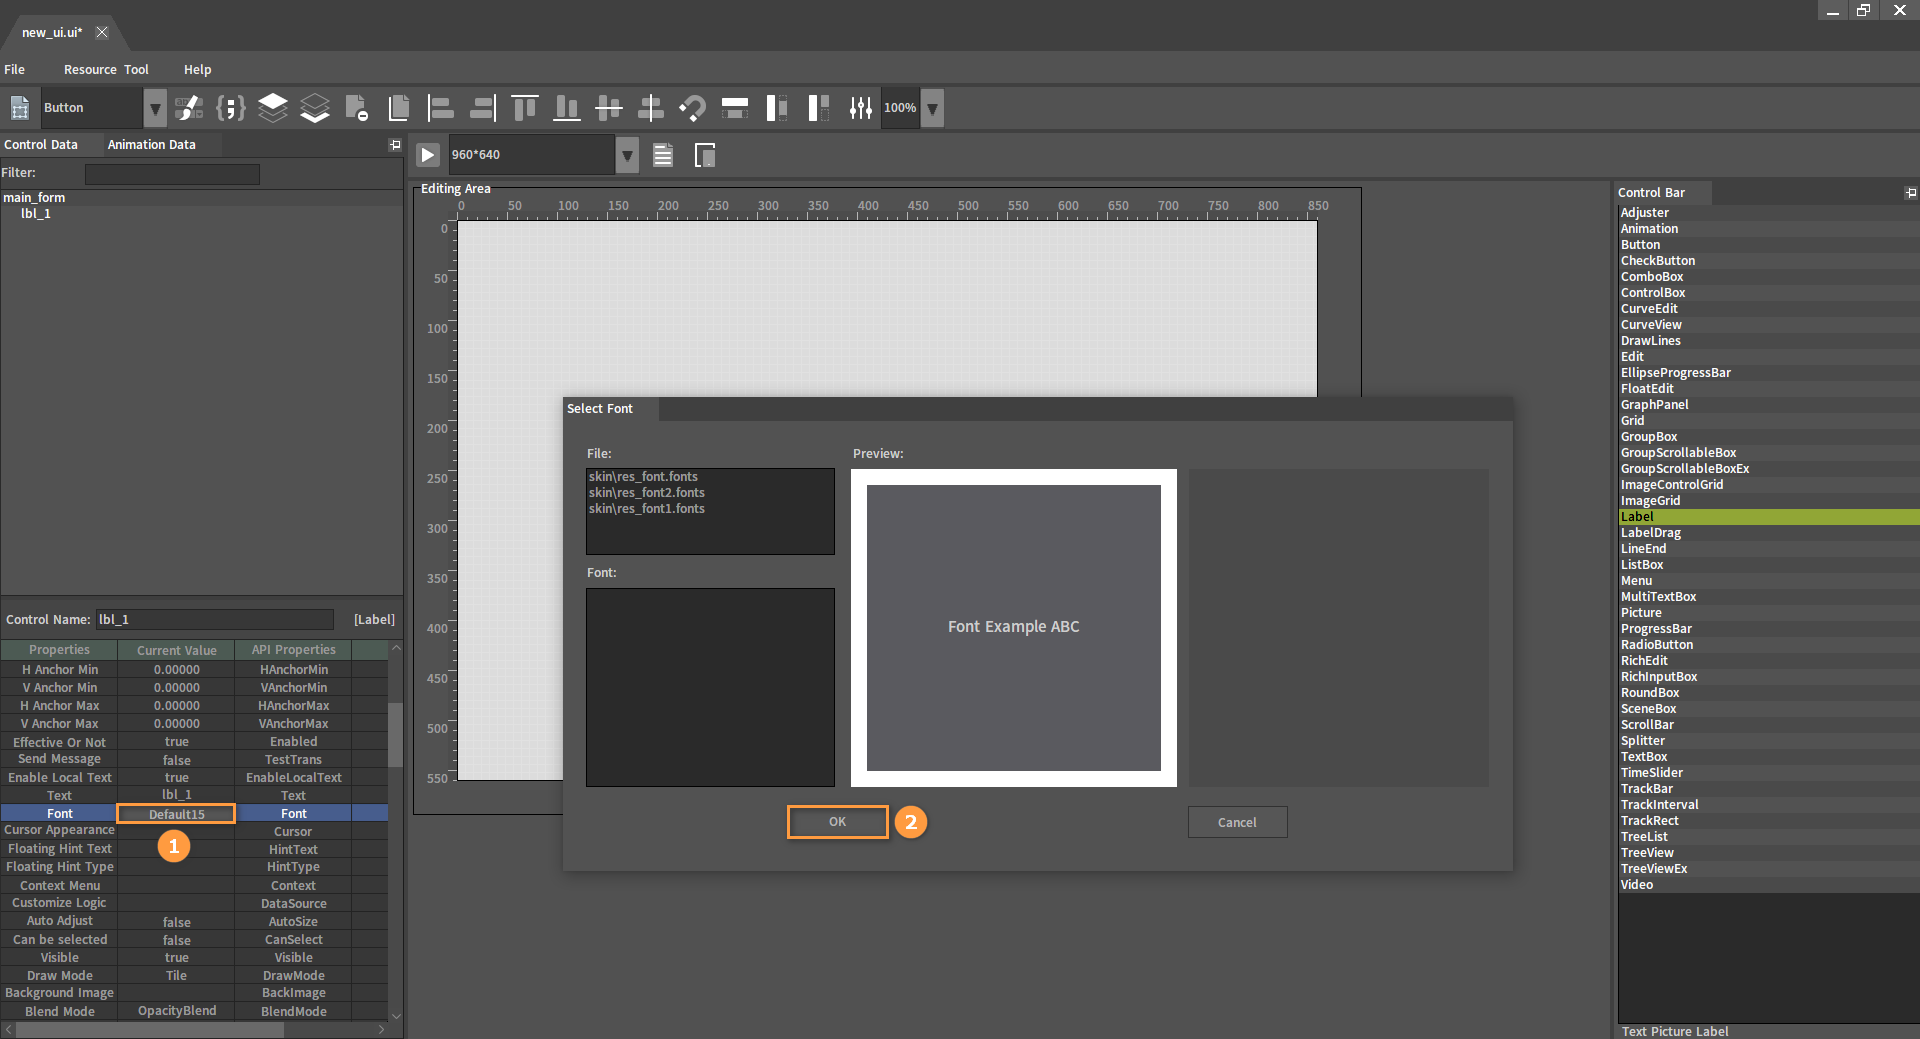
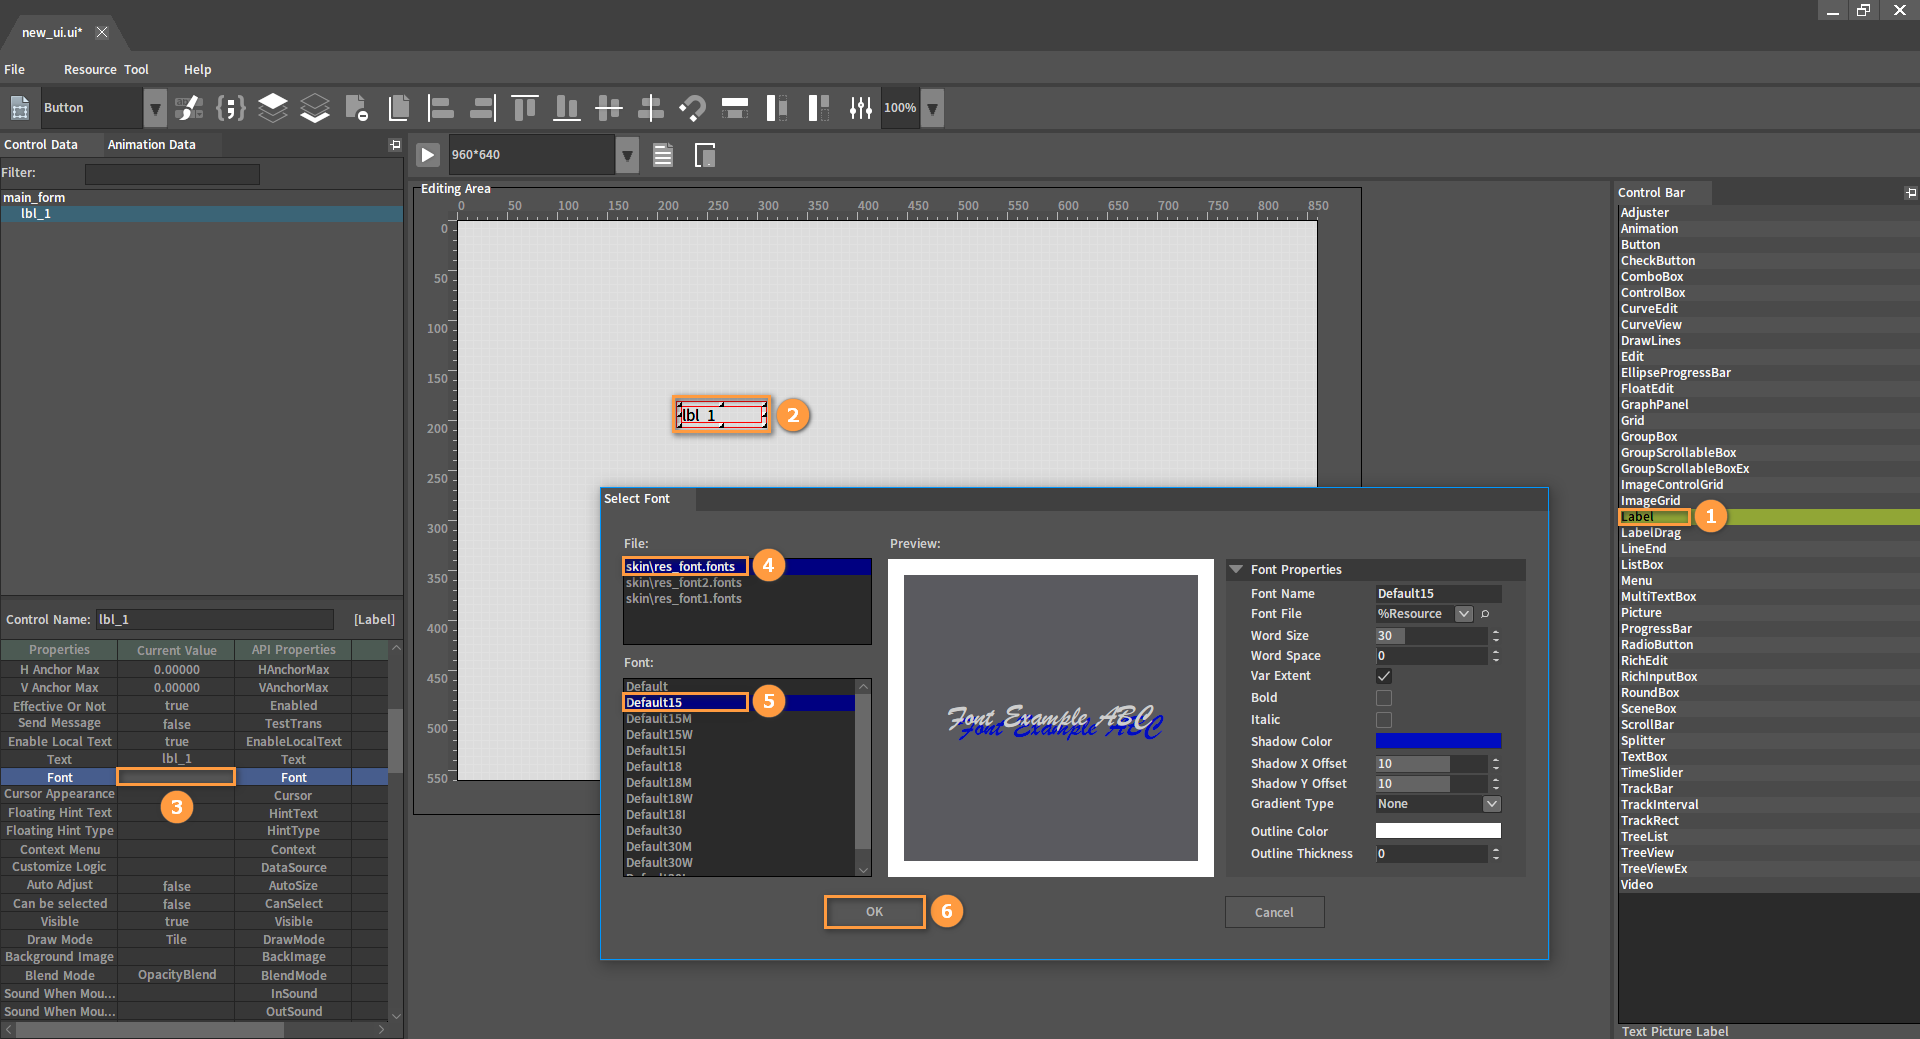
Select the Label control in the Control Bar panel of the UI Editor interface, and click to create it under Editing Area. Click the Font property in the Control Property panel to open the Select Font window. Select a font as needed, and click OK to apply the corresponding font effect.
If the currently displayed font still needs to be modified, you can refer to the previous introduction to re-edit the font in the current Select Font window or reopen the Font Editor.
Note: The OK button will save the modification in addition to returning the selected value. However, once clicked, it will exit the current window.

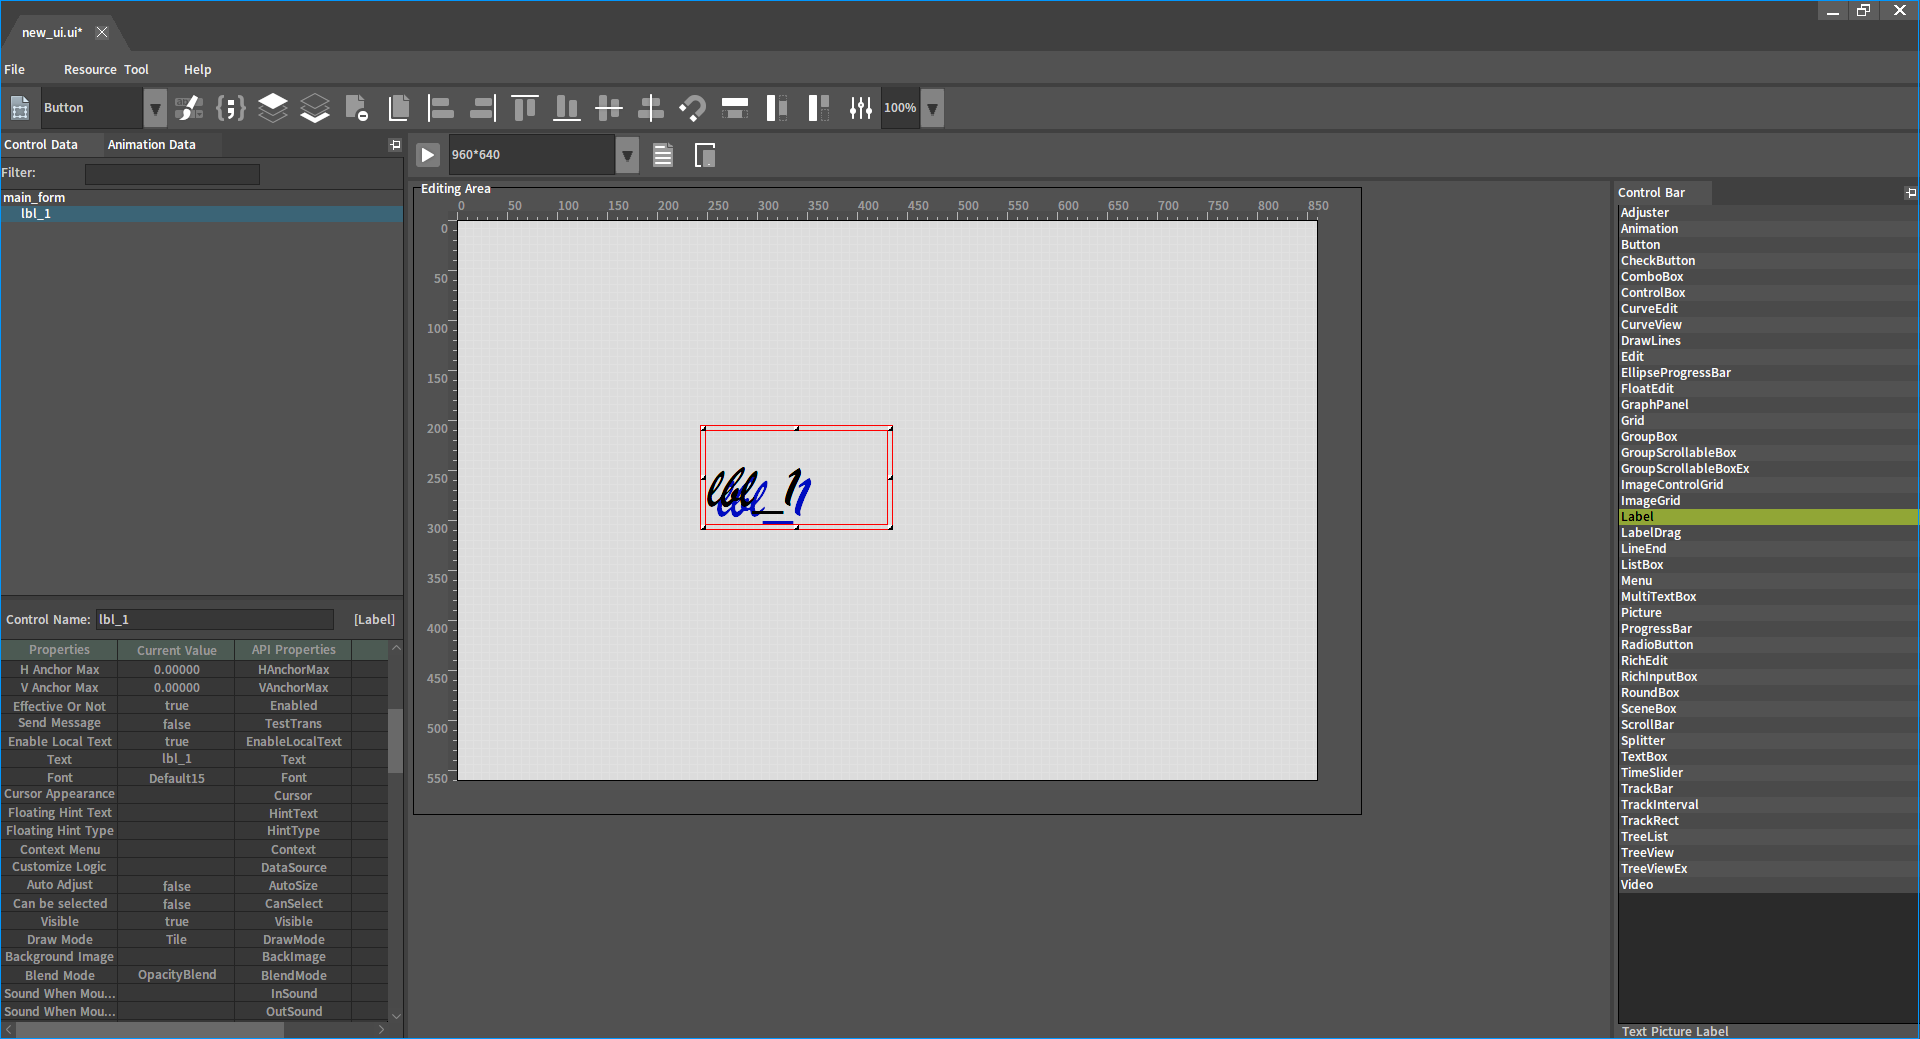
After selecting the font, the effect is shown below.
To clear the selected font, just reopen the Select Font window without selecting any font, and click OK directly.