UI Animation Designer
Overview
UI Animation can be used to process the motion curve, motion speed and other properties of animations, making the control transitions more logical and realistic.
Opening the UI Editor
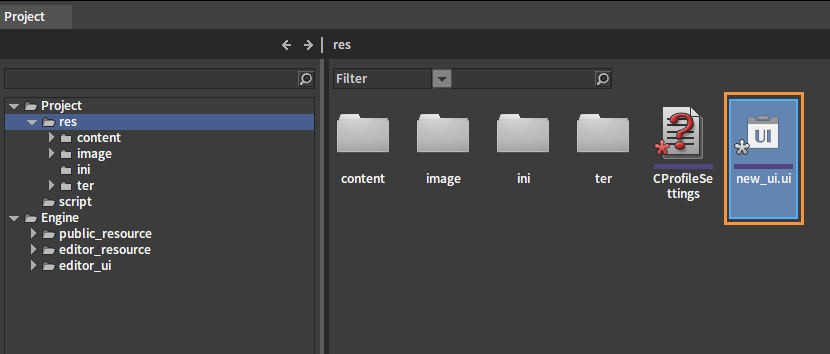
Double-click the UI resource as needed in the Resource Preview window to open the UI editing interface.
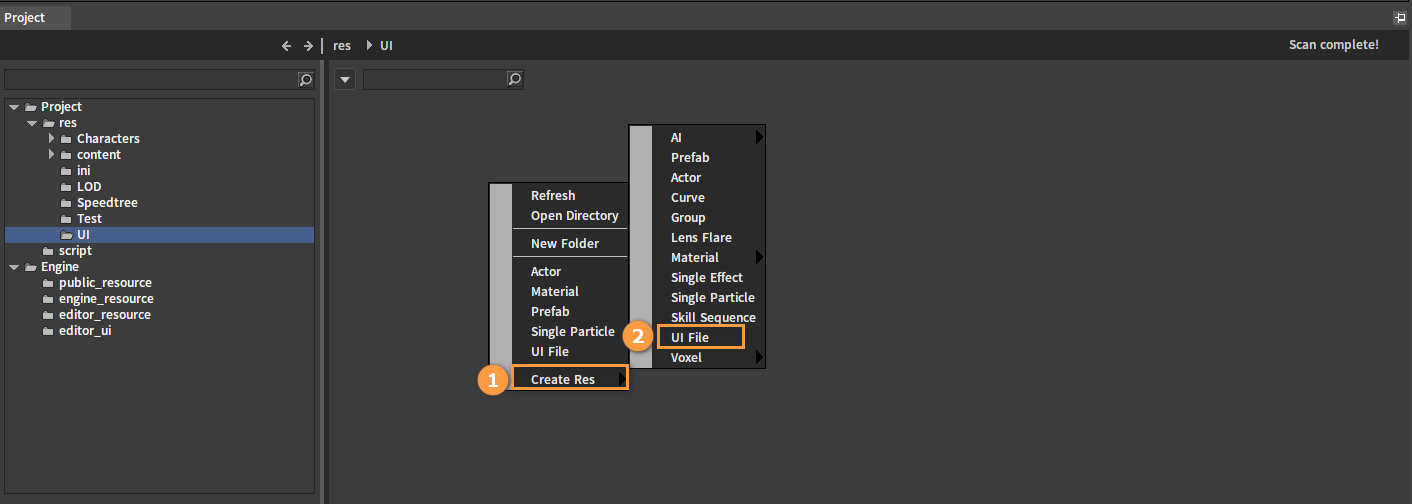
Create a new UI file as follows:
Click the blank space in the Resource Preview window to bring up menu options. Select Create Res -> UI File to create one and rename it as needed.
Switching to UI Animation Designer
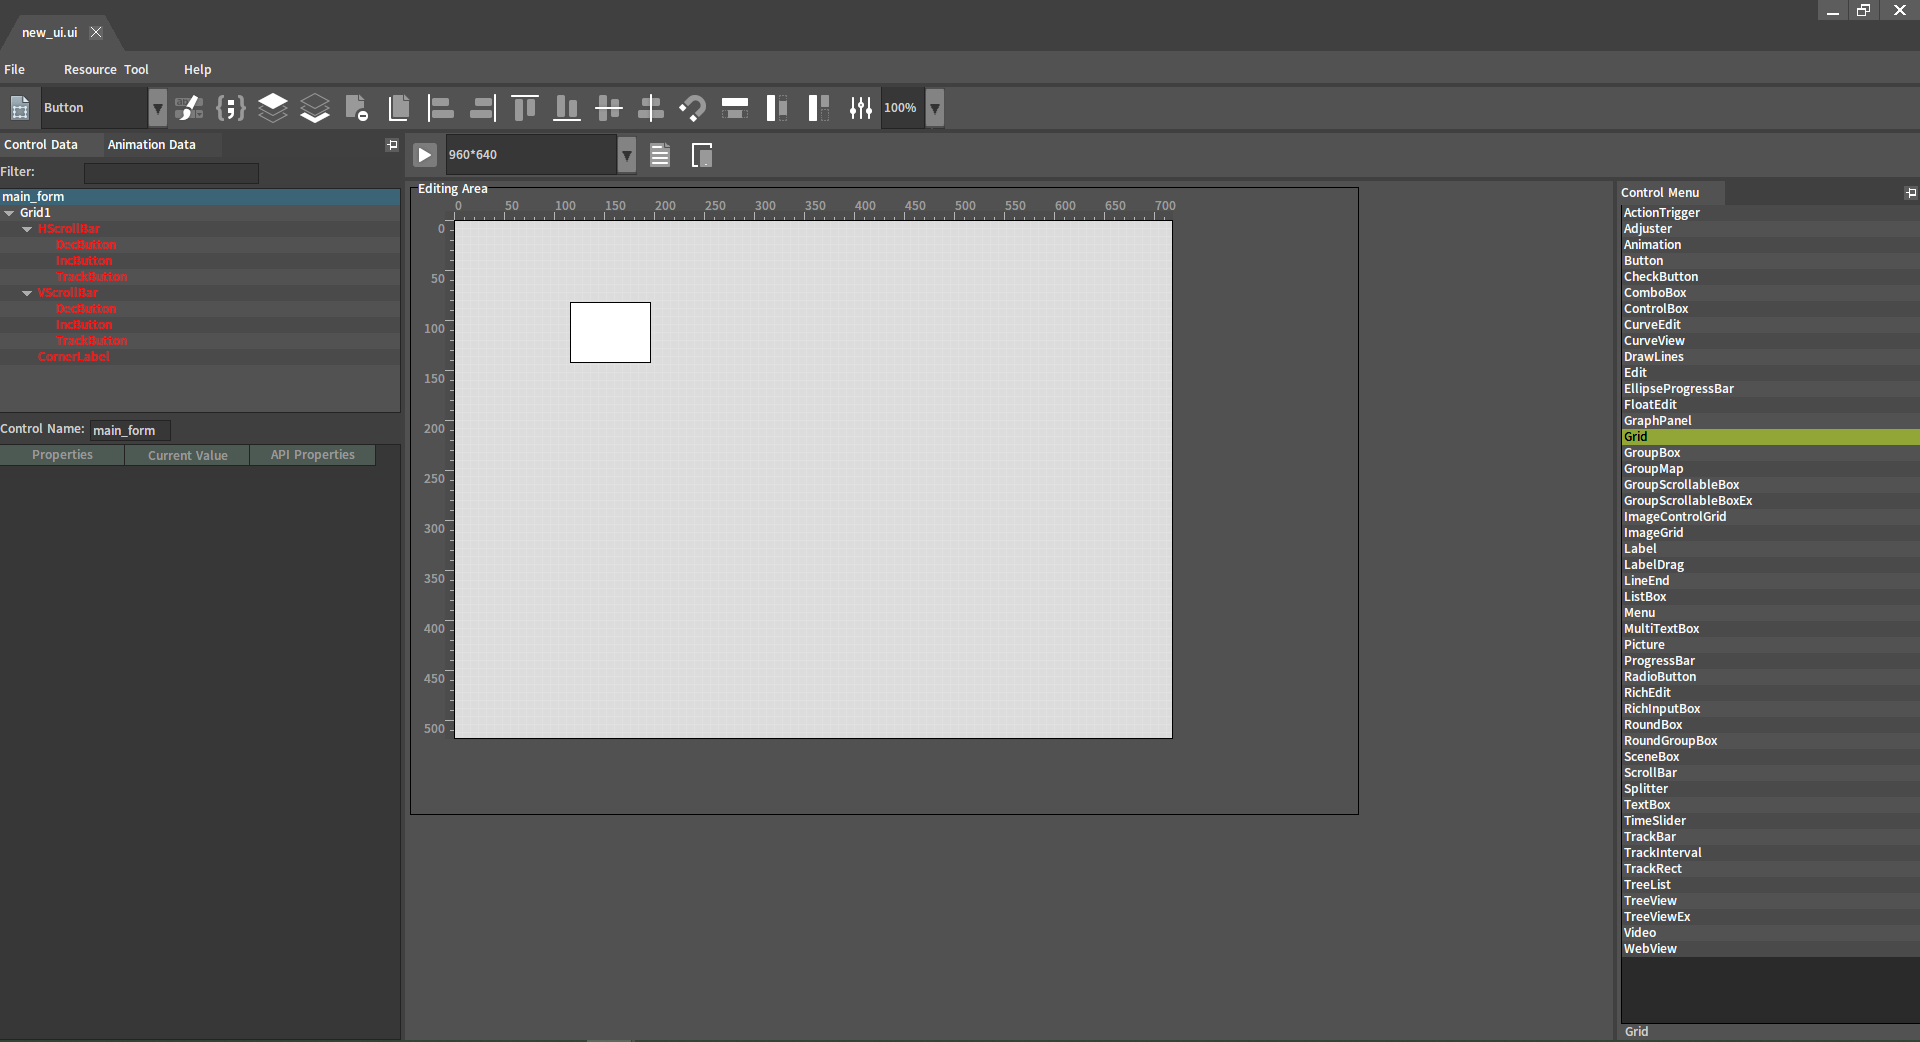
Click Animation Data to switch to UI Animation Designer editing interface.

Interface Introduction
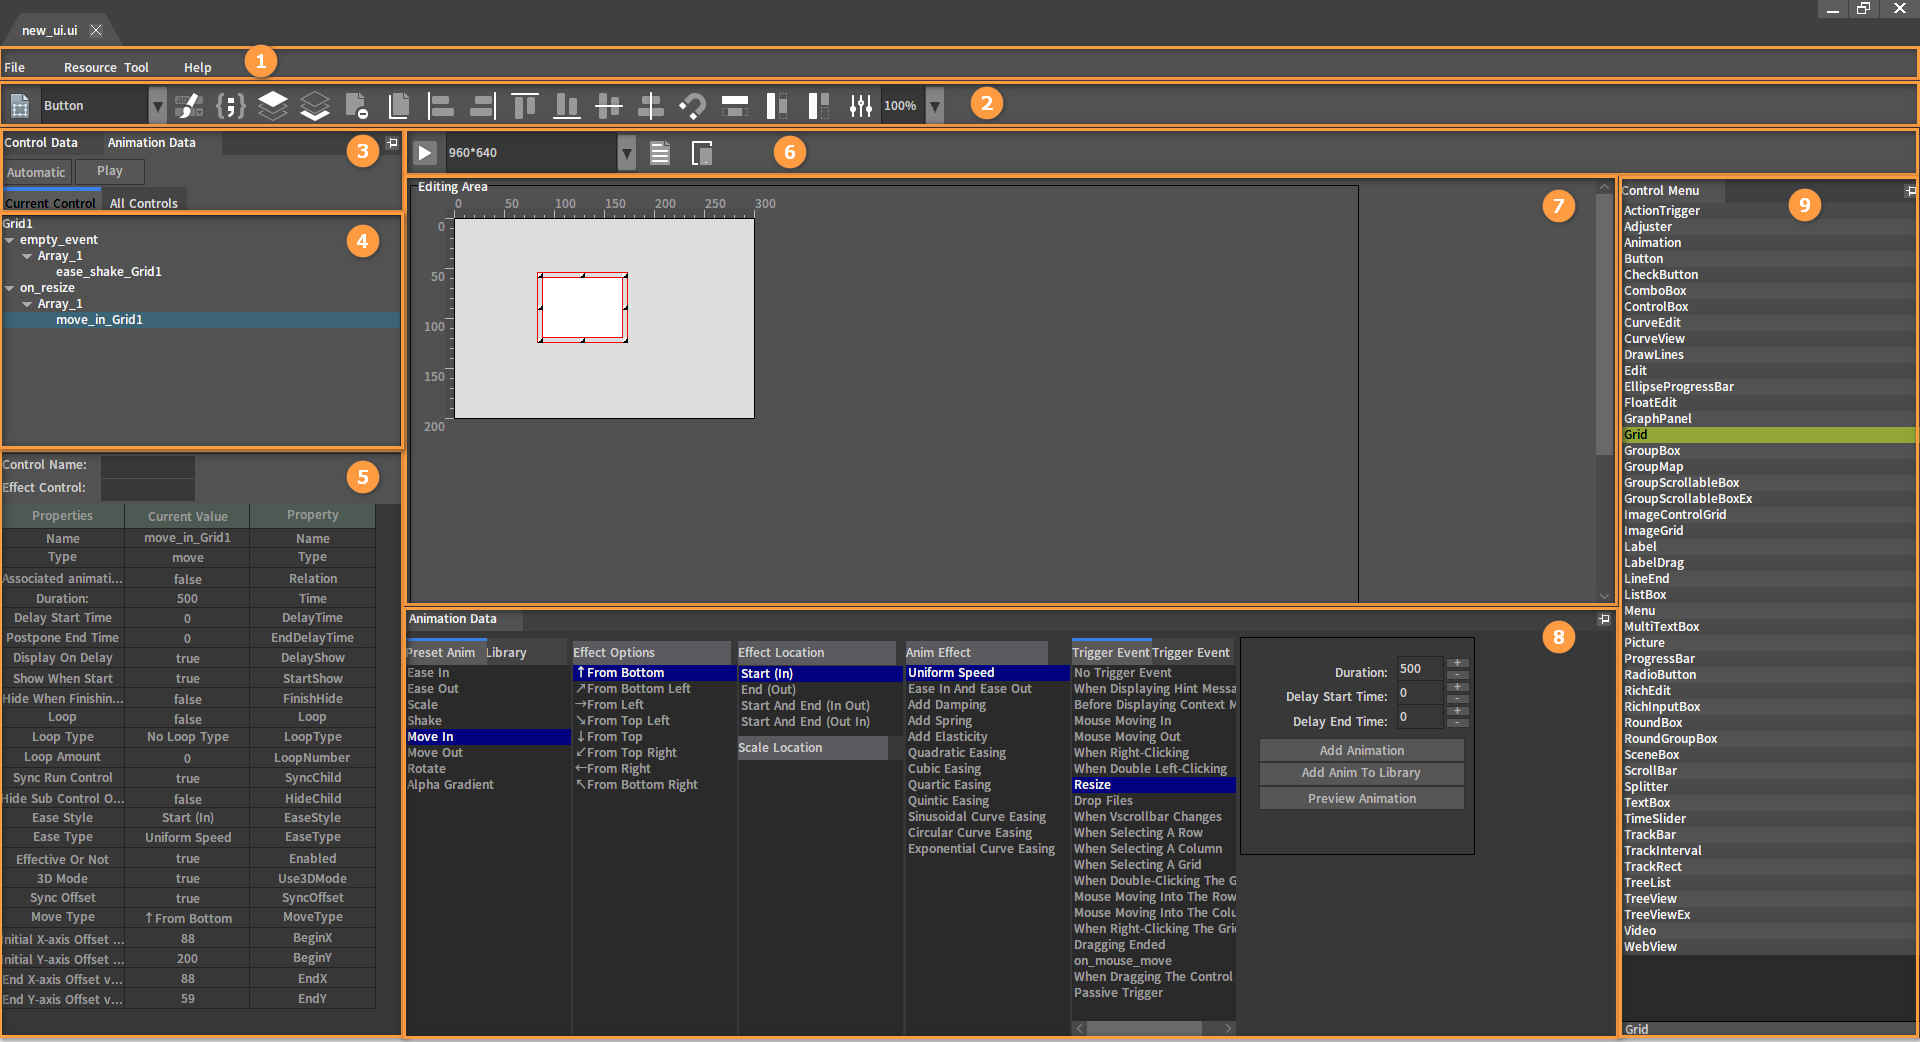
Animation Designer Main Interface
| No. | Name | Description |
|---|---|---|
| 1 | Menu Bar | Provide options related to the Editor. |
| 2 | Toolbar | Provide some operation options related to the control. |
| 3 | Mode Switch | Switch between two UI Designers. |
| 4 | Anim Tree | Display the animations and their hierarchies of each control. |
| 5 | Effect Property List | Display detailed properties of the animation effect selected in the Anim Tree. |
| 6 | Simulation Device Preview Window | Adjust interface resolution and provide preview feature. |
| 7 | Editing Area | Display the position and animation effects of the control. |
| 8 | Animation Date Window | Add animation with some option settings. |
| 9 | Control Menu | Display built-in controls of the designer. |
Animation Data Window
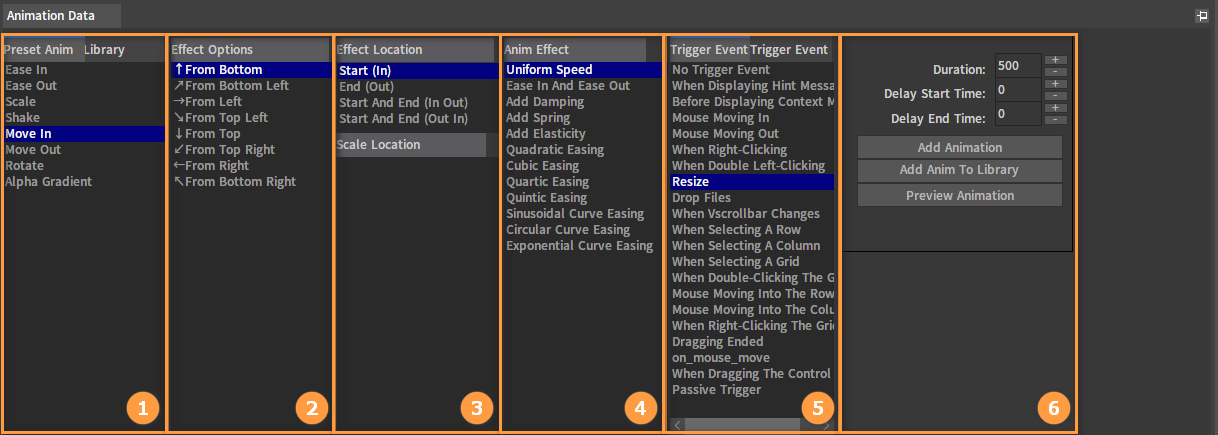
| No. | Name | Description |
|---|---|---|
| 1 | Preset Anim/Library | Main types of UI animations, e.g. translation, scale, etc. |
| 2 | Effect Options | Sub animation types, e.g. translation direction |
| 3 | Effect Location/ Scale Location | The position where the animation is performed |
| 4 | Anim Effect | Describe an additive effect of animation, e.g. uniform speed, ease in and ease out, spring, etc. |
| 5 | Trigger Event Name/Trigger Event | The effect is triggered by current control through the specified event (name) |
| 6 | Add Animation Window | Adjust animation time, add animations, and preview animations |
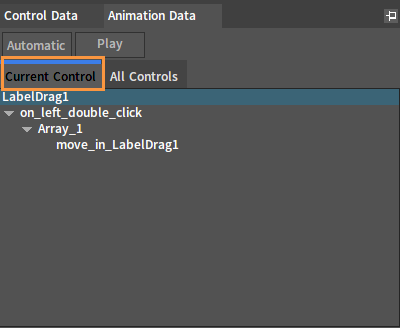
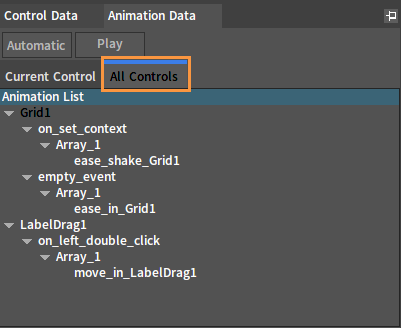
Anim Tree
Anim Tree is used to describe the controls with effects, events, effects, etc. in the current Main Form. There are two types of Anim Trees. One is the Current Control Anim Tree. Click the Current Control button to switch to it, as shown on the left, it displays the selected control and its animations in the editing area. The other is the All Controls Anim Tree. Click the All Controls button to switch to it, as shown on the right, it displays all the controls and their animations.
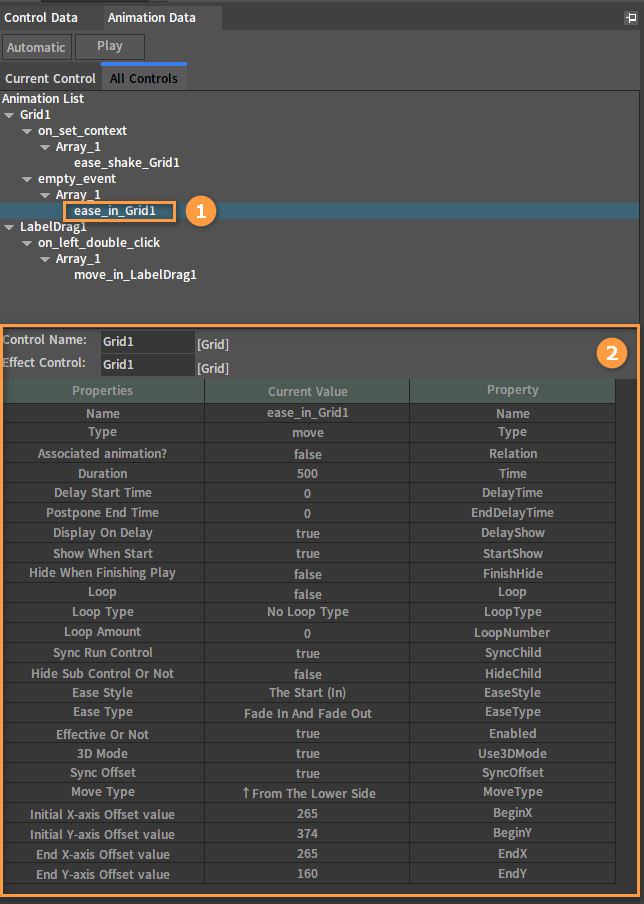
Effect Property List
The Effect Property List shows the properties of the animations. Select an animation in the Anim Tree, and the Effect Property List will be shown directly below it.
Animation Introduction
An animation consists of many options, which are given in a list. Before clicking the Add Animation button, an option must be selected under the non-empty list, otherwise it will fail to add and a hint will pop up. Note that each time an option is clicked in the list (Except the Trigger Event List), the control will perform the corresponding animation in the editing area.
Preset Anim and Effect Options
Preset Anim specifies the change way of the control, while Effect Options specify its change direction during motion.
Ease In is a preset animation that can make the control perform a movement from the boundary of the Main Form to the control coordinates with its speed from fast to slow. The Effect Options can specify the orientation of the start point in the editing area:
- From Bottom
- From Bottom Left
- From Left
- From Top Left
- From Top
- From Top Right
- From Right
- From Bottom Right
Ease Out is a preset animation that can make the control perform a movement from the control coordinates to the boundary of the Main Form with its speed from fast to slow. The Effect Options can specify the orientation of the end point in the editing area:
- To Bottom
- To Bottom Left
- To Left
- To Top Left
- To Top
- To Top Right
- To Right
- To Bottom Right
Scale is a preset animation that allows the control size to change gradually. The specific size change rules are determined by the Effect Options:
- Zoom In: The length and height of the control stretch from 0.
- Zoom Out: The length and height of the control shrink to 0.
- Horizontal Stretch: The height of the control remains the same and the length stretches from 0.
- Horizontal Shrink: The height of the control remains the same and the length shrinks to 0.
- Vertical Stretch: The length of the control remains the same and the height stretches from 0.
- Vertical Shrink: The length of the control remains the same and the height shrinks to 0.
Shake is a preset animation that makes the control shake, the direction of which is determined by the Effect Options.
- Shake Up And Down: Shake up and down.
- Shake Left And Right: Shake left and right.
Move In is a preset animation that can make the control perform a movement from the boundary of the Main Form to the control coordinates with uniform speed. The Effect Options can specify the orientation of the start point in the editing area:
- From Bottom
- From Bottom left
- From Left
- From Top left
- From Top
- From Top Right
- From Right
- From Bottom Right
Move Out is a preset animation that can make the control perform a movement from the control coordinates to the boundary of the Main Form with uniform speed. The Effect Options can specify the orientation of the end point in the editing area:
- From Top
- To Bottom Left
- To Left
- To Top left
- From Bottom
- To Top Right
- To Right
- To Bottom Right
Rotate is a preset animation that can rotate or flip the control. The Effect Options can specify the rotation method.
- Counterclockwise Rotate: Rotate counterclockwise around the center point.
- Clockwise Rotate: Rotate clockwise around the center point.
- Flip From Up To Down: Flip from up to down.
- Flip From Down To Up: Flip from down to up.
- Flip From Right To Left: Flip from right to left.
- Flip From Left To Right: Flip from left to right.
Alpha Gradient is a preset animation that makes the alpha value of the control change gradually. The Effect Options can specify the change range of the alpha value.
- 0-255
- 255-0
Scale Location
Scale Location refers to the position where the control is scaled. The shrinking and stretching effects respectively represent the end point and start point of the animation:
- Center Point
- Top Left
- Top Right
- Bottom Left
- Bottom Right
- Left Center Point
- Top Center Point
- Right Center Point
- Bottom Center Point
Anim Effect
Amin Effect specifies the change effect of the rate and frequency during animation execution:
- Uniform Speed: The effect of executing at a uniform speed.
- Ease In And Ease Out: Add ease in and ease out effect.
- Add Damping: Add damping effect.
- Add Spring: Spring effect.
- Add Elasticity: Elasticity effect.
- Quadratic Easing: Quadratic easing effect.
- Cubic Easing: Cubic easing effect.
- Quartic Easing: Quartic easing effect.
- Quintic Easing: Quintic easing effect.
- Sinusoidal Curve Easing: Sinusoidal curve easing effect.
- Circular Curve Easing: Circular curve easing effect.
- Exponential Curve Easing: Exponential curve easing effect.
Effect Location
Effect Location specifies different playback phases based on the change effect of the rate or frequency selected in the animation effect:
Start (In): The animation plays forward from start to end.
End (Out): The animation plays backward from start to end.
Start And End (In Out): The first half of the animation is played forward, and the second half of the animation is played backward.
Start And End (Out In): The first half of the animation is played backward, and the second half of the animation is played forward.
Trigger Events
Events are operations that can be recognized by the control. A control bound with an animation needs to add the corresponding event to notify the control to execute the animation. The commonly used events in the Editor are as follows:
| No. | Trigger Event Name | Trigger Function |
|---|---|---|
| 1 | No Trigger Event | empty_event |
| 2 | When Displaying Hint Message | on_set_hint |
| 3 | Before Displaying Context Menu | on_set_context |
| 4 | Mouse Moving In | on_get_capture |
| 5 | Mouse Moving Out | on_lost_capture |
| 6 | When Right-Clicking | on_right_click |
| 7 | When Double Left-Clicking | on_left_double_click |
| 8 | Resize | on_resize |
| 9 | Drop Files | on_drop_files |
| 10 | When Vscrollbar Changes | on_vscroll_changed |
| 11 | When Selecting A Row | on_select_row |
| 12 | When Selecting A Column | on_select_col |
| 13 | When Selecting A Grid | on_select_grid |
| 14 | When Double-Clicking The Grid | on_double_click_grid |
| 15 | Mouse Moving Into The Row | on_mousein_row_changed |
| 16 | Mouse Moving Into The Column | on_mousein_col_changed |
| 17 | When Right-Clicking The Grid | on_right_select grid |
| 18 | Dragging Ended | on_drag_leave |
| 19 | Mouse Move | on_mouse_move |
| 20 | When Dragging The Control | on_drag_move |
| 21 | Passive Trigger | Passive Trigger |
Time
Some time-related properties including Duration, Delay Start Time, and Delay End Time can also be modified all in milliseconds (ms). The exact number can be entered directly in the input box. Or click the ![]() and
and ![]() buttons to modify. The Duration and Delay Start Time are incremented by 250 (ms) each time, and the Delay End Time are incremented by 50 (ms).
buttons to modify. The Duration and Delay Start Time are incremented by 250 (ms) each time, and the Delay End Time are incremented by 50 (ms).
Duration: Setting the duration of the animation execution will change the playback time of the animation. If the duration of the animation execution is increased, the execution speed will be reduced accordingly; and vice versa.
Delay Start Time: If the delay start time is not 0, it will wait for a number of milliseconds before executing the animation.
Delay End Time: If the delay end time is not 0, although the animation is over, it will not be really over until the delay end time is completed.
Operation Introduction
Adding Animation Instances
Here's an example of adding an animation that eases in from the bottom for the text box:
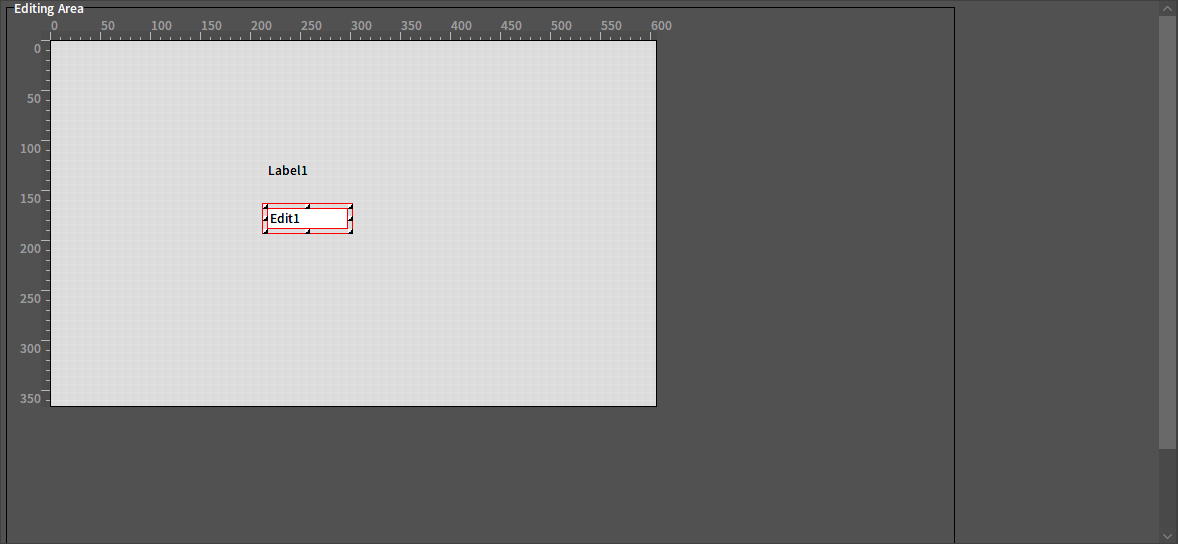
Select a control in the editing area. There will be a red box outside, indicating the specific control that needs to be animated. Click the text box control Edit1 here.
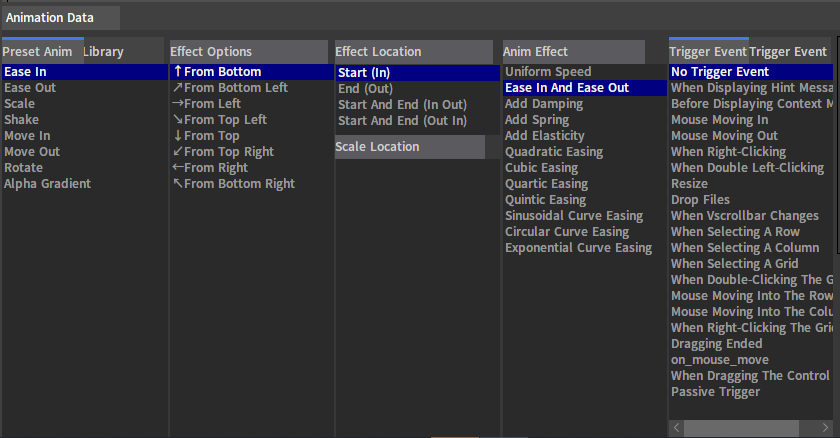
Click Ease In -> From Bottom -> Start (In) -> Ease In And Ease Out -> No Trigger Event. The properties are set for the animation now:
Preset Anim: Ease in.
Effect Options: From bottom, ease in from the bottom of the Main Form.
Effect Location: When starting, the control Edit1 will perform an accelerated motion from start to end.
Anim Effect: Ease in and ease out.
Trigger Event: No trigger event.
Set the Duration of the animation to 2000ms, which means the duration of the ease-in animation process of Edit1 is 2000ms.

To preview the animation, click the Preview Animation button or use the shortcut key Space to view the specific effect of the animation under all the currently modified property values.

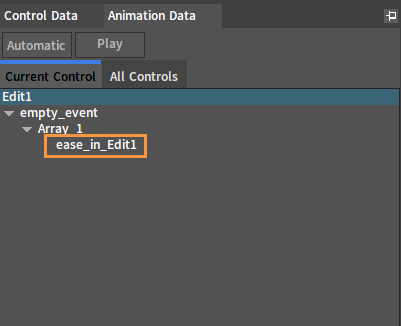
After modifying the time, click the Add Animation button to add animation and mount it on the Anim Tree node of the control. Animations can also be added by using the shortcut key
 in the keyboard.
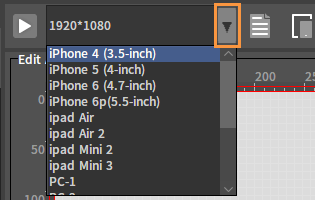
Adjusting and Simulating Device Resolution
Click the ![]() button to open the drop-down menu and select the corresponding device and resolution.
button to open the drop-down menu and select the corresponding device and resolution.
Simulation Preview
Click the ![]() button to simulate previewing the added animations.
button to simulate previewing the added animations.
