Material Editor
Overview
The Material Editor is used to edit materials and modify the static mesh and the surface material properties of the skeletal mesh to achieve expected visual effects.
Material Editor Properties
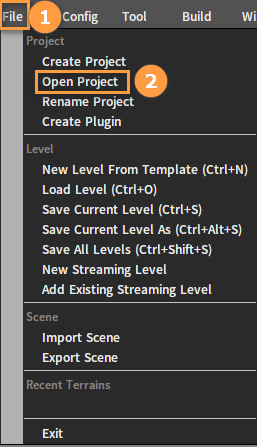
In the Flexi Editor, click File -> Open Project, then click Browse in My Projects panel. In the pop-up Select Project File window, select test_project under 02_demo, then select flexi.projectinfo and click OK. After that, double-click new_animation_demo under My Levels to open the scene.

Press the shortcut key M to open the Material Editor.
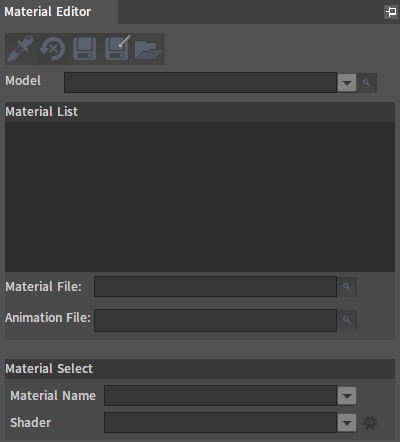
At the top of the Material Editor is the Tool Bar.

Frequently used buttons:
| No. | Button | Description |
|---|---|---|
| 1 | Absorb | Get the material information of the selected model in the scene. |
| 2 | Restore | The previous modification can be undone with the Restore button before it is saved. |
| 3 | Save | Save the modification to the material file. |
Click the Absorb button on the Tool Bar and select the model to be viewed in the Level panel. Here we select the armor area of this character.

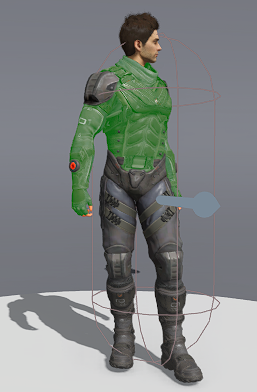
The material information of the selected model will now be displayed in the Material Editor.
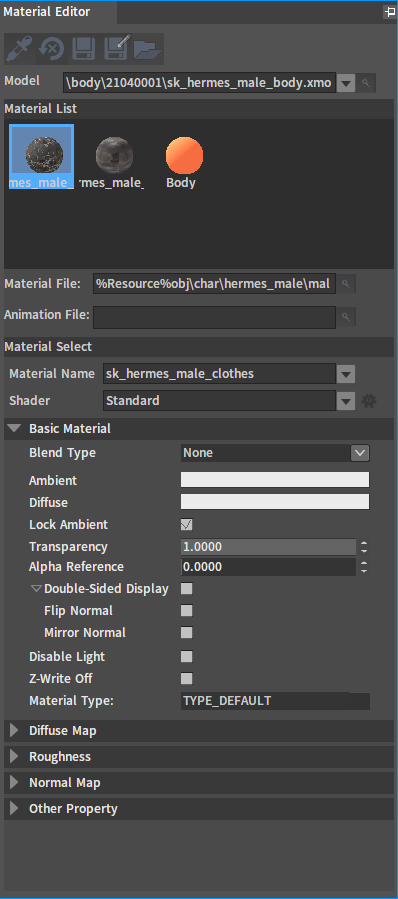
| Property | Description |
|---|---|
| Model | Display the model path. In the case of multiple models, select the model to be viewed in the drop-down list. |
| Material List | Display all the material info of the current model. Select a material in the Material List to see the parameters of this material. |
| Material File | Path of the material file. |
| Animation File | Material animations simulate material property changes, which are mainly used to create special effects. |
| Material Select | Including settings of Material Name and Shader. |
| Basic Material | Blend Type, color of Ambient and Diffuse, Transparency, Alpha Reference, whether to Flip Normal, whether to enable Z-Write Off, and whether to disable Light, etc. can be set in Basic Material. |
| Diffuse Map | Diffuse map. |
| Roughness | Used to store Metallic, Roughness and Specular Intensity info of objects. |
| Normal Map | Normal map, which simulates bump effects on the plane in order to save model resources. |
| Other Property | Properties of specific functions. |
Material Select Settings
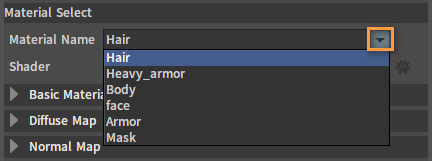
Material Select includes settings of Material Name and Shader. Material Name displays the name of the current material. If there are multiple materials, click the ![]() button on the right of Material Name to switch to the required material in the drop-down list.
button on the right of Material Name to switch to the required material in the drop-down list.
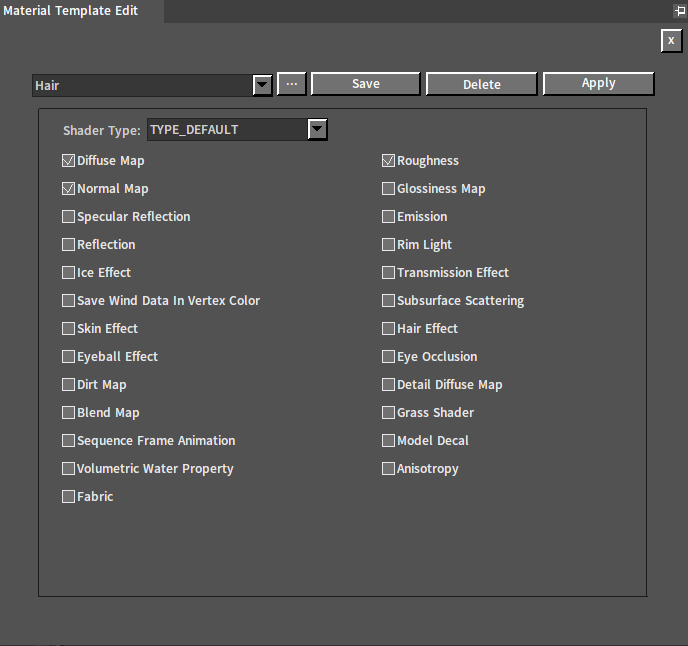
Shader displays the shader template name of the current material. Hold down the Ctrl key and click the ![]() button to add or delete parameter options in the pop-up Material Template Edit window.
button to add or delete parameter options in the pop-up Material Template Edit window.
Viewing Model Materials
There are two ways to view model materials.
- Press the shortcut key M to open the Material Editor, then click the Absorb button on the Tool Bar, and select the model in the scene (refer to the method described earlier in section Material Editor Properties). Or select the model in the scene first, and then press the shortcut key M to open the Material Editor.
- In Flexi, find the required model file in the Project panel.
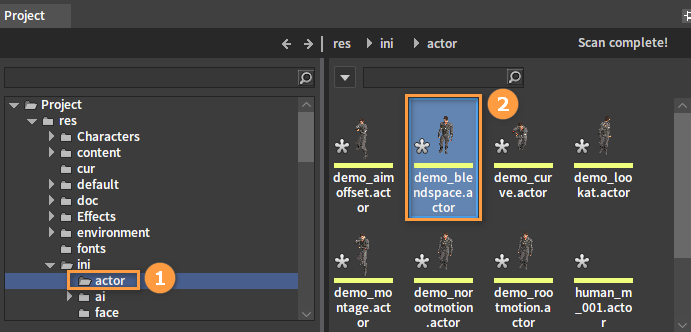
Double-click the file to open the Material Editing Window. In the Material panel of Model, you can see the material information of this model.

Importing Models and Setting Materials
Importing Models
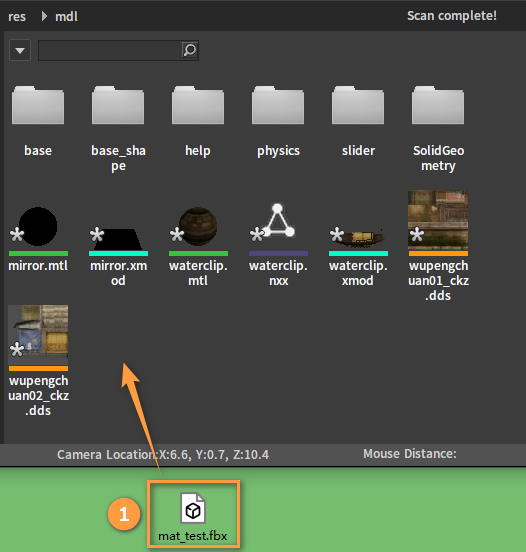
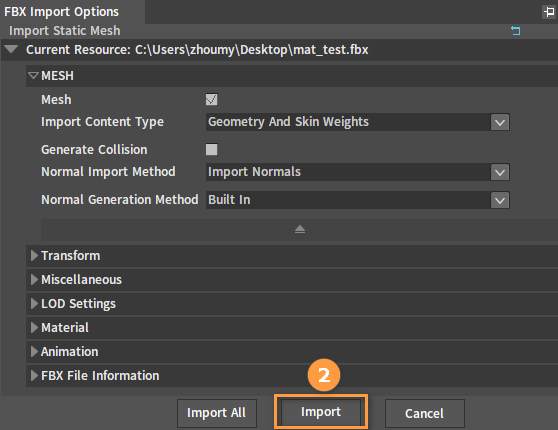
Drag the FBX model file to be imported into the Resource Preview Window. Here we use the mat_test.fbx file as an example. Set the import parameters in the pop-up FBX Import Options window, and then click the Import button to finish the process.
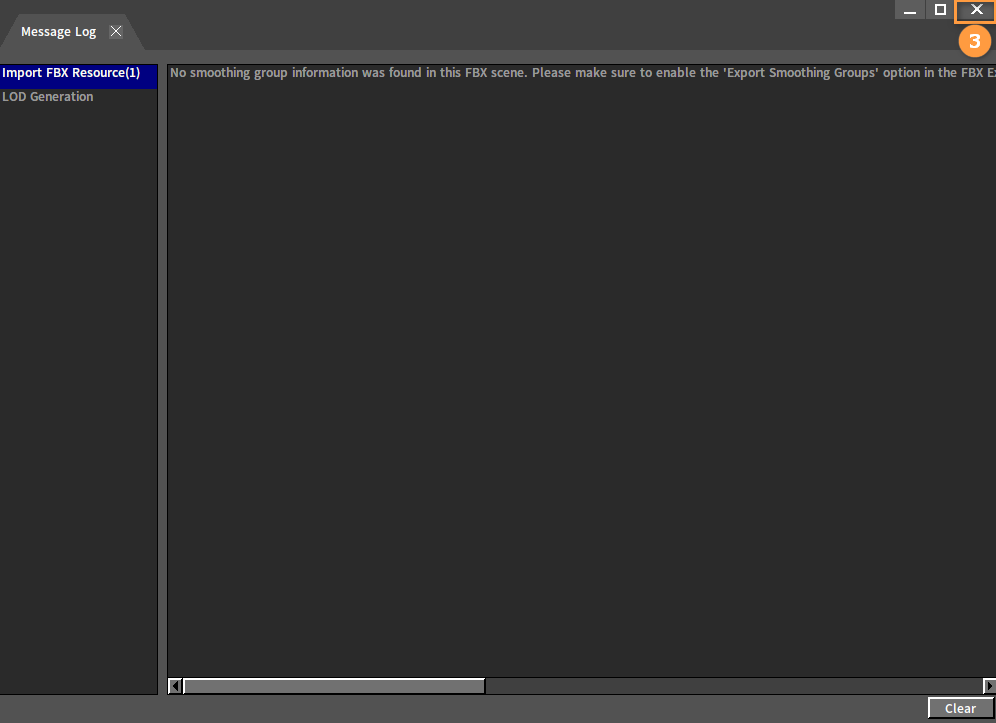
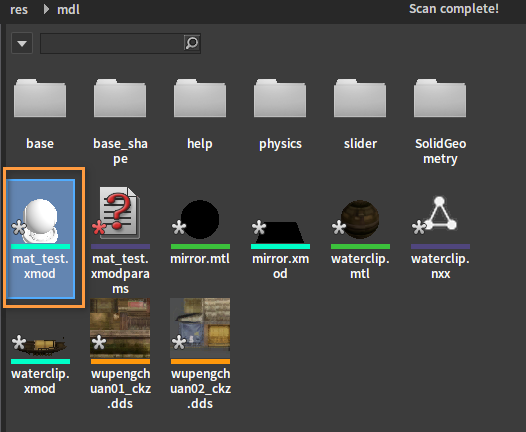
After the import is completed, an XMOD file with the same name will be generated in the Resource Preview window.
Setting Materials
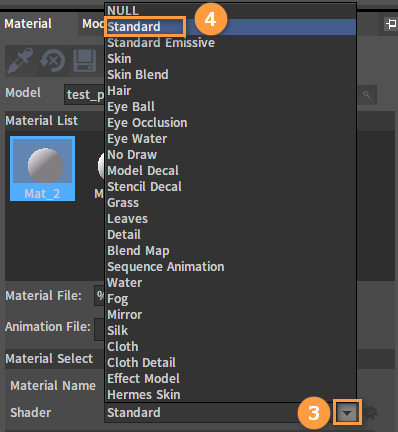
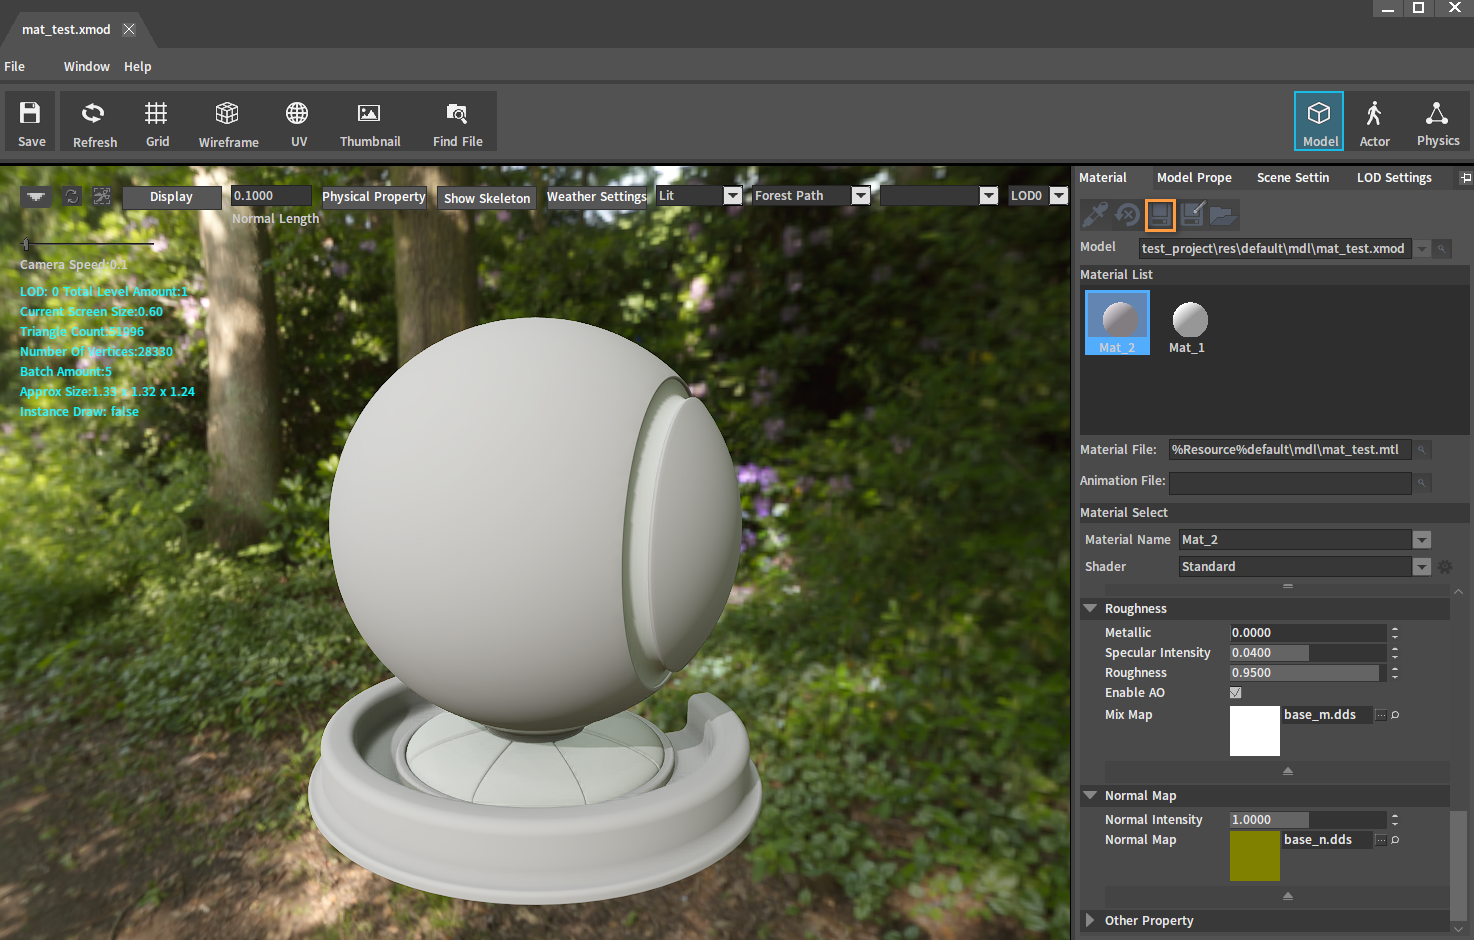
Double-click the XMOD file to open the Material Editing window, select Mat_2 in Material Name, then click the ![]() button on the right of Shader and select the required Shader template. Here we select Standard.
button on the right of Shader and select the required Shader template. Here we select Standard.

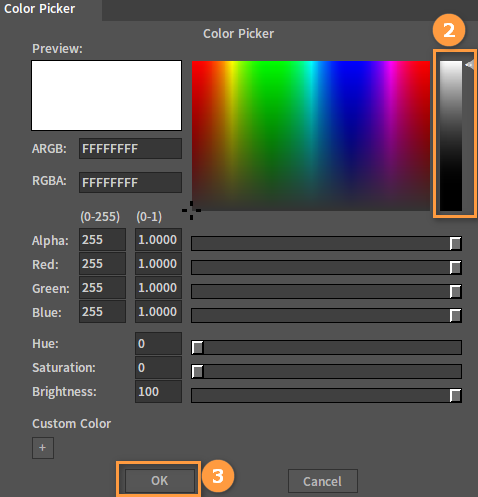
Under Basic Material, click the Color Bar on the right of Ambient and select the required color in the pop-up Color Picker window. Set the Diffuse color in the same way. Here we select white for both Ambient and Diffuse.

After that, set Diffuse Map, Roughness and Normal Map respectively.
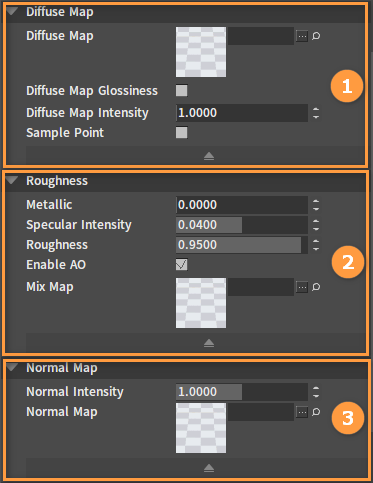
Three map properties:
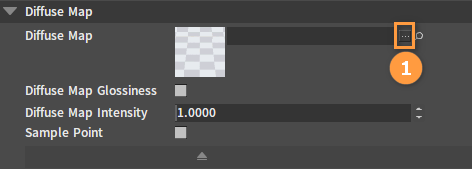
Diffuse Map
Property Description Diffuse Map Diffuse map. Diffuse Map Glossiness Whether the diffuse Alpha channel contains glossiness. Diffuse Map Intensity Diffuse map intensity. Sample Point Whether the sampling mode of the map uses point sampling mode. Roughness
Property Description Metallic Metallic. Specular Intensity Specular intensity. Roughness Roughness. Enable AO Whether to enable AO data in the material. Mix Map Mix map (3 or 4 channels: Metallic, Roughness, Specular Intensity and AO). Normal Map
Property Description Normal Intensity Normal intensity. Normal Map Normal map.
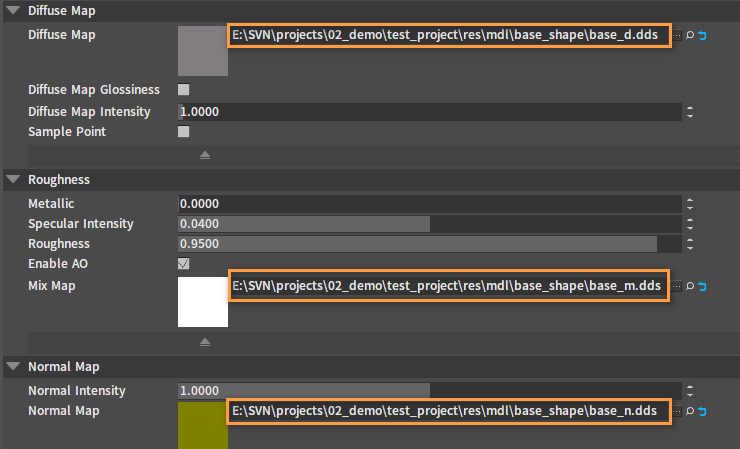
There are two ways to apply a map.
- Find the required map in the Resource Preview window and drag it into the corresponding slot in the Material Editor.

Or enter the map path into the box on the right of the corresponding slot to apply the map.
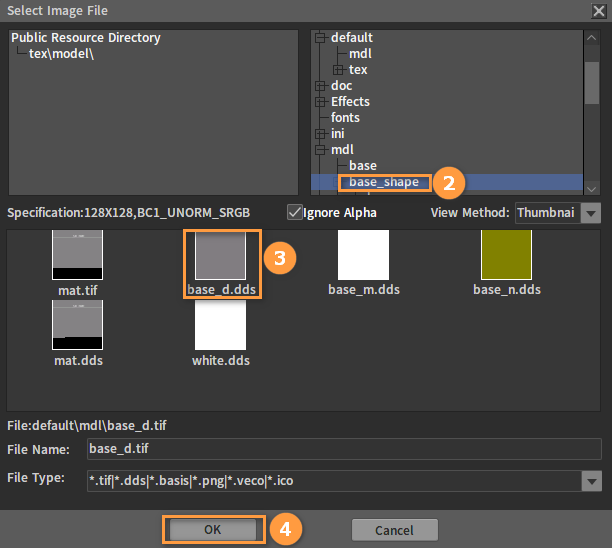
- Click the
 button on the right of each slot to find the required map.
After applying maps, click the Save button on the Tool Bar to complete the material settings. The effect after setting is shown below:
Creating and Editing Material Files
Creating Material Files
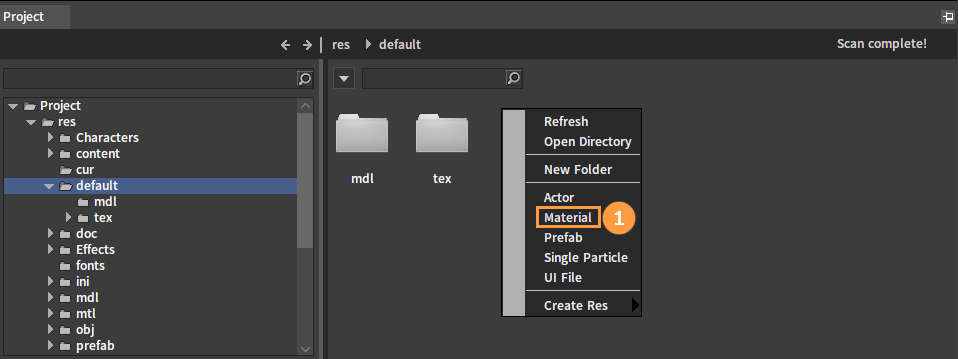
In some cases during the game production process, the producer wants to create external materials that can be applied to different models. Right-click on a blank space in the Resource Preview window and select Material in the pop-up menu to create a Material file.
Editing Material Files
You can rename the newly created material file, modify the material name and parameters as needed.
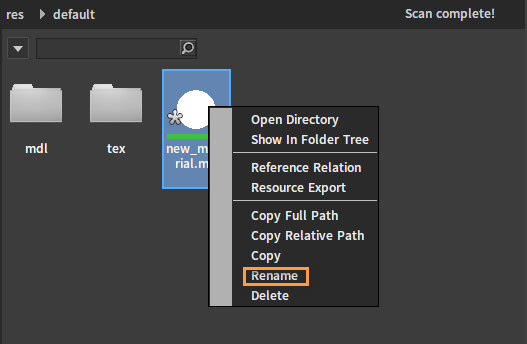
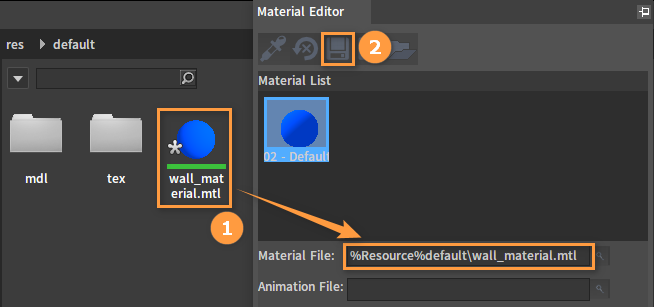
Right-click the newly created material file and select Rename in the pop-up menu to rename the file. Here we change the file name to wall_material.

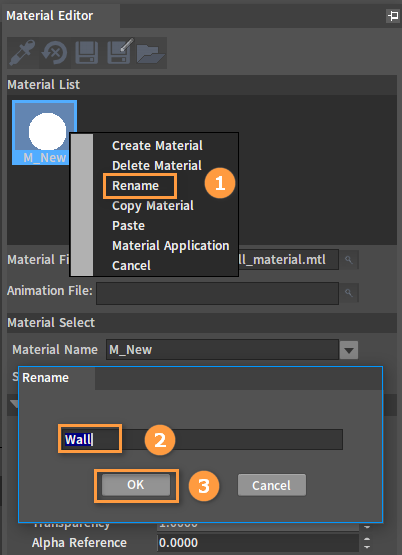
Double-click wall_material.mtl to open the Material Editor. Right-click the material ball to be renamed in the Material List and select Rename. Enter the new name in the pop-up Rename window and click the OK button.
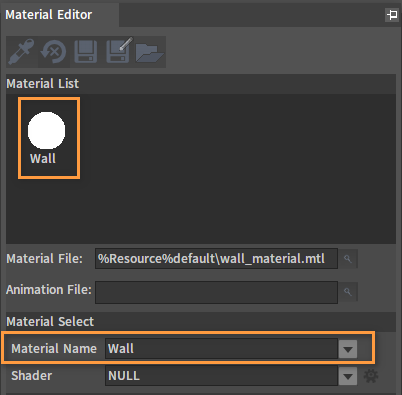
After renaming:
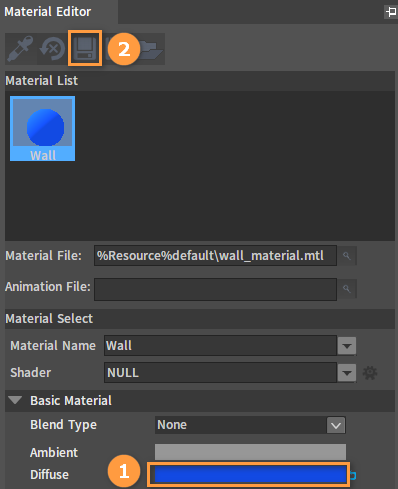
Modify the Diffuse property under Basic Material as described in the previous section Setting Materials. Here we select blue. When finished, click the Save button.
Creating, Deleting and Copying Materials
Creating Materials
Double-click the material file to open the Material Editor, right-click on the blank space of the Material List, and select Create Material in the pop-up menu.

The newly created material will be placed at the end of the material list, which is shown below:

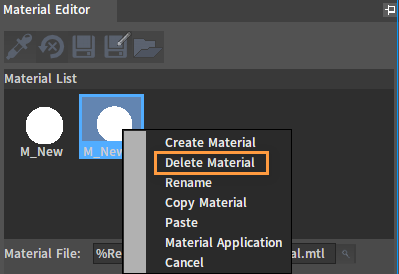
Deleting Materials
In the Material List, right-click the material to be deleted and select Delete Material in the pop-up menu.
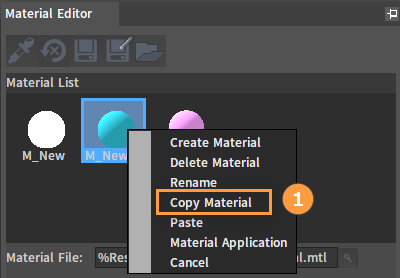
Copying Materials
Overrides the data from one material to another. This is performed in two steps.
Right-click the material to be copied in the Material List, then select Copy Material to copy the selected material in the pop-up menu.
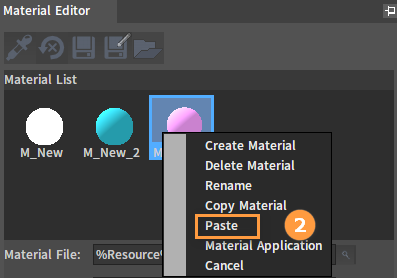
Right-click the material to be overridden in the Material List and select Paste to override the current material.
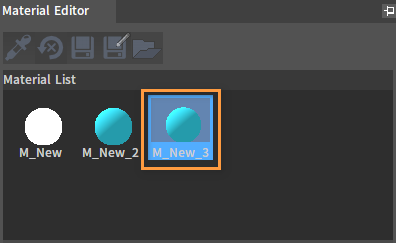
After copying successfully, the effect is as shown below:
Using Material Files
Material files can be used in two ways:
Public Materials: Apply the material file to the XMOD file, which will affect all instances of the model in the scene.
Private Materials: Apply the material file to a specific model instance in the scene, which will not affect other model instances in the scene.
The following describes the two ways to use materials separately.
Public Materials
- In the Hierarchy panel of animation_demo, you can see two objects named back_ground_mesh. Click to select one of them.
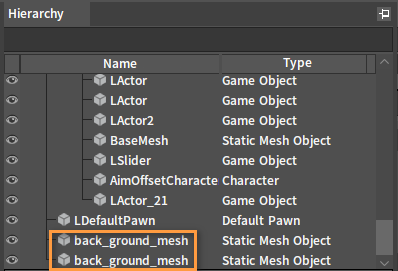
- Press the shortcut key M to bring up the Material Editor, then drag wall_material from the Resource Preview window to the input box on the right of Material File and click the Save button.
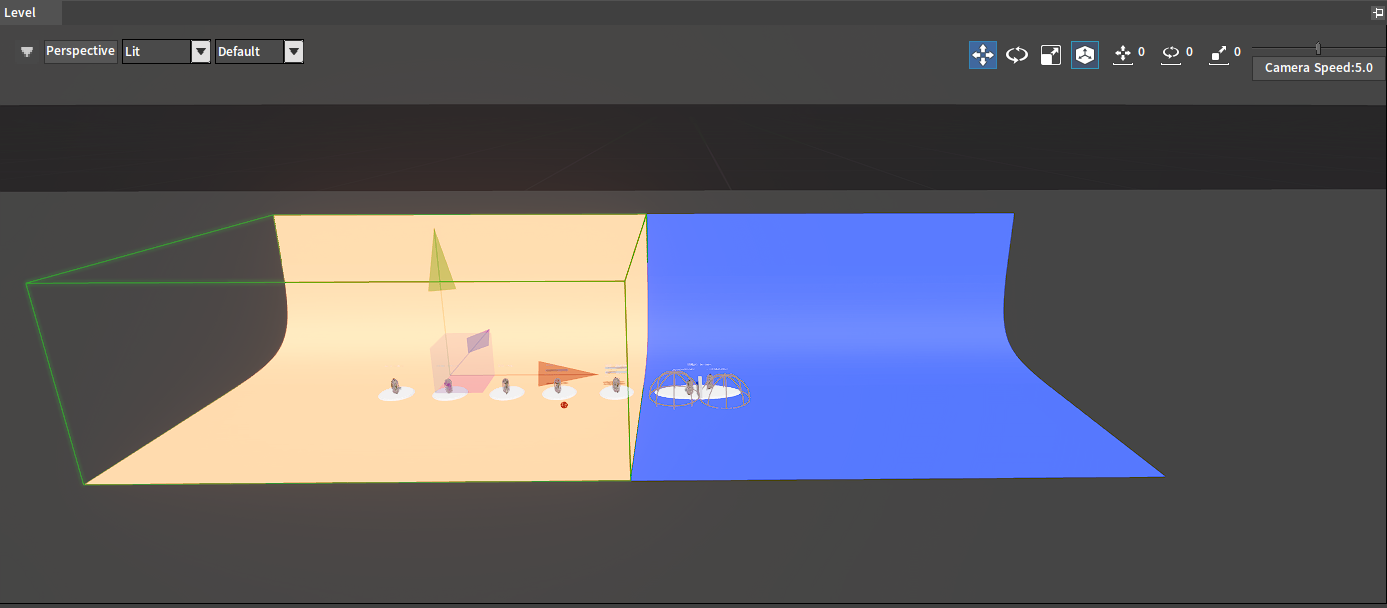
Now both walls in the scene will change to the color of the new material.

Private Materials
Create a new material named special_wall using the method described in the Creating and Editing Material Files section. Then set the Diffuse property to orange and save it.


Select the back_ground_mesh that needs to be set as a private material in the Hierarchy panel, and select StaticMenshComponent0(Inherited) in the Inspector panel. In Visual Base, click File -> Private Materials, and drag special_wall into the slot on the right of Material File.
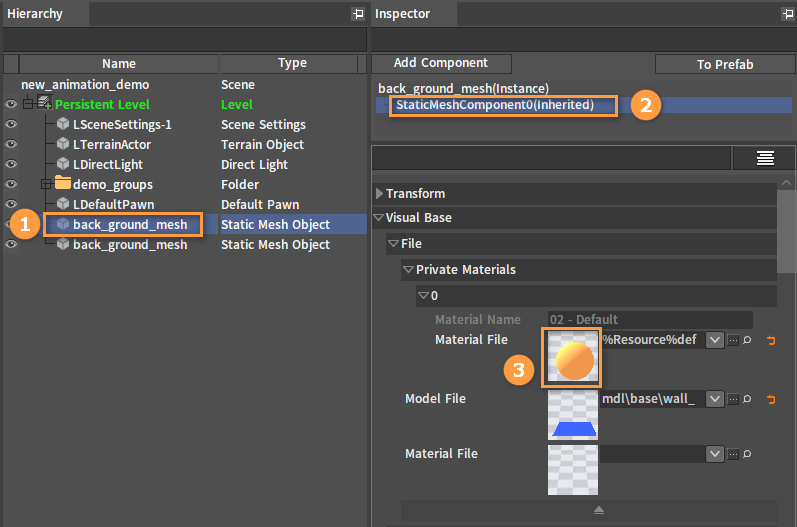
Now you can see that in the scene, the color of the instance applying special_wall has changed, and the other instance remains the same color as before.