Asset Management
Last Updated Time: 11/13/2023
Referencing Assets
In the Resource Preview window, select an asset and right-click to open the shortcut menu, then select Reference Relation to view the reference relationships of the asset in the pop-up window.

The Asset Reference Relation window:
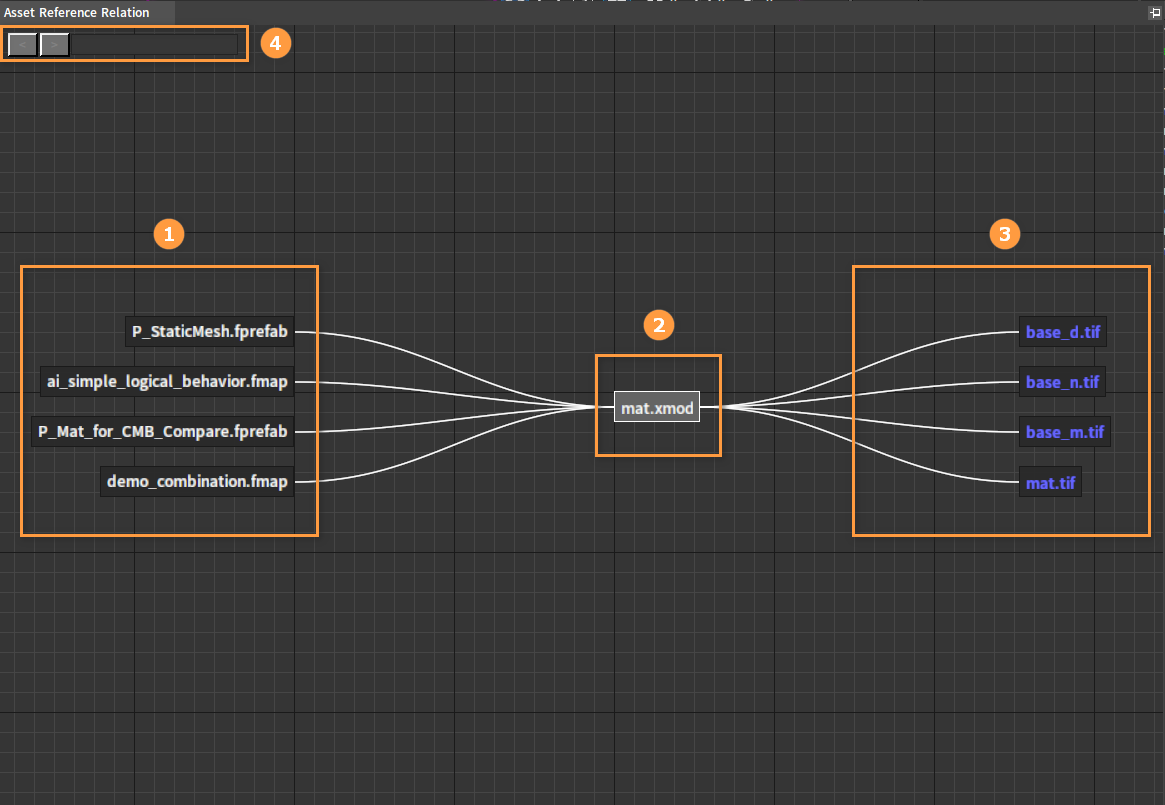
| No. | Description |
|---|---|
| 1 | Reference other assets of the selected asset. |
| 2 | Currently selected asset. |
| 3 | Other assets that the currently selected asset depends on. |
| 4 | Navigation and Search Box. Double-click a node in the Asset Reference Relation window and it will jump to display the reference relationship of the node, then you can go back or forward by the Navigation buttons. Enter text in the search box and the nodes that match the text in the search box will be highlighted. |
Reference/Dependency Types:

| No. | Description |
|---|---|
| 1 | White text indicates the explicit dependencies (assets that have dependencies documented in the file). |
| 2 | Blue text indicates the implicit dependencies (Assets that do not have dependencies documented in the file, but depend on other assets through a certain rule, e.g. the same file name with different suffixes). |
| 3 | Bright pink text indicates the depended asset does not exist, just like the Template_CubMap_irr_file.dds showed above. |
Reference types are the same as dependency types.
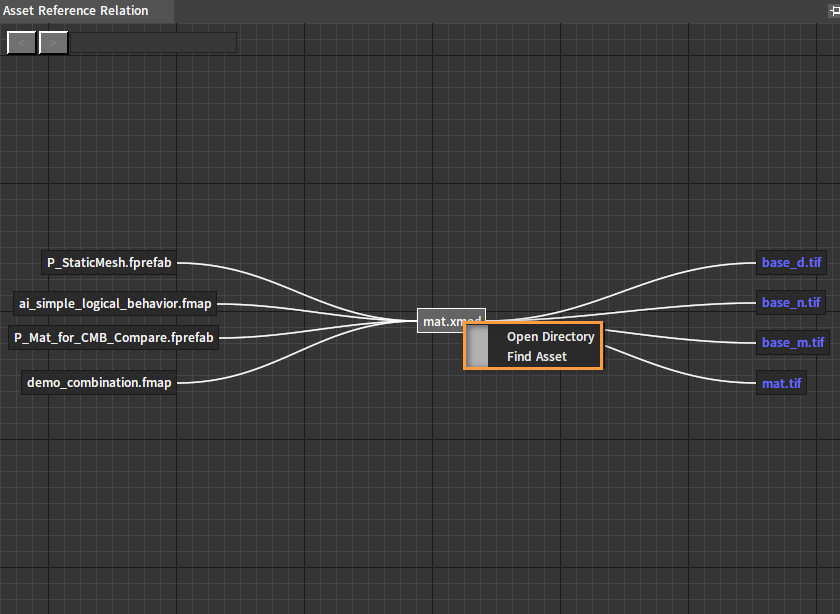
In the Asset Reference Relation window, select an asset node and right-click it to open the shortcut menu, then select Open Directory to locate the asset in the System Explorer. Select Find Asset to locate the asset in the Engine’s Resource Preview window.
Exporting Assets
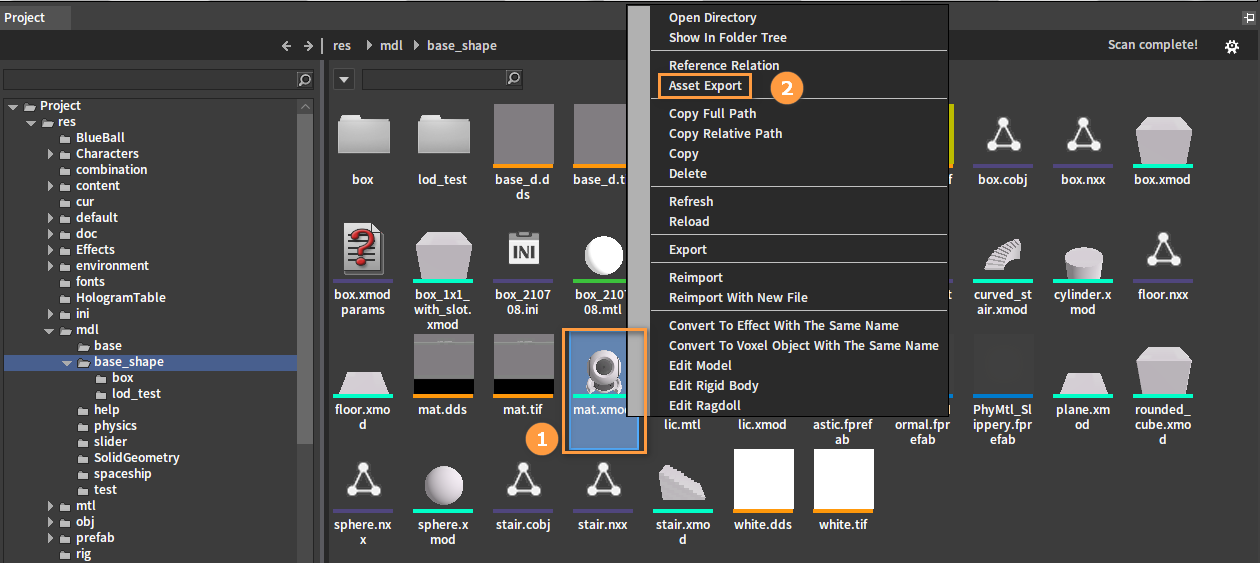
In the Resource Preview window, select an asset and right-click to open the shortcut menu, then select Asset Export to bring up the Select Directory window to confirm the export directory.
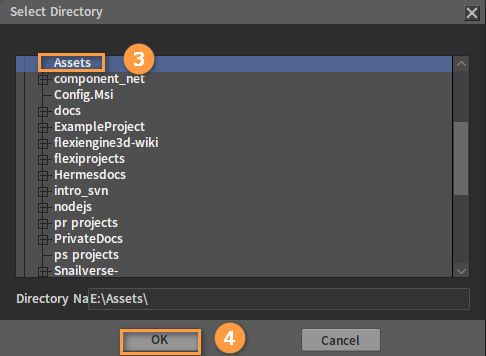
After confirmation, the asset and the assets it depends on will be exported to the specified folder.
Moving Assets
In the Resource Preview window, select an asset/multiple assets, drag it/them into a folder, and the following window will pop up:

| No. | Name | Description |
|---|---|---|
| 1 | Copy | Copy the selected file to the target folder. |
| 2 | Move | Move the selected file into the target folder and modify the assets that reference this asset at the same time. |
| 3 | Cancel | Cancel moving. |
Currently, assets moving abide by the following rules:
If there is an implicit reference relationship between assets A and B, moving asset A or B will automatically move the other asset (asset A or B) as well and maintain the relative path relationship.
If there is a explicit reference relationship between assets A and B, moving asset A or B will only move that one rather than both.
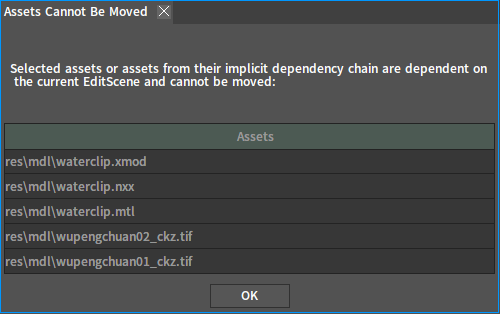
If the asset to be moved is being referenced by the currently edited Level, a Assets Cannot Be Moved box will pop up (as shown below). Please create a new Empty Level and then move it again.
If any other asset editor is currently open when moving, a Message Prompt box will pop up (as shown below). In this case, please close all open asset editors and try again.

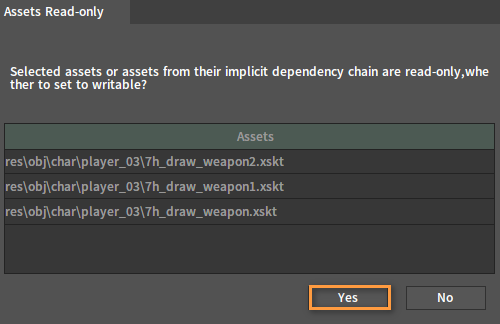
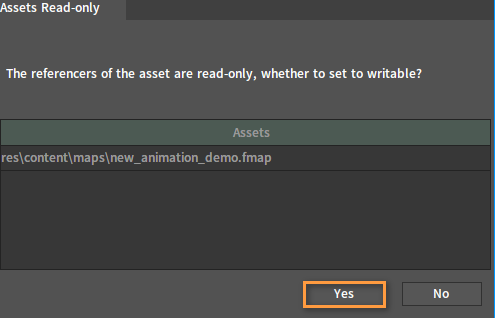
If the currently selected asset has the Read-Only property, a Message Prompt box will pop up (as shown below). Click the Yes button, the Read-Only property of the asset will be removed first, and then the movement will be performed.
Replacing Assets
In the Resource Preview window, select an asset to be replaced, right-click to open the shortcut menu, and select Asset Replace.

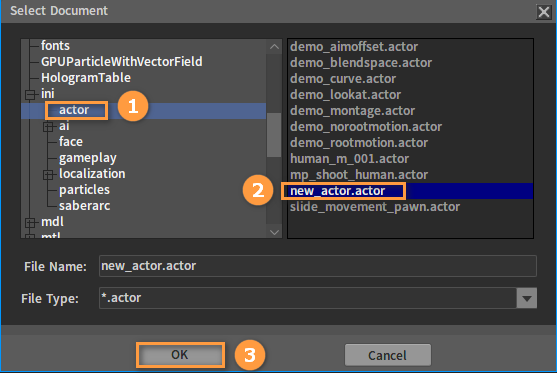
In the pop-up Select Document window, select an asset (the new asset) to replace with and click the OK button.
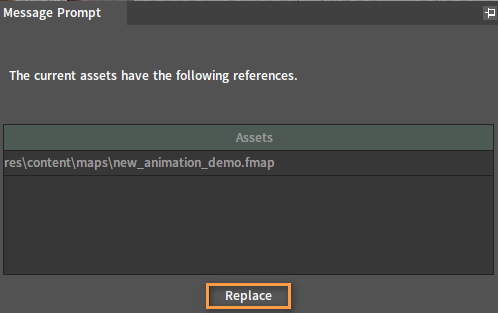
At this point, a Message Prompt box will pop up, which shows a reference of the asset to be replaced (the old asset). You can click Replace to replace the asset, and replace the reference relationship from the old asset to the new one.
The reference relationship of the replaced asset (the old asset) (See Referencing Assets in this documentation for details on how to view asset reference relationships):
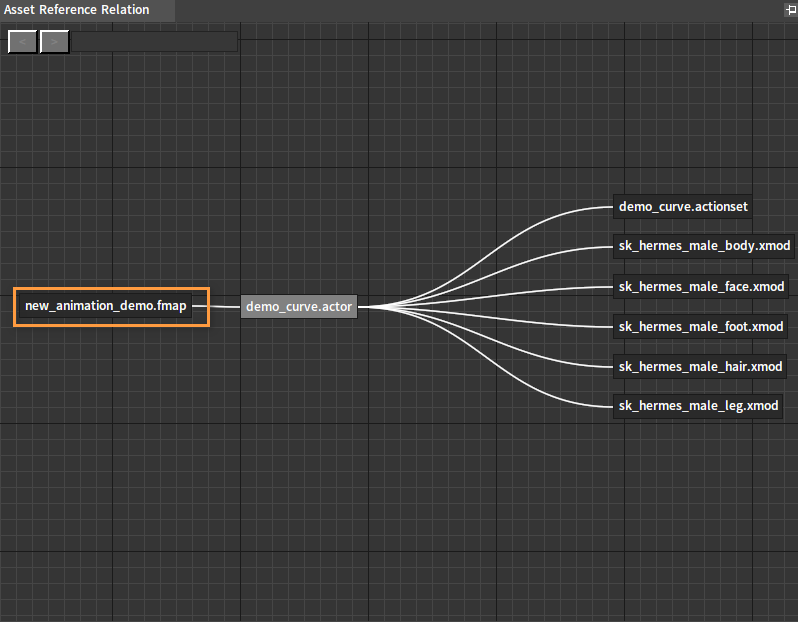 Before replacement | 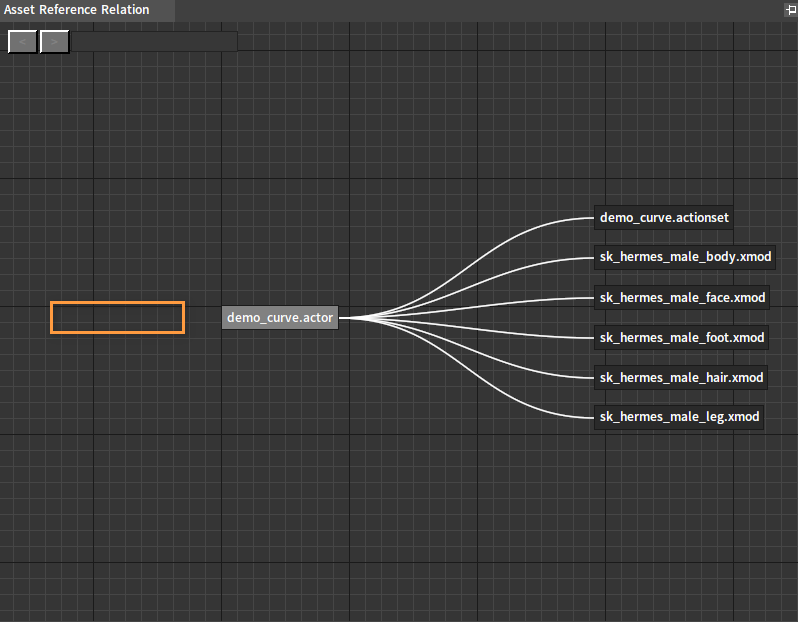 After replacement |
The reference relationship of the asset (the new asset) to replace with:
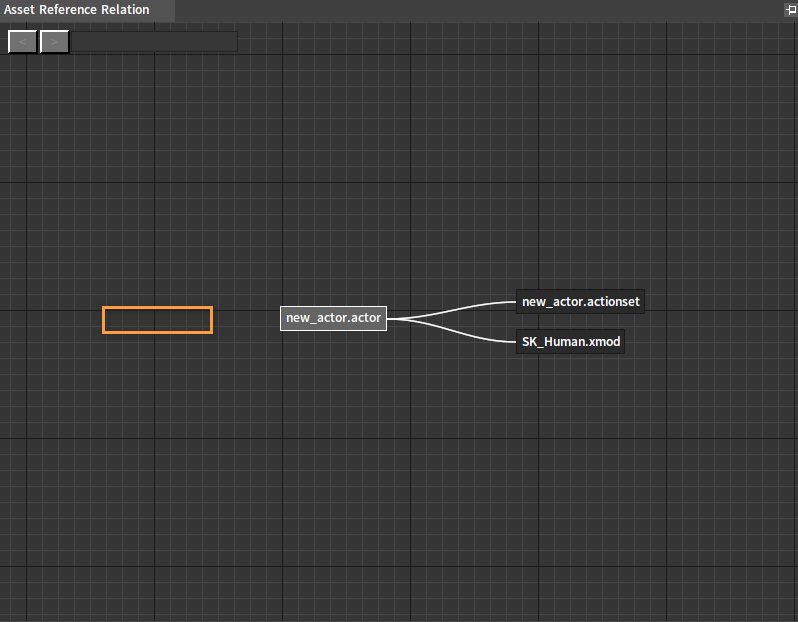 Before replacement |  After replacement |
Replacement is prohibited if the following conditions exist when replacing assets:
When replacing, a Message Prompt box will pop up if the replaced asset is referenced by the currently edited level (as shown below).

If any of the asset editors is open when replacing, a Message Prompt box will pop up (as shown below). Please close all open asset editors and try again.

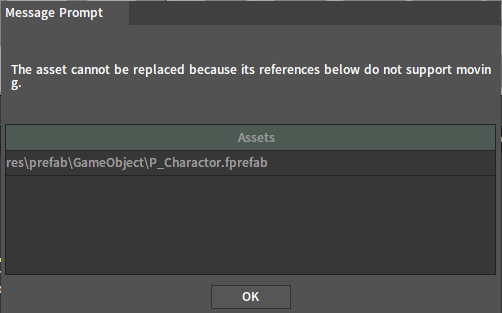
When replacing, if there are assets cannot be moved in the reference of the asset to be replaced, a Message Prompt box will pop up (as shown below).
When replacing, if there is an implicit reference in the reference of the asset to be replaced, a Message Prompt box pops up (as shown below).

When replacing, if there is a Read-only asset in the reference of the asset to be replaced, a Message Prompt box will pop up (as shown below). Clicking the Yes button will remove the Read-only property of the asset first, and then perform the replacement.
Asset Registries
When started, the Engine Editor will automatically collect and analyze the reference relationships of the assets in the Project and organize a small database (Asset Registry) in memory.
Building Asset Registries
It takes roughly 3 steps to create an Asset Registry:
Collect all the assets in the res directory and the script directory under the Project, the exposed asset list of the Engine, and the last modification time of the collected assets.
This step may take a long time in large projects, for which we recommend:
a. Store the project in SSD.
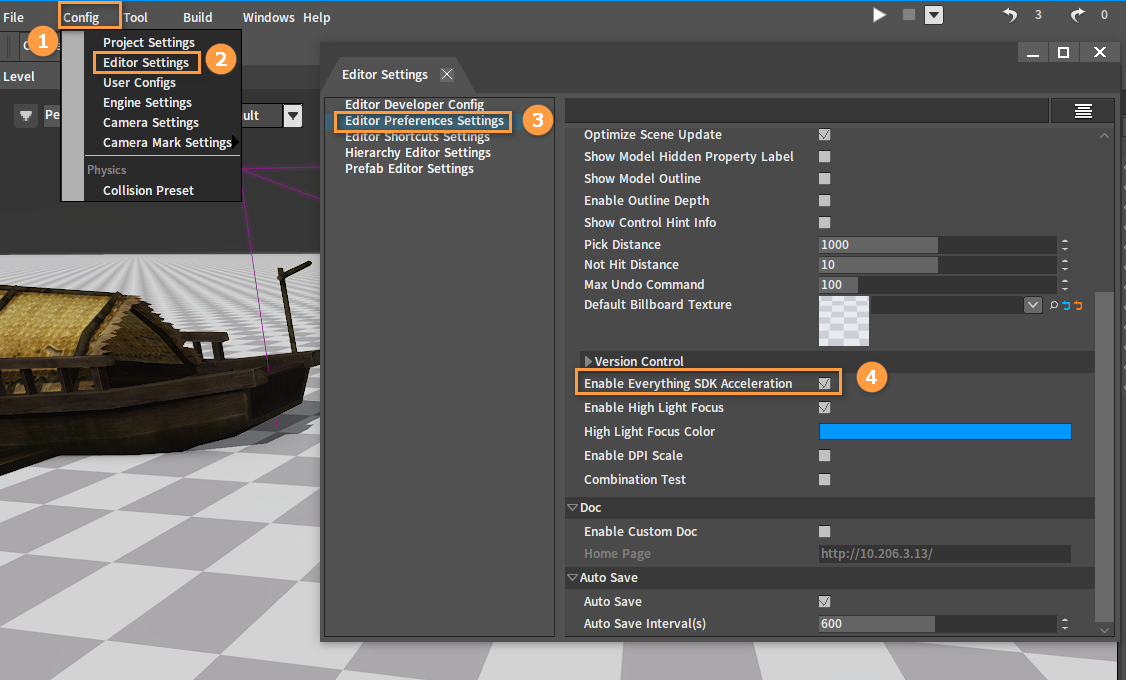
b. Install Everything (above 1.4.1 version)(Download here: https://www.voidtools.com/). After installation, click Configuration -> Editor Settings in the Editor, then click Editor Preferences Settings in the Editor Settings window, and make sure Enable Everything SDK Acceleration is turned on ( it is enabled by default ) in the right interface.
Analyze the reference relationships of the assets collected in step 1 (For the analysis of the asset reference relationships here, all files will be analyzed only when the project is opened for the first time, and when the project is opened again subsequently, the asset reference analysis will be incremental analysis).
Use the asset list and reference relationships collected in steps 1 and step 2 to create an Asset Registry.
Using SVN as the Version Control Software
Make sure the asset to be operated is under SVN's version control and has been checked out to a local directory. This operation is not currently supported by the Engine and needs to be done by using an external tool (such as TortoiseSVN).
Configuring
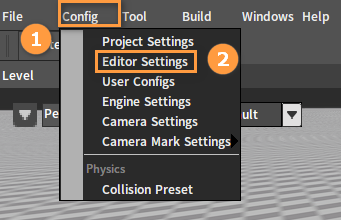
After starting the Engine, click Config -> Editor Settings to open the Editor Settings window.
In Editor Preferences Settings of the Editor Settings window, check Enable Version Control, select Version Control Type as SVN, and select the path where the SVN Command Line Tool is located.
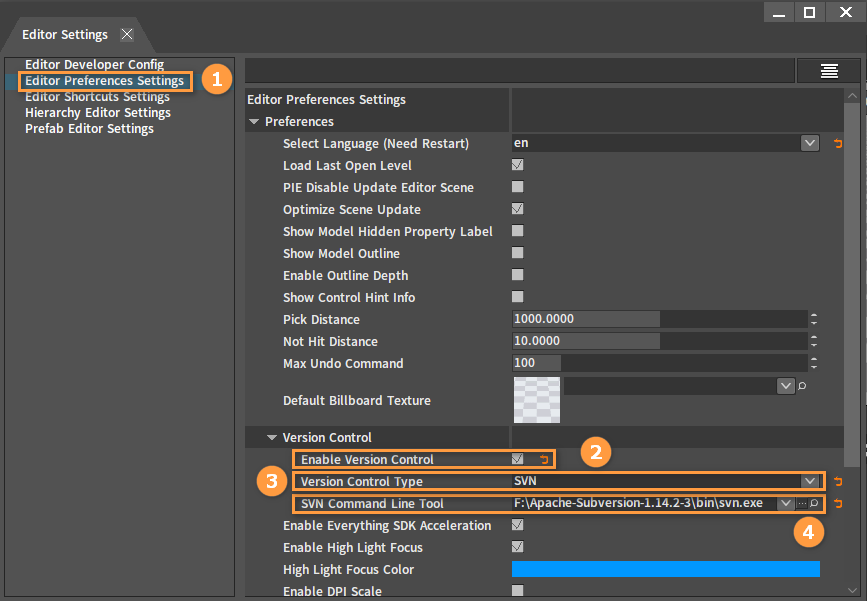
After configuring, close the Editor Settings window and a restart prompt will appear. After restarting, operating assets in the Resource Preview window will synchronize SVN operations, and each asset will have a [Corner Mark](#Corner Marks) that is under version control.
Right-click an asset in the Resource Preview window to open the Shortcut Menu, and you can see Source Control contains Refresh Status and Add.
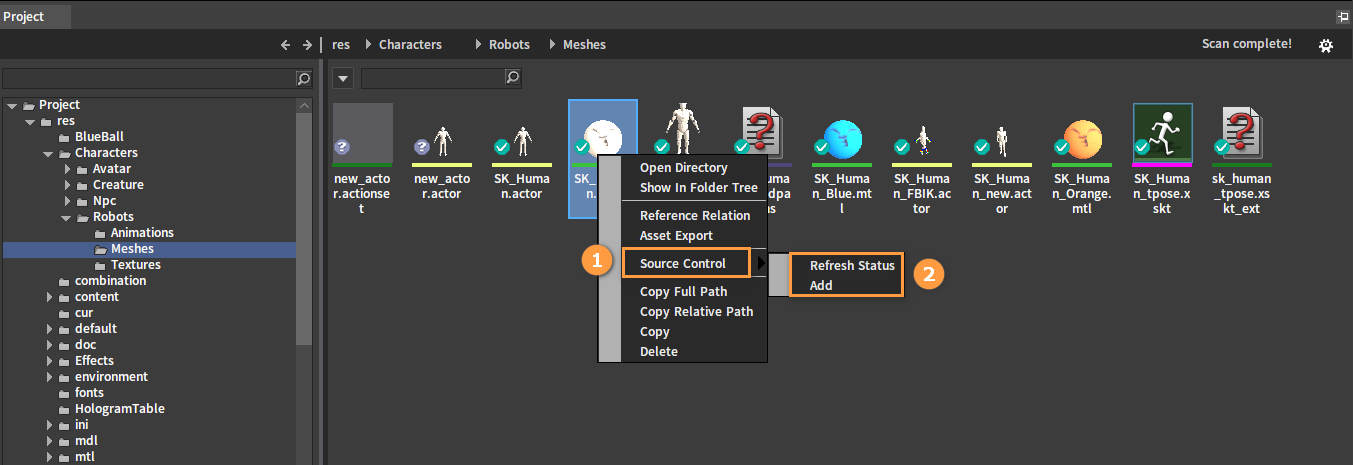
| Menu Item | Description |
|---|---|
| Refresh Status | Refresh the version control status of the current asset. |
| Add | Add the asset to version control. |
Corner Marks
![]() : Regular asset (An asset that has not been modified locally since the last update).
: Regular asset (An asset that has not been modified locally since the last update).
![]() : New asset (An asset that is to be added to version control).
: New asset (An asset that is to be added to version control).
![]() : Edited asset.
: Edited asset.
![]() : Asset that is not under version control.
: Asset that is not under version control.
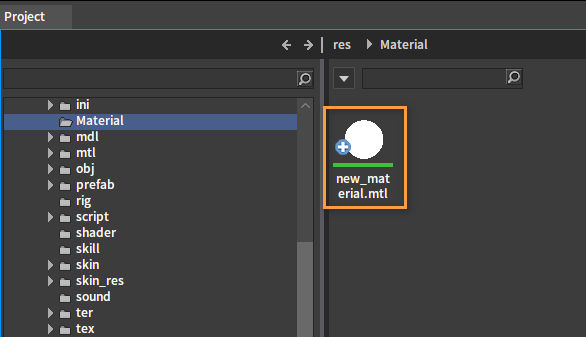
New Assets
When creating a new asset or importing an asset in the Resource Preview window, the asset will be automatically added to version control with the corner mark ![]() .
.
Deleting Assets
Deleting assets in the Resource Preview window (by selecting Delete from the Right-click Menu or by pressing the Delete key) will automatically mark them as deleted in SVN.
Synchronizing (Updating) Assets
This operation is not currently supported by the Engine and needs to be done by using an external tool (such as TortoiseSVN).
Committing Assets
This operation is not currently supported by the Engine and needs to be done by using an external tool (such as TortoiseSVN).